
Related Manuals for Euhomy IM-02


Summary of Contents for Euhomy IM-02
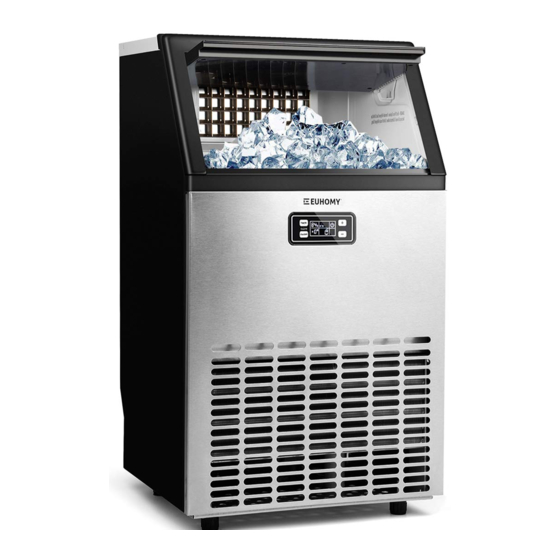
- Page 1 Commercial Ice Maker Instruction Manual SKU:IM-02 Email:support@euhomy.com Facebook:@Euhomy.Official...
- Page 3 Email: support@euhomy.com Facebook: @Euhomy.Official The Euhomy team is available 24/7 to address your questions, comments, and concerns. Your satisfaction is our ultimate goal. We want to make everything right so you'll share your positive experience with other shoppers on Amazon.
- Page 5 It may be that the PUA tube inside the machine fell off during transportation. You can remove the back cover of the machine and connect it by yourself. If you don't know how to operate, please contact the Euhomy team. We will give you a professional video to help you solve the problem.
-
Page 7: Table Of Contents
Contents Safety precautions 02-04 Operation & Installation 05-14 15-19 Tips & Maintenance 20-21 Specifications Warranty Troubleshooting-support@euhomy.com... -
Page 8: Safety Precautions
Safety Precautions When using electrical appliances, basic safety precautions should be followed to reduce the risk of fire, electric shock, and injury to persons or property. Read all the instructions before using any appliance: Use this appliance only for its intended purpose as described in this owners' manual. This ice-maker must be properly installed in accordance with the installation instructions before it is used. - Page 9 Safety Precautions Note: This appliance must be earthed. Use the proper power source according to the nameplate. Keep all ventilation openings, in the appliance enclosure or in the built-in structure, clear of obstruc- tion. Do not damage the refrigerant circuit. This appliance is not intended for use by persons (including children) with reduced physical, sensory or mental capabilities, or lack of experience and knowledge, unless they have been given supervision or instruction concerning use of the appliance by a person responsible for their safety.
- Page 10 Safety Precautions Note: Do not damage the refrigerant circuit. This appliance is not intended for use by persons (including children) with reduced physical, sensory or mental capacities, or lack of experience and knowledge, unless they have been given supervision or instruction concerning the use of the appliance by a person responsible for their safety.
-
Page 11: Operation & Installation
Operation & Installation MAIN UNIT CONSTRUCTION 1.Top cover 2.Door for ice taking 3.Ice-making & its water tank assembly: Including ice-making evaporator, water tank, water pump and some detecting parts 4.Front panel 5.Operation panel 6.Air outlet: Must keep the air circulate smoothly. Hot air will blow out when unit running. 7.Water draining port: Normal plugged with the cap. - Page 12 Operation & Installation A.Water dividing pipe: with nine little holes, water will flow from these little holes. If no water flows out, it can be disassembled and cleaned. B.Evaporator (ice-making module) C.Ice full detecting board: Use to detect if the inner cabinet is full of ice or not, and to check the ice-harvest process is over or not.
- Page 13 Operation & Installation EXPLOSIVE DRAWINGS...
- Page 14 Operation & Installation...
- Page 15 Operation & Installation UNPACKING YOUR ICE MAKER Remove the exterior and interior packaging. Check if all the accessories, including the instruction manual, ice scoop, white water inlet pipe, 4 ways to 2 ways water quick connector and the water draining pipe, etc., are present. If any parts are missing, please contact our customer service. Remove the tape for fixing the door and inner cabinet, ice scoop, etc.
- Page 16 Operation & Installation To ensure proper ventilation for your ice maker, the front of the unit must be completely unobstructed (at least 20CM free space). Allow at least 50 mm clearance at the back, and 50 mm at the top and sides for proper air circulation.
- Page 17 Operation & Installation CLEANING YOUR ICE MAKER BEFROE USING FOR THE FIRST TIME Before using your ice maker, it is strongly recommended to clean it thoroughly. Open the ice collecting door. Clean with diluted detergent, warm water and a soft cloth. Repeatedly clean the water contacting inner parts, you can pull the Water drainpipe of the water tank indicating “IT”...
- Page 18 Operation & Installation Connect the water hose to the water faucet of the water main supply system First, install the supplied water quick-connector to the water faucet by screw thread. Second, remove the clipper from the water quick-connector, insert the other end of the water hose into this quick-connector port completely, then install back the clipper, also this step is completed.
- Page 19 Operation & Installation Each ice making cycle is around 11-20minutes. The ice making time will be changed according to the ambient temperature and the water temperature change. Especially the first ice making cycle, the ice making cycle will be longer because of the high-water temperature in the water tank, but the ice making cycle will not be longer than 30minute.
- Page 20 Operation & Installation Automatic self-cleaning program. The default cleaning time is 20 minutes. Start the self-cleaning program: After connecting all the water pipes, plug on the main power supply plug, then press “TIMER CLEAN" button on control panel for more than 5 seconds, to enter the self-cleaning program.
-
Page 21: Tips & Maintenance
Tips & Maintenance PREPARING THE ICE MAKER FOR LONG STORAGE If the ice maker will not be used for a long time, or if it is to be moved to another place, it will be necessary to drain out all of the water in the system. Allow all the ice cubes to be ejected from the evaporator of ice maker. - Page 22 Tips & Maintenance NOTICE: Stainless steel models exposed to chlorine gas and moisture, such as in areas with spas or swimming pools, may have some discoloration of stainless steel. Discoloration from chlorine gas is normal. INTERIOR CLEANING For Ice Storage Bin The ice storage bin should be sanitized occasionally.
- Page 23 Tips & Maintenance For the water tank and ice-full detecting plate Also, the water tank and the ice-full detecting plate is very important to keep your ice cube hygienic. Put a mixture of neutral cleaner & water into a clean water jet, and then spray to all the inner surface of tank &...
- Page 24 Tips & Maintenance Check to be sure that the water drainpipe of the water tank has been installed properly in the slot of the tank wall. Then pour one cup of Nickel-Safe Ice Maker Cleaning Solution into the water tank. Wait about for 5 minutes.
- Page 25 Tips & Maintenance SEMI-MONTHLY CLEANING The ice shovel, ice bin, water tank, the ice-full detecting plate and the surface of the evaporator are to be cleaned twice a month according to the interior cleaning program. SEMI-ANNUAL CLEANING All the components & surfaces exposed to water or ice cubes, like ice storage bin, water tank, door, evaporator, water pump, silicone tube, water dividing pipe, etc.
-
Page 26: Specifications
Specifications Water Drainage Port Water In let Port CORRECT DISPOSAL OF THIS PRODUCT IM-02 POWER SUPPLY VOLTAGE 1 Phase, 110-120/60HZ CLAIMATE CLASS 104TC ELECTRICAL PROTECTION CLASS ICE MAKING RATING (Amps) 2.2Amp ICE HARVEST RATING (Amps) 2.5Amp ICE MAKING CAPACITY (KG/24H) - Page 27 Specifications WIRING DIAGRAM NORMAL SOUNDS Your new ice maker may make sounds that are not familiar to you. Most of the new sounds are normal. Hard surfaces like the floor, walls and cabinets can make the sounds seem louder than they actually are.
-
Page 28: Warranty
Euhomy offers a limited 1-year warranty (“warranty period") on all of our products purchased new and unused from Euhomy company, with an original proof of purchase and where a defect has arisen, wholly or substantially, as a result of faulty manufacture, parts or workmanship during the warranty period. The warranty does not apply where damage is caused by other factors, including without limitation: (a)normal wear and tear;... -
Page 29: Troubleshooting-Support@Euhomy.com
Troubleshooting-support@euhomy.com Possible Cause Problem Solution Check the main water supply pressure or check the water supply hose is blocked or No water supply. not, adding the water pressure or cleaning the hose necessary. Floating ball of the water level Clean the water tank and the water level "... - Page 32 Email:support@euhomy.com Facebook:@Euhomy.Official...