Sign In
Upload
Manuals
Brands
Sunrise Medical Manuals
Wheelchair
Quickie Attitude Power
Sunrise Medical Quickie Attitude Power Manuals
Manuals and User Guides for Sunrise Medical Quickie Attitude Power. We have
3
Sunrise Medical Quickie Attitude Power manuals available for free PDF download: Directions For Use Manual
Sunrise Medical Quickie Attitude Power Directions For Use Manual (148 pages)
Brand:
Sunrise Medical
| Category:
Mobility Aid
| Size: 7.05 MB
Table of Contents
English
4
Definitions
4
Table of Contents
4
Foreword
5
Use
5
Area of Application
5
1 General Safety Notes and Driving Limits
6
Safety Instructions - Prior to each Ride
7
Safety Instructions - While Driving
7
Safety Instructions - after Your Ride
7
2 Warranty
8
3 Handling
9
Delivery
9
Unpacking
9
Manual Version
9
Hybrid Version
9
Start up
9
Storage
9
Transport
9
Security
9
4 Adjusting the Pedal Position
10
Adjustment
10
Handles
10
5 Adjusting the Connecting Frame
12
Adjustment
12
6 Docking and Dedocking
13
Docking: Fig.6.1 - Fig.6.5
13
Docking: Fig.6.6 - Fig.6.10
14
7 Functional Components
15
Connecting Frame (Fig.7.1)
15
Brakes
15
Parking Brake (Fig.7.2 )
15
Main Brakes (Fig.7.3)
15
Performance Brake Lever (Fig.7.4)
15
Coaster Brake (Fig.7.5)
17
Coaster Brake Integrated in the Gear Hub
17
Derailleur Gears/Gear Hub (Fig.7.6-Fig.7.7)
17
Trigger Switch (Fig.7.6-Fig.7.7)
17
Grip Shift Switch (Fig.7.8)
17
Angle- and Depth Adjustment of the Crank Position
18
Adjusting the Angle of the Frame (Fig.7.9)
18
Adjusting the Depth of the Frame (Fig.7.10)
18
Adjusting the Chain-Tension (Fig.7.11)
18
Length-Adjustment of the Cranks (Attitude Junior Only)
19
8 Maintenance
20
Checks to be Carried out before Use
20
9 Service Period
21
Servicing
21
10 Tyre Maintenance
21
Fitting and Repairing Tyres
21
Inflation
21
11 Maitenance Brakes
21
Maintaining the Brakes
21
12 Cleaning/Hygene
21
Hygiene When Being Reused
21
13 Disposal / Recycling of Materials
22
Materials Used
22
14 Nameplate
22
15 Torque
23
Torque Settings
23
16 Technical Data
23
Part 1 Neodrives Smmi and Motor
26
Safety Advice/Instructions
26
Intended Use of the Neodrives Components
26
Permissible Operating Conditions / Operating Sites
26
Standard Scope of Delivery
27
Neodrive Components
27
Technical Data
27
Smart Man-Machine Interface (Smmi)
28
Controller
28
Fitting and Removing the Smmi
29
Functions of the Smmi
29
Start Menu
30
Selecting the Assistance Level
30
Activating Recuperation
31
Braking Assistant
32
Important Information
32
Pushing Aid
33
Using the Pushing Aid
33
For Add-On Bikes
33
Date and Time
33
Travel Modes
34
Displaying Journey Information
34
Information and Warning Symbols
35
Battery Capacity Display (Standard Display)
35
Warning
35
Braking Assistant Active
35
Service Reminder
35
Warning - Temperature Problem
35
Warning - System Fault
35
Warning - General Fault
35
Easy Display Mode
36
Activating Easy Display
36
Deactivating Easy Display
36
Other Settings
36
USB Port: (Fig.3.14)
36
Programming Options by the Specialist Dealer
37
Firmware Updates and Relaying Them to the Motor and Battery
37
Note on the Smmi Plugs: (Fig.3.15)
38
Thermal Management
38
Motor
39
Removing the Drive Wheel
39
Attaching the Drive Wheel
40
Cleaning the Motor and Smmi
41
Motor
41
Smmi Unit
41
Transportation
41
Safety Precautions
41
Error Indications and Possible Remedies
42
Introduction
43
Important Instructions
43
Proper Use of the Neodrives Battery
43
Part 2 Neodrives Battery
43
Signs and Symbols
43
Permissible Operating Conditions / Operating Sites
43
Standard Scope of Delivery (Neodrives Components)
43
Technical Data
44
Key Elements Overview
44
Safety Instructions and Precautions on the Use of the Battery
45
Safety Instructions/Precautions
45
Safety Instructions and Precautions on How to Store the Battery
45
Safety Instructions and Precautions on the Charging Process
45
Safety Information and Precautions on How to Transport and Ship the Battery
46
Safety Information and Precautions on the Charger
46
Starting up
47
Information on the Operating Modes
47
Inserting the Battery
47
Connecting the Battery to the Motor Cable
47
Switching on the Battery
47
Operation
47
Battery Capacity Indicator
48
Detaching the Battery
49
Switching off the Battery
49
Disconnecting the Cable
49
Removing the Battery
49
Charging the Battery
50
Connecting the Battery Charger
50
Charging Process
50
LED Displays During the Charging Process
50
Keys
51
Cleaning the Battery
51
Disposal
51
Liability
51
Dutch
52
Voorwoord
53
Gebruik
53
Toepassingen
53
1 Algemene Veiligheidstips en Rijbeperkingen
54
Veiligheidsvoorschriften - Controle Voor Iedere Rit
55
Veiligheidsvoorschriften - Tijdens Het Rijden
55
Veiligheidsvoorschriften - Nadat U de Aankoppelfiets Hebt Gebruikt
55
2 Garantie
56
3 Gebruik
57
Levering
57
Uitpakken
57
Handmatig Voortbewogen Versie
57
Hybride Versie
57
Opstarten
57
Opslag
57
Vervoer
57
Beveiliging
57
4 Aanpassen Van de Pedalen
58
Aanpassing
58
Handvatten
58
5 Aanpassen Van Het Aankoppelframe
60
Aanpassing
60
6 Aan- en Afkoppelen
61
Aankoppelen: Fig. 6.1 - Fig. 6.5
61
Afkoppelen: Fig. 6.6 - Fig. 6.10
62
7 Functionele Onderdelen
63
Fietsstandaard (Fig. 7.1)
63
Remmen
63
Parkeerrem (Fig. 7.2)
63
Hoofdremmen (Fig. 7.3)
63
Performance Remhendel (Fig. 7.4)
63
Terugtraprem (Fig. 7.5)
65
In de Naafversnelling Geïntegreerde Terugtraprem
65
(Standaard Aanwezig Op de Attitude Junior)
65
Derailleur / Naafversnelling (Fig. 7.6 - Fig. 7.7)
65
Trigger Shift (Fig. 7.6 - Fig. 7.7)
65
Grip Shift (Fig. 7.8)
65
Aanpassing Hoek en Diepte Van de Crank-Positie
66
Aanpassen Van de Hoek Van Het Frame (Fig. 7.9)
66
Aanpassen Van de Diepte Van Het Frame (Fig. 7.10)
66
Aanpassen Van de Spanning Van de Ketting (Fig. 7.11)
66
Aanpassing Van de Lengte Van de Cranks (Uitsluitend Bij de Attitude Junior)
67
8 Onderhoud
68
Controles Uit te Voeren Voor Ieder Gebruik
68
9 Onderhoudstermijn Onderhoud
69
10 Onderhoud Banden
69
Monteren en Repareren Van Banden
69
Oppompen
69
11 Onderhoud Remmen
69
Onderhoud Van de Remmen
69
12 Reinigen/Hygiëne
69
Hygiënemaatregelen als de Stoel Wordt Gebruikt Door Nieuwe Gebruiker
69
13 Afvalverwerking / Recycling Van Materialen
70
Gebruikt Materiaal
70
14 Sticker
70
15 Koppel
71
Vereiste Draaikracht (Torque)
71
16 Technische Gegevens
71
Part 1 Neodrives Smmi en Motor
74
Veiligheidsadvies/Instructies
74
Bedoeld Gebruik Van de Neodrive Onderdelen
74
Toegestane Gebruiksomstandigheden / Gebruikslocaties
74
Standaard Leveringsomvang
75
Neodrive Onderdelen
75
Technische Gegevens
75
Smart Man-Machine Interface (Smmi)
76
Bediening
76
Monteren en Verwijderen Van de Smmi
77
Functies Van de Smmi
77
Startmenu
78
Het Assistentieniveau Kiezen
78
Activeer Terugwinning
79
Remassistent
80
Belangrijke Informatie
80
Duwondersteuning
81
De Duwondersteuning Gebruiken
81
Voor Aankoppelfietsen
81
Datum en Tijd
81
Rijmode
82
Uw Tripinformatie Weergeven
82
Informatie en Waarschuwingssymbolen
83
Weergave Batterijcapaciteit (Standaard Weergave)
83
Waarschuwing
83
Remassistent Actief
83
Onderhoudsherinnering
83
Waarschuwing - Temperatuurprobleem
83
Waarschuwing - Systeemfout
83
Waarschuwing - Algemene Fout
83
Easy Display (Vergrote Weergave) Modus
84
Easy Display (Vergrote Weergave) Inschakelen
84
Easy Display (Vergrote Weergave) Uitschakelen
84
Overige Instellingen
84
USB-Poort: (Fig. 3.14)
84
Programmakeuzes Door de Gespecialiseerde Dealer
85
Firmware Updates en Deze Overzetten Naar de Motor en de Accu
85
Let Op de Smmi-Stekkers: (Fig. 3.15)
86
Warmtemanagement
86
Motor
87
Verwijderen Van Het Aandrijfwiel
87
Monteren Van Het Aandrijfwiel
88
Reiniging Van de Motor en de Smmi
89
Motor
89
Smmi-Unit
89
Transport
89
Veiligheidsmaatregelen
89
Foutmeldingen en Mogelijke Oplossingen
90
Inleiding
91
Belangrijke Instructies
91
Bedoeld Gebruik Van de Neodrive Accu
91
Part 2 Neodrives Accu
91
Tekens en Symbolen
91
Toegestane Gebruiksomstandigheden / Gebruikslocaties
91
Standaard Leveringsomvang (Neodrives Onderdelen)
91
Technische Gegevens
92
Overzicht Hoofdelementen
92
Veiligheidsinstructies en Voorzorgsmaatregelen Voor Het Gebruik Van de Accu
93
Veiligheidsvoorschriften / Voorzorgsmaatregelen
93
Veiligheidsvoorschriften en Voorzorgsmaatregelen Voor de Opslag Van de Accu
93
Veiligheidsvoorschriften en Voorzorgsmaatregelen Bij Het Laadproces
93
Veiligheidsvoorschriften en Instructies Hoe de Accu te Vervoeren en Verzenden
94
Veiligheidsvoorschriften en Voorzorgsmaatregelen Voor de Oplader
94
Opstarten
95
Informatie over de Modi
95
Inzetten Van de Accu
95
Aansluiten Van de Accu Op de Motorkabel
95
Inschakelen Van de Accu
95
Gebruik
95
Accuspanningsmeter
96
Losmaken Van de Accu
97
Uitschakelen Van de Accu
97
Afkoppelen Van de Kabel
97
Verwijderen Van de Accu
97
Opladen Van de Accu
98
Aansluiten Van de Accu-Oplader
98
Oplaadcyclus
98
Weergave LED Lampjes Tijdens de Oplaadcyclus
98
Sleutels
99
Reinigen Van de Accu
99
Verwijdering
99
Aansprakelijkheid
99
Disposal
99
Liability
99
Français
100
Définitions
100
Avant-Propos
101
Champ D'application
101
Utilisation
101
1 Consignes Générales de Sécurité Et Limites de Conduite
102
Consignes Relatives À la Sécurité - Avant Chaque Utilisation
103
Consignes Relatives À la Sécurité - Pendant L'utilisation
103
Consignes Relatives À la Sécurité - Après Chaque Utilisation
103
2 Garantie
104
3 Manipulation
105
Livraison
105
Déballage
105
Modèle Manuel
105
Modèle Hybride
105
Démarrage
105
Entreposage
105
Transport
105
Sécurité
105
4 Réglage de la Position des Pédales
106
Réglage
106
Poignées
106
5 Réglage du Cadre de Raccordement
108
Réglage
108
6 Ancrage Et Décrochage
109
Accrochage : Fig. 6.1 - Fig. 6.5
109
Décrochage : Fig. 6.6 - Fig. 6.10
110
7 Composants Fonctionnels
111
Cadre de Raccordement (Fig. 7.1)
111
Freins
111
Frein de Stationnement (Fig. 7.2)
111
Frein Principal (Fig. 7.3)
111
Levier de Freinage Performance (Fig. 7.4)
111
Frein À Rétropédalage (Fig. 7.5)
113
Frein À Rétropédalage Incorporé Au Moyeu À Vitesses
113
(De Série Sur L'attitude Junior)
113
Dérailleur / Moyeu (Fig. 7.6 - Fig. 7.7)
113
Gâchette de Changement de Plateau (Fig. 7.6 - Fig. 7.7)
113
Manette de Changement de Vitesse (Fig. 7.8)
113
Réglage de L'inclinaison Et de la Profondeur du Pédalier
114
Réglage de L'angle D'inclinaison du Cadre (Fig. 7.9)
114
Réglage de la Profondeur du Cadre (Fig. 7.10)
114
Réglage de la Tension de la Chaîne (Fig. 7.11)
114
Réglage de la Longueur du Pédalier (Attitude Junior Uniquement)
115
8 Entretien
116
Vérifications À Effectuer Avant Chaque Utilisation
116
9 Intervalles D'entretien
117
Entretien
117
10 Entretien des Pneus
117
Montage Et Réparation des Pneus
117
Gonflage
117
11 Maintenance des Freins
117
Entretien des Freins
117
12 Nettoyage/Hygiène
117
Consignes D'hygiène Avant Réutilisation
117
13 Mise Au Rebut / Recyclage des Matériaux
118
Matériaux Utilisés
118
14 Plaque Signalétique
118
15 Couple Réel
119
Serrage Dynamométrique
119
16 Caractéristiques Techniques
119
Partie 1 Interface SMMI Et Moteur Neodrives
122
Recommandations/Consignes Relatives À la Sécurité
122
Usage Prévu des Composants Neodrives
122
Lieux Et Conditions D'utilisation Préconisés
122
Objet de la Livraison
123
Composants Neodrives
123
Caractéristiques Techniques
123
Interface Homme-Machine (IHM) Intelligente
124
Boîtier de Commande
124
Installation Et Retrait de L'ihm Intelligente
125
Fonctions de L'ihm
125
Menu de Démarrage
126
Sélection du Niveau D'assistance
126
Activation de la Fonction de Récupération
127
Assistance Au Freinage
128
Informations Importantes
128
Aide À la Propulsion
129
Utilisation de la Fonction D'aide À la Propulsion
129
Pour Les Kits Handbikes
129
Date Et Heure
129
Modes de Conduite
130
Affichage des Informations Relatives Au Trajet
130
Informations Et Symboles D'avertissement
131
Affichage de la Capacité de la Batterie (Affichage Standard)
131
Avertissement
131
Assistance Au Freinage Activée
131
Rappel D'entretien
131
Avertissement - Température Anormale
131
Avertissement - Anomalie Système
131
Avertissement - Anomalie
131
Mode Affichage Simplifié
132
Activation de L'affichage Simplifié
132
Désactivation de L'affichage Simplifié
132
Autres Paramètres
132
Port USB : (Fig. 3.14)
132
Options Programmables Par Le Revendeur Spécialisé
133
Mises À Jour du Micrologiciel Et Application des Mises À Jour Au Moteur Et À la Batterie
133
Remarque Sur Les Fiches de L'ihm : (Fig. 3.15)
134
Gestion Thermique
134
Moteur
135
Retrait de la Roue Motrice
135
Montage de la Roue Motrice
136
Nettoyage du Moteur Et de L'ihm
137
Moteur
137
Interface Homme-Machine
137
Transport
137
Consignes de Sécurité
137
Anomalies Et Solutions Préconisées
138
Introduction
139
Consignes Importantes
139
Utilisation Appropriée de la Batterie Neodrives
139
Partie 2 Batterie Neodrives
139
Signes Et Symboles
139
Lieux Et Conditions D'utilisation Préconisés
139
Éléments Inclus (Composants Neodrives)
139
Caractéristiques Techniques
140
Principaux Éléments
140
Consignes de Sécurité Et Précautions Relatives À L'utilisation de la Batterie
141
Consignes de Sécurité/Précautions
141
Consignes de Sécurité Et Précautions Relatives À L'entreposage de la Batterie
141
Consignes de Sécurité Et Précautions Relatives Au Processus de Recharge
141
Consignes de Sécurité Et Précautions Relatives Au Transport Et À L'expédition de la Batterie
142
Consignes de Sécurité Et Précautions Relatives Au Chargeur
142
Démarrage
143
Information Sur Les Modes de Fonctionnement
143
Insertion de la Batterie
143
Connexion de la Batterie Au Câble du Moteur
143
Mise Sous Tension de la Batterie
143
Fonctionnement
143
Indicateur de Niveau de Charge de Batterie
144
Retrait de la Batterie
145
Mise Hors Tension de la Batterie
145
Déconnexion du Câble
145
Charge de la Batterie
146
Connexion du Chargeur de Batterie
146
Processus de Recharge
146
Témoins LED Allumés Durant la Recharge
146
Touches
147
Nettoyage de la Batterie
147
Enlèvement
147
Limite de Responsabilité
147
Disposal
147
Liability
147
Advertisement
Sunrise Medical Quickie Attitude Power Directions For Use Manual (116 pages)
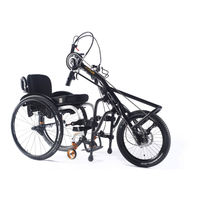
ADD ON BIKE
Brand:
Sunrise Medical
| Category:
Wheelchair
| Size: 2.37 MB
Table of Contents
English
4
Table of Contents
4
Foreword
5
Use
5
Area of Application
5
1 General Safety Notes and Driving Limits
6
Safety Instructions - Prior to each Ride
7
Safety Instructions - While Driving
7
Safety Instructions - after Your Ride
7
2 Warranty
8
Guarantee
8
Liability
8
3 Handling
9
Delivery
9
Unpacking
9
Powered Version
9
Start up
9
Storage
9
Transport
9
Security
9
4 Adjusting the Pedal Position
10
Adjustment
10
5 Adjusting the Connecting Frame
12
Adjustment
12
6 Docking and Dedocking
13
Docking: Fig.6.1 - Fig.6.6
13
De-Docking: Fig.6.6 - Fig.6.10
14
7 Functional Components
14
Connecting Frame (Next Page Fig.7.1)
14
Parking Brake (Next Page Fig.7.2 )
14
Main Brakes (Fig.7.3)
15
Performance Brake Lever (Fig.7.4)
15
Throttle
16
8 Maintenance
17
9 Service Period
18
Servicing
18
10 Tyre Maintenance
18
Fitting and Repairing Tyres
18
Inflation
18
11 Maitenance Brakes
18
Maintaining the Brakes
18
12 Cleaning/Hygene
18
Hygiene When Being Reused
18
13 Disposal / Recycling of Materials
19
Materials Used
19
14 Nameplate
19
15 Torque
20
Torque Settings
20
16 Technical Data
20
Part 1 Ansmann Display
23
Safety Advice/Instructions
23
Intended Use of the Ansmann Components
23
Permissible Operating Conditions / Operating Sites
23
Standard Scope of Delivery
24
Technical Data
24
Functions of the Ansmann System
25
Switching on and off
25
Overview of Functions
25
Ansmann LCD Display View
25
Installing the Display
25
Caution
25
Initial Start-Up Display
26
Back-Light Brightness
26
Setting Back-Light Brightness
26
Using the Display: 26 NOTE
26
Set Wheel Circumference
27
Speedometer, Average Speed, Maximum Speed
28
Resetting the Trip Distace and Trip Time
28
Drive Wheel and Motor
29
Attaching the Drive Wheel
29
Cleaning
29
Cleaning the Motor
29
Motor
29
Display
29
Safety Precautions Sunlight/Direct Heat
29
Part 2 Ansmann Battery
32
Introduction
32
Important Instructions
32
Proper Use of the Ansmann Battery
32
Signs and Symbols
32
Permissible Operating Conditions / Operating Sites
32
Standard Scope of Delivery (Ansmann Components)
32
Technical Data
33
The Key Elements at a Glance
33
Safety Advice/Precautions
34
Safety Instructions and Precautions on the Use of the Battery
34
Safety Instructions and Precautions on How to Store the Battery
34
Safety Instructions and Precautions on the Charging Process
34
Safety Information and Precautions on How to Transport and Ship the Battery
35
Safety Information and Precautions on the Charger
35
Battery
36
Start up
36
Information on the Operating Modes
36
Inserting the Battery
36
Switching on the Battery
36
Battery Capacity Indicator
36
Detaching the Battery
36
Switching off the Battery
36
Removing the Battery
36
Charging the Battery
37
Connecting the Battery Charger
37
Charging Process
37
LED Displays During the Charging Process
37
Fuse Replacement at the Battery
38
Cleaning the Battery
38
Battery Storage
38
Disposal
39
Battery Charger
40
Liability
40
Français
41
Avant-Propos
42
Champ D'application
42
Utilisation
42
1 Consignes Générales de Sécurité Et Limites de Conduite
43
Consignes Relatives À la Sécurité - Avant Chaque Utilisation
44
Consignes Relatives À la Sécurité - Pendant L'utilisation
44
Consignes Relatives À la Sécurité - Après Chaque Utilisation
44
2 Garantie
45
Limite de Responsabilité
45
3 Manipulation
46
Livraison
46
Déballage
46
Version Motorisée
46
Démarrage
46
Entreposage
46
Transport
46
Sécurité
46
4 Réglage de la Position des Pédales
47
Réglage
47
5 Réglage du Cadre de Raccordement
49
Réglage
49
6 Ancrage Et Décrochage
50
Accrochage : Fig. 6.1 - Fig. 6.6
50
Décrochage : Fig. 6.6 - Fig. 6.10
51
7 Composants Fonctionnels
51
Cadre de Raccordement (Fig.7.1, Page Suivante)
51
Frein de Stationnement (Fig. 7.2, Page Suivante)
51
Frein Principal (Fig. 7.3)
52
Levier de Freinage Performance (Fig. 7.4)
52
Poignée D'accélération
53
8 Entretien
54
9 Intervalles D'entretien
55
Entretien
55
10 Entretien des Pneus
55
Montage Et Réparation des Pneus
55
Gonflage
55
11 Maintenance des Freins Entretien des Freins
55
12 Nettoyage/Hygiène
55
Consignes D'hygiène Avant Réutilisation
55
13 Mise Au Rebut / Recyclage des Matériaux
56
Matériaux Utilisés
56
14 Plaque Signalétique
56
15 Couple Réel
57
Serrage Dynamométrique
57
16 Caractéristiques Techniques
57
Partie 2 - Batterie Ansmann
69
Introduction
69
Consignes Importantes
69
Utilisation Appropriée de la Batterie Ansmann
69
Signes Et Symboles
69
Lieux Et Conditions D'utilisation Préconisés
69
Éléments Inclus (Composants Ansmann)
69
Caractéristiques Techniques
70
Principaux Éléments
70
Recommandation Et Précautions Relatives À la Sécurité
71
Consignes de Sécurité Et Précautions Relatives À L'utilisation de la Batterie
71
Consignes de Sécurité Et Précautions Relatives À L'entreposage de la Batterie
71
Consignes de Sécurité Et Précautions Relatives Au Processus de Recharge
71
Consignes de Sécurité Et Précautions Relatives Au Transport Et À L'expédition de la Batterie
72
Consignes de Sécurité Et Précautions Relatives Au Chargeur
72
Batterie
73
Démarrage
73
Information Sur Les Modes de Fonctionnement
73
Insertion de la Batterie
73
Mise Sous Tension de la Batterie
73
Indicateur de Niveau de Charge de Batterie
73
Retrait de la Batterie
73
Mise Hors Tension de la Batterie
73
Charge de la Batterie
74
Connexion du Chargeur de Batterie
74
Processus de Recharge
74
Témoins LED Allumés Durant la Recharge
74
Changement de Fusible de la Batterie
75
Nettoyage de la Batterie
75
Entreposage de la Batterie
75
Enlèvement
76
Chargeur de Batteries
77
Limite de Responsabilité
77
Dutch
105
Deel 2 Ansmann Accu
106
1 Inleiding
106
Belangrijke Instructies
106
Bedoeld Gebruik Van de Ansmann Accu
106
Tekens en Symbolen
106
Toegestane Gebruiksomstandigheden / Gebruikslocaties
106
Standaard Leveringsomvang (Ansmann Onderdelen)
106
2 Technische Gegevens
107
Overzicht Van de Hoofdonderdelen
107
3 Veiligheidsadvies/Voorzorgsmaatregelen
108
Veiligheidsinstructies en Voorzorgsmaatregelen Voor Het Gebruik Van de Accu
108
Veiligheidsvoorschriften en Voorzorgsmaatregelen Voor de Opslag Van de Accu
108
Veiligheidsvoorschriften en Voorzorgsmaatregelen Bij Het Laadproces
108
Veiligheidsvoorschriften en Instructies Hoe de Accu te Vervoeren en Verzenden
109
Veiligheidsvoorschriften en Voorzorgsmaatregelen Voor de Oplader
109
4 Accu
110
Opstarten
110
Informatie over de Modi
110
Inzetten Van de Accu
110
Inschakelen Van de Accu
110
Accuspanningsmeter
110
Losmaken Van de Accu
110
Uitschakelen Van de Accu
110
Verwijderen Van de Accu
110
Opladen Van de Accu
111
Aansluiten Van de Accu-Oplader
111
Oplaadcyclus
111
Weergave LED Lampjes Tijdens de Oplaadcyclus
111
Vervangen Van de Zekering Van de Accu
112
Reinigen Van de Accu
112
Bewaren Van de Accu
112
5 Verwijdering
113
6 Accu-Oplader
114
7 Aansprakelijkheid
114
Sunrise Medical Quickie Attitude Power Directions For Use Manual (112 pages)
Add on Bike
Brand:
Sunrise Medical
| Category:
Bicycle
| Size: 2.21 MB
Table of Contents
English
4
Definitions
4
Table of Contents
4
Definitions of Words Used in this Manual
4
Foreword
5
Use
5
Area of Application
5
1 General Safety Notes and Driving Limits
6
Safety Instructions - Prior to each Ride
7
Safety Instructions - While Driving
7
Safety Instructions - after Your Ride
7
2 Warranty
8
Guarantee
8
Liability
8
3 Handling
9
Delivery
9
Unpacking
9
Powered Version
9
Start up
9
Storage
9
Transport
9
Security
9
4 Adjusting the Handlebar Position
10
Adjustment
10
5 Docking and Dedocking
12
Docking: Fig.5.1 - Fig.5.5
12
De-Docking: Fig.5.6 - Fig.5.10
13
Connecting Frame (Next Page Fig.6.1)
13
6 Functional Components
13
Parking Brake (Next Page Fig.6.2 )
13
Main Brakes (Fig.6.3)
14
Throttle
14
7 Maintenance
15
Checks to be Carried out before Use
15
8 Service Period
16
Servicing
16
9 Tyre Maintenance
16
Fitting and Repairing Tyres
16
10 Maitenance Brakes
16
Maintaining the Brakes
16
11 Cleaning/Hygene
16
Hygiene When Being Reused
16
12 Disposal / Recycling of Materials
17
Materials Used
17
13 Nameplate
17
14 Torque
18
Torque Settings
18
15 Technical Data
18
Introduction
21
Intended Use of the Ansmann Components
21
Part 1 Ansmann Display 21 DANGER
21
Safety Advice/Instructions
21
Permissible Operating Conditions / Operating Sites
21
Ansmann Components
22
Technical Data
22
Standard Scope of Delivery
22
Warning
23
Switching on and off
23
Overview of Functions
23
Ansmann LCD Display View
23
Installing the Display
23
Functions of the Ansmann System
23
Caution
23
Initial Start-Up Display
24
Back-Light Brightness
24
Setting Back-Light Brightness
24
Using the Display
24
Speedometer, Average Speed, Maximum Speed, Total
26
Distance, Trip Distance, Trip Time
26
Resetting the Trip Distace and Trip Time
26
Attaching the Drive Wheel
27
Drive Wheel and Motor
27
Cleaning the Motor
27
Motor
27
Display
27
Cleaning
27
Sunlight/Direct Heat
27
Safety Precautions
27
Part 2 Ansmann Battery
31
Introduction
31
Important Instructions
31
Proper Use of the Ansmann Battery
31
Signs and Symbols
31
Permissible Operating Conditions / Operating Sites
31
Standard Scope of Delivery (Ansmann Components)
31
The Key Elements at a Glance
32
Technical Data
32
Safety Advice/Precautions
33
Safety Instructions and Precautions on the Use of the Battery
33
Safety Instructions and Precautions on How to Store the Battery
33
Safety Instructions and Precautions on the Charging Process
33
Safety Information and Precautions on How to Transport and Ship the Battery
34
Safety Information and Precautions on the Charger
34
Battery
35
Start up
35
Information on the Operating Modes
35
Inserting the Battery
35
Switching on the Battery
35
Battery Capacity Indicator
35
Detaching the Battery
35
Switching off the Battery
35
Removing the Battery
35
Charging the Battery
36
Connecting the Battery Charger
36
Charging Process
36
LED Displays During the Charging Process
36
Fuse Replacement at the Battery
37
Keys
37
Cleaning the Battery
37
Disposal
38
Battery Charger
39
Liability
39
Polski
66
1 Wstęp
67
Wprowadzenie
67
Ważne Instrukcje
67
Przeznaczenie Akumulatora Ansmann
67
Znaki I Symbole
67
Dopuszczalne Warunki I Miejsca Użytkowania
67
Zakres Dostawy (Podzespoły Systemu Ansmann)
67
2 Dane Techniczne
68
Kluczowe Podzespoły Systemu
68
3 Środki Bezpieczeństwa
69
Instrukcje Bezpieczeństwa Dotyczące Użytkowania Akumulatora
69
Instrukcje Bezpieczeństwa Dotyczące Przechowywania Akumulatora
69
Instrukcje Bezpieczeństwa Dotyczące Ładowania Akumulatora
69
Instrukcje Bezpieczeństwa Dotyczące Przewozu I Transportu Akumulatora
70
Instrukcje Bezpieczeństwa Dotyczące Ładowarki
70
4 Akumulator
71
Uruchamianie
71
Informacje O Trybach Pracy
71
Montaż Akumulatora
71
Włączanie Akumulatora
71
Wskaźnik Naładowania Akumulatora
71
Odłączanie Akumulatora
71
Wyłączanie Akumulatora
71
Demontaż Akumulatora
71
Ładowanie Akumulatora
72
Podłączanie Ładowarki Do Akumulatora
72
Ładowanie
72
Diody LED Podczas Ładowania
72
Wymiana Bezpiecznika Akumulatora
73
Klucze
73
Czyszczenie Akumulatora
73
Przechowywanie Akumulatora
73
5 Usuwanie Zużytych Produktów
74
6 Ładowarka
75
7 Odpowiedzialność
75
Čeština
102
1 Úvod
103
Důležité Pokyny
103
Řádné PoužíVání Akumulátoru Neodrives
103
Značky a Symboly
103
Přípustné Provozní Podmínky
103
Standardní Rozsah Dodávky (Součásti Ansmann)
103
2 Technické Údaje
104
Přehled Klíčových Prvků
104
3 Bezpečnostní Pokyny a Opatření
105
Bezpečnostní Pokyny a Opatření K Použití Akumulátoru
105
Bezpečnostní Pokyny a Opatření Ke Skladování Akumulátoru
105
Bezpečnostní Pokyny a Opatření K Procesu Nabíjení
105
Bezpečnostní Pokyny a Opatření K Přepravě a Expedici Akumulátoru
106
Bezpečnostní Pokyny a Opatření K Nabíječce
106
4 Akumulátor
107
Spuštění
107
Informace O Provozních Režimech
107
Vložení Akumulátoru
107
Zapnutí Akumulátoru
107
Indikátor Kapacity Akumulátoru
107
Odpojení Akumulátoru
107
Vypnutí Akumulátoru
107
Demontáž Akumulátoru
107
Nabíjení Akumulátoru
108
Připojení Nabíječky K Akumulátoru
108
Nabíjení
108
Diody Indikují Průběh Nabíjení
108
VýMěna Pojistky V Akumulátoru
109
Klíče
109
ČIštění Akumulátoru
109
Skladování Akumulátoru
109
5 Ekologická Likvidace
110
Likvidace
110
6 Nabíječka Akumulátorů
111
7 Odpovědnost
111
Advertisement
Advertisement
Related Products
Sunrise Medical Quickie Aspire M11
Sunrise Medical Quickie Aspire F11
Sunrise Medical Quickie Argon
Sunrise Medical Quickie Quickie Match Point
Sunrise Medical Quickie Sedeo Original
Sunrise Medical QUICKIE Easy Life T
Sunrise Medical Quickie ST
Sunrise Medical Quickie Groove R
Sunrise Medical Quickie Groove M
Sunrise Medical Quickie IRIS SE
Sunrise Medical Categories
Wheelchair
Medical Equipment
Mobility Aid
Scooter
Controller
More Sunrise Medical Manuals
Login
Sign In
OR
Sign in with Facebook
Sign in with Google
Upload manual
Upload from disk
Upload from URL