Sign In
Upload
Manuals
Brands
Ricoh Manuals
All in One Printer
DD 5450
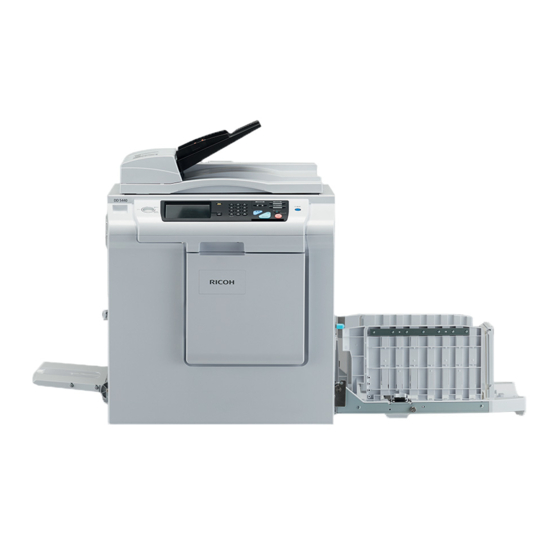
Ricoh DD 5450 Manuals
Manuals and User Guides for Ricoh DD 5450. We have
2
Ricoh DD 5450 manuals available for free PDF download: Field Service Manual, Operating Instructions Manual
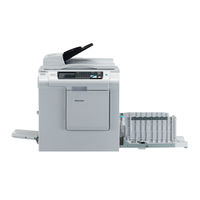
Ricoh DD 5450 Field Service Manual (403 pages)
Brand:
Ricoh
| Category:
Disc Duplicator
| Size: 73.92 MB
Table of Contents
Introduction 2
10
Introduction
3
Using the Service Manual
4
Cautions Regarding the Installation Location
5
Safety Instructions
5
Cautions for Installation Work
6
Cautions for Maintenance, Inspection and Servicing
7
Locations of Warning Labels
8
Table of Contents
10
Chapter 1 Introduction
11
Specifications
12
Dimensions
15
System Setup
16
Machine Exteriors
17
Part Names and Their Functions
17
Inside of Machine
18
Outside/Inside of Print Output Side
19
Display Screen
22
Setting Screen
22
Chapter 2 Installation Procedure
23
Machine Installation
24
Machine Installation
25
Installation
25
Installing the Machine
25
Attaching the Jump Plates
26
Turning the Power Switch on
26
Setting the Roll Master
28
Preparing the Drum
30
Setting the Ink Pack
32
Replenishing Ink
34
Adjusting Ink Amount
35
Setting Date & Time
36
Platen Cover PN7000
38
Unpacking Checks
38
Installing on the Machine
39
Adf Df7010
40
Unpacking Checks
40
Installing on the Machine
41
Adjusting the Height of the ADF
45
HELP Setting
46
A3 Color Drum Type D1
48
Unpacking Checks
48
Preparing the Drum
49
Setting the Ink Pack
51
Replenishing Ink
52
Adjusting Ink Amount
54
A4 Drum Type D1
55
Unpacking Checks
55
Preparing the Drum
56
Setting the Drum
57
Setting the Ink Pack
58
Replenishing Ink
60
Adjusting Ink Amount
61
Tape Dispenser Type D1
63
Unpacking Checks
63
Installing the Knob on the Tape Dispenser
64
Setting Tape Roll
67
HELP Setting (Type D1)
70
And Small Classification (Type D1)
71
And Small Classification (Type D)
72
Printer Unit (USB) Type D1
74
Unpacking Checks
74
Installation
75
Setting the Machine (Hardware)
81
Start Position)
81
Printer Unit (NIC) Type D1
82
Unpacking Checks
82
Installation
84
Setting the Machine (Hardware)
90
Setting Password Function
91
Start Position)
94
USB Slot Type D1
95
Unpacking Checks
95
Installation
96
Operation Check
97
Chapter 3 Description of the Operation
99
Scanner Section
101
Description
101
Sequence of Operation
102
(With ADF Connected)
102
(With ADF Unconnected)
102
1) Sequence of the Scanner Operation
102
Open / Closed
103
Reading the Document Density
103
Reading the Document Size
103
Paper
104
Function of Parts and Circuit
105
Master Making / Master Feed / Ejection Section
109
Master Making / Master Feed Section
109
Description
109
Sequence of Operation
110
Sequence of the Master Setting
110
Master Making / Master Feeding
111
Functions of Parts
112
Thermal Head
112
End Mark Sensor
115
Master Top Sensor
117
Drum Master Sensor
118
Cutter Unit
119
Clutch
120
Master Ejection Section
121
Description
121
Circuit
121
Function of Parts
122
Master Clamp Opening / Closing Section
123
Description
123
Close Lever
124
Structure
124
B Mode and C Mode Sensors
127
Master Making/Master Feed/Ejection Section
109
Paper Feed Section
128
Description
128
Operation
129
Timing Roller
129
Timing Roller Drive
131
Escaping the Guide Roller
132
Paper Feed Length
133
Functions of Parts
134
Double Feed Detection Mechanism
136
Sensor
137
Switch
138
Paper Sensor
139
Length Sensor
140
Drum Driving Section
141
Description
141
Functions of Parts
142
Drum Position-1 Sensor
142
Drum Position-2 Sensor
143
Main Motor Control
146
Rotational Speed Control (Encoder Sensor)
146
Press Section
147
Description
147
Press Roller Timing & Printing
147
Functions of Parts
149
Press Roller Sensor
149
Switching the Contact Pressure
150
Contact Pressure Detection
151
Paper Ejection Section
152
Description
152
Functions of Parts
153
Paper Stripper Finger
153
Top Fan
154
Print Tray Fan
156
Paper Eject Jam Sensor
157
Paper Jam Detection Timing
158
Paper Eject Fan
159
Paper Ejection Belt
159
Drum Section
160
Description
160
Circuit
161
Functions of Parts
162
Ink Detection
162
Ink Roller Up/Down Mechanism
164
Ink Pump
166
Drum Switch
167
Fine Start Mode
168
Front Cover Sensor
169
Chapter 4 Mechanism
171
Exterior
172
Removing the Document Cover
172
Removing the
172
Removing the Scanner Outer Cover
173
Removing the Rear Cover
174
Removing the Main PCB Unit, Drive PCB Unit, Relay PCB Unit, Switching Power Supply 24V/5V and Battery
174
Removing the Control Panel
178
Removing the Control Panel PCB
179
Removing the LED PCB Unit
180
Removing the LCD Module
181
Removing the Power Switch
185
Removing the Battery PCB Unit
186
Removing the Motor PCB Unit
186
Scanner Section
187
Removing the Glass
187
Removing the Reading Cover
187
Removing the Scanner Unit
188
Removing the LED Lamp Unit
189
Removing the Lamp Cord
190
Removing the Slider a
191
Removing the Slider B
193
Master Making/ Master Feed and Ejection Section
194
Master Making/ Master Feed Section
194
Removing the Cutter Unit
194
Removing the End Mark Sensor PCB Unit
195
Removing the Static Eliminating Brush Bracket
195
Removing the Thermal Head
196
Removing the Master Feed Unit
197
Removing the Master Feed Stepping Motor
198
Master Ejection Section
199
Removing the Eject Motor (Roll-Up Motor)
199
Removing the Master Ejection Box
199
Master Clamp Opening/Closing Section
200
Removing the Clamp Motor
200
Removing the Master Clamp Opening/Closing Unit
200
Removing the Timing Belt
201
Master Making/Master Feed and Ejection Section
194
Paper Feed Section
202
Removing the Feed Tray Unit
202
Removing the Elevator Lower Limit Switch
203
Removing the Paper Feed Roller
203
Removing the Paper Separator Unit
204
Removing the Side Separators
205
Removing the Paper Top Detect Sensor, Signal Sensor, Double Feed Detect Sensor
206
Removing the Timing Roller
207
Drum Driving Section
208
Removing the Sub-Frame
208
Removing the Drum Gear and Driving Assy
209
Removing the P Roll
209
Removing the P Roll Bracket
210
Paper Ejection Section
212
Removing the Paper Stripper Finger, Sub Paper Stripper Finger
212
Removing the Paper Tray Fan Unit
213
Removing the Paper Eject Fan Unit
214
Removing the Paper Ejection Belt
215
Removing the Paper Ejection JAM Sensor
216
Removing the Paper Ejection Motor
217
Removing the Top Fan Unit
218
Removing the Fan
218
Removing the Pressure Adjustment Unit
219
Removing the Press Motor
219
Drum Section
220
Removing the Screen
220
Removing the Sponge
221
Removing the Master Clamp
221
Removing the Base Unit
221
Removing the Outer Frame F Unit
222
Removing the Outer Frame R Assy
223
Removing the Inner Frame
224
Removing the Ink Pump
225
Removing the Ink Pump Motor
225
Removing the Ink Detection PCB Unit
226
Removing the Ink Roller Up/Down Motor
226
Chapter 5 Standards/Adjustment
227
Scanner Section
228
Attaching the Rear Wire
228
Attaching the Front Wire
229
Master Making/Master Feed/Ejection Section
230
Adjusting the Timing Belt Tension
230
Master Making / Master Feed Section
230
Attaching the Spring
231
Master Ejection Section
231
Adjusting the Timing Belt Tension
232
Adjusting the Timing Belt Tension
233
Master Clamp Opening/Closing Section
233
Master Ejection Master Clamp Opening/Closing Lever
233
Master Feed Master Clamp Opening/Closing Lever
233
Positioning the Master Clamp Opening/Closing Levers
233
Adjusting the B / C Mode
234
Adjustment for B Mode
234
Adjusting C-Mode
236
Paper Feed Section
237
Adjusting the Elevator Top Limit Sensor
237
Adjusting the Paper Separator Unit Clearance
237
Adjusting the Elevator Lower Limit Switch
238
Adjusting the G Roll Escape Amount/Timing
239
Top Margin Adjustment
239
Adjusting the Vertical Reg. Sensors
240
Bottom Limit Adjustment
240
Top Limit Adjustment
240
Drum Driving Section
241
Adjusting the Drum Stop Position
241
Adjusting the Master Attach Position
242
Press Section
243
Checking the of Press Roller Sensor
243
Adjusting the Printing Area (Press off Timing)
244
Paper Ejection Section
245
Adjusting the Paper Stripper Finger Clearance
245
Drum Section
246
Adjusting the Ink Amount
246
Adjusting the Squeegee Gap
247
Adjusting the Drum Rail Gap
248
Adjusting the Master Clamp Margin
248
Operation Side
248
Rear Side
248
Electrical System
249
Adjusting M-Make Feed Volume Magnification
249
Adjusting M-Make Speed Magnification
249
Adjusting Reduction/Enlargement
249
Adjusting Scan Horizontal Magnification
250
Adjusting Scan Vertical Magnification
250
Master Making Start Position
251
Reading Start Position
252
Adjusting the Lateral (Operation Side) Reading Start Position
252
Adjusting the Top End Reading Start Position Adjustment Procedure
252
Adjusting the Master Making Start Position
253
When in Online
253
When the Scanner Is in Use
253
Adjusting the Document Reading Darkness
254
Adjusting the Scan Level: Text Mode
254
Adjusting the Scan Level: Text/Photo,Photo/Text, Photo Mode
254
Adjusting of Printer Unit's Printing Speed
255
Adjusting the M-Make Speed
255
Adjusting the Pre-Stop Speed
255
Adjusting the Jog Speed
256
Adjusting the Print Speed
256
Adjusting Paper Eject Speed
257
Adjusting the Paper Eject Speed
257
Setting the Top Fan
257
Chapter 6 Maintenance/Check
259
Guaranteed Periodical Maintenance
260
Cleaning and Oiling
260
Periodical Maintenance
261
Chapter 7 Troubleshooting
263
Countermeasures for the Defective Operation
264
Troubleshooting Guide
264
Lamp Does Not Light up
265
Malfunction of Master Feed Clutch
266
Optical System Dose Not Move Forward/Backward
266
Malfunction of Master Feed Stepping Motor
267
MASTER EJECTION ERROR" Is Displayed
267
ADD PAPER to FEED TRAY" Is Displayed
268
CLOSE FRONT COVER Is Displayed
268
Malfunction of Eject Motor
268
CLOSE TOP COVER" Is Displayed
269
MASTER" Is Displayed
269
INK" Is Displayed
270
PAPER JAM on EJECTION SIDE" Is Displayed
271
PAPER JAM on FEEDER SIDE" Is Displayed
271
OUT of BATTERY. CALL SERVICE PERSON." Is Displayed
272
USED MASTER CORE" or "USED MASTER FULL" Is Displayed
272
Paper Jams in the Paper Feed Side
273
Paper Jams in the Paper Eject Side
274
E001" Is Displayed
275
E002" Is Displayed
276
E005" Is Displayed
277
E006" Is Displayed
278
E009" Is Displayed
279
E011" Is Displayed
279
E012" Is Displayed
280
E013" Is Displayed
281
E015" Is Displayed
282
E016" Is Displayed
283
E017" Is Displayed (ADF) (29) "E020" Is Displayed (Tape Dispenser)
284
E021" Is Displayed (Tape Dispenser)
284
E023" Is Displayed (Tape Dispenser)
284
E024" Is Displayed (Tape Dispenser)
285
E030" Is Displayed
285
E032" Is Displayed
286
E033" Is Displayed
286
E034" Is Displayed
286
E036" Is Displayed
286
E037" Is Displayed
287
E038" Is Displayed
287
E039" Is Displayed
287
Error Display
288
Chapter 8 HELP Mode
291
HELP Mode List
292
Overview
296
HELP Mode Functions and Operation Procedures
297
Chapter 9 Others
393
Electrical Parts Layout and Their Functions
394
Sensors 1
395
Sensors 2
396
Motors/Fans
397
PCB Unit/Others
398
Connector VR/LED Layout and Functions
399
Advertisement
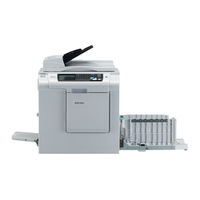
Ricoh DD 5450 Operating Instructions Manual (224 pages)
Brand:
Ricoh
| Category:
All in One Printer
| Size: 9.05 MB
Table of Contents
Operating Instructions
1
Table of Contents
11
Chapter 1 Part Names and Their Functions
18
Printer Appearance
18
Inside of Machine
19
Outside/Inside of Print Output Side
20
Control Panel
22
Main Screen
23
Setting Screen
23
Turning Power ON/OFF
24
Turning Power on
24
Turning Power off
24
Standard Mode
25
Document/Printing Paper Specifi Cations
26
Acceptable Documents
26
Acceptable Printing Paper
26
Chapter 2 Preparing for Printing
30
How to Set Papers
30
When no Heavy Weight Paper Is Fed or Two Sheets of Light Weight Paper Are Fed
31
How to Supply or Replace Paper While Printing
32
How to Set the Print Tray
33
How to Set the Jump Plates
34
Loading Documents
35
How to Load Document
35
How to Load Document on the Exposure Glass
35
Loading Document in Automatic Document Feeder (ADF)(Optional)
36
Basic Printing
38
Printing Using Basic Functions
38
Enlargement / Reduction
40
Enlargement and Reduction from Standard-Size Documents to Standard-Size Paper
40
Enlargement and Reduction from Standard-Size Documents to Standard-Size Paper
41
Selecting Printing Paper Size
42
Master Making Area by Paper Size [European]
42
How to Set Paper Size
42
Master Making Area by Paper Size [U.S.]
43
How to Set Paper Size
43
How to Set "CUSTOM" in Paper Size Setting
44
Print Speed Adjustment
45
How to Adjust Print Speed
45
How to Set TOP SPEED
46
Chapter 3 Enlargement / Reduction
48
Minor Reduction
50
Free Zoom
52
Custom Scaling
54
Adjusting Darkness
56
Scan Darkness
56
How to Adjust Scan Darkness
56
Master Darkness
57
How to Adjust Master Darkness
57
Print Darkness
58
How to Adjust Print Darkness
58
The Document
59
Printing Photographs and Color Documents
60
Image Mode
60
How to Set Image Mode
60
Document
61
Adjusting Print Position
62
Print Position Adjustment
62
Document Size
64
How to Set Document Size
64
How to Set "CUSTOM" in Document Size
65
Document
67
Chapter 4 Edit Function: Preview
68
Checking Document to be Printed
68
Preview →P
68
Edit Function: Multiple Exposure
72
Multiple Exposure on One Page
72
How to Set Multiple Exposure (2, 4, 8, and 16-Up)
74
One Page
75
In 1
76
How to Set 2 in 1
76
How to Set 2 in 1 Using the ADF (Option)
79
Custom
80
How to Set Custom
80
Cut Line
82
How to Set Cut Line
82
Edit Function: Book Shadow Erasure
84
Book Shadow Erasure
84
Area of Shadow Erasure
85
How to Set Book Shadow Erasure
86
Edit Function: 90° Rotation
89
90° Rotation
89
How to Set 90° Rotation
89
Edit Function: 180° Rotation
91
180° Rotation
91
How to Set 180° Rotation
91
Edit Function: Edit Image
93
Edit Image
93
Make up
93
How to Set Make up
95
Add Make Up, Switch Erase Area, New Make up
107
Trimming
111
How to Set Trimming
111
Edit Function: Document Memory
114
Document Memory
114
How to Set Document Memory
114
Special Function: Program
116
Program
116
Retrieving Settings
121
Clearing Settings
124
Special Function: Paper Type
126
Paper Type
126
How to Set Paper Type
126
Special Function: Narrow Paper
128
Narrow Paper
128
How to Set Narrow Paper
128
Special Function: Ink Saving Mode
130
Ink Saving Mode
130
How to Set Ink Saving Mode
130
How to Replenish Ink
132
Special Function: Replenish Ink
132
Replenishing Ink
132
Special Function: Confi Dential Safeguard
133
Confi Dential Safeguard
133
How to Set Confi Dential Safeguard
133
Special Function: Document Darkness Detection
135
Document Darkness Detection
135
How to Set Document Darkness Detection
135
Special Function: Interval Print
137
Interval Print
137
How to Set Interval Print
137
Special Function: Batch Print Sequential Batch Print
139
Batch Print / Sequential Batch Print
139
How to Set Batch Print / Sequential Batch Print
140
How to Enter Batch Print / Sequential Batch Print
142
Separating Prints with Tape Strips
143
(Available Only with Tape Dispenser Unit)
143
Special Function: Document Misset Detection
144
Document Misset Detection
144
How to Set Document Misset Detection
144
Peripheral Function: Online Mode
146
Making Prints Using Personal Computer
146
How to Set Online Mode
146
How to Cancel Reprint When in Manual Setting
147
Setting Function: Initial Confi Guration
148
Initial Confi Guration
148
How to Set Initial Confi Guration
148
Setting Function: Shortcut Setting
151
Shortcut Setting
151
Setting Function: Energy Save Mode
153
Energy Save Mode
153
How to Set Energy Save Mode
153
Setting Function: Automatic Power off
155
Automatic Power off
155
How to Set Automatic Power off
155
Setting Function: Automatic Reset
157
Automatic Reset
157
How to Set Automatic Reset
157
Setting Function: Fine Start
159
Fine Start
159
How to Set Fine Start
159
Setting Function: Optimize Print
161
Optimize Print
161
How to Set Optimize Print
161
Setting Function: Pre-Print
163
Pre-Print
163
How to Set Pre-Print
163
Setting Function: Repeat Counter
165
Repeat Counter
165
How to Set Repeat Counter
165
Setting Function: Proof Print
167
Proof Print
167
How to Set Proof Print
167
Setting Function: Print Position Adjustment (While Printing)
169
Print Position Adjustment While Printing
169
How to Set Print Position Adjustment While Printing
169
Setting Function: Display Brightness
171
Display Brightness
171
How to Set Display Brightness
171
Setting Function: Date & Time
173
Date & Time
173
How to Set Date & Time
173
Setting Function: Buzzer
175
Buzzer
175
How to Set Buzzer
175
Setting Function: Information
177
Information
177
How to Confi Rm Information
177
Chapter 5 Replacing Ink Pack
180
How to Replace Ink Pack
180
Replacing Roll Master
183
How to Replace Roll Master
183
How to Dispose of Used Masters
186
Replacing Drum Unit
188
How to Remove Drum Unit
188
How to Set Drum Unit
189
Replacing Separator Unit
191
Replacing Side Separator Unit
192
Chapter 6
194
If Trouble Occurs
194
When Messages Appear
195
Supplying Paper While Printing
198
If Paper Runs out During Printing
198
Changing Paper Size
199
Paper Jams
201
Paper Jam on the Feeder Side (Feed Tray)
201
Paper Jam on the Ejection Side (Print Tray Side)
202
Paper Adhering to Drum
203
When "MASTER EJECTION ERROR" Is Displayed
205
Removing the Master Adhering to the Drum
205
When Master Setting Error Has Occurred
208
How to Remove the Master
208
When "SET MASTER ROLL PROPERLY" Is Displayed
209
How to Set the Master Roll
209
Chapter 7 Daily Maintenance
211
Daily Maintenance
212
Chapter 8 Specifi Cations / Information
213
Specifi Cations
214
Information on Replacing Battery
217
Chapter 9 Appendix
219
Index
220
Advertisement
Related Products
Ricoh DDP70E-92
Ricoh Priport DD 4450
Ricoh DDST Unit Type E
Ricoh D054
Ricoh Aficio DSm620
Ricoh Aficio DSc424
Ricoh DSm415
Ricoh D104
Ricoh D008
Ricoh D094
Ricoh Categories
All in One Printer
Printer
Digital Camera
Copier
Printer Accessories
More Ricoh Manuals
Login
Sign In
OR
Sign in with Facebook
Sign in with Google
Upload manual
Upload from disk
Upload from URL