Sign In
Upload
Manuals
Brands
ProCurve Manuals
Switch
2610-48-PWR
ProCurve 2610-48-PWR Manuals
Manuals and User Guides for ProCurve 2610-48-PWR. We have
3
ProCurve 2610-48-PWR manuals available for free PDF download: Management And Configuration Manual, Manual, Installation And Getting Started Manual
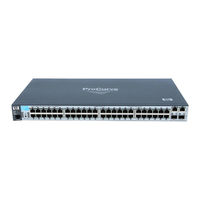
ProCurve 2610-48-PWR Management And Configuration Manual (464 pages)
2610/2610-PWR Series Switches
Brand:
ProCurve
| Category:
Switch
| Size: 7.04 MB
Table of Contents
Table of Contents
5
Product Documentation
19
Software Feature Index
20
1 Getting Started
26
Introduction
26
Conventions
26
Feature Descriptions by Model
26
Command Syntax Statements
26
Command Prompts
27
Screen Simulations
27
Port Identity Examples
28
Sources for more Information
28
Need Only a Quick Start
30
IP Addressing
30
To Set up and Install the Switch in Your Network
30
Selecting a Management Interface
32
Overview
32
Advantages of Using the Menu Interface
33
Advantages of Using the CLI
34
Cli Usage
34
Advantages of Using the Web Browser Interface
35
Advantages of Using Procurve Manager or Procurve Manager Plus
36
Using the Menu Interface
40
Overview
40
Starting and Ending a Menu Session
41
How to Start a Menu Interface Session
42
How to End a Menu Session and Exit from the Console
43
Main Menu Features
45
Screen Structure and Navigation
47
Rebooting the Switch
50
Menu Features List
52
Where to Go from here
53
4 Using the Command Line Interface (CLI)
55
Contents
55
Overview
56
Accessing the CLI
56
Using the CLI
56
Privilege Levels at Logon
57
Privilege Level Operation
58
Operator Privileges
58
Manager Privileges
59
How to Move between Levels
61
Listing Commands and Command Options
62
Listing Commands Available at any Privilege Level
62
Command Option Displays
64
Displaying CLI "Help
65
Configuration Commands and the Context Configuration Modes
67
CLI Control and Editing
70
5 Using the Web Browser Interface
71
Contents
71
Overview
72
General Features
73
Starting a Web Browser Interface Session with the Switch
74
Using a Standalone Web Browser in a PC or UNIX Workstation
74
Using Procurve Manager (PCM) or Procurve Manager Plus (PCM+)
75
Tasks for Your First Web Browser Interface Session
77
Viewing the "First Time Install" Window
77
Creating Usernames and Passwords in the Browser Interface
78
Using the Passwords
80
Using the User Names
80
If You Lose a Password
80
Online Help for the Web Browser Interface
81
Support/Mgmt Urls Feature
82
Support URL
83
Status Reporting Features
84
The Overview Window
84
The Port Utilization and Status Displays
85
Port Utilization
85
Port Status
87
The Alert Log
88
Sorting the Alert Log Entries
88
Alert Types and Detailed Views
89
The Status Bar
90
Setting Fault Detection Policy
91
6 Switch Memory and Configuration
95
Contents
95
Overview
97
Overview of Configuration File Management
97
Using the CLI to Implement Configuration Changes
100
Using the Menu and Web Browser Interfaces to Implement Configuration Changes
103
Configuration Changes Using the Menu Interface
103
Rebooting from the Menu Interface
105
Configuration Changes Using the Web Browser Interface
106
Using Primary and Secondary Flash Image Options
107
Displaying the Current Flash Image Data
107
Switch Software Downloads
109
Local Switch Software Replacement and Removal
110
Rebooting the Switch
112
Operating Notes
116
Multiple Configuration Files
117
General Operation
118
Listing and Displaying Startup-Config Files
120
Viewing the Startup-Config File Status with Multiple Configuration Enabled
120
Displaying the Content of a Specific Startup-Config File
121
Changing or Overriding the Reboot Configuration Policy
121
Managing Startup-Config Files in the Switch
124
Renaming an Existing Startup-Config File
124
Creating a New Startup-Config File
124
Erasing a Startup-Config File
127
Using the Clear + Reset Button Combination to Reset the Switch to Its Default Configuration
128
Transferring Startup-Config Files to or from a Remote Server
129
TFTP: Copying a Configuration File to a Remote Host
129
TFTP: Copying a Configuration File from a Remote Host
130
Xmodem: Copying a Configuration File to a Serially Connected Host
130
Xmodem: Copying a Configuration from a Serially Connected Host
131
Xmodem: Copying a Configuration from a Serially
131
Connected Host
131
7 Interface Access and System Information
133
Contents
133
Overview
134
Interface Access: Console/Serial Link, Web, and Telnet
135
Menu: Modifying the Interface Access
136
CLI: Modifying the Interface Access
137
Denying Interface Access by Terminating Remote Management Sessions
141
Denying Interface Access by Terminating Remote
141
Management Sessions
141
System Information
142
Menu: Viewing and Configuring System Information
143
CLI: Viewing and Configuring System Information
144
Web: Configuring System Parameters
147
8 Configuring IP Addressing
150
Overview
150
IP Configuration
151
Just Want a Quick Start with IP Addressing
152
IP Addressing with Multiple Vlans
152
IP Addressing in a Stacking Environment
153
Menu: Configuring IP Address, Gateway, and Time-To-Live (TTL)
153
CLI: Configuring IP Address, Gateway, and Time-To-Live (TTL)
155
Web: Configuring IP Addressing
159
How IP Addressing Affects Switch Operation
159
Dhcp/Bootp Operation
160
Network Preparations for Configuring Dhcp/Bootp
163
IP Preserve: Retaining VLAN-1 IP Addressing Across Configuration
164
File Downloads
164
Operating Rules for IP Preserve
164
9 Time Protocols
170
Overview
170
Timep Time Synchronization
170
SNTP Time Synchronization
170
Overview: Selecting a Time Synchronization Protocol or Turning off Time Protocol Operation
171
General Steps for Running a Time Protocol on the Switch
171
Disabling Time Synchronization
172
SNTP: Viewing, Selecting, and Configuring
172
Menu: Viewing and Configuring SNTP
173
CLI: Viewing and Configuring SNTP
176
Viewing the Current SNTP Configuration
176
Configuring (Enabling or Disabling) the SNTP Mode
177
Timep: Viewing, Selecting, and Configuring
182
Menu: Viewing and Configuring Timep
183
CLI: Viewing and Configuring Timep
184
Viewing the Current Timep Configuration
185
Configuring (Enabling or Disabling) the Timep Mode
186
SNTP Unicast Time Polling with Multiple SNTP Servers
189
Address Prioritization
189
Adding and Deleting SNTP Server Addresses
190
Menu Interface Operation with Multiple SNTP Server Addresses
191
Configured
191
SNTP Messages in the Event Log
191
10 Port Status and Basic Configuration
193
Contents
193
Overview
195
Viewing Port Status and Configuring Port Parameters
195
Menu: Viewing Port Status and Configuring Port Parameters
198
CLI: Viewing Port Status and Configuring Port Parameters
200
Using the CLI to View Port Status
200
Displaying Spanning Tree Configuration Details
202
Using the CLI to Configure Ports
202
Using the CLI to Configure a Broadcast Limit
203
Configuring Auto-MDIX
204
Manual Auto-MDIX Override
205
Viewing Transceiver Status
207
Jumbo Frames
209
Web: Viewing Port Status and Configuring Port Parameters
209
Operating Rules
210
Terminology
210
Configuring Jumbo Frame Operation
211
Overview
211
Viewing the Current Jumbo Configuration
212
Enabling or Disabling Jumbo Traffic on a VLAN
214
Operating Notes for Jumbo Traffic-Handling
214
Troubleshooting
216
General Operation
217
Qos Passthrough Mode
217
How to Enable or Disable Qos Passthrough Mode
218
Priority Mapping with and Without Qos Passthrough Mode
218
Configuring Port-Based Priority for Incoming Packets
220
The Role of 802.1Q VLAN Tagging
220
Outbound Port Queues and Packet Priority Settings
221
Operating Rules for Port-Based Priority
222
Configuring and Viewing Port-Based Priority
223
Messages Related to Prioritization
224
Troubleshooting Prioritization
224
Configuring and Operating Rules for Friendly Port Names
225
Using Friendly (Optional) Port Names
225
Configuring Friendly Port Names
226
Displaying Friendly Port Names with Other Port Data
227
Uni-Directional Link Detection (UDLD)
231
Configuring UDLD
232
Enabling UDLD
233
Changing the Keepalive Interval
234
Changing the Keepalive Retries
234
Configuring UDLD for Tagged Ports
234
Viewing UDLD Information
235
Configuration Warnings and Event Log Messages
238
Contents
239
11 Power over Ethernet (Poe) Operation
239
Configuration Options
240
Overview
240
Related Publications
241
Terminology
241
Power Availability and Provisioning
242
Powered Device (PD) Support
242
Power Priority
243
Configuring Poe Operation
245
Cycling Power on a Port
246
Poe for Pre-802.3Af-Standard Pds
247
Displaying the Switch's Global Poe Power Status
249
Viewing Poe Configuration and Status
249
Displaying an Overview of Poe Status on All Ports
250
Displaying the Poe Status on Specific Ports
251
Applying Security Features to Poe Configurations
252
Assigning Poe Ports to Vlans
252
Planning and Implementing a Poe Configuration
252
Poe Event Log Messages
253
Overview
258
Port Status and Configuration
258
12 Port Trunking
258
Link Connections
259
Port Connections and Configuration
259
Port Trunk Options and Operation
259
Trunk Configuration Methods
260
Menu: Viewing and Configuring a Static Trunk Group
264
CLI: Viewing and Configuring a Static or Dynamic Port Trunk Group
266
Using the CLI to View Port Trunks
266
Using the CLI to Configure a Static or Dynamic Trunk Group
268
Trunk Group Operation Using LACP
271
Web: Viewing Existing Port Trunk Groups
271
Default Port Operation
274
LACP Notes and Restrictions
275
How the Switch Lists Trunk Data
277
Trunk Group Operation Using the "Trunk" Option
277
Outbound Traffic Distribution Across Trunked Links
278
13 Configuring for Network Management Applications
281
Overview
283
Using SNMP Tools to Manage the Switch
283
Configuring for SNMP Access to the Switch
284
SNMP Management Features
284
Configuring for SNMP Version 3 Access to the Switch
285
SNMP Version 3 Commands
286
Snmpv3 Enable
287
SNMP Version 3 Users
288
Group Access Levels
291
SNMP Communities
292
Menu: Viewing and Configuring Non-SNMP Version 3 Communities
294
CLI: Viewing and Configuring SNMP Community Names
296
SNMP Notification and Traps
298
Trap Features
300
Configuring Trap Receivers
301
Enabling and Configuring SNMP Inform
302
Sending Event Log Messages as Traps
304
Using the CLI to Enable Authentication Traps
304
Advanced Management: RMON
305
CLI-Configured Sflow with Multiple Instances
305
Terminology
305
Configuring Sflow
306
Viewing Sflow Configuration and Status
307
Introduction
309
LLDP (Link-Layer Discovery Protocol)
309
LLDP Terminology
310
General LLDP Operation
311
LLDP Configuration Options
311
Packet Boundaries in a Network Topology
311
LLDP Standards Compatibility
314
Options for Reading LLDP Information Collected by the Switch
314
LLDP Operating Rules
315
LLDP Operation and Commands
316
Viewing the Current LLDP Configuration
316
Configuring Global LLDP Packet Controls
318
Configuring SNMP Notification Support
321
Configuring LLDP Per-Port Advertisement Content
323
Configuring Per-Port LLDP Transmit and Receive Modes
323
Displaying Advertisement Data
325
Advertisements
326
Displaying Switch Information Available for Outbound
326
Displaying Switch Information Available for Outbound Advertisements
326
Displaying LLDP Statistics
330
LLDP Operating Notes
333
LLDP and CDP Data Management
334
LLDP and CDP Neighbor Data
334
CDP Operation and Commands
336
Downloading Switch Software
340
Overview
340
General Switch Software Download Rules
341
Using TFTP to Download Switch Software from a Server
341
Menu: TFTP Download from a Server to Primary Flash
342
CLI: TFTP Download from a Server to Primary or Secondary Flash
344
Using Secure Copy and SFTP
345
How It Works
346
Command Options
347
The SCP/SFTP Process
347
Authentication
348
SCP/SFTP Operating Notes
348
Menu: Xmodem Download to Primary Flash
349
Using Xmodem to Download Switch Software from a PC or UNIX Workstation
349
CLI: Xmodem Download from a PC or Unix Workstation to Primary or Secondary Flash
350
Workstation
350
Menu: Switch-To-Switch Download to Primary Flash
352
Switch-To-Switch Download
352
CLI: Switch-To-Switch Downloads
353
Using Procurve Manager Plus to Update Switch Software
354
Troubleshooting TFTP Downloads
355
Transferring Switch Configurations
356
Copying Command Output to a Destination Device
359
Copying Diagnostic Data to a Remote Host, PC, or Unix Workstation
359
Copying Crash Data Content to a Destination Device
360
Copying Event Log Output to a Destination Device
360
Copying Crash Log Data Content to a Destination Device
361
Overview
365
Status and Counters Data
366
Menu Access to Status and Counters
367
CLI Access
368
General System Information
368
Menu Access
368
CLI Access
369
Menu Access
369
Switch Management Address Information
369
CLI Access
370
Menu: Displaying Port Status
370
Module Information
370
CLI Access
371
Menu: Displaying Port Status
371
Port Status
371
Web Access
371
Viewing Port and Trunk Group Statistics and Flow Control Status
372
Menu Access to Port and Trunk Statistics
373
CLI Access to Port and Trunk Group Statistics
374
Viewing the Switch's MAC Address Tables
374
Web Browser Access to View Port and Trunk Group Statistics
374
Menu Access to the MAC Address Views and Searches
375
CLI Access for MAC Address Views and Searches
377
Menu Access to STP Data
379
Spanning Tree Protocol (STP) Information
379
CLI Access to STP Data
380
Internet Group Management Protocol (IGMP) Status
381
VLAN Information
381
VLAN Information
382
Web Browser Interface Status Information
384
Port and Static Trunk Monitoring Features
385
Menu: Configuring Port and Static Trunk Monitoring
386
CLI: Configuring Port and Static Trunk Monitoring
388
Web: Configuring Port Monitoring
390
Overview
393
Troubleshooting Approaches
393
Browser or Telnet Access Problems
395
General Problems
397
Unusual Network Activity
397
IGMP-Related Problems
398
Prioritization Problems
398
LACP-Related Problems
399
Port-Based Access Control (802.1X)-Related Problems
399
Radius-Related Problems
403
Spanning-Tree Protocol (STP) and Fast-Uplink Problems
404
SSH-Related Problems
405
Stacking-Related Problems
406
TACACS-Related Problems
406
Timep, SNTP, or Gateway Problems
408
VLAN-Related Problems
408
Event Log Operation
411
Using Logging to Identify Problem Sources
411
Menu: Entering and Navigating in the Event Log
413
Cli
414
Debug and Syslog Operation
415
Debug Types
416
Configuring the Switch to Send Debug Messages to One or more Syslogd Servers
417
Diagnostic Tools
422
Port Auto-Negotiation
422
Diagnostic Tools
423
Ping and Link Tests
423
Web: Executing Ping or Link Tests
424
CLI: Ping or Link Tests
425
CLI: Viewing the Configuration File
427
Displaying the Configuration File
427
Web: Viewing the Configuration File
427
Listing Switch Configuration and Operation Details for Help in Troubleshooting
428
CLI Administrative and Troubleshooting Commands
430
Traceroute Command
430
Restoring the Factory-Default Configuration
434
Using the Clear/Reset Buttons
434
Using the CLI
434
Restoring a Flash Image
435
Mac Address Management
439
Determining MAC Addresses in the Switch
440
Overview
440
Menu: Viewing the Switch's MAC Addresses
441
CLI: Viewing the Port and VLAN MAC Addresses
442
Viewing the MAC Addresses of Connected Devices
444
E Daylight Savings Time on Procurve Switches
447
Configuring Daylight Savings Time
447
Advertisement
ProCurve 2610-48-PWR Manual (454 pages)
2610 / 2610-PWR Series
Brand:
ProCurve
| Category:
Switch
| Size: 4.91 MB
Table of Contents
Table of Contents
5
Product Documentation
17
Software Feature Index
18
Introduction
24
Overview of Access Security Features
24
Getting Started
24
Management Access Security Protection
25
General Switch Traffic Security Guidelines
26
Command Syntax Statements
27
Feature Descriptions by Model
27
Conventions
27
Command Prompts
28
Screen Simulations
28
Port Identity Examples
28
Sources for more Information
29
Need Only a Quick Start
30
IP Addressing
30
To Set up and Install the Switch in Your Network
31
Overview
34
Configuring Username and Password Security
34
Configuring Local Password Security
36
Menu: Setting Passwords
36
CLI: Setting Passwords and Usernames
37
Web: Setting Passwords and Usernames
38
Front-Panel Security
39
When Security Is Important
39
Front-Panel Button Functions
40
Configuring Front-Panel Security
42
Password Recovery
48
Password Recovery Process
50
Web and MAC Authentication
53
Contents
53
Overview
54
Client Options
55
General Features
56
How Web and MAC Authentication Operate
57
Authenticator Operation
57
Terminology
61
Operating Rules and Notes
62
General Setup Procedure for Web/Mac Authentication
64
Do These Steps before You Configure Web/Mac Authentication
64
Additional Information for Configuring the RADIUS Server to Support MAC Authentication
65
Configuring the Switch to Access a RADIUS Server
67
Configuring Web Authentication
70
Overview
70
Configure the Switch for Web-Based Authentication
71
Configuring MAC Authentication on the Switch
75
Overview
75
Configure the Switch for MAC-Based Authentication
76
Show Commands for Web-Based Authentication
80
Show Commands for MAC-Based Authentication
83
Show Client Status
85
Contents
87
TACACS+ Authentication
87
Overview
88
Terminology Used in TACACS Applications
89
General System Requirements
91
General Authentication Setup Procedure
91
Before You Begin
94
Configuring TACACS+ on the Switch
94
CLI Commands Described in this Section
95
Viewing the Switch's Current Authentication Configuration
95
Viewing the Switch's Current TACACS+ Server Contact
96
Configuration
96
Configuring the Switch's Authentication Methods
96
Configuring the Switch's TACACS+ Server Access
103
How Authentication Operates
108
General Authentication Process Using a TACACS+ Server
108
Local Authentication Process
110
Using the Encryption Key
111
Controlling Web Browser Interface Access When Using TACACS
112
Authentication
112
Messages Related to TACACS+ Operation
113
Operating Notes
114
RADIUS Authentication and Accounting
115
Contents
115
Overview
117
Terminology
118
Switch Operating Rules for RADIUS
119
General RADIUS Setup Procedure
120
Configuring the Switch for RADIUS Authentication
121
Outline of the Steps for Configuring RADIUS Authentication
122
Configure Authentication for the Access Methods You Want RADIUS to Protect
123
Configure the Switch to Access a RADIUS Server
126
Configure the Switch's Global RADIUS Parameters
128
Local Authentication Process
132
Authentication
133
Controlling Web Browser Interface Access When Using RADIUS
133
Overview
133
Configuring RADIUS Authorization
133
Controlling Web Browser Interface Access When Using RADIUS Authentication
133
Commands Authorization Type
134
Enabling Authorization with the CLI
134
Showing Authorization Information
135
Configuring the RADIUS Server
135
Example Configuration on Cisco Secure Acs for Ms Windows
137
Example Configuration Using Freeradius
140
Configuring RADIUS Accounting
141
Operating Rules for RADIUS Accounting
142
Steps for Configuring RADIUS Accounting
143
Reports to the Radius Server
145
Updating Options
147
Viewing RADIUS Statistics
148
General RADIUS Statistics
148
RADIUS Authentication Statistics
150
RADIUS Accounting Statistics
151
Changing RADIUS-Server Access Order
152
Messages Related to RADIUS Operation
154
Configuring RADIUS Server Support for Switch Services
155
Contents
155
Overview
156
Configuring the RADIUS Server for Cos Services
157
Viewing the Currently Active Per-Port Cos Configuration Specified by a RADIUS Server
157
Configuring and Using RADIUS-Assigned Access Control Lists
160
Introduction
160
Terminology
160
Overview of RADIUS-Assigned, Dynamic Port Acls
163
Contrasting Dynamic and Static Acls
165
How a RADIUS Server Applies a Dynamic Port ACL
166
To a Switch Port
166
General ACL Features, Planning, and Configuration
167
The Packet-Filtering Process
168
Operating Rules for Dynamic Port Acls
168
Configuring an ACL in a RADIUS Server
169
Configuring ACE Syntax in RADIUS Servers
172
Configuring the Switch to Support Dynamic Port
174
Acls
174
Displaying the Current Dynamic Port ACL Activity
175
On the Switch
175
Event Log Messages
178
Causes of Client Deauthentication Immediately after Authenticating
179
Monitoring Shared Resources
179
Configuring Secure Shell (SSH)
181
Contents
181
Overview
182
Terminology
184
Public Key Formats
185
Prerequisite for Using SSH
185
Steps for Configuring and Using SSH for Switch and Client Authentication
186
General Operating Rules and Notes
188
Configuring the Switch for SSH Operation
189
Assign Local Login (Operator) and Enable (Manager) Password
189
Generate the Switch's Public and Private Key Pair
190
Provide the Switch's Public Key to Clients
192
Enable SSH on the Switch and Anticipate SSH Client
195
Contact Behavior
195
Configure the Switch for SSH Authentication
198
Use an SSH Client to Access the Switch
201
Further Information on SSH Client Public-Key Authentication
202
Messages Related to SSH Operation
208
Configuring Secure Socket Layer (SSL)
211
Contents
211
Overview
212
Terminology
213
Prerequisite for Using SSL
215
Steps for Configuring and Using SSL for Switch and Client Authentication
215
General Operating Rules and Notes
216
Configuring the Switch for SSL Operation
217
Assign Local Login (Operator) and Enable (Manager) Password
217
Generate the Switch's Server Host Certificate
219
Comments on Certificate Fields
221
Enable SSL on the Switch and Anticipate SSL Browser Contact
227
Behavior
231
Common Errors in SSL Setup
231
Contents
233
Access Control Lists (Acls)
233
Optional Network Management Applications
235
Introduction
235
ACL Applications
235
Optional PCM and IDM Applications
236
General Application Options
236
Introduction
236
Terminology
238
Overview
241
Types of IP Acls
241
ACL Inbound Application Points
241
Features Common to All Acls
242
General Steps for Planning and Configuring Acls
243
ACL Operation
244
Introduction
244
The Packet-Filtering Process
245
Planning an ACL Application
248
Switch Resource Usage
248
Managing ACL Resource Consumption
250
Traffic Management and Improved Network Performance
254
Security
254
Guidelines for Planning the Structure of an ACL
255
ACL Configuration and Operating Rules
256
How an ACE Uses a Mask to Screen Packets for Matches
257
Configuring and Assigning an ACL
264
Overview
264
ACL Configuration Structure
265
ACL Configuration Factors
268
Using the CLI to Create an ACL
270
Configuring and Assigning a Numbered, Standard ACL
271
Configuring and Assigning a Numbered, Extended ACL
276
Configuring a Named ACL
282
Enabling or Disabling ACL Filtering on an Interface
284
Deleting an ACL from the Switch
285
Displaying ACL Data
286
Display an ACL Summary
286
Display the Content of All Acls on the Switch
287
Display the ACL Assignments for an Interface
288
Displaying the Content of a Specific ACL
289
Displaying the Current ACL Resources
291
Display All Acls and Their Assignments in
292
The Switch Startup-Config File and Running-Config File
292
Display All Acls and Their Assignments in the Switch Startup-Config File and Running-Config File
292
Using the CLI to Edit Acls
292
Editing Acls and Creating an ACL Offline
292
Working Offline to Create or Edit an ACL
295
Enable ACL "Deny" Logging
299
Requirements for Using ACL Logging
299
ACL Logging Operation
299
Enabling ACL Logging on the Switch
300
Operating Notes for ACL Logging
302
General ACL Operating Notes
303
Traffic/Security Filters
306
Overview
306
General Operation
306
Applying a Source Port Filter in a Multinetted VLAN
307
Using Source-Port Filters
308
Operating Rules for Source-Port Filters
308
Configuring a Source-Port Filter
309
Viewing a Source-Port Filter
311
Filter Indexing
313
Editing a Source-Port Filter
313
Using Named Source-Port Filters
314
Configuring Port-Based and User-Based Access Control (802.1X)
325
Contents
325
Overview
327
Why Use Port-Based or User-Based Access Control
327
General Features
327
User Authentication Methods
328
Terminology
330
Example of the Authentication Process
333
General 802.1X Authenticator Operation
333
VLAN Membership Priority
334
General Operating Rules and Notes
336
General Setup Procedure for 802.1X Access Control
338
Do These Steps before You Configure 802.1X Operation
338
Overview: Configuring 802.1X Authentication on the Switch
340
Configuring Switch Ports as 802.1X Authenticators
341
Enable 802.1X Authentication on Selected Ports
342
Reconfigure Settings for Port-Access
344
Configure the 802.1X Authentication Method
348
Enter the RADIUS Host IP Address(Es)
349
Enable 802.1X Authentication on the Switch
350
Optional: Reset Authenticator Operation
350
Optional: Configure 802.1X Controlled Directions
350
802.1X Open VLAN Mode
353
Introduction
353
VLAN Membership Priorities
354
Use Models for 802.1X Open VLAN Modes
355
Operating Rules for Authorized-Client and Unauthorized-Client Vlans
360
Setting up and Configuring 802.1X Open VLAN Mode
364
802.1X Open VLAN Operating Notes
368
Option for Authenticator Ports: Configure Port-Security to Allow Only 802.1X-Authenticated Devices
369
Port-Security
370
Configuring Switch Ports to Operate as Supplicants for 802.1X Connections to Other Switches
371
Example
371
Supplicant Port Configuration
372
Displaying 802.1X Configuration, Statistics, and Counters
375
Show Commands for Port-Access Authenticator
375
Viewing 802.1X Open VLAN Mode Status
378
Show Commands for Port-Access Supplicant
381
How RADIUS/802.1X Authentication Affects VLAN Operation
382
VLAN Assignment on a Port
383
Operating Notes
383
Example of Untagged VLAN Assignment in a RADIUS-Based Authentication Session
385
Enabling the Use of GVRP-Learned Dynamic Vlans in Authentication Sessions
388
Operating Note
390
Messages Related to 802.1X Operation
391
Configuring and Monitoring Port Security
393
Contents
393
Basic Operation
394
Overview
394
Eavesdrop Protection
395
Blocking Unauthorized Traffic
395
Trunk Group Exclusion
396
Planning Port Security
397
Port Security Command Options and Operation
398
Retention of Static MAC Addresses
402
Displaying Current Port Security Settings
402
Configuring Port Security
404
MAC Lockdown
409
Differences between MAC Lockdown and Port Security
411
Deploying MAC Lockdown
413
MAC Lockout
417
Port Security and MAC Lockout
419
Web: Displaying and Configuring Port Security Features
419
Reading Intrusion Alerts and Resetting Alert Flags
420
Notice of Security Violations
420
How the Intrusion Log Operates
421
Keeping the Intrusion Log Current by Resetting Alert Flags
421
Using the Event Log to Find Intrusion Alerts
426
Web: Checking for Intrusions, Listing Intrusion Alerts, and Resetting Alert Flags
427
Operating Notes for Port Security
427
Using Authorized IP Managers
429
Contents
429
Overview
430
Configuration Options
431
Access Levels
431
Defining Authorized Management Stations
432
Overview of IP Mask Operation
432
Menu: Viewing and Configuring IP Authorized Managers
433
CLI: Viewing and Configuring Authorized IP Managers
434
Configuring Ip Authorized Managers for the Switch
435
Web: Configuring IP Authorized Managers
437
Web Proxy Servers
437
Web-Based Help
438
Building IP Masks
438
Configuring One Station Per Authorized Manager IP Entry
438
Configuring Multiple Stations Per Authorized Manager IP Entry
439
Additional Examples for Authorizing Multiple Stations
441
Operating Notes
441
ProCurve 2610-48-PWR Installation And Getting Started Manual (114 pages)
2610 Series
Brand:
ProCurve
| Category:
Switch
| Size: 2.49 MB
Table of Contents
Table of Contents
5
Introducing the Switch
9
Front of the Switch
11
Network Ports
12
Leds
12
Port Leds
15
LED Mode Select Button and Indicator Leds
16
Reset Button
17
Clear Button
17
Console Port
18
Back of the Switch
18
RPS and EPS Input Port
19
Power Connector
19
Switch Features
19
Installing the Switch
21
Included Parts
21
Included Parts
22
Installation Precautions
23
Installation Procedures
24
Prepare the Installation Site
26
Verify the Switch Passes Self Test
28
LED Behavior
29
Mount the Switch
30
Rack or Cabinet Mounting
30
Rack Mounting the 2610-PWR Switches
31
Rack Mounting the Non-PWR Switches
33
Flat Wall Mounting
35
Wall Mounting Horizontal
35
Horizontal Surface Mounting
36
Connect the Switch to a Power Source
37
Connect the Network Cables
37
Using the RJ-45 Connectors
37
Installing or Removing Mini-Gbics
38
Installing the Mini-Gbics
38
Connecting Cables to Mini-Gbics
39
Removing the Mini-Gbics
39
Optional) Connect a Redundant Power Supply to a Switch 2610-PWR Series
40
The 600 RPS/EPS Provides Two Types of Power to the Switches
40
The 610 EPS Only Provides External Poe Power
40
Operating Characteristics of the 600 RPS/EPS (J8168A)
41
RPS/EPS Operation
41
600 RPS/EPS Leds
42
Operating Characteristics of the 610 EPS (J8169A)
42
610 EPS Leds
46
Optional) Connect a Console to the Switch
49
Terminal Configuration
49
Direct Console Access
50
Sample Network Topologies for Non-PWR Switches
51
As a Desktop Switch
51
As a Segment Switch
52
Connecting to a Backbone Switch
53
Sample Network Topologies for PWR Switches
55
As a Desktop Switch Implementing Poe
55
As a Segment Switch Implementing Poe
56
Stacking the Switch
58
Configuring the Switch
59
Recommended Minimal Configuration
59
Using the Console Setup Screen
60
Where to Go from here
61
Using the IP Address for Remote Switch Management
63
Starting a Telnet Session
63
Starting a Web Browser Session
63
Troubleshooting
65
Basic Troubleshooting Tips
65
Diagnosing with the Leds
68
LED Patterns for General Switch Troubleshooting
68
Diagnostic Tips
69
LED Patterns for Poe Troubleshooting
72
Proactive Networking
73
Hardware Diagnostic Tests
74
Checking Console Messages
74
Checking the Switch Leds
74
Testing the Switch by Resetting It
74
Testing End-To-End Network Communications
75
Testing Switch-To-Device Network Communications
75
Testing Twisted-Pair Cabling
75
Restoring the Factory Default Configuration
76
Downloading New Switch Software
77
HP Customer Support Services
77
Before Calling Support
77
Switch Specifications
79
Physical
79
Electrical
79
RPS/EPS Electrical Input
80
Environmental
80
BTU Ratings
80
Acoustics
81
Connectors
81
Cable Length
82
Lasers
82
Safety
82
B Switch Ports and Network Cables
83
Switch Ports
83
Twisted-Pair Cables
83
Fiber-Optic Cables
84
Mode Conditioning Patch Cord for Gigabit-LX
85
Installing the Patch Cord
86
Twisted-Pair Cable/Connector Pin-Outs
87
Cable Diagram
89
Pin Assignments
89
Straight-Through Twisted-Pair Cable for 10 Mbps or 100 Mbps Network Connections
89
Cable Diagram
90
Crossover Twisted-Pair Cable for 10 Mbps or 100 Mbps Network Connection
90
Pin Assignments
90
Cable Diagram
91
Pin Assignments
91
Straight-Through Twisted-Pair Cable for 1000 Mbps Network Connections
91
Safety and EMC Regulatory Statements
93
Safety Information
93
Informations Concernant la Sécurité
94
Hinweise zur Sicherheit
95
Considerazioni Sulla Sicurezza
96
Consideraciones sobre Seguridad
97
Safety Information (Japan
98
Safety Information (China
99
EMC Regulatory Statements
100
Canada
100
Australia/New Zealand
100
Japan
100
Korea
101
Taiwan
101
European Community
102
D Recycle Statements
103
Waste Electrical and Electronic Equipment (WEEE) Statements
103
Advertisement
Advertisement
Related Products
ProCurve 2610 Series
ProCurve 2610-PWR
ProCurve 2610-24
ProCurve 2610-24/12PWR
ProCurve 2610-24-PWR
ProCurve 2610-48
ProCurve 2600-PWR Series
ProCurve 2600 Series
ProCurve 2650-PWR
ProCurve 2626-PWR
ProCurve Categories
Switch
Network Router
Wireless Access Point
Network Hardware
Antenna
More ProCurve Manuals
Login
Sign In
OR
Sign in with Facebook
Sign in with Google
Upload manual
Upload from disk
Upload from URL