Motorola PTP 500 Manuals
Manuals and User Guides for Motorola PTP 500. We have 5 Motorola PTP 500 manuals available for free PDF download: User Manual, Deployment Manual
Motorola PTP 500 User Manual (288 pages)
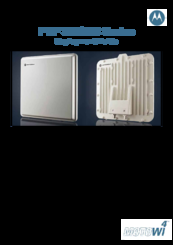
Point-to-Point Wireless Bridge
Brand: Motorola
|
Category: Network Router
|
Size: 3.99 MB
Table of Contents
-
-
Terminology23
-
Warranty25
-
RF Safety27
-
-
-
-
-
Link Range52
-
Obstructions53
-
-
Wind Loading54
-
-
LPU Kit63
-
-
Preparation68
-
Checks68
-
-
-
Powering up85
-
7 Web
91-
Configuration104
-
Save and Restore113
-
Statistics119
-
-
Software Upgrade141
-
-
Barring Channels151
-
-
Change Password168
-
License Key168
-
Properties171
-
Reboot172
-
8 Recovery Mode
173-
Reboot182
-
-
-
Power LED Is off185
-
Test Radio Link190
-
No Activity190
-
Some Activity191
-
-
Lightning Strike191
-
Advertisement
Motorola PTP 500 User Manual (286 pages)
Motorola PTP 500 Series Point-to-Point Wireless Bridges
Brand: Motorola
|
Category: Network Hardware
|
Size: 4.13 MB
Table of Contents
-
-
Terminology23
-
Warranty25
-
RF Safety27
-
-
-
-
-
Link Range52
-
Obstructions52
-
-
Wind Loading54
-
-
LPU Kit63
-
-
Preparation68
-
Checks68
-
-
-
Powering up85
-
7 Web
91-
Configuration104
-
Save and Restore113
-
Statistics119
-
-
Software Upgrade140
-
-
Barring Channels150
-
-
Change Password167
-
License Key167
-
Properties169
-
Reboot170
-
8 Recovery Mode
171-
Reboot180
-
-
-
Power LED Is off183
-
Test Radio Link188
-
No Activity188
-
Some Activity189
-
-
Lightning Strike189
-
Motorola PTP 500 User Manual (198 pages)
Point-to-point Wireless Solutions
Brand: Motorola
|
Category: Network Hardware
|
Size: 6.12 MB
Table of Contents
-
Font Types15
-
Welcome20
-
Warranty31
-
Region Codes35
-
Distance41
-
Definitions43
-
Installation46
-
Preparation46
-
Powering up55
-
Web58
-
Status Page62
-
Install82
-
VLAN Warning86
-
Barring Channels102
-
Diagnostics116
-
CSV Download118
-
Password Change119
-
License Key119
-
Properties121
-
System Reboot122
-
Reboot122
-
Recovery Mode123
-
Reboot131
-
Fault Finding132
-
Hardware132
-
Power132
-
Ethernet132
-
Radio134
-
No Activity134
-
Some Activity134
-
Overview135
-
PTP LPU End Kit138
-
Wind Loading143
-
General143
Advertisement
Motorola PTP 500 Deployment Manual (26 pages)
wi4 Point to Point Wireless Ethernet Bridges
Brand: Motorola
|
Category: Network Router
|
Size: 0.43 MB
Table of Contents

Motorola PTP 500 Deployment Manual (20 pages)
Motorola Network Router User Manual
Brand: Motorola
|
Category: Network Router
|
Size: 1.05 MB