Sign In
Upload
Manuals
Brands
Endress+Hauser Manuals
Measuring Instruments
analytikjena Biometra TOne
Endress+Hauser analytikjena Biometra TOne Manuals
Manuals and User Guides for Endress+Hauser analytikjena Biometra TOne. We have
3
Endress+Hauser analytikjena Biometra TOne manuals available for free PDF download: Operating Manual, Short Manual
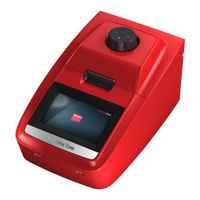
Endress+Hauser analytikjena Biometra TOne Operating Manual (101 pages)
High-performance thermal cycler for DNA amplification by PCR
Brand:
Endress+Hauser
| Category:
Measuring Instruments
| Size: 3.57 MB
Table of Contents
Table of Contents
3
Basic Information
7
Notes on the Operating Manual
7
Purpose
7
Safety and Warning Instructions
9
General Notes
9
Safety Markings on the Biometra Tone
9
Technical Condition
10
Requirements for the Operating Personnel
10
Safety Instructions: Transport and Installation
10
Safety Instructions: During Operation
11
General
11
Safety Instructions: Protection against Explosion and Fire
11
Safety Instructions: Electrical Equipment
11
Handling of Samples, Auxiliary and Operating Materials
12
Safety Instructions: Service and Repair
12
Behavior During Emergencies
13
Function and Setup
14
High Speed Thermoblock
14
Fig. 1 the Biometra Tone Thermal Cycler
14
High Performance Smart Lid
15
Display
15
User-Specific Quick Start of Programs
15
Easy Programming
16
Linear Gradient Tool
16
GLP Compliance
16
Open System Philosophy
16
Order Numbers
17
Installation
18
Scope of Delivery
18
Unpacking and Inspection
18
Setting the Operating Voltage
18
Fig. 2 Voltage Selector Switch on the Underside of the Device
18
Commissioning
19
General Setup
19
Installation When Used in a Network
19
Control Elements
21
Biometra Tone Front View
21
Biometra Tone Rear View
21
Fig. 3 Front View of the Biometra Tone
21
High Performance Smart Lid (HPSL)
22
Closing the Lid
22
Fig. 4 Rear View of the Biometra Tone
22
Opening the Lid
23
The Biometra Tone Software
23
Keyboard
23
Fig. 5 Placement of Sample Tubes in the Block
23
Keypad
24
Fig. 6 Keyboard
24
Fig. 7 Keypad
24
Cursor Keys
25
Confirm or Cancel
25
List of Commands and Icons Used
25
Operation
30
Power on Self-Test
30
Login Screen
30
Fig. 8 Start Screen
30
Login
31
Fig. 9 Login Screen
31
Fig. 10 Select User Screen
31
Home Screen
32
Fig. 11 Enter Password Screen
32
Fig. 12 Home Screen
32
Block Status
33
Fig. 13 Bock Status/Quick Start Button
33
Quick Start Function
34
Incubation Mode
35
Fig. 14 Biometra Tone Program Quick Start Screen
35
Fig. 15 Biometra Tone Incubation Mode Screen
36
Creating, Editing and Saving Programs
37
Programming Modes
37
Fig. 16 Spreadsheet Programming
37
Fig. 17 Graphical Programming
37
Creating a New Program/Using a Program Template
38
Fig. 18 Program Overview Screen
39
Fig. 19 Blank Program Template
39
Assigning Program Names
40
Setting the Heated Lid Temperature
40
Fig. 20 Program Template Screen
40
Preheating the Heated Lid
41
Editing Steps
41
Fig. 21 Heated Lid Temperature Setting Screen
41
Editing All Parameters of a Step
42
Programming Loops
43
Fig. 22 Pprogram Step Editing Screen
43
Programming a Temperature Increment
44
Programming a Time Increment
44
Adjusting the Ramp Rate
45
Programming a Gradient Step
45
Fig. 23 Temperature Gradient on a 96 Well Sample Block
45
Fig. 24 Linear Gradient Tool Screen
46
Direct Programming of Program Parameters for a Step
47
Fig. 25 Standard Gradient Programming Screen
47
Fig. 26 Biometra Tone Spreadsheet Program View
47
Fig. 27 Gaphical Program View
48
Fig. 28 Individual Program Parameter Editing
49
Fig. 29 Gradient View
49
Inserting a Step
50
Deleting a Step
50
Saving the Program
50
Fig. 30 Program Overview Screen
51
Fig. 31 Quick Select Screen
52
Starting, Coping and Deleting Programs
53
Starting a Program
53
Fig. 32 Program Overview Screen
53
Copying a Program
54
Fig. 33 Biometra Tone Program Overview Screen with Preview
54
Copying All Programs
55
Fig. 34 Program Overview Screen
55
Deleting a Program
56
Fig. 35 Program Overview Screen
56
Fig. 36 Confirmation Prompt
56
Deleting All Programs
57
Fig. 37 Confirmation Prompt
57
Running, Pausing, Continuing and Stopping Programs
58
Display During a Run
58
Pausing a Program
59
Fig. 38 Displays During the Run in a Graphical, Spreadsheet and Gradient View
59
Fig. 39 Run Display Screens During a Program Pause
60
Continuing the Program
61
Skipping a Step
61
Stopping the Program
61
Fig. 40 Confirmation Prompt
61
Tools
62
Configuration
62
Fig. 41 Biometra Tone Tools Screen
62
Setting the Date and Time
63
Fig. 42 Settings Screen
63
Fig. 43 Date and Time Entry Screen
63
Automatic User Logout
64
Fig. 44 Automatic User Logout Screen
64
Configuring the Beeper
65
Network
65
Network Settings
65
Fig. 45 Beeper Configuration Screen
65
Network Users
66
Display Brightness
66
Fig. 46 Network Settings Screen
66
Screen Calibration
67
Factory Settings
67
Fig. 47 Display Brightness Adjustment Screen
67
Fig. 48 Calibration Screen
67
User Management
68
Fig. 49 Confirmation Prompt
68
Fig. 50 Biometra Tone User Management Screen
68
Creating a User
69
Editing User Settings
69
Fig. 51 Biometra Tone Create New User Screen
69
Delete User
70
Fig. 52 User Data Screen
70
Fig. 53 Confirmation Prompt
70
Documentation
71
Run Log File
71
Fig. 54 Biometra Tone Documentation Screen
71
Fig. 55 Biometra Tone Run Log File Overview Screen
72
Fig. 56 Biometra Tone Run Log File Screen
73
Power on Logfile
74
Fig. 57 Program View Screen
74
Extended Self-Test Log File
75
Error Log File
75
Fig. 58 Power on Log File Screen
75
Fig. 59 Biometra Tone Extended Self-Test Log File Screen
75
Extended Self-Test
76
Fig. 60 Biometra Tone Error Log File Screen
76
Fig. 61 How to Load the Sample Block with Plasticware for the Extended Self-Test
77
Fig. 62 Biometra Tone Extended Self-Test Screen
77
Service Info File (SINF)
78
Fig. 63 Extended Self-Test Overview Screen
78
Backup
79
Fig. 64 Service Info File Creation Screen
79
Cycler Info
80
Fig. 65 Backup File Screen
80
Contact
81
Fig. 66 Cycler Info Screen
81
Fig. 67 Service Department Contact Details Screen
82
Adaptation of Programs
83
Quick Reference Guide
85
Troubleshooting
90
Administrator Password Forgotten
90
Slow Heating and Cooling
90
Auto Restart
90
Auto Restart Without an Apparent Cause
90
Adaptation of Programs from Other Thermal Cyclers
91
Loosening the Lid Wheel in Case of Blockage
91
Maintenance and Care
92
Cleaning the Housing
92
Disinfecting the Device
93
Firmware Update
93
Service
94
Device Return Information
94
Packing the Biometra Tone
95
Disposal
96
Technical Specifications
97
Declaration of Conformity
99
Index
100
Advertisement
Endress+Hauser analytikjena Biometra TOne Operating Manual (73 pages)
Brand:
Endress+Hauser
| Category:
Measuring Instruments
| Size: 3.71 MB
Table of Contents
Table of Contents
3
Basic Information
7
About this Manual
7
Intended Use
8
Security
9
Safety Labeling on the Device
9
Requirements for the Operating Personnel
10
Safety Instructions for Transport and Commissioning
10
Safety Instructions: During Operation
10
Summary of Safety Instructions
10
Safety Instructions - Protection against Explosion and Fire
11
Safety Instructions - Electrical Equipment
11
Handling Hazardous Substances
12
Safety Instructions - Maintenance and Repair
12
Behavior During Emergencies
13
Function and Design
14
Principle of Operation
14
Design
15
Fig. 1 Device Configuration
15
Thermal Block
16
Temperature Gradient
16
Fig. 2 Opened Device with Thermal Block
16
Heated Lid
17
Terminals and Interfaces on the Rear of the Device
17
Fig. 3 Device Rear
17
Models
18
Control Software
18
Scope of Delivery
18
Fig. 4 Fitting Samples into the Device
19
Consumables and Reagents
19
Installation and Commissioning
20
Installation Conditions
20
Ambient Conditions
20
Power Supply
20
Unpacking and Setting up the Device
20
Setting the Operating Voltage
21
Connecting the Device to a Network
22
Fig. 5 Voltage Selector Switch at the Bottom of the Device
22
Opening and Closing the Device
23
Fitting Samples into the Device
24
Fig. 6 Placing Additional Tubes into the Block
24
Operation
25
Using the Software (General)
25
Starting the Software
26
Home Screen
27
Fig. 7 Home Screen
27
Quick-Starting Programs
28
Fig. 8 Table Containing the most Recently Used Programs
28
Incubating Samples at Constant Temperature
29
Fig. 9 Incubate Page
29
Creating or Editing PCR Programs
30
Fig. 10 Graphical Programming
30
Fig. 11 Spreadsheet Programming
30
Opening a Program Template for Editing
32
Assigning Program Names
32
Fig. 12 Program Templates
32
Defining the Temperature and the Preheating Function of the Heated Lid
33
Graphical or Spreadsheet Programming
33
Fig. 13 Graphical Programming
34
Fig. 14 Spreadsheet Programming
35
Editing, Adding or Deleting Steps
36
Programming a Loop
37
Fig. 15 Defining All Parameters for a Step
37
Programming a Temperature Increment
38
Fig. 16 Program with Loop (Spreadsheet View)
38
Fig. 17 Program with Loop (Graphical View)
38
Programming a Time Increment
39
Adjusting the Heating and Cooling Rate
39
5.6.10 Programming a Gradient
40
Fig. 18 Temperature Gradient (Block Format 96)
40
Fig. 19 Linear Gradient Tool (Mono Block)
41
Fig. 20 Standard Gradient Programming
41
5.6.11 Saving the Program
42
Copying or Deleting PCR Programs
42
Executing a PCR Run
43
Fig. 21 Program Overview with Preview
44
Fig. 22 Overview of the Program Run
44
Understanding the Graphical, Spreadsheet and Gradient View
45
Fig. 23 Graphical Display During a Program Run
45
Fig. 24 Spreadsheet View During a Program Run
46
Pausing or Stopping Executed Programs, Skipping Steps
47
Fig. 25 Gradient View (During Gradient Step, Block Format 96-Well)
47
Tools
48
Customizing Software Settings
48
Fig. 26 Network Settings
49
Viewing the Documentation
50
Fig. 27 Documentation of Self Tests
51
Performing an Extended Self Test
52
Fig. 28 Load the Thermal Block (Block Format 96) for the Self Test
52
Creating a Service Info File for Troubleshooting
53
Performing a Backup
53
5.10 User Management
54
5.10.1 Editing a User
55
5.10.2 Creating New Users
56
5.10.3 Deleting a User
56
Troubleshooting
57
Heating and Cooling Process Take too Long
57
Automatic Restart after Power Failure
57
Automatic Restart Without an Apparent Cause
57
Transferring Programs from Other Devices
57
Mirror Programs on Multiple Devices
59
Unlocking the Lid Wheel from a Deadlock
59
Fig. 29 Unlocking a Deadlocked Lid with a Pen
59
Cleaning the Housing
61
Calibration
61
Maintenance and Care
61
Disinfecting the Device
62
Firmware Update
63
Transport and Storage
64
Transport
64
Moving the Device in the Laboratory
64
Preparing the Device for Transport
64
Returning a Device
65
Fig. 30 Packaging Instructions
65
Storage
66
Disposal
67
Specifications
68
10.1 Model-Specific Data
68
List of Figures
73
Endress+Hauser analytikjena Biometra TOne Short Manual (2 pages)
Brand:
Endress+Hauser
| Category:
Laboratory Equipment
| Size: 0.26 MB
Advertisement
Advertisement
Related Products
Endress+Hauser analytikjena SPECORD PLUS
Endress+Hauser analytikjena multi N/C pharma HT
Endress+Hauser analytikjena Biometra TMS
Endress+Hauser analytikjena multi N/C UVHS
Endress+Hauser analytikjena multi N/C pharma UV
Endress+Hauser analytikjena multi EA 5100
Endress+Hauser Proline t-mass A 150
Endress+Hauser Proline Promass A 100
Endress+Hauser Proline Promass A 500 PROFINET
Endress+Hauser Proline Promass A 300 PROFINET
Endress+Hauser Categories
Measuring Instruments
Transmitter
Radar
Switch
Accessories
More Endress+Hauser Manuals
Login
Sign In
OR
Sign in with Facebook
Sign in with Google
Upload manual
Upload from disk
Upload from URL