Sign In
Upload
Manuals
Brands
Brother Manuals
Sewing Machine
PE-300S
Brother PE-300S Manuals
Manuals and User Guides for Brother PE-300S. We have
5
Brother PE-300S manuals available for free PDF download: Operation Manual, Manuel D'instructions, Service Manual, Manual
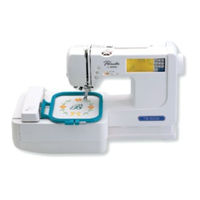
Brother PE-300S Operation Manual (112 pages)
Brother PE-400D Sewing Machines: Users Manual
Brand:
Brother
| Category:
Sewing Machine
| Size: 2.68 MB
Table of Contents
Important Safety Instructions
2
Warning Labels
5
Table of Contents
6
Setting up
8
Principal Parts
8
Other Included Accessories
10
Options
11
Selection Keys
12
Screen Messages Guide You through each Operation
12
Operation Buttons
13
Using the Operation Buttons
13
Basic Sewing Machine Operation
14
Flat Bed Extension Table
14
Free Arm
14
Power Supply
15
Using the Screen Keys
16
About the Screen
16
Adjusting the Brightness of the Screen
16
How to Change Language
17
How to Clear the Language Selection
18
Bobbin Winding / Bobbin Thread Setting
19
Setting the Bobbin
22
Upper Threading
23
Starting and Stopping Sewing
26
START/STOP" Button
26
Foot Controller
26
Stitch Selection (Utility Stitches)
27
Stitches
27
Trial Sewing
28
Stitch Width and Stitch Length
30
Adjusting the Stitch Width
30
Adjusting the Stitch Length
30
Quick Adjustment Reference Chart for Stitch Width and Stitch Length
31
Thread Tension
33
Correct Tension
33
Tightening the Upper Thread Tension
33
Loosening the Upper Thread Tension
33
Presser Foot
34
Changing the Presser Foot
34
Changing the Embroidery Foot and the Zipper Foot
35
Feed Dogs
36
Needle
37
Checking the Needle
37
Installing the Needle Securely
37
Fabric/Thread/Needle Combination Chart
38
Utility Stitches
39
Straight Stitches
39
Changing Needle Position
40
Sewing Corners
40
Sewing Curves
41
Sewing Thick Seams
41
Sewing Thick Fabric
41
Sewing Thin Fabric
42
Using the Free Arm
42
Stretch Stitch and Triple Stitch
43
Stretch Stitch
43
Triple Stitch
43
Zigzag Stitches
44
Overcasting (Using a Zigzag Stitch)
44
Applique (Using a Zigzag Stitch)
44
Patchwork (for Crazy Quilt)
45
Sewing a Curve with a Zigzag Stitch
45
Dotted Zigzag
46
Attaching Elastic Bands
46
Overcasting
46
Overcasting
47
Overcasting
48
Blind Hem Stitches
49
If the Needle Does Not Catch the Fold of Hem Enough
50
If the Needle Catches the Fold of Hem too Much
50
Buttonhole Stitches
51
Order of One Cycle
52
Sewing Stretch Fabrics ( )
53
Buttons that Do Not Fit into the Guide Plate (Odd-Shaped Buttons)
53
Bar Tacking
54
Thick Fabrics
55
Appliques
56
Sewing the Applique Around Corners
56
Scallop
57
Patchwork Stitch
58
Zipper Insertion (Centered and Side Application)
59
Centered Application
59
Side Application
60
Smocking
62
Button Sewing
63
Attaching Buttons with Four Holes
64
Embroidering
65
1 Embroidery Unit and Memory Cards (Optional)
65
Attaching the Embroidery Foot "Q
65
Before You Begin
65
3 Attaching the Embroidery Unit
66
Removing Embroidery Unit
67
Choosing Embroidery Patterns (Part I)
68
One-Point Patterns
69
Borders
71
Lettering
72
Lower and Upper Case Letters
73
Numerals and Punctuation
73
Selecting Patterns from a Memory Card
74
Choosing Embroidery Patterns (Part II)
75
If You Accidentally Choose the Wrong Design
75
If You Choose the Wrong Character
75
To Change Size
75
To Make Words
76
Embroidering
77
Embroidering Attractive Finishes
77
Setting the Fabric into the Embroidery Frame
78
Fitting the Embroidery Frame to the Embroidery Unit
80
Removing the Embroidery Frame
80
Embroidering
81
Thread Tension
83
Checking Thread Colors
84
Checking Thread Colors and Time Required
84
Checking Time Required to Complete a Pattern
85
Choosing Embroidery Placement
86
Checking the Embroidering Area
87
Moving the Embroidery Location
87
Embroidering from a Specific Starting Point
88
Mirroring Patterns
89
Rotating and Mirroring Patterns
89
Rotating Patterns
89
Changing Size and Stitch Density of Characters and Borders
90
To Change Size
90
Multi-Colored Lettering
91
To Change Stitch Density (Limited to Certain Alphabets and Borders)
91
If the Thread Breaks During Embroidery
92
If the Upper Thread Breaks
92
Continuing after the Power Shuts off
93
When Starting over from the Beginning
93
Combining Characters to Form Words
94
Embroidery Applications
94
Outline Embroidery
95
Embroidering Appliques (Using a Frame Pattern)
96
Embroidering Onto Small Pieces of Fabric or Onto Corners
97
Memory
98
Saving Groups of Characters
98
Restoring Saved Designs
99
Maintenance
100
Cleaning
100
Cleaning the Screen
100
Cleaning the Sewing Machine Surface
100
Cleaning the Shuttle
100
Changing the Light Bulb
102
Troubleshooting
103
Before Taking Your Machine in for Service
103
Basic Sewing Machine Maintenance
103
Error Messages
106
Warning Messages
106
Instruction Messages
108
Alarms
108
Sewing Chart
109
Patterns (Programmed in Machine)
110
Utility Stitches
110
Character Embroidering Chart
110
Frame Pattern Embroidering Chart
110
Pattern
111
One Point Mark Embroidery Pattern
111
Advertisement
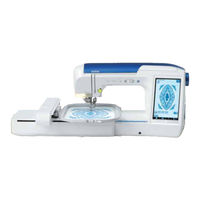
Brother PE-300S Operation Manual (111 pages)
Brother PE-300S Sewing Machines: Users Manual
Brand:
Brother
| Category:
Sewing Machine
| Size: 3.97 MB
Table of Contents
Important Safety Instructions
2
Warning Labels
5
Table of Contents
6
Setting up
8
Principal Parts
8
Other Included Accessories
10
Options
11
Selection Keys
12
Screen Messages Guide You through each Operation
12
Operation Buttons
13
Using the Operation Buttons
13
Basic Sewing Machine Operation
14
Flat Bed Extension Table
14
Free Arm
14
Power Supply
15
Using the Screen Keys
16
About the Screen
16
Adjusting the Brightness of the Screen
16
How to Change Language
17
How to Clear the Language Selection
18
Bobbin Winding / Bobbin Thread Setting
19
Setting the Bobbin
22
Upper Threading
23
Starting and Stopping Sewing
26
START/STOP" Button
26
Foot Controller
26
Stitch Selection (Utility Stitches)
27
Stitches
27
Trial Sewing
28
Stitch Width and Stitch Length
30
Adjusting the Stitch Width
30
Adjusting the Stitch Length
30
Quick Adjustment Reference Chart for Stitch Width and Stitch Length
31
Thread Tension
33
Correct Tension
33
Tightening the Upper Thread Tension
33
Loosening the Upper Thread Tension
33
Presser Foot
34
Changing the Presser Foot
34
Changing the Embroidery Foot and the Zipper Foot
35
Feed Dogs
36
Needle
37
Checking the Needle
37
Installing the Needle Securely
37
Fabric/Thread/Needle Combination Chart
38
Utility Stitches
39
Straight Stitches
39
Changing Needle Position
40
Sewing Corners
40
Sewing Curves
41
Sewing Thick Seams
41
Sewing Thick Fabric
41
Sewing Thin Fabric
42
Using the Free Arm
42
Stretch Stitch and Triple Stitch
43
Stretch Stitch
43
Triple Stitch
43
Zigzag Stitches
44
Overcasting (Using a Zigzag Stitch)
44
Applique (Using a Zigzag Stitch)
44
Patchwork (for Crazy Quilt)
45
Sewing a Curve with a Zigzag Stitch
45
Dotted Zigzag
46
Attaching Elastic Bands
46
Overcasting
46
Overcasting
47
Overcasting
48
Blind Hem Stitches
49
If the Needle Does Not Catch the Fold of Hem Enough
50
If the Needle Catches the Fold of Hem too Much
50
Buttonhole Stitches
51
Order of One Cycle
52
Sewing Stretch Fabrics ( )
53
Buttons that Do Not Fit into the Guide Plate (Odd-Shaped Buttons)
53
Bar Tacking
54
Thick Fabrics
55
Appliques
56
Sewing the Applique Around Corners
56
Scallop
57
Patchwork Stitch
58
Zipper Insertion (Centered and Side Application)
59
Centered Application
59
Side Application
60
Smocking
62
Button Sewing
63
Attaching Buttons with Four Holes
64
Embroidering
65
1 Embroidery Unit and Memory Cards (Optional)
65
Attaching the Embroidery Foot "Q
65
Before You Begin
65
3 Attaching the Embroidery Unit
66
Removing Embroidery Unit
67
Choosing Embroidery Patterns (Part I)
68
One-Point Patterns
69
Borders
71
Lettering
72
Lower and Upper Case Letters
73
Numerals and Punctuation
73
Selecting Patterns from a Memory Card
74
Choosing Embroidery Patterns (Part II)
75
If You Accidentally Choose the Wrong Design
75
If You Choose the Wrong Character
75
To Change Size
75
To Make Words
76
Embroidering
77
Embroidering Attractive Finishes
77
Setting the Fabric into the Embroidery Frame
78
Fitting the Embroidery Frame to the Embroidery Unit
80
Removing the Embroidery Frame
80
Embroidering
81
Thread Tension
83
Checking Thread Colors
84
Checking Thread Colors and Time Required
84
Checking Time Required to Complete a Pattern
85
Choosing Embroidery Placement
86
Checking the Embroidering Area
87
Moving the Embroidery Location
87
Embroidering from a Specific Starting Point
88
Mirroring Patterns
89
Rotating and Mirroring Patterns
89
Rotating Patterns
89
Changing Size and Stitch Density of Characters and Borders
90
To Change Size
90
Multi-Colored Lettering
91
To Change Stitch Density (Limited to Certain Alphabets and Borders)
91
If the Thread Breaks During Embroidery
92
If the Upper Thread Breaks
92
Continuing after the Power Shuts off
93
When Starting over from the Beginning
93
Combining Characters to Form Words
94
Embroidery Applications
94
Outline Embroidery
95
Embroidering Appliques (Using a Frame Pattern)
96
Embroidering Onto Small Pieces of Fabric or Onto Corners
97
Memory
98
Saving Groups of Characters
98
Restoring Saved Designs
99
Maintenance
100
Cleaning
100
Cleaning the Screen
100
Cleaning the Sewing Machine Surface
100
Cleaning the Shuttle
100
Changing the Light Bulb
102
Troubleshooting
103
Before Taking Your Machine in for Service
103
Basic Sewing Machine Maintenance
103
Error Messages
106
Warning Messages
106
Instruction Messages
108
Alarms
108
Sewing Chart
109
Patterns (Programmed in Machine)
110
Utility Stitches
110
Character Embroidering Chart
110
Frame Pattern Embroidering Chart
110
Pattern
111
One Point Mark Embroidery Pattern
111
Brother PE-300S Service Manual (57 pages)
Brand:
Brother
| Category:
Sewing Machine
| Size: 1.44 MB
Table of Contents
Table of Contents
3
Mechanical Chart
4
Power Transmission Chart
5
Electronic Parts Arrangement Chart
6
Control System Block Diagram
7
Main Motor Control
8
Pattern Generator
8
Other Electronic Component Functions
8
29
Position of Touch Panel (be Sure to Adjust the Touch Panel after Reconnecting the Touch Panelconnector.)
30
Setting the Test Mode
31
Tension of Motor Belt and Timing Belt
32
Timing of Rotation Shutter and Up-Down Feed Cam
33
Needle down Position Adjust Timing Belt
34
Timing of Needle and Rotary Hook (Clearance between the Needle and the Rotary Hook Point)
35
Needle Bar Height
36
Front/Back, Left/Right Position of Feed Dog
37
Feed Dog Height
38
Presser Bar Height
39
Button Holer (Position of Buttonholer Lever)
40
Bobbin Winder (Adjust Bobbin Winder Switch)
41
Inner Rotary Hook Bracket Position
42
Inner Rotary Hook Tension
42
Thread Tension (Uper Thread Tension)
43
Setting Z Gear
44
Feed Adjustment (Gear Backlash)
45
Needle Threader
46
(Checking the Hook Position in Horizontal Direction)
46
Needle Threader (Exchange)
47
(Checking the Hook in Standard Position)
47
Needle Threader
48
(Checking the Hook Position in Vertical Direction)
48
Timing Belt Tension for the X Direction
49
Timing Belt Tension for the y Direction
50
51
Main Motor Does Not Run
52
Pattern Cannot be Selected
52
When Power Is Turned On, Buzzer Does Not Sound and Nothing Appears on Display
52
Needle Is Raised. Feed Pulse Motor When Needle Is Lowered)
52
Buttonholes Are Not Stitched Correctly
53
Correct Patterns Are Not Created
53
Manual Operation of Feed and Zigzag Pulse Motors Is Not Possible
53
Abnormal
53
Operation of Main Motor Is Not Stable, Maximum Speed Operation Is Not Possible, or Speed Cannot be Adjusted
53
Bobbin Winder Doesn't Work
54
Embroidery Attachment Doesn't Work Well
54
Foot Controller Does Not Operate Normally When Depressed
54
LCD Does Not Light up Properly
54
Needle Thread Breakage Detector Doesn't Work Correctly
54
Advertisement
Brother PE-300S Manual (42 pages)
Accessory Catalog
Brand:
Brother
| Category:
Sewing Machine
| Size: 9.48 MB
Table of Contents
Brother Sewing Machine Lineup
3
Brother General Sewing Accessories
4
Brother General Sewing Accessories
5
Narrow Hemmer Foot
6
Seam Guide
7
Straight Stitch Foot
7
Side Cutter
7
Knee Lifter
9
Brother Embellishment Feet
10
Brother Embellishment Feet
11
Fringe Foot
12
Open Toe Foot
12
Ruffler Foot
13
Brother Quilting Feet
14
Brother Quilting Feet
15
Gathering Foot
35
Piping Foot
38
Taping Foot
38
(French) Brother PE-300S Manuel D'instructions (110 pages)
User Manual - French
Brand:
Brother
| Category:
Sewing Machine
| Size: 2.8 MB
Table of Contents
Table of Contents
4
Mise en Route
6
Composantes Principales
6
Autres Accessoires Fournis
8
Options
9
Touches Selection
10
L'écran des Messages Vous Guide Pour Chaque Opération
10
Touches Operation
11
Utilisation des Touches Opération
11
La Machine
11
Fonctionnement de Base de la Machine
12
Tablette Plate D'extension
12
Bras Libre
12
Alimentation
13
Utilisation des Operationsa L'ecran
14
A Propos de L'écran
14
Réglage de la Luminosité de L'écran
14
Changement de la Langue D'affichage
15
Pour Annuler la Sélection de Langue
16
Bobinage de Canette/Reglage du Fil de Canette
17
Mise en Place de la Canette
20
Enfilage Superieur
21
Debut Et Arret de la Couture
24
Touche "MARCHE/ARRET
24
Pédale de Commande
24
Selection des Points (Points Utilitaires)
25
Points
25
Essai de Couture
26
Largeur Et Longueur de Point
28
Réglage de la Largeur du Point
28
Réglage de la Longueur du Point
28
Tableau de Référence Rapide Pour Les Réglages de Largeur Et de Longueur de Point
29
Tension du Fil
31
Tension Correcte
31
Augmentation de la Tension du Fil Supérieur
31
Diminution de la Tension du Fil Supérieur
31
Pied Presseur
32
Changement de Pied Presseur
32
Changement du Pied Pour Broderies Et du Pied Pour Fermeture À Glissière
33
Griffes D'entrainement
34
Aiguille
35
Vérification de L'aiguille
35
Bonne Installation de L'aiguille
35
Tableau de Combinaisons Tissu/Fil/Aiguille
36
Points Utilitaires
37
Points Droits
37
Modification de la Position de L'aiguille
38
Couture D'angles
38
Couture D'angles
39
Pour Coudre des Coutures Épaisses
39
Couture Tissu Épais
39
Couture Tissu Fin
40
Utilisation du Bras Libre
40
Point Elastique Et Triple Point
41
Point Élastique
41
Triple Point
41
Zigzag
42
Surfilage (en Utilisant Le Point Zigzag)
42
Appliqué (en Utilisant Le Point Zigzag)
42
Patchwork (Pour Couette Folle)
43
Couture de Courbes en Point Zigzag
43
Zigzag Pointille
44
Apposition de Rubans Élastiques
44
Surfilage
44
Surfilage
45
Surfilage
46
Points Invisibles
47
Si L'aiguille Ne Prend Pas Suffisamment Le Pli de L'ourlet
48
Si L'aiguille Pique Trop Sur Le Pli de L'ourlet
48
Boutonniere
49
L'ordre D'un Cycle
50
Couture de Tissus Élastiques
51
Au Cas Où Le Bouton Ne S'adapte Pas Au Plateau du Guide (Bouton de Forme Spéciale)
51
Point D'arret
52
Pour Les Tissus Épais
53
Appliques
54
Dans Le Cas D'une Couture D'angle
54
Feston
55
Patchwork
56
Insertion de Fermeture a Glissiere (Centree, Sur Le Cote)
57
Centrée
57
Sur Le Côté
58
Point Smock
60
Couture des Boutons
61
Fixation des Boutons À Quatre Trous
62
Broderie
63
Avant de Commencer
63
Choix des Motifs de Broderie (Premiere Partie)
66
Motifs À un Point
67
Motifs D'encadrement
69
Lettrage
70
Chiffres Et Ponctuation
71
Lettres Majuscules Et Minuscules
71
Sélection des Motifs À Partir D'une Carte Mémoire
72
Choix des Motifs a Broder (Deuxieme Partie)
73
Si Vous Choisissez Accidentellement un Motif Non Souhaité
73
Si Vous Avez Choisi un Mauvais Caractère
73
Pour Modifier la Taille
73
Pour Composer des Mots
74
Broderie
75
Broderie de Jolies Finitions
75
Mise en Place du Tissu Dans Le Cadre de
76
Broderie
78
Dépose de L'unité de Broderie
78
Fixation du Cadre de Broderie Sur L'unité de Broderie
78
Broderie
79
Tension du Fil
81
Verification des Couleurs des Fils Et du Temps Requis
82
Vérification des Couleurs des Fils
82
Vérification du Temps Requis Pour
83
Terminer un Motif
83
Choix de L'emplacement de la Broderie
84
Vérification de L'espace À Broder
85
Déplacement de L'emplacement de la Broderie
85
Broderie À Partir D'un Point Particulier
86
Motifs Pivotés, Motifs Avec Effet Mirroir
87
Motifs Avec Effet Miroir
87
Rotation des Motifs
87
Modification de la Taille Et de la Densite des Points des Lettres Et des
88
Encadrements
88
Pour Modifier la Densité des Points (Fonction Limitée À Certains Alphabets Et À Certains Encadrements)
89
Lettrage À Plusieurs Couleurs
89
Si Le Fil Se Rompt Pendant la Broderie
90
En Cas de Rupture du Fil Supérieur
90
Pour Recommencer Depuis Le Début
91
Continuation Après la Mise Hors Tension
91
Applications de Broderie
92
Combinaison de Lettres Pour Former des Mots
92
Broderie de Pourtours
93
Broderie D'appliqués (en Utilisant un Motif D'encadrement)
94
Broderie Sur des Tissus de Petite Taille Ou Dans Les Coins
95
Memoire
96
Mémorisation de Groupes de Caractères
96
Rappel des Motifs Mémorisés
97
Fixation du Pied Pour Broderie "Q
63
1 Unité de Broderie Et Cartes Mémoire (en Option)
63
3 Fixation de L'unité de Broderie
64
Dépose de L'unité de Broderie
65
Entretien
98
Nettoyage
98
Nettoyage de L'écran
98
Nettoyage de la Surface de la Machine
98
Nettoyage du Crochet
98
Remplacement de L'ampoule D'eclairage
100
Resolution des Problemes
101
Avant D'envoyer Votre Machine en Reparation
101
Entretien de Base de la Machine
101
Message D'alerte
104
Messages D'erreur
104
Alarmes
106
Tableau de Couture
107
Patterns (Programmed in Machine)
108
Utility Stitches
108
Character Embroidering Chart
108
Frame Pattern Embroidering Chart
108
Motifs (Carte Memoire)
109
Motif de Broderie de Marque un Point
109
Advertisement
Related Products
Brother PE-700
Brother PE-400D
Brother PE-150V
Brother PE-180D
Brother PE-190D
Brother PE-780D
Brother PE500
Brother PE-200
Brother PE770
Brother PE750
Brother Categories
Sewing Machine
All in One Printer
Printer
Label Maker
Fax Machine
More Brother Manuals
Login
Sign In
OR
Sign in with Facebook
Sign in with Google
Upload manual
Upload from disk
Upload from URL