Genie Aladdin Connect Quick Setup Manual
Garage door opener controller
Hide thumbs
Also See for Aladdin Connect:
- Installation manual (24 pages) ,
- Programming manual (7 pages) ,
- Quick setup manual (2 pages)
Advertisement
Table of Contents
- 1 Recommended Tools
- 2 Included Components
- 3 Important Safety Instructions
- 4 In the Home Close to Wi-Fi Router
- 5 In the Garage
- 6 Wi-Fi Signal Indicator
- 7 Wire Aladdin Connect
- 8 Button & Connection Detail
- 9 Mount and Power Aladdin Connect
- 10 Mount DPS Module to Garage Door
- 11 Complete the Programming
- Download this manual
See also:
Installation Manual
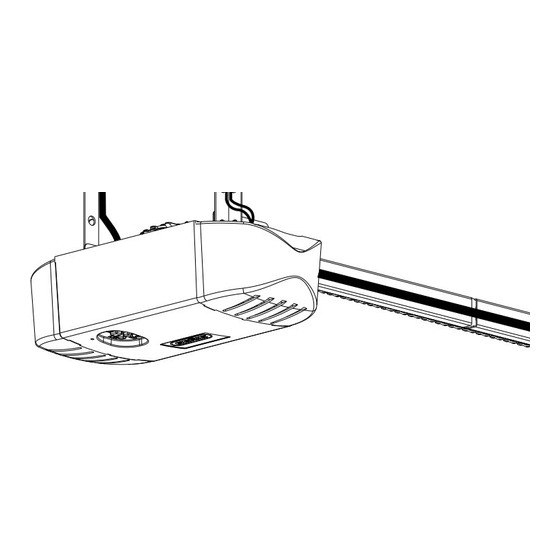
Aladdin Connect™
Control Wire
Power Pack
Typical Single Door
Installation
See online manual
for other installation
types.
For a video of this installation,
Visit www.GenieCompany.com/AladdinConnect / InstallationVideo
Wall Button Wire
Photocell wire
Quick Set-up Guide
Recommended Tools
Included Components
Drill & 3/32 Bit
DCM
Small Common
(Door Control Module)
Screwdriver
5/16 Wrench or
Nut Driver
Phillips Head
Screwdriver
Wire Cutters/
Strippers
Hammer
Wire Spool
DPS
(Door Position Sensor)
Hardware Bag
Power Pack
Insulated
Staple x30
39195503015 08/15
Advertisement
Table of Contents

Related Manuals for Genie Aladdin Connect


Summary of Contents for Genie Aladdin Connect
- Page 1 Quick Set-up Guide Recommended Tools Included Components Aladdin Connect™ Control Wire Drill & 3/32 Bit Wall Button Wire Photocell wire Small Common Power Pack (Door Control Module) Screwdriver (Door Position Sensor) Typical Single Door 5/16 Wrench or Installation Nut Driver...
-
Page 2: Important Safety Instructions
NE JAMAIS PASSER SOUS UNE PORTE À L’ARRÊT OPEN DOOR. PARTIELLEMENT OUVERTE. The Aladdin Connect™ operating system is Le système d’exploitation Aladdin Connect ™ a été designed for unattended operation. The door conçu pour fonctionner sans surveillance. La porte could move unexpectedly. - Page 3 Scan for app. FIG.A FIG.B NOTE: Customers using control apps from other vendors and NOT using the Aladdin Connect™ app to control this system will need to visit www.GenieCompany.com/AladdinConnect for specific Wi-Fi Apple and the Apple logo are trademarks instructions.
- Page 4 STEP 3 WARNING In the Garage: UNPLUG GARAGE DOOR OPENER PRIOR TO INSTALLING These factors must be determined prior to mounting Aladdin Connect™ ALADDIN CONNECT™ (DCM) to the wall or ceiling. Door may operate unexpectedly. 1. Optimal Wi-Fi signal strength.
- Page 5 Button & Connection Detail Wire Aladdin Connect™: (Single door install shown) Aladdin Connect™ will wire directly to the wall control connections at the powerhead or directly to the wall control. New Genie models shown. Visit www.GenieCompany.com/AladdinConnect for more information on older models and other brands of garage door openers.
- Page 6 *Wiring methods for other garage door openers. All Genie brand and most competitor brands of garage door openers will operate with Aladdin Connect™. Visit www.GenieCompany. com/AladdinConnect for detailed wire diagrams or to check compatibility with other manufacturer’s controls or check your garage door...
- Page 7 STEP 5 Mount and Power Aladdin Connect™: Using the DCM mounting bracket as a template at the optimal Wi-Fi location. Mark and drill 2-3/32” pilot holes and mount bracket to wall using supplied screws. If mounting to drywall, use anchors provided in kit or if mounting to perforated angle at opener location, use nuts, washers and screws provided.
- Page 8 STEP 6 Mount DPS Module to Garage Door: The DPS should be mounted on the TOP door panel only. Mount to steel reinforced end stile on the far left or right under the top hinge. DO NOT mount to unreinforced door panel. Clean door where DPS will mount.
- Page 9 Follow the on screen prompts to complete the set-up and test the Aladdin Connect™ system. NOTE: This kit includes one DPS sensor for use with one door only. Additional DPS sensors can be purchased separately from your local Genie retailer.
- Page 10 Only for use on standard sectional garage doors. (2) This device must accept any interference, DO NOT install Aladdin Connect™ on garage door including interference that may cause openers without safety photocells. undesired operation of this device. Le présent appareil est conforme aux DO NOT install Aladdin Connect™ on swing-out or CNR d’Industrie Canada applicables...
- Page 11 Aladdin Connect™ Limited Warranty GMI Holdings, Inc. d/b/a The Genie Company (“Seller”) warrants to the original purchaser of the Genie Aladdin Connect (“Product”), subject to all of the terms and conditions hereof, that the Product and all components thereof will be free from defects in materials and workmanship for a period of One (1) Year, from the date of purchase: Seller’s obligation under this warranty is specifically limited to repairing or replacing, at its option, the Product or any part thereof which is determined by Seller...