Table of Contents
Advertisement
Advertisement
Table of Contents

Related Manuals for Baby Lock Crown Jewel III BLCJ18-3


Summary of Contents for Baby Lock Crown Jewel III BLCJ18-3
-
Page 2: Table Of Contents
Baby Lock Crown Jewel III Stitch Regulator Setup . . . . . . . . . . . . . . . . -
Page 3: Important Information
The Baby Lock Crown Jewel quilting machine is a high quality machine that incorporates very robust design features and is very easy to service. -
Page 4: Important Safety Instructions
To disconnect from the wall outlet, push the switch to the off position, then remove the plug from outlet • pulling from the plug, not the cord. Never operate the Baby Lock Crown Jewel III if the cord is damaged or not working correctly. If a mechanical or electrical problem is encountered, return the Baby Lock Crown Jewel III to your nearest authorized Baby Lock retailer for examination, repair, electrical, or mechanical adjustment. - Page 5 This machine is intended for household or commercial use. Disclaimer Baby Lock and its Retailers are in no way legally responsible or liable for damage to the Baby Lock Crown Jewel when used improperly or not in accordance with the guidelines stated in this manual or when used on machine quilting frames not recommended by Baby Lock.
- Page 6 To increase the life of your machine 1. Do not store this machine in areas exposed to direct sunlight or high humidity. Never use or store the ma- chine near a heater, an iron, a halogen lamp or other hot objects. 2.
- Page 7 Pour débrancher la machine de la prise murale, mettez l’interrupteur sur arrêt, puis retirez la fiche de la • prise en tirant à partir de la fiche et non du cordon. N’utilisez jamais la Baby Lock Crown Jewell III si le cordon est endommagé ou ne fonctionne pas correctement. En cas de problème mécanique ou électrique, renvoyez la Baby Lock Crown Jewell III au centre de service agréé...
- Page 8 • N’utilisez que les aiguilles conçues pour le quilting en piqué libre et recommandées par Baby lock pour cette machine. D’autres types d’aiguilles risqueraient de se fracturer au cours d’un quilting normal. Ne pas laisser les enfants jouer avec la machine. Cette machine est conçue pour être utilisée par des •...
- Page 9 COMMENT DÉBALLER/REMBALLER LA MACHINE Conservez le carton et les matériaux d’emballage. Il est possible que vous deviez ramener la machine au revendeur ou l’envoyer pour la faire réparer. Si vous ne l’emballez pas correctement ou si vous n’utilisez pas les matériaux d’emballage corrects, la machine pourrait être endommagée.
-
Page 10: Baby Lock Crown Jewel Iii Quick Facts
Baby Lock and its authorized retailers are not legally responsible or liable for Minimum Sewing Speed 90 spm damage to the Baby Lock Crown Jewel III Needle Bar Stroke 35.3 mm when used improperly or not in accordance Sewing Foot Stroke/Lift... -
Page 11: Home Machine Quilting Frame Recommendation
Baby Lock Crown Jewel III Quilting Frame Safety Section Recommendation NOTE: Do not operate your Baby Lock Crown Jewel III quilt- • Baby Lock Pearl Frame ing machine until you have completely read the information contained in this manual. Please keep all packaging and sales •... -
Page 12: Package Contents/Included Accessories
Package Contents /Included Accessories Part Name Part Code Box 1 of 3 Baby Lock Crown Jewel III BLCJ18A3 Quilting Machine / Stitch Regulator User Manual IBBLCJ18-3 Class M Bobbins (5 pieces) BLJ-BOB (3 pkg.) Needle size 16 (1 pkg. of 10) 134FG-100 Needle size 18 (1 pkg. -
Page 13: Optional Accessory Listings
Optional Accessories Part Name Part Code Shown on page 47 Adaptor Plate/Stylus Holder BLJ18-SA Shown on page 46 Channel Lock BLJ18-CL LED Lights (pkg. 2) BLJ18-L Shown on page 17 Not shown UV LED Lights (pkg. 2) BLJ18-UVL` Shown on page 48 Horizontal Spool Pin BLJ18-HS Not shown... -
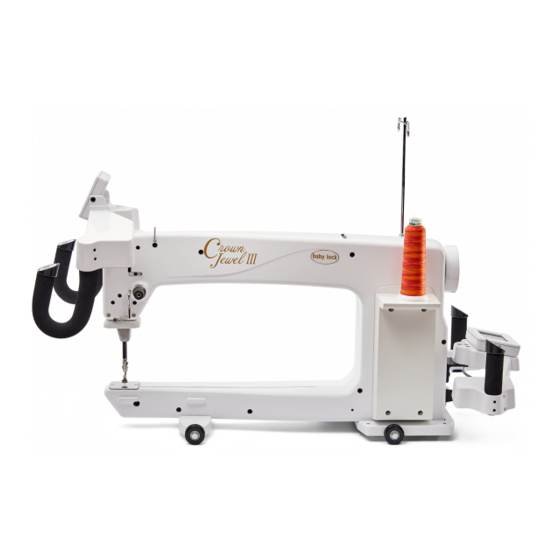
Page 14: Baby Lock Crown Jewel Iii Components
Baby Lock Crown Jewel III Components Front View Diagram A 1. Thread Mast 8. Thread Guide E 2. Thread Guide A 9. Needle Bar Thread Guide 3. Three Hole Thread Guide B 10. Needle 4. Thread Guide C 11. Front Casing/Frame 5. -
Page 15: Rear View Diagram B
Baby Lock Crown Jewel III Components continued Back View Diagram B 14. Ruler Foot 15. Needle 16. Needle Bar Thread Guide 17. Needle Bar 18. Presser Bar 19. Foot Mount 20. Needle Plate 21. LED Light Ring 22. Front Handle Bar Serial Port 23. -
Page 16: Installing Machine On Carriage
Installing Machine on Carriage Place the carriage on the table rails ensuring that the carriage stitch regulator assembly is toward the back of the table (Figure 1). Front of table The stitch regulator, machine and carriage are connected by a ribbon cable that has 3 connectors (Figure 2). The machine should arrive from the factory with the ribbon cable already at- tached by Connectors A and B. -
Page 17: Installing Front Handles
Installing Front Handles CAUTION: Unplug the Baby Lock Crown Jewel III from the electrical outlet. All power to the machine must be turned off when in- stalling the front handles. Failure to do so can result in damage to the machine. -
Page 18: Installing Rear Handles
NOTE: After the handles have been completely installed and with your fingertips. plugged in, test them by turning the Baby Lock Crown Jewel III on/off switch to “on”. The handles will run a self-test by briefly dis- playing their version during boot up, and then the LED lights on NOTE: Do not grasp the LEDs themselves, as the front handles will illuminate. -
Page 19: Inserting (Or Changing) The Needle/Needle Guide
Inserting (or Changing) the Needle Move the needle bar to the IMPORTANT NOTE: Check the needle to highest position by turning confirm it is fully inserted. The needle bar has the handwheel counter- Sight a sight opening above the needle bar clamp clockwise or pressing the Opening screw—make sure the needle is touching the... -
Page 20: Installing The Power Cord
The washer protects the painted surface when the nut is tightened. Tighten Turning on the Baby Lock Crown Jewel III the mast clockwise until it is securely in place. Use There are two power switches for your machine. -
Page 21: Laser Stylus Safety And Use Guidelines
Power is supplied to the laser when it is plugged the clamp on the post and pivoting the laser up or into the Baby Lock Crown Jewel III. Be sure the down. To make an adjustment, simply loosen the laser is attached to the Baby Lock Crown Jewel III black thumbscrews, position, and retighten. -
Page 22: Installing The Laser Stylus
Installing the Laser Stylus the post and then place the washer under the nut and onto the machine against the painted CAUTION LASER SAFETY: surface. The washer protects the painted When using the Laser Stylus, basic safety surface when the nut is tightened. Tighten the precautions should be taken. -
Page 23: Threading The Machine
Threading the Machine Slide thread (cone or spool) onto spool pin, NOTE: The purpose of this guide is to prevent insert the thread through the thread-mast loops of thread coming off of the thread cone eyelet from back to front, continuing to thread and going into the top tension as a knot, guide A. -
Page 24: Changing The Hopping Feet
This is not the case with the Baby Lock Crown Jewel III quilting machine. Consequently the top tension is always tight and the tensions discs are never open. -
Page 25: Bobbin And Thread Tension Adjustments
Bobbin and Thread Tension Adjustments NOTE: See Bobbin Winding Instructions contained in the bobbin winder carton. Insert Bobbin into Bobbin Case CAUTION: To prevent personal injury always Figure 18 turn off the power switch while inserting and/or removing bobbin case or anytime your hands are near the needle area. - Page 26 It is easy to set the top tension with the Baby Lock position. Crown Jewell III Quick-Set Tension. To adjust the...
-
Page 27: Maintenance
Cleaning and Lubricating the Machine Only use a good quality light sewing machine oil in the Baby Lock Crown Jewel III. Internal oiling is not necessary on the Baby Lock Crown Jewel III except when the machine is taken to a service technician for routine maintenance and cleaning. -
Page 28: Using The Touch Screen Displays On The Handlebars
Using the Touch Screen Displays on the Handlebars The Baby Lock Crown Jewel III has touch-screen dis- plays on the front and rear handlebars. Settings may be changed at either of these locations. Main Screen Manual Mode Screen Button Functions: Pressing the “Regulated”... - Page 29 Bobbin Thread Indicator If you use the Low-Bobbin Estimator feature, The Bobbin Thread Indicator box (Figure 25) shows how much bobbin thread remains on the bobbin. The value counts down until it gets to zero, at which time the low-bobbin alarm alerts you that it is time to put Figure 25 in a new bobbin if the alarm is enabled.
- Page 30 “Cruise” regulated mode. (Figure 30) Figure 30 More Precision If “Precision” mode is selected, the Baby Lock Crown Jewel II will begin stitching only after the Start button is pressed and you begin to move the machine. (Figure 31) Figure 31...
- Page 31 Figure 34 In “Cruise” mode, the machine will stop stitch- ing after about three seconds if no movement has occurred. More Menu The More screen provides access to other func- tions available on the Baby Lock Crown Jewel III (Figure 34).
- Page 32 Low Bobbin The Baby Lock Crown Jewel III includes a low bobbin capability so you can estimate how soon your bobbin thread will run out. This Low Bobbin Capacity is based on an estimate of how much of a particular thread can...
- Page 33 Timers There are two useful timers. The first (top) timer is a reminder timer. It enables you to set an alarm to go off after a specific period of time, similar to a kitchen timer. Use the “+” and “-” buttons to set the time dura- tion.
- Page 34 The best contrast is achieved when viewed in a dark or dimly lit room. Although Baby Lock has chosen to use UV lights which emit a light wavelength at the lowest end...
- Page 35 Information contained in the boxes below the serial number identifies the electronics board version num- bers as well as the version numbers of the Baby Lock Crown Jewel III and its handlebars. The Lifetime and Project stitch counters count the number of stitches the machine has performed.
- Page 36 Motor Sensor Test Diagnostics The “Motor” Sensor test can help you determine whether Motor Sensor Test there may be a problem with the Baby Lock Crown Jewel Rotate the hand wheel slowly. Passing Test: III motor. Slowly rotating the handwheel should result in a pulsing audible “beep.
- Page 37 Speed Sensor Test The “Speed” Sensor test can help you determine whether or not there is a problem with the Baby Lock Crown Jewel III speed sensor. Before performing this test, remove the bobbin case and the top thread. Press the “Start”...
- Page 38 Keypad Test Solid beep for 1/3 of a stitch cycle, no beep for the rest of the cycle. Diagnostics The Keypad test allows the user to press any of the four keys on the front or back handles to verify that the Baby Keypad Test Lock Crown Jewel III is reading the buttons as they are Press one of the handlebar keys.
-
Page 39: Baby Lock Crown Jewel Iii Stitch Regulator Setup
3 or 4 seconds, the machine will stop and If you leave the Baby Lock Crown Jewel III in Precision Regu- position the needle. In Precision Regulated lated mode with the start indicator box green and do not move mode, the needle pauses when you stop mov- the machine for two minutes, the system will “time-out”... -
Page 40: To Begin Quilting
Baby Lock Crown Jewel III, the handlebars. Gripping the handlebars too tightly may cause users can begin with a few “beginner” tech- body tension resulting in poor quilting quality. The Baby Lock niques. Crown Jewel III, combined with the Baby Lock quilting frame system will give you a smooth even glide. -
Page 41: Troubleshooting
Use only needles SKIPPING damaged, dull, bent, or authorized by Baby Lock. installed improperly • Always change the needle if the needle has struck any hard object such as a straight pin, etc. The tip of the needle can become dam- aged or burred, resulting in fabric damaged as well as skipped stitches and thread breakage. - Page 42 Problem Cause Correction Upper tension too tight • Loosen upper tension. • Inspect that the thread take-up lever, thread stirrup or tension Improper threading spring are all threaded correctly and that the thread is “flossed” into the tension discs THE NEEDLE The needle is bent or •...
- Page 43 Problem Cause Correction • If using short staple threads, inexpensive or industrial threads or “Fuzz” caught under TENSION coated threads, lint and other material will build up under the the tension spring in IS POOR tension leaf spring and begin to lift the spring, reducing the spring’s the bobbin ability to compress against the thread.
- Page 44 Problem Cause Correction THREAD NESTS Not enough tension on • Check that the machine is threaded correctly. Make certain that UNDER QUILT top thread thread is “flossed” snugly in place between the two tension discs. If machine is threaded correctly, tighten top tension by rotating the tension knob clockwise.
- Page 45 Problem Cause Correction NEEDLE Thread cones/spools • Look for severe twisting of threads when approximately 12 to 15 THREAD may have abraded inches has been pulled off, with the ends pinched together. Cot- BREAKS thread casing, severe ton threads are particularly susceptible to dry rot or wet rot which twisting or thread rot makes thread brittle.
- Page 46 Cause Correction Wrong type of needle • Use needles recommended by Baby Lock. Using the wrong needle with a smaller shank diameter causes many problems. For example, a system 1738 or 287WH needle with a shank diameter of 1.64mm will fit loosely into the needle bar clamp.
-
Page 47: Optional Accessories
Optional Accessories Channel Lock Place the channel lock on either of the front wheels of the machine as shown in (Figure 53) (not on the carriage wheels). This will lock the wheels so that the machine carriage will move from right to left but not forward and backward. -
Page 48: Stylus And Adaptor Plate With Holder
Installing the Stylus Holder The stylus holder has two threaded holes. Place the stylus holder under the adaptor plate and align the two holes with the long slot in the adaptor Wing Bolts and Washers Carriage Bolts plate. Place the two wing bolts with washers first through the slot and then thread into the stylus holder as shown (Figure 58). -
Page 49: Horizontal Spool Pin
Optional Accessories continued Crown Jewel III Micro Handles Horizontal Spool Pin Enjoy complete precision while long arm quilting. An optional horizontal spool pin is available These centralized, adjustable handles fit perfectly for metallic and specialty threads wound on a in between the existing handles on the Crown spool (not a cone). -
Page 50: Couching Feet Set
Pro-Stitcher The Pro-Stitcher quilting software is the perfect program for any Baby Lock Crown Jewel owner looking to create more exquisite quilts than ever before. Not only can quilters smoothly transition from free motion to computerized quilting, but they can also edit and create custom quilt patterns with the built-in Art &...