
Related Manuals for THOMSON THC300


Summary of Contents for THOMSON THC300
- Page 1 THC300 Digital Cable HD Receiver User Manual Bedienungsanleitung Návod k obsluze Používateľská príručka Evolution. Emotion. Passion. Ръководство за потребителя www.thomsonstb.net...
- Page 4 THOMSON is a trademark of TECHNICOLOR S.A. used under license to STRONG Europe Represented by STRONG Ges.m.b.H. • Franz-Josefs-Kai 1 • 1010 Vienna • Austria Email: support_at@thomsonstb.net 18 Jun 2015 13:07...
- Page 5 THC300 is delivered with USB multimedia support. After downloading the PVR software from the website www.thomsonstb.net the receiver can be upgraded to support the recording function via USB. This user manual describes the full functionality including the recording function and may not be applicable if the PVR software has not yet been installed.
-
Page 6: Table Of Contents
*This user manual describes the full functionality including the recording function and may not be applicable if the PVR software has not yet been installed. ThOMsOn declares that this item complies with the basic requirements and other relevant regulations of directives 2004/108/ec and 73/23/ec, Rohs 2002/95/ec Subject to alterations. -
Page 7: Introduction
1.0 inTRODucTiOn 1.1 safety instructions DO nOT insTALL YOuR ReceiveR: • In a closed or poorly ventilated cabinet; directly on top of or under any other equipment; on a surface which might obstruct the ventilation slots. DO nOT eXPOse The ReceiveR OR iTs AccessORies: •... -
Page 8: Storage
1.2 storage Your receiver and its accessories are stored and delivered in a packaging designed to protect against electric shocks and moisture. When unpacking it, make sure that all the parts are included and keep the packaging away from children. When transporting the receiver from one place to another or if you are returning it under warranty conditions, make sure to repack the receiver in its original packaging with its accessories. -
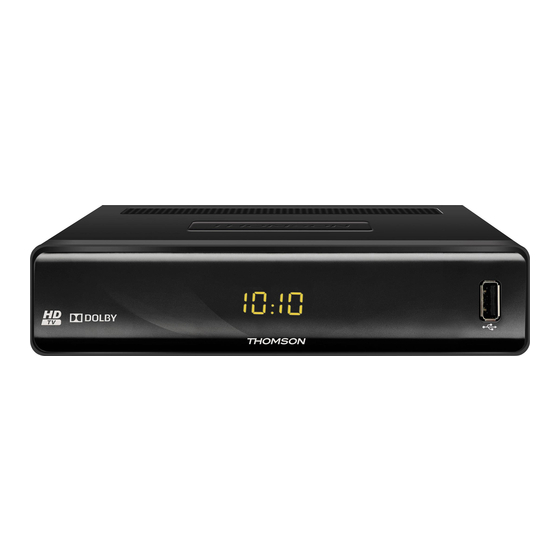
Page 9: Your Receiver
• It is advised not to store important information on USB storage devices used with the receiver. Always make backups of data on your USB storage device before using it with this receiver. THOMSON will not take responsibility for any loss of information or circumstances caused by loss of information. -
Page 10: Remote Control
specification meets these requirements before connecting your receiver to the wall outlet. 2.4 Remote control Fig. 3 1. q Switches the receiver On/Standby 2. ! Mutes all audio outputs of the receiver 3. PG+/PG- Page up/down in all list modes 4. -
Page 11: Installing The Batteries
2.5 installing the batteries Fig. 4 Open the cover on the remote control and insert 2x AAA batteries into the compartment. Correct position of the polar diagram shows the batteries inside the compartment. 1. Open the cover. 2. Insert the batteries. 3. -
Page 12: Connecting To Tv With Scart Cable
3.3 connecting to Tv with scART cable Fig. 6 Your receiver is also equipped with a SCART connector; alternatively, the TV set can be connected to the receiver using a good quality SCART cable. 3.4 connecting to a Digital Audio Amplifier with s/PDiF Fig. -
Page 13: Dvb-C Installation
by selecting your language using tu. Once you have selected your language, press q to move the highlight to the next item and use tu to change. Language Here you can choose your language. Region: Select your region where this receiver is used. Subtitle: Select Normal to display subtitles per default, Select Hard of Hearing to show HoH subtitles per default. -
Page 14: Quick Guide To Using Your Receiver
Tools. (DeFAuLT Pin: 1234). 5.0 Quick GuiDe TO usinG YOuR ReceiveR We at THOMSON understand that you can’t wait to enjoy your digital HD cable receiver. The following quick guide will make you familiar with the basic operation of this device. -
Page 15: Info Banner
6.1.2 channel list Press Ok in viewing mode to display the Channel List. Use pq in the channel list to highlight your channel of choice and press Ok once to select the highlighted channel. Press Ok again to leave the channel list mode. Inside the channel list it is possible to use the PG+/PG- buttons as well in order to scroll page-wise through the list. -
Page 16: Timeshift
*Availability of DVB/HoH subtitles depends on the broadcast. If subtitles are not supported, they can be activated via Teletext if available. 6.6 Timeshift* Timeshift allows you to pause live broadcasts and resume playback later. To activate this function set the Timeshift mode in the DVR Setting menu to on by selecting Pause. For details, see 7.6.3. -
Page 17: Main Menu
*This user manual describes the full functionality including the recording function and may not be applicable if the PVR software has not yet been installed. **Please connect a USB storage device with sufficient free space before you start a recording. 7.0 MAin Menu The main menu gives you access to settings, multimedia functions and games. - Page 18 made, press eXiT twice. A confirmation banner will pop up. Select Yes to save the changes or No to discard. 7.1.1.3 skipping channels Channels marked with Skip will be skipped when zapping channels with the pq buttons. The channels will still be available from the channel list. To mark channels for skipping, press GReen while in TV Channel List.
-
Page 19: Installation
to enter the changes. When all changes have been made, press eXiT twice. Select Yes to save the changes or No to discard. Delete Press bLue in Edit Channel to enable the Delete function. The Delete sign will move up to indicate that Delete is selected. Use pq to highlight a channel and press Ok to mark it for deletion. -
Page 20: System Setup
If By Channel is selected, use pqtu to select Channel No Symbol Rate and Scan QAM. If Network Search is set to On, all channel belonging to the network of your operator will be found, according to NIT information provided in the signal of the operator. If By Frequency is selected, use pqtu and 0 ~ 9 to select Frequency, Symbol Rate and select the correct ScanQAM parameter. - Page 21 7.3.1 Language This menu allows you to set up your language preferences. Language: Use tu to select the language for the On Screen Display. First Audio: Use tu to select Audio language. Second Audio: Use tu to select a language that will be played when the language selected at First Audio isn’t available.
- Page 22 Dolby® Digital Plus* audio to the TV via HDMI or to a Home entertainment system (for example) through coaxial S/PDIF. Dolby® Digital Plus* is only available on the HDMI output. nOTe: *Dolby® and the double-D symbol are registered trademarks of Dolby® Laboratories 7.3.3 Local Time setting Here you can set up your region and time zone.
-
Page 23: Tools
Timer Service: Choose between Channel (the timer will wake up the receiver) or Record (Timer will start recording the scheduled event). Wakeup Channel: Use tu to select the channel the timer will wake up with. Wakeup Date: Use the 0~9 buttons to enter the date for the timed event. Wakeup Time: Use the 0~9 buttons to enter the starting time. - Page 24 Press eXiT to leave. 7.4.1 information This submenu shows receiver specific information such as hardware version and software version. It also displays our web address www.thomsonstb.net. Please have the Information screen on hand when you call our hotline. The person who answers your call might ask for the information given in this screen.
-
Page 25: Media
When all settings have been made, move the highlight to Start and press Ok to start the upgrade process. After a few seconds, the receiver asks: “Are you sure to burn flash?”. Select Yes to finalize the upgrade or No to quit without upgrading. If, after a software upgrade, the receiver should behave in an nOTe: unexpected way, please perform a factory reset as well. - Page 26 Press 7 to open the Edit menu. This menu allows access of the following functions by entering the number: rename 4, copy 5, delete 6, create folder 7. One step back or leave the folder and quit the function. eXiT: Record:* Press 2 to enter a new name for the selected recording.
- Page 27 Formatting will permanently delete ALL data stored on the Warning: connected device. Please make a backup copy of all data you wish to keep before entering the HDD Format menu. THOMSON cannot be held responsible for loss of data from USB devices used with this receiver.
-
Page 28: Troubleshooting
pressing the YeLLOW/2 button. Select Off to deactivate Timeshift. Step to: 30 sec to 30 min. Set the time step you like to jump forward to by pressing 4 during playback of recorded files. This only works when the info banner is displayed on screen. If it is not, press inFO. - Page 29 Problem Possible cause What to do No picture or sound on HDMI or SCART is not Switch to correct TV/ TV or amplifier selected on your TV or amplifier input amplifier or the unit is set Select lower resolution to higher resolution as on receiver the TV supports.
-
Page 30: Technical Specifications
Audio playback: MP3 and OGG* Picture view: BMP and JPEG* *THOMSON cannot guarantee the playback of all files although extensions are listed, as it depends on codec used, data bit rate and resolution (all MPEG codec formats are supported). TechnicAL sPeciFicATiOns... - Page 31 system Transponder: DVB-C (Digital Cable) Main Processor: Ali M3812 Demodulator: Sony CXD2837 Memory: DDR II 64MB FLASH size: connectors Cable IN - IEC Female Cable OUT - IEC Male (Loop through) S/PDIF (coaxial) HDMI TV SCART USB 2.0 port : DC 5 V, 800 mA (max.) supported General Data Supply voltage: 220 - 240 V AC (SMPS), 50/60 Hz...
- Page 32 TechnicAL sPeciFicATiOns...