
Related Manuals for THOMSON THT504


Summary of Contents for THOMSON THT504
- Page 1 THT504 Digital Terrestrial HD Receiver User Manual Manuel d’utilisation Manuale utente Manual del usuario Manual do Utilizador Instrukcja obsługi Evolution. Emotion. Passion. Ръководство на потребителя www.thomsonstb.net...
- Page 2 THOMSON is a trademark of TECHNICOLOR S.A. used under license to STRONG Europe Represented by STRONG Ges.m.b.H. • Franz-Josefs-Kai 1 • 1010 Vienna • Austria Email: support_at@thomsonstb.net 09 Feb 2015 15:05...
-
Page 5: Table Of Contents
Amplifier 3.7 Connecting a USB storage device ThomSon declares that this item complies with the basic requirements and other relevant regulations of directives 2004/108/eC and 73/23/eC, rohS 2002/95/eC Subject to alterations. In consequence of continuous research and development technical specifications, design and appearance of products may change. -
Page 6: Introduction
1.0 InTroduCTIon 1.1 Safety Instructions do noT InSTall Your reCeIver: In a closed or poorly ventilated cabinet; directly on top of or under any other equipment; on a surface which might obstruct the ventilation slots. do noT eXpoSe The reCeIver or ITS aCCeSSorIeS: •... -
Page 7: Equipment Set-Up
• It is advised not to store important information on USB storage devices used with the receiver. Always make backups of data on your USB storage device before using it with this receiver. THOMSON will not take responsibility for any loss of information or circumstances caused by loss of information. -
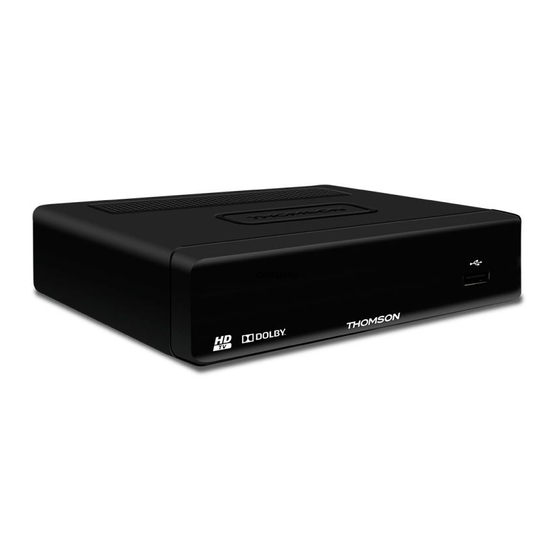
Page 8: Your Receiver
2.0 Your reCeIver 2.1 defaulT pIn: 1234 2.2 front panel Fig. 1 Point your remote control towards this sensor. Ir sensor RED indicates that the receiver is in STANDBY mode. mode indicator GREEN indicates that the receiver is in OPERATING mode. Connector for USB storage devices. -
Page 9: Installing The Batteries
Menu Off: Increases/decreases the volume level. Menu On: Change settings for specific menus 11. ok Menu Off: Displays the current channel list Menu On: Activates the highlighted menu item. 12. reCord Records the TV programme to the connected USB storage device 13. -
Page 10: Connection
3.0 ConneCTIon 3.1 Connecting to a terrestrial antenna Fig. 6 To receive broadcasted signals, your terrestrial indoor or outdoor antenna must be connected to the ANT IN connector on the back of the receiver. Use a properly shielded antenna cable and suitable connectors. -
Page 11: Connecting To An Analogue Audio Amplifier
3.6 Connecting to an analogue audio amplifier Fig. 7 Use the 3.5 mm jack to connect your receiver to the analogue input of your Hi-Fi or audio amplifier with a 3.5 mm jack to RCA cable for achieving best possible analogue audio quality. 3.7 Connecting a uSb storage device Fig. -
Page 12: Quick Guide To Using Your Receiver
Load Factory Setting in the submenu Tools. (defaulT pIn: 1234). 5.0 QuICk guIde To uSIng Your reCeIver We at THOMSON understand that you can’t wait to enjoy your new high definition digital terrestrial receiver. The following quick guide will make you familiar with the basic operation of this device. -
Page 13: Channel List
6.1.1 direct access via 0~9 buttons To gain direct access to a certain channel, simply input its number with the 0~9 buttons on the remote control. Channel numbers can be up to four digits long. Entering a number with less than four digits is possible. -
Page 14: Subtitles
6.5 Subtitles Some channels support a choice of subtitle languages. Press SubTITle in viewing mode to display a list of available subtitle languages. Select your subtitle of choice with and press ok to confirm. Press eXIT to leave without making changes.* * Availability of DVB/HoH subtitles depends on the broadcast. -
Page 15: Main Menu
7.0 maIn menu The main menu gives you access to settings, multimedia functions and games. To access the main menu, press menu in viewing mode. The main menu consists of the following sub menus: Edit Channel, Installation, System Setup, Tools, Games and Media. Throughout the main menu, menu or eXIT can be used to get back to the previous screen. -
Page 16: Moving Channels
To mark channels for skipping, press green while in TV Channel List. Use to select a channel and press ok to mark or unmark it for skipping. Channels set for skipping will be marked with the symbol. When all changes have been made, press eXIT twice. A confirmation banner will pop up. -
Page 17: Installation
7.1.2 radio Channel list Basically, the operation of the Radio Channel List is the same as in the TV Channel List. The only difference is that in Radio Channel List there is no video information, so it will always display the radio background on the preview screen. -
Page 18: Antenna Power
If By Channel is selected, use the cursor buttons to select Scan Band and Channel No. If By Frequency is selected, use the cursor buttons to select Frequency and Bandwidth. Highlight Search and press ok to start scanning. Newly found channels will be added to the channel list. 7.2.3 antenna power to select Installation, press ok or to advance. -
Page 19: Local Time Setting
7.3.2 Tv System Use this menu to match your receiver to your TV set. The following settings are available: Video Resolution: Use this option to select the video resolution of your TV screen. Options are: By Source (automatic detection of video resolution offered to the receiver), By Native TV (automatic detection of maximal resolution of TV screen), and manual selections 480i, 576i up to 1080p Please use a setting that matches your TV’s specifications. -
Page 20: Parental Lock
The receiver will display a list with 8 timers, followed by their respective status. Select the timer you wish to set or change with and press ok to proceed. The timer setup menu will now be displayed. The following settings are available: Timer Mode: Choose between Off (Timer inactive), Once, Daily (Timer will be executed every day, same time) or Weekly (Timer will be executed every week, same... -
Page 21: Tools
7.4 Tools Press menu in viewing mode to enter the Main Menu. Select the Tools submenu with and press ok or to enter. to highlight the submenu of choice and press ok proceed. Press eXIT to leave. 7.4.1 Information This submenu shows receiver specific information such as hardware version and software version. It also displays our web address www.thomsonstb.net . -
Page 22: Games
After a few seconds, the receiver asks: “Are you sure to burn flash?”. Select Yes to finalize the upgrade or No to quit without upgrading. If, after a software upgrade, the receiver should behave in an unexpected way, noTe: please perform a factory reset as well. See chapter 7.4.2. After an update the receiver restarts automatically. - Page 23 video: Press the Info button to set repeat mode. The options are repeat folder Info: folder icon/repeat once 1 or no repetition (no icon shown). During the playback of a movie with external subtitles, press 1 to enter the subtitle menu. In this menu you can select size and colours of your preference.
- Page 24 Warning: Please make a backup copy of all data you wish to keep before entering the HDD Format menu. THOMSON cannot be held responsible for loss of data from USB devices used with this receiver. Press ok to proceed, select FAT or Cancel, or press eXIT to leave without formatting.
-
Page 25: Troubleshooting
Step to: 30 sec to 30 min. Set the time step you like to jump forward by pressing 4 during playback of recorded files. This will only work when the info banner is displayed on screen. If it is not, press Info. Time Shift to Record: If set to On the timeshifted part will be included in your recording when you start to record the current programme. -
Page 26: Technical Specifications
problem possible cause What to do Scrambled channel Channel is scrambled Select alternative channel Message No response to remote Receiver off Plug in and turn on plug control Remote not aimed correctly Aim remote at front panel Front panel obstructed Check for obstructions Remote batteries exhausted Replace remote batteries... - Page 27 MP3 and OGG* Picture view: BMP and JPEG* *THOMSON cannot guarantee the playback of all files although extensions are listed, as it depends on codec used, data bit rate and resolution (all MPEG codec formats are supported). Connectors ANT IN - IEC Female...