
Related Manuals for Denon DN-500BD


Summary of Contents for Denon DN-500BD
-
Page 1: User Guide
User Guide English ( 3 – 28 ) Guía del usuario Español ( 29 – 54 ) Guide d’utilisation Français ( 55 – 80 ) Guida per l’uso Italiano ( 81 – 106 ) Benutzerhandbuch Deutsch ( 107 – 132 ) Appendix English ( 133 –135 ) -
Page 3: Box Contents
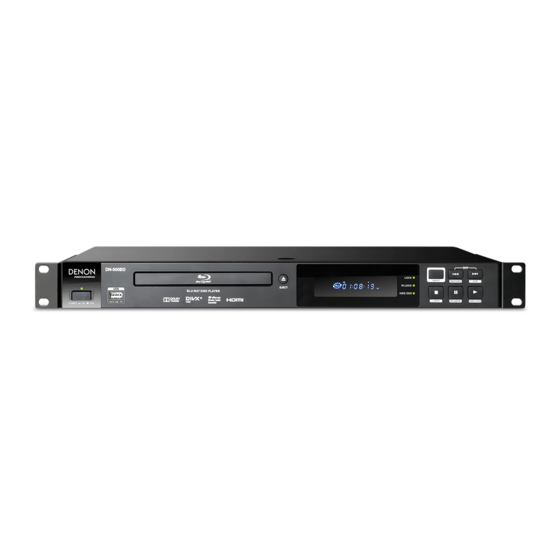
User Guide (English) Introduction Box Contents Support DN-500BD Rack Ears & Screws For the latest information about this product (system requirements, compatibility information, etc.) and Power Cable User Guide product registration, visit denonpro.com. Remote Control Safety & Warranty Manual Safety Instructions Please also see the included Safety &... - Page 4 1112 13 1. Power: Press this button to turn DN-500BD on/off. The light above the button will be red when it is off or green when it is on. Make sure the AC In is properly connected to a power outlet. Do not turn the unit off during media playback—doing so could damage your media.
-
Page 5: Rear Panel
6. LAN Port: This input lets you connect a host device (usually a computer) to DN-500BD. You can use the host device to control DN-500BD via commands sent from it. Alternatively, use this connection to access the internet. -
Page 6: Remote Control
1. Power ( ): Press this button to turn DN-500BD on/off. The light above the button on DN-500BD will be red when it is off or green when it is on. Make sure the AC In is properly connected to a power outlet. Do not turn the unit off during media playback—doing so could damage your media. -
Page 7: Battery Usage
22. Audio: Press this button during video playback to show current audio setting in the upper-left corner of the screen. Each press after that will select the next available setting. The available settings depend on the supported audio configurations of your video. For example, a video file may let you select Stereo, Mono, Left, or Right, while a Blu-ray Disc may let you select DTS-HD MA (Master Audio) or Dolby Digital in various languages. - Page 8 Not all of these steps may apply to your specific audio/video setup, but you will need to do Steps 1 and 5 at the very least. 1. Connect DN-500BD to your TV monitor or display by doing one of the following: • Use an HDMI cable to connect the HDMI Output to the HDMI input of your TV monitor or display.
-
Page 9: Initial Wizard
Page 5. If you do not want to use that aspect ratio, press Skip Back ( ) to return to the previous page and select a different one. 8. On Page 6, press OK to view the Home screen and start using DN-500BD, or press Skip Back ( to return to the previous page. -
Page 10: Operation
1. Press Eject ( ) on DN-500BD or the remote control to open the disc tray. 2. Insert a disc into the disc tray, and press Eject ( ) on DN-500BD or the remote control again to close it. The display will show LoAd when the disc is loading and then bdnU when the disc is loaded. -
Page 11: Additional Functions
You can do this up to 5 times before it returns to normal playback speed. To resume playback, press Play ( ) on DN-500BD or the remote control. To skip to the next chapter, press Skip Forward ( ) on DN-500BD or the remote control. - Page 12 To close the Information panel, press Info. (If the panel does not close, press OK once and then press Info.) A bookmark is a specific location in a video that is stored in DN-500BD’s memory. You can set up to 12 bookmarks and then jump to those locations directly, saving you the time of scanning through the video later.
-
Page 13: Playing Audio Discs
1. Press Eject ( ) on DN-500BD or the remote control to open the disc tray. 2. Insert an audio CD into the disc tray, and press Eject ( ) on DN-500BD or the remote control again to close it. (The CD must be properly finalized.) The display will show LoAd when the disc is loading and then Cd when the CD is loaded. - Page 14 2. Set the desired ending point by pressing A-B on the remote control again, or press Shift and Skip Forward ( ) on DN-500BD again. A-B will appear on the screen, and the loop will start and repeat continuously. 3. To stop the loop, press A-B on the remote once more, or press Shift and Skip Forward ( ) on DN- 500BD once more.
- Page 15 2. Do any of the following in the Program page: • At any time, press Play ( ) on DN-500BD or the remote control to start playing the Program. • At any time, press Return on the remote control to exit the Program page. This will clear all slots of the Program.
-
Page 16: Playing Files (Video, Audio, Or Picture)
• Press Home to return to the Home screen. While using the Media Center, you cannot use any buttons (on DN-500BD or the remote control) other than the ones described above. To stop playback, press Stop () on DN-500BD or the remote control. - Page 17 You can do this up to 5 times before it returns to normal playback speed. To resume playback, press Play ( ) on DN-500BD or the remote control. While viewing pictures, these buttons let you change the speed of the slide show (Slow, Middle, or Fast).
- Page 18 3. Select the folder for the desired file type: Photo, Music, or Video. 4. Select the file from which you want to start playback, and then press Play ( ) on DN-500BD or the remote control, or press OK on the remote control. The playlist will start playing.
-
Page 19: Adjusting The Sound
Adjusting the Picture To change the picture resolution, press HDMI on the remote control. Each press will select the next available resolution: Auto (DN-500BD will detect the optimal resolution automatically), 480i/576i, 480p/576p, 720p, 1080i, or 1080p. Alternatively, change the resolution in the Setting menu. See Adjusting the Settings to learn how to do this. -
Page 20: Other Features
This helps prevent accidental changes to playback. To enable/disable the IR Lock feature, press and hold Shift and then press Pause on DN-500BD’s front panel. When IR Lock is enabled, the IR Lock light (to the right of the display) will turn on. - Page 21 When you start playing that disc again, you can choose to start from that point or from the beginning of the disc. DN-500BD can do this for up to 5 discs, replacing the oldest one if it needs to remember a new one. When set to Off, this feature is disabled.
- Page 22 Important: This option applies only to the HDMI output at a 1080p resolution. o DVD 24p Conversion: When set to On, DN-500BD will convert the frame rate of a 1080p DVD video playing at 24 Hz to 60 Hz (for locations using the NTSC standard) or 50 Hz (for locations using the PAL standard).
- Page 23 Dynamic Range: When set to On, DN-500BD will apply some compression to smooth out the high and low volume levels of the audio. When set to Off, DN-500BD will not use any compression. When set to Auto, DN-500BD will use the compression specified by the Blu- ray Disc being played (for other discs, there will be no compression).
- Page 24 • Setting o Interface: Select how DN-500BD will access the internet: Ethernet (the LAN port must be connected to your Ethernet connection) or Wireless (DN-500BD will connect to your wireless router). When you change this setting, you will be asked if you want to continue, which terminates your current connection.
- Page 25 Proxy Setting: When set to Disable, DN-500BD will not use a proxy server. When set to Enable, DN-500BD will use a proxy server with the information in the Proxy Host and Proxy Port windows.
- Page 26 Options The Options menu lets you change certain settings during playback without having to enter the Setting menu. The menu will appear on the left side of the screen. The available Options will vary based on the kind of media you are currently using: DVD or Blu-ray Disc (see BDMV Options below), video file (see Video Options...
- Page 27 Video Options • File: The number on the left is the currently playing video file, which you can change. The number on the right is the total number of video files in the folder. • Title (if available): The number on the left is the currently playing title, which you can change. The number on the right is the total number of titles.
- Page 28 Picture File Options • File: The number on the left is the currently shown picture file, which you can change. The number on the right is the total number of picture files in the folder. • Mode: Use this to select a playback mode: Normal, Random, or Shuffle. •...
-
Page 29: Technical Specifications
Appendix (English) Technical Specifications All specifications are subject to change without notice. Digital System Digital media player System (Blu-ray Disc, DVD, CD, USB device [mass storage class]) AVCHD playback format Supported Disc Formats Blu-ray Disc BD25, BD50, BD-ROM, BD-R, BD-RE DVD, DVD+R, DVD-R, DVD+RW, DVD-RW CD, CD-R, CD-RW, DTS Music Disc (DTS Audio CD, 5.1 Music Disc), HDCD, Super Video CD (SVCD),... -
Page 30: Other / General
Audio Analog Outputs Output Level : +4 dBu = +1.786 dBV (balanced XLR) Output Level : +6 dBV (unbalanced RCA) : 0.5V, 75 Ω Digital Output Output Level (coaxial) Signal Format: AES/EBU Surround Audio DTS-Master Audio, DTS-HD High Resolution Audio, DTS Digital Surround, Dolby TrueHD, Dolby Digital (AC-3), Dolby Digital Plus (7.1ch) 20 Hz –... -
Page 31: Trademarks And Licenses
Trademarks and Licenses Denon is a trademark of D&M Holdings Inc., registered in the U.S. and other countries. Blu-ray™, Blu-ray Disc™, and the logo are trademarks of the Blu-ray Disc Association. Dolby and the double-D symbol are registered trademarks of Dolby Laboratories. - Page 32 denonpro.com Manual Version 1.3...