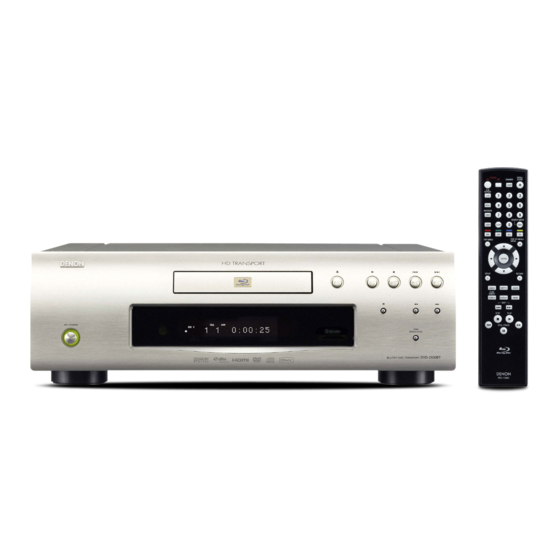
Denon DVD-2500BT Service Manual
Blu-ray disc/dvd video transport
Hide thumbs
Also See for DVD-2500BT:
- Operating instructions manual (42 pages) ,
- Quick start manual (3 pages) ,
- Specifications (49 pages)
Table of Contents
Advertisement
MODEL
DVD-2500BT
●
For purposes of improvement, specifications and
design are subject to change without notice.
●
Please use this service manual with referring to the
operating instructions without fail.
●
Some illustrations using in this service manual are
slightly different from the actual set.
SERVICE MANUAL
BLU-RAY DISC/DVD VIDEO TRANSPORT
e
Denon Brand Company, D&M Holdings lnc.
JP
E3
E2
E2R
注 意
サービスをおこなう前に、このサービスマニュアル
を必ずお読みください。本機は、火災、感電、けが
などに対する安全性を確保するために、さまざまな
配慮をおこなっており、また法的には「電気用品安
全法」にもとづき、所定の許可を得て製造されてお
ります。従ってサービスをおこなう際は、これらの
安全性が維持されるよう、このサービスマニュアル
に記載されている注意事項を必ずお守りください。
本機の仕様は性能改良のため、予告なく変更すること
●
があります。
補修用性能部品の保有期間は、製造打切後 8 年です。
●
修理の際は、必ず取扱説明書を参照の上、作業を行っ
●
てください。
本文中に使用しているイラストは、説明の都合上現物
●
と多少異なる場合があります。
Ver. 2
Please refer to the
MODIFICATION NOTICE.
EK
E2A E1C E1K
X0393 V.02 DE/CDM 0808
Advertisement
Table of Contents

Related Manuals for Denon DVD-2500BT


Summary of Contents for Denon DVD-2500BT
- Page 1 Please use this service manual with referring to the 修理の際は、必ず取扱説明書を参照の上、作業を行っ ● operating instructions without fail. てください。 ● Some illustrations using in this service manual are 本文中に使用しているイラストは、説明の都合上現物 ● slightly different from the actual set. と多少異なる場合があります。 Denon Brand Company, D&M Holdings lnc. X0393 V.02 DE/CDM 0808...
-
Page 2: Laser Radiation
DVD-2500BT... - Page 3 DIMENSION DVD-2500BT...
-
Page 4: Wire Arrangement
If wire bundles are untied or moved to perform adjustment or parts replacement etc., be sure to rearrange them neatly as they were originally bundled or placed afterward. Otherwise, incorrect arrangement can be a cause of noise generation. Wire arrangement viewed from the top DVD-2500BT... -
Page 5: Specifications
SPECIFICATIONS DVD-2500BT... -
Page 6: Laser Beam Safety Precautions
CAUTION: Use of controls and adjustments, or doing procedures other than those specified herein, may result in hazardous radiation exposure. Drive Mechanism Assembly Laser Beam Radiation Laser Pickup Turntable Location: Inside Top of BD mechanism. B1.5 Mechanism Assembly DVD-2500BT... - Page 7 CAUTION: Use of controls and adjustments, or doing procedures other than those specified herein, may result in hazardous radiation exposure. Drive Mechanism Assembly Laser Beam Radiation Laser Pickup Turntable CAUTION LASER RADIATION WHEN OPEN. DO NOT STARE INTO BEAM. Location: Top of BD mechanism. B1.0 Mechanism Assembly DVD-2500BT...
-
Page 8: Safety Check After Servicing
RF or Connected in i≤2mA DC Antenna terminals parallel 230 V 50kΩ RES. i≤0.7mA AC Peak Connected in A/V Input, Output i≤2mA DC parallel Note: This table is unofficial and for reference only. Be sure to confirm the precise values. DVD-2500BT... -
Page 9: Standard Notes For Servicing
2. Do not supply hot air to the chip parts around the flat pack-IC for over 6 seconds because damage to the chip parts may occur. Put masking tape around the flat pack-IC to protect other parts from Connector damage. (Fig. S-1-2) * Be careful to avoid a short circuit. DVD-2500BT... - Page 10 CBA; when removing entire flat pack-IC, first apply soldering iron to center of the flat pack-IC and heat up. Then remove (glue will be melted). (Fig. S-1-6) 4. Release the flat pack-IC from the CBA using tweezers. (Fig. S-1-6) DVD-2500BT...
-
Page 11: Installation
Pin 1 of the Flat Pack-IC is indicated by a " " mark. Fig. S-1-7 Hot Air Blower Presolder Iron Wire Soldering Iron To Solid Mounting Point Fig. S-1-5 Flat Pack-IC Fig. S-1-8 Fine Tip Soldering Iron Flat Pack-IC Tweezers Fig. S-1-6 DVD-2500BT... -
Page 12: Instructions For Handling Semi- Conductors
Because the static electricity charge on clothing will not escape through the body grounding band, be careful to avoid contacting semi-conductors with your clothing. <Incorrect> <Correct> Grounding Band 1MΩ 1MΩ Conductive Sheet or Copper Plate DVD-2500BT... -
Page 13: Cabinet Disassembly Instructions
[15] Power Supply CBA [15] [16] AV CBA D8 7(S-26), *CN2503 [10] [11] [16] AV CBA [12] [13] [14] [16] [17] Microcontro D9 4(S-27) Sub Microcontroller ller CBA [17] [17] [18] Pedestal D9 3(S-28) *About *[9](S-14), remove only (S-14) of Rear Panel. DVD-2500BT... - Page 14 Therefore, do not disassemble it. Replace the FE (S-5) Main CBA & BD Mechanism Assembly as a unit. (S-2) (S-4) (S-1) (L-1) CN2001 (S-2) (L-2) (S-1) (L-1) [3] Tray Panel CN4002 Fig. D3 (S-1) (S-1) [1] Top Cover (S-1) Fig. D1 DVD-2500BT...
-
Page 15: Front Bracket
(S-12) (S-11) (S-15) (S-20) [12] Fan Holder (S-13) (S-14) [9] Rear Panel [13] Motor DC Fan (S-15) (S-10) (S-19) (S-21) (S-15) (S-20) CN1003 (S-19) (S-19) [11] FE Main CBA & BD Mechanism Assembly CN2500 CN2601 Fig. D5 Fig. D7 DVD-2500BT... -
Page 16: How To Eject Manually
1. Remove the Top Cover and the Top Panel. 2. Insert a screwdriver, etc. into the Hole A straightly so that the Portion A is pushed. 3. Pull the tray out manually and remove a disc. Screwdriver, Portion A hexagon wrench Hole A DVD-2500BT... - Page 17 Cautions concerning the structure The chassis touches the patterns on the circuit board at 6 points, but these patterns are all ground patterns, so performance is not affected. View from the bottom DVD-2500BT...
-
Page 18: How To Initialize The Blu-Ray Disc Player
" ******* " differ depending on the models. Version Info Model Name : ******* Version : *.*** Region : *-* EEPROM CLEAR : OK EEPROM CLEAR <STOP> EXIT <POWER> Fig. b Fig. c 4. To exit this mode, press [POWER OFF] button. DVD-2500BT... -
Page 19: Firmware Renewal Mode
************A*.bin Version Info (*1) Now Loading... Model Name : ******* Version : *.*** EXIT : POWER Region : *-* Fig. c Programming Mode Screen (Example) EEPROM CLEAR <STOP> EXIT <POWER> Fig. d VFD in Programming Mode (Example) Fig. g DVD-2500BT... -
Page 20: How To Verify The Firmware Version
3. To exit this mode, press [POWER OFF] button. 10. To exit this mode, press [POWER OFF] button. The region setting can be changed up to five times (including factory preset). If you exceed the region change limit, DVD playback images will be affected by noise. DVD-2500BT... -
Page 21: Service Mode
Surround Rch Surround Back Surround Back Surround Lch Sub woofer Even Setting even parity Parity Setting RS-232C Setting non parity Version Up Mode SD Card Test Default Setting Default setting Note: If some test are performed continuously, any erro DVD-2500BT... - Page 22 Note:Press the number key to select items. Or, press the cursor button (up/down) to select items and press [ENTER] button. INDICATION DESCRIPTION REMARK Model Name Model Name E5J***D, etc. Region BD region - DVD region A-1, etc. Release Ver. Release version D.jpp, etc. DVD-2500BT...
-
Page 23: Tray Lock Mode
3. To exit this mode, press [SETUP], [TOP MENU], [3], [AUDIO], [0] and [SETUP] buttons on the remote control unit in that order. "Trade Off" will appear in the upper right corner on the screen, and on VFD for 2 seconds. Fig.b VFD DVD-2500BT... -
Page 24: Remote Lock Mode
Fig.b VFD a. If [STILL/PAUSE] button is not pressed for 5 seconds or any other button is pressed within 5 seconds, the unit will be released from "Remote Lock Mode". b. When initializing, set the Remote Lock Mode "off". DVD-2500BT... -
Page 25: Troubleshooting
Check EV+3.3V line and service it if defective. Is 3.3V voltage supplied to the emitter of Q2504? Replace Q2504. Is 3.3V voltage outputted to collector of Q2504? Check Q2503 and their periphery, and service it if defective. DVD-2500BT... - Page 26 Check D1016, C1020 and their periphery circuit, and service it if defective. Replace IC2601. FLOW CHART NO.10 P-ON+3.3V is not outputted. Is 5V voltage supplied to Pin(1) of IC2600? Check D1013, D1014, D1021, C1019, C1025, and their periphery, and service it if defective. Replace IC2600. DVD-2500BT...
- Page 27 Is the "H" pulse inputted to the Pin(27) of IC2000? Check the line between the RS3000 (remote control receiver) and the Pin(27) of IC2000, and service it if detective. Replace IC2000. DVD-2500BT...
- Page 28 [No Disc] indicated. Picture does not appear normally. Audio is not outputted normally. Replace the BE Main CBA Unit. No improvement can be found. Original BE Main CBA Unit is poor. Replace the FE Main CBA & BD Mechanism Assembly. DVD-2500BT...
- Page 29 1. Remove the Top Cover, Top Panel, Tray Panel and BE Main CBA Unit. 2. Disconnect Connectors and replace the FE Main CBA & BD Mechanism Assembly. Refer to CABINET DISASSEMBLY INSTRUCTIONS. FE Main CBA & BD Mechanism Assembly DVD-2500BT...
-
Page 30: Firmware Update Procedure
E5E**UD_dummy_.bin Fig. g VFD upon Finishing the Programming Mode (Example) E5H**UD*****A1.bin At this time, no button is available. 8. Unplug the AC cord from the AC outlet. Then plug it EXIT : POWER again. Fig. c Firmware Select Screen DVD-2500BT... - Page 31 Sending files into the memory. When BD-player finishes Reading... reading data, it will open a tray automatically. It has finished reading data. Remove the Please remove the updata disc, Disc and close the tray. DVD-2500BT...
-
Page 32: Block Diagrams
BLOCK DIAGRAMS System Control Block Diagram DVD-2500BT... - Page 33 Digital Signal Process 1 Block Diagram DVD-2500BT...
- Page 34 Digital Signal Process 2 Block Diagram DVD-2500BT...
-
Page 35: Hdmi Block Diagram
HDMI Block Diagram DVD-2500BT... -
Page 36: Power Supply Block Diagram
Power Supply Block Diagram DVD-2500BT... -
Page 37: Schematic Diagrams / Cba's And Test Points
IC’s, transistors, resistors, switches, and fuses are identified by four digits. The first two digits are not shown for each component. In each block of the diagram, there is a note such as shown below to indicate these abbreviated two digits. DVD-2500BT... - Page 38 : Indicates a test point with a jumper wire across a hole in the PCB. : Used to indicate a test point with a component lead on foil side. : Used to indicate a test point with no test pin. : Used to indicate a test point with a test pin. DVD-2500BT...
- Page 39 AV Schematic Diagram DVD-2500BT...
- Page 40 Sub Microcontroller Schematic Diagram DVD-2500BT...
- Page 41 AC plug to the AC power supply. replace only with the same type fuse. hot GND as a common terminal. Otherwise it may cause some components in the power supply circuit to fail. DVD-2500BT...
- Page 42 (h1) (h1) (h1) (h1) (h1) (h1) (h1) (h1) (h1) (h1) DVD VCD TrueHD MSTR SD USB NET V S S WMA AAC HDCD ANGLE PROG RAND L. P. MPEG D.MIX (h1) (h1) PROG RAND HDCD ANGLE MPEG D.MIX (2G~14G) DVD-2500BT...
- Page 43 RS232C Schematic Diagram SD Schematic Diagram E5J01SCRS E5J01SCSD DVD-2500BT...
- Page 44 FE Main 1/5 Schematic Diagram 1 NOTE: The order of pins shown in this diagram is different from that of actual IC001. IC001 is divided into four and shown as IC001 (1/4) ~ IC001 (4/4) in this FE Main Schematic Diagram Section. DVD-2500BT...
- Page 45 FE Main 2/5 Schematic Diagram 1 NOTE: The order of pins shown in this diagram is different from that of actual IC001. IC001 is divided into four and shown as IC001 (1/4) ~ IC001 (4/4) in this FE Main Schematic Diagram Section. DVD-2500BT...
- Page 46 FE Main 3/5 Schematic Diagram DVD-2500BT...
- Page 47 FE Main 4/5 Schematic Diagram 1 NOTE: The order of pins shown in this diagram is different from that of actual IC001. IC001 is divided into four and shown as IC001 (1/4) ~ IC001 (4/4) in this FE Main Schematic Diagram Section. DVD-2500BT...
- Page 48 FE Main 5/5 Schematic Diagram 1 NOTE: The order of pins shown in this diagram is different from that of actual IC001. IC001 is divided into four and shown as IC001 (1/4) ~ IC001 (4/4) in this FE Main Schematic Diagram Section. DVD-2500BT...
- Page 49 BE Main 1/9 Schematic Diagram 2 NOTE: The order of pins shown in this diagram is different from that of actual IC6001. IC6001 is divided into eight and shown as IC6001 (1/8) ~ IC6001 (8/8) in this BE Main Schematic Diagram Section. DVD-2500BT...
- Page 50 BE Main 2/9 Schematic Diagram 2 NOTE: The order of pins shown in this diagram is different from that of actual IC6001. IC6001 is divided into eight and shown as IC6001 (1/8) ~ IC6001 (8/8) in this BE Main Schematic Diagram Section. DVD-2500BT...
- Page 51 BE Main 3/9 Schematic Diagram 2 NOTE: The order of pins shown in this diagram is different from that of actual IC6001. IC6001 is divided into eight and shown as IC6001 (1/8) ~ IC6001 (8/8) in this BE Main Schematic Diagram Section. DVD-2500BT...
- Page 52 BE Main 4/9 Schematic Diagram 2 NOTE: The order of pins shown in this diagram is different from that of actual IC6001. IC6001 is divided into eight and shown as IC6001 (1/8) ~ IC6001 (8/8) in this BE Main Schematic Diagram Section. DVD-2500BT...
- Page 53 BE Main 5/9 Schematic Diagram 2 NOTE: The order of pins shown in this diagram is different from that of actual IC6001. IC6001 is divided into eight and shown as IC6001 (1/8) ~ IC6001 (8/8) in this BE Main Schematic Diagram Section. DVD-2500BT...
- Page 54 BE Main 6/9 Schematic Diagram 2 NOTE: The order of pins shown in this diagram is different from that of actual IC6001. IC6001 is divided into eight and shown as IC6001 (1/8) ~ IC6001 (8/8) in this BE Main Schematic Diagram Section. DVD-2500BT...
- Page 55 BE Main 7/9 Schematic Diagram 2 NOTE: The order of pins shown in this diagram is different from that of actual IC6001. IC6001 is divided into eight and shown as IC6001 (1/8) ~ IC6001 (8/8) in this BE Main Schematic Diagram Section. DVD-2500BT...
- Page 56 BE Main 8/9 Schematic Diagram 2 NOTE: The order of pins shown in this diagram is different from that of actual IC6001. IC6001 is divided into eight and shown as IC6001 (1/8) ~ IC6001 (8/8) in this BE Main Schematic Diagram Section. DVD-2500BT...
- Page 57 BE Main 9/9 Schematic Diagram DVD-2500BT...
-
Page 58: Wiring Diagram
E: Emitter RS232C-PW-CONT HW(-) P-ON+3.3V P-ON+3.3V RS232C-RXD HB(-) C: Collector FL-SDA RS232C-TXD FL-SCL EV+5V B: Base FL-CS P-ON+3.3V R: Reference FL-RESET LDSNS2 REMOTE LDSNS1 G: Gate KEY-1 KEY-2 D: Drain INLIMIT 1 2 3 LOAD(+) S: Source LED-R LOAD(-) LED-G DVD-2500BT... - Page 59 ---MEMO--- DVD-2500BT...
-
Page 60: Exploded View
2L023 2L028 FE MAIN CBA & BD MECHANISM ASSEMBLY 2L029 2L028 POWER SW CBA 2L019 SUB MICROCONTROLLER CBA 2L018 2L029 2L064 2L064 CN4003 2L018 2L019 2L018 2L040 2L064 2L018 2L020 2L020 2L040 2L040 SD CBA 2L040 2L064 FRONT CBA DVD-2500BT... -
Page 61: Parts List Of Exploded View
SP, SR model 1VM223921 A4 9H2406000700D REAR PANEL E5J01ED 1VM225698 A4 9H2406000980D REAR PANEL 1VM226117(DVD2500BTBKE2R) 1VM226117 BOTTOM PANEL(LOW) E5E01UD 1VM225238 A6 00D1040334007 DENON FOOT E5E00UD 1VM426219 A7 00D4611050005 FOOT RUBBER(DENON) E5E00UD 1VM426239 A8 00D9H26000948 TRAY PANEL ASSEMBLY(BLACK) E5E00UD BK model 1VM223619D... - Page 62 B-TIGHT SCREW M3X8 E5E00UD 1VM428563 2L080 S-TIGHT SCREW M3X6 E5E00UD 1VM428564 2L081 S-TIGHT SCREW M3X6 E5E00UD 1VM428564 2L082 SCREW TAP TIGHT M3X5 BIND HEAD+BLK NI BK model GBHC3050 2L082 SCREW C-TIGHT M3X5 BIND HEAD + SP, SR model GBCC3050 DVD-2500BT...
- Page 63 PACKING Lower Side Upper Side DVD-2500BT...
-
Page 64: Parts List Of Packing & Accessories
ACCESSORY BAG E5795ED 0VM416059 DRY BATTERY R6P/2S XB0M451T0001 DRY BATTERY R6UW/2S XB0M311MS001 DRY BATTERY ES-GR6M-C XB0M571GLP01 SERVICE CENTER SHEET E8700UD 1VM425536C X15 9H2611000770S AC CORD W/O A GND WIRE CEE/1500/NO/BLACK WAE0152LTE02 X15 9H2611000780S CORD W/O A GND WIRE CEE/162/NO/BLACK WAE0162VLX01 DVD-2500BT...