Table of Contents
Advertisement
Quick Links
Advertisement
Table of Contents

Related Manuals for Fujitsu Fi-718PR


Summary of Contents for Fujitsu Fi-718PR
- Page 1 P3PC-4322-01ENZ0 fi-718PR Imprinter Operator's Guide...
-
Page 2: Table Of Contents
Contents Introduction ..............................1 1. Preparations ............................2 1.1. Checking the Package Contents ......................... 2 1.2. Names of Component Parts ......................... 2 2. Installation ............................... 3 2.1. Installing the Imprinter ..........................3 2.2. Loading the Print Cartridge ......................... 4 2.3. Test Print ............................... 5 3. -
Page 3: Introduction
Introduction Thank you for purchasing the fi-718PR Imprinter option Windows 8 (*1) ® Windows 8 (32/64-bit) (hereinafter referred to as the “Imprinter”) for the ® Windows 8 Pro (32/64-bit) fi-7160/fi-7180 Color Image Scanner. ® Windows 8 Enterprise (32/64-bit) This guide explains how to install, connect, operate, and take daily care of the imprinter. -
Page 4: Preparations
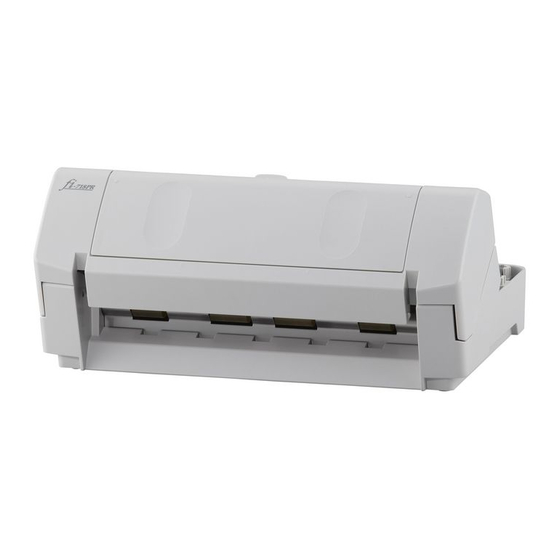
● [ ] button/[ ] button ● [Scan/Enter] button If any of the components are missing, contact your ● [Stop/Clear] button ● FUJITSU scanner dealer or an authorized FUJITSU scanner [Power] button service provider. Stacker 1.2. Names of Component Parts <Imprinter Unit>... -
Page 5: Installation
Raise the locks (x2) on the back of the scanner. Carefully pull the stacker out. 3) Once the left arm of the stacker has been released from the scanner, remove the right arm. ATTENTION You must remove the stacker before installing the imprinter. fi-718PR Imprinter Operator’s Guide | 3... -
Page 6: Loading The Print Cartridge
Turn the locks inwards. 2.2. Loading the Print Cartridge Load the print cartridge in the following procedure. ATTENTION When installing or replacing the print cartridge, be careful not to insert it out of place. Turn off the scanner. Open the print cartridge cover. Connect the EXT cable to the connector on the back of the scanner. -
Page 7: Test Print
● Confirm that the print cartridge is positioned within the document width. Position the print cartridge holder along where the document will pass through. Press the [Menu] button. 10. Close the print cartridge cover. The [Settings Menu] screen is shown on the LCD. fi-718PR Imprinter Operator’s Guide | 5... - Page 8 ⑥ Select [3: Test Print] by pressing the [ ] or [ ] button, and press the [Scan/Enter] button. ⑤ ④ The [No. of Sheets Scanned] screen is shown on the LCD. ③ ATTENTION ② If the Imprinter is disconnected or not connected properly, [Cannot use this function because the Imprinter is not ①...
-
Page 9: Basic Operation
For Right-Edge Printing 3.2. How to Use the Paper Guides For Left-Edge Printing Use the paper guides to prevent paper jams due to curling of the edges, as shown below. Feed direction fi-718PR Imprinter Operator’s Guide | 7... -
Page 10: Print Setup
To Remove the Paper Guides> 3.3. Print Setup < Pressing and holding together with your fingers, as below, You can configure settings for the imprinter by using the lift up and pull away the guide. scanner driver’s setup dialog box. PaperStream IP (TWAIN) driver (Example) Configure the settings in [Imprinter] of the [Endorser] menu in standard mode. -
Page 11: Replacing The Print Cartridge
Remove the print cartridge. ATTENTION Note that when printing on the edge of the document, the print cartridge may print outside the document depending on its print position. fi-718PR Imprinter Operator’s Guide | 9... -
Page 12: Removing Jammed Documents
Close the print cartridge cover. 3.5. Removing Jammed Documents When a paper jam occurs, remove the document in the following procedure. ATTENTION Do not use force to pull out the jammed document. Remove all documents from the ADF paper chute (feeder). - Page 13 ● Some ink will be consumed each time you turn on the scanner, even when the imprinter is not printing. ● To prevent damage, do not transport the imprinter when the scanner is installed. fi-718PR Imprinter Operator’s Guide | 11...
-
Page 14: Daily Care
4. Daily Care 4.1. Cleaning the Print Cartridge 4.2. Cleaning the Imprinter Poor quality prints may occur due to blocked ink emission After frequent use, the waste ink will begin to accumulate holes in the nozzle plate of the print cartridge. Leaving the on the base surface of the print cartridge holder, which can imprinter unused for a long period of time can also cause soil printouts. -
Page 15: Cleaning The Rollers
ATTENTION *1: For information about the cleaning materials, contact your FUJITSU scanner dealer or an authorized FUJITSU scanner When cleaning, be careful not to touch the metal wheels located behind the upper rollers in the Print section. -
Page 16: Error Messages
Check if the print cartridge is mounted correctly. If the problem persists, write down the displayed U6:B4 Print cartridge not installed error code and contact your FUJITSU scanner dealer or an authorized FUJITSU scanner service provider. Adjust the imprinting start position and the imprinter... -
Page 17: Specifications
Temperature: 10 to 35ºC (50 to 95 ºF), Humidity: 20 to 80% Consumable Print Cartridge (P/N: CA00050-0262) The printable number of characters: 4,000,000 characters (May decrease depending on the font selection) Replacement cycle : 4,000,000 characters or six months after opening fi-718PR Imprinter Operator’s Guide | 15...