Table of Contents
Advertisement
Advertisement
Table of Contents

Related Manuals for Motorola PRO5150


Summary of Contents for Motorola PRO5150
- Page 1 ™ PRO5150 Portable Radio PRO5150 User Guide...
-
Page 3: Table Of Contents
Sending a Call ..... 17 PRO5150™ Model....5 Receiving a Call . -
Page 4: Computer Software Copyrights
Scan Channel Discovery Alert ..22 The Motorola products described in this manual Phone......23... -
Page 5: Safety
The battery was designed safe usage contained in the specifically to be used with a Motorola charger. C a u t i o n Product Safety and RF Charging in non-Motorola equipment may... - Page 6 Notes English...
-
Page 7: Radio Overview
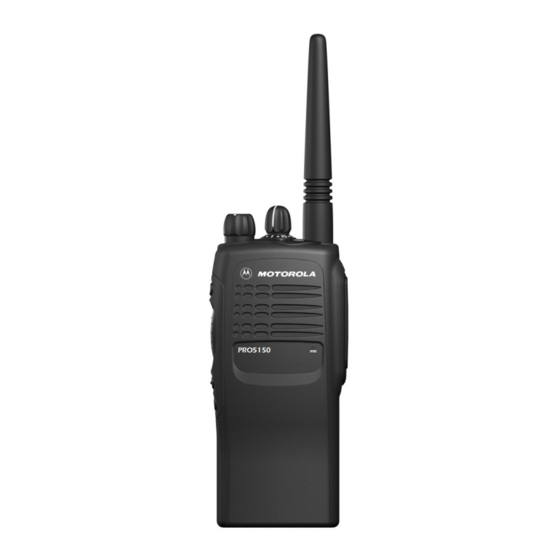
PARTS OF THE RADIO RADIO OVERVIEW ™ PRO5150 Model Channel Selector Knob Top Button (TB) (programmable) On/Off/Volume Knob LED Indicator Side Button 1 (A) (programmable) Microphone Push-to-Talk (PTT) Front Buttons (optional) Button (P1, P2, and P3 are programmable) Side Button 2 (B) -
Page 8: On/Off/Volume Knob
On/Off/Volume Knob Each button can be programmed to select up to two features, depending on the type of Turns the radio on or off, and adjusts the button press: radio’s volume. • short press—quickly pressing and Channel Selector Knob releasing the programmable buttons, or Switches the radio to different channels. - Page 9 Function Short Press Long Press Hold Down Page Button Emergency Initiate Emergency Cancel Emergency — (Top button only) siren. siren. Turn monitor Continually monitor Monitor — — function off. selected channel. Sound a tone for Volume Set — — adjusting radio volume. Check the battery’s Battery Gauge —...
-
Page 10: Push-To-Talk (Ptt) Button
Function Short Press Long Press Hold Down Page Button Option Board Toggle between activating and deactivating — — † (if one is installed) the option board. † Phone Access Phone Mode. — † Speed Dial Access your phone list. — †... -
Page 11: Audio Indicators For Programmable
AUDIO INDICATORS FOR PROGRAMMABLE BUTTONS High-Low Tone Low-High Tone Some programmable buttons use tones to indicate one of two modes: Button High-Low Tone Low-High Tone Scan Start scan Stop scan Low power High power Power level selected selected Squelch Tight squelch Normal squelch Option Board Activated... - Page 12 Notes English...
-
Page 13: Getting Started
GETTING STARTED LED color Status No LED Indication Battery inserted incorrectly. BATTERY INFORMATION Single Green Flash Successful charger power-up. Charging the Battery Flashing Red* Battery unchargeable or not making proper contact. If a battery is new, or its charge level is very low, you will need to charge it before you can Steady Red Battery in rapid-charge mode. -
Page 14: Battery Charge Status
Battery Charge Status Battery chargers will only charge the Motorola- authorized batteries listed below; other You can check battery charge status by batteries may not charge. holding down the preprogrammed Battery Gauge button (see page 7). The charge status Part No. -
Page 15: Attaching The Battery
Attaching the Battery Removing the Battery Battery Latches Fit the extensions at the bottom of the battery Turn off the radio (see page 16). into the bottom slots on the radio. Slide both battery latches downward. Press the top part of the battery toward the radio until you hear a click. -
Page 16: Accessory Information
ACCESSORY INFORMATION Removing the Antenna Attaching the Antenna Turn the antenna counterclockwise to remove Turn the antenna clockwise to attach it. English... -
Page 17: Attaching The Belt Clip
Attaching the Belt Clip Removing the Belt Clip Belt Clip Tab Align the grooves of the belt clip with those of Use a key to press the belt clip tab away from the battery. the battery. Press the belt clip downward until you hear a Slide the belt clip upward to remove it. -
Page 18: Attaching The Side Connector Cover
Attaching the Side Connector Cover TURNING THE RADIO ON OR OFF Antenna Loop Slot Thumbscrew Turn the On/Off/ Turn the On/Off/ Volume Control knob Volume Control knob Place the loop (attached to the side connector counterclockwise until clockwise. cover) over the antenna; then slide it you hear a click. -
Page 19: Adjusting The Volume
ADJUSTING THE VOLUME SENDING A CALL button Hold down the Volume Set or Monitor Turn your radio on. (see page 7); you will hear a continuous tone. Use the Channel Selector knob to select the Turn the On/Off/Volume Control knob to the desired channel. - Page 20 Notes English...
-
Page 21: Radio Calls
SOUNDING AN EMERGENCY SIREN RADIO CALLS When the orange Top button is pressed, your radio will sound a loud, piercing Emergency RECEIVING A SELECTIVE CALL Siren (see page 7), if programmed by your (16-channel models only) dealer (see page 6). When you receive a selective call: To stop the Emergency Siren, press the Emergency button again. -
Page 22: Repeater Or Talkaround Mode
REPEATER OR TALKAROUND Press the preprogrammed Squelch button (see page 7) to toggle between tight and MODE normal squelch. Talkaround Mode enables you to communicate SETTING THE POWER LEVEL with another radio when either: • the repeater is not operating Each channel in your radio has a predefined transmit power level that can be changed: –or–... -
Page 23: Scan
SCAN Priority Channel Scanning Sequence None specified Ch1 Ch2 Ch3 You can monitor multiple channels and receive Ch4 …Ch1 any calls that are transmitted on them. Depending on your radio model, either four or Channel 2 Ch2 Ch1 Ch2 Ch3 sixteen different channels can be programmed Ch2 Ch4 Ch2 …Ch1 into each scan list by the dealer. -
Page 24: Deleting A Nuisance Channel
DELETING A NUISANCE CHANNEL SCAN CHANNEL DISCOVERY ALERT If a channel continually generates unwanted calls This feature enables you to identify the last or noise (a “nuisance” channel), use the Scan channel monitored before scanning was button to temporarily delete the channel from the stopped. -
Page 25: Phone
PHONE You will hear a series of tones, indicating that an access code is being sent automatically. – or– If your radio has access to a telephone system, you can make a phone call. To do this, your Enter your access code using the keypad. radio must send an access code to a station When you hear a dial tone: that connects it to a phone line. - Page 26 Hold the radio in a vertical position with the microphone 1 to 2 inches (2.5 to 5 cm) away from your mouth. Press and hold the PTT button to talk; release it to listen. To end a phone call: Enter the deaccess code using the keypad. –...
-
Page 27: Warranty
Centers, will at no charge to the end user purchaser either repair or replace or reimburse Hereafter, PRO5150 Portable Units, as well as their the purchase price of the PRODUCT should it accessories, will be referred to as PRODUCTS or turn out to be defective during the warranty PRODUCT. - Page 28 When the PRODUCT is not used in Service Center. accordance with the operating instructions that accompany it. MOTOROLA disclaims liability with regard to II. WHAT THIS WARRANTY DOES NOT range, coverage, or operation of a system as COVER: a whole with relation to the PRODUCT.
- Page 29 Motorola de Colombia Diagonal 127A No. 17-64 Santafé de Bogotá For more information, please contact any of our D.C. – Colombia MOTOROLA Service Centers listed below, or Tel. (571) 615-5941 visit our web site at the following URL: http://www.motorola.com/radiosolutions Motorola do Brasil...
- Page 30 Notes: English...
-
Page 31: Accessories
Nylon Case, Standard Battery with Belt ACCESSORIES Loop HLN9703_ Nylon DTMF Case, Thin Battery with Belt Motorola offers a number of accessories to Loop enhance the productivity of your two-way HLN9704_ Nylon DTMF Case, Standard Battery with radio. Many of the available accessories are Belt Loop listed below. -
Page 32: Headsets
HEADSETS BATTERIES BDN6647_ Lightweight Headset, Single-Muff HNN9008_R Small NiMH, High-Capacity HMN9021_ Over-the-Head, Medium-Weight Headset, HNN9009_R Large NiMH, Ultra-High-Capacity Dual-Muff HNN9010_R Large NiMH, Ultra-High-Capacity FM HMN9022_ Behind-the-Head, Medium-Weight HNN9011_R Large NiCd, High-Capacity FM Headset, Dual-Muff HNN9012_R Large NiCd, High-Capacity HMN9787_ Headset with Boom Microphone HNN9013_R Slim Li-lon, High-Capacity REMOTE SPEAKER MICROPHONES... - Page 33 1. Turn Channel Selector knob to desired channel. ™ 2. Press PTT and speak clearly with mouth about 2.5 to 5 cm (1 to 2 inches) PRO5150 Quick Reference Card away from microphone. Record the functions for your radio’s programmable buttons in the table 3.
- Page 36 MOTOROLA, the Stylized M Logo, PRO5150, and Call Alert are registered in the U.S. Patent and Trademark Office. All other product or service names are the property of their respective owners. © Motorola, Inc. 2003. *HKLN4210A* HKLN4210A...