
Related Manuals for Samsung SW70X1

Summary of Contents for Samsung SW70X1
-
Page 1: Table Of Contents
WASHING MACHINE SW70X1(P) SW70X2(P) SW75X1S(P) SW75X2S(P) WASHING MACHINE CONTENTS 1. Precautions 2. Specifications 3. Features 4. Operating Instructions 5. Schematic and Wiring Diagrams 6. Disassembly and Reassembly 7. Troubleshooting 8. Exploded Views 9. Power Cord... -
Page 2: Precautions
Copyright ©Samsung Electronics Co., LTD. All right reserved. The information in this manual is subject to change without notice. 1. Precautions When performing trouble - shooting and part replacement during servicing note the following safety precautions. 1-1 Safety Precautions 1-1-1 Use Genuine Parts... -
Page 3: Specifications
2. Specifications Classifications Specifications Washing and Dehydrating Capacity 5.0 kg / 5.5 kg Washing Method Heavy duty rotation type (centripetal current) Standard Volume of Water High Level Medium Level 43 l Low Level 35 l Extra low level 28 l Applicable Volume of Water 145 l (high level of water) Rotation of the Pulsator... -
Page 4: Features
1. Adjust horizontally : First , Then . 2. If the thread is not within the limit, adjust the height of the legs. 2. Install the drain hose about 70~80cm above the ground (for pump model). SAMSUNG ELECTRONICS CO., LTD... - Page 5 3. Features 3-2-5 Connecting the water supply hose 1. Romove the adaptor from the 2. First, using a "+" type screwdriver, 3. Connect adaptor to the water tap water supply hose. loosen the three screws on the by firmly tightening the screws. adaptor.
-
Page 6: Operating Instructions
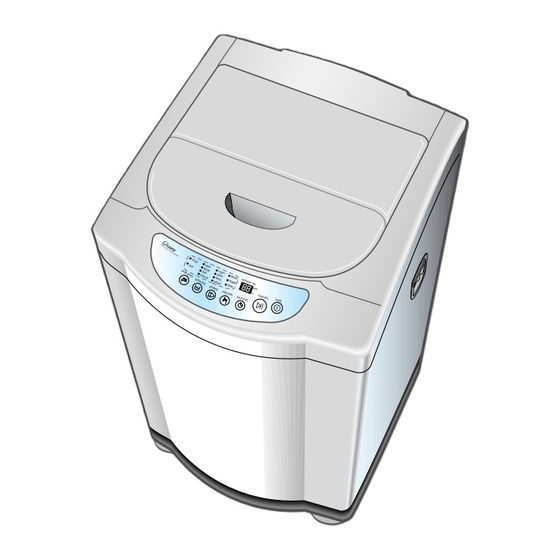
WATER SUPPLY HOSE (COLD) DETERGENT BOX DRAIN HOSE (Pump) DOUBLE FALL GUIDE POWER CORD BLEACH INLET SOUND ABSORPTION SPIN BASKET PANEL LINT FILTER MAGIC HAND PULSATOR FRONT GROUND LEAD CONTROL PANEL ADJUSTABLE LEGS WATER DRAIN HOSE SAMSUNG ELECTRONICS CO., LTD... -
Page 7: Control Panel
4. Operating Instructions 4-2 Control Panel WASH RINSE SPIN 4-2-1 Function Indicator Light 4-2-5 Water Supply (option) 1. In use indicated by a flashing symbol. 1. Press this button to select water temperature. 2. The light goes out at the end of the function. 2. -
Page 8: Water Supply
→ RINSE + SPIN →WASH→RINSE + SPIN connected. → ON → OFF → ON 2) sequence : 3. The beginning conditions are as follows when function key is selected. 3) After finishing operation, this key is automatically turned off. SAMSUNG ELECTRONICS CO., LTD... - Page 9 4. Operating Instructions 4-4 Description of Technical Points 4-4-1 Weight Recognizing Function 1. Weight recognizing function works first washing 3. If the water level does not reach to the water level operating before water is supplied, not in WOOL selected for 60minutes after starting water course and Manual function operation (Wash, supplying, the water supplying Error is displaying Rinse, Spin,...
- Page 10 TOTAL WASH RINSE 2 RINSE 1 SPIN TIME WATER FREQUENCY COURSE WATER INTER- WATER INTER- WATER INTER- LEVEL SOAK WASH DRAIN SPIN STOP RINSE DRAIN SPIN STOP RINSE DRAIN SPIN STOP SUPPLY MITTENT SUPPLY MITTENT SUPPLY MITTENT 50Hz FUZZY HIGH 1'30"...
- Page 11 TOTAL WASH RINSE 2 RINSE 1 SPIN TIME WATER FREQUENCY COURSE WATER INTER- WATER INTER- WATER INTER- LEVEL WASH DRAIN SPIN STOP RINSE DRAIN SPIN STOP RINSE DRAIN SPIN STOP SUPPLY MITTENT SUPPLY MITTENT SUPPLY MITTENT 50Hz WASH HIGH 23'00" MEDIUM 2'30"...
- Page 12 5. Schematic and Wiring Diagrams 5-2 PCB and Pattern Diagram WASHING MACHINE...
-
Page 13: Schematic And Wiring Diagrams
5. Schematic and Wiring Diagrams 5-1 Wiring Diagram SAMSUNG ELECTRONICS CO., LTD... -
Page 14: Disassembly And Reassembly
2. Reversal may cause a severe vibration that might rock the washing machine. Shape CASE-D BAR-S SPRING COLLOR-S Front White White Yellow White Rear White Yellow Yellow White SAMSUNG ELECTRONICS CO., LTD... - Page 15 6. Disassembly and Reassembly 6-2 Disassembly Disassembly Procedure Illustration Remarks Removing the PCB Assembly 1) Open the Lid. 2) Remove the Screw. 3) Lift up the Control Panel while pushing it from right to left. 4) Turn the Control Panel "up" 5) Remove the four Screws connecting the Control Panel and the PCB Assembly.
- Page 16 2) Remove the Lead Wire Terminal and the Earth Wire. 3) Remove the Two Hoses. 4) Remove the 2screws which fix the filter. 5) Lay down the Washer with the right side facing the Floor. SCREWS 6) Remove the 2 Screws which fix the pump. SAMSUNG ELECTRONICS CO., LTD...
- Page 17 6. Disassembly and Reassembly 6-3 Spin - Nut Repairing Box 6 HANDLE 5 CONNECTING ROD 4 GUIDE 3 JIG 2 SPIN NUT 1 SHAFT 6-3-1 Procedure 3. Insert the connecting rod and handle into the square box. Then turn the handle clockwise on the 1.
-
Page 18: Troubleshooting
An unbalanced load is sensed three The buzzer sounds five times Open the door. times during dehydration cycle. with a 0.5sec. ON/0.5sec. OFF Balance the laundry. cycle. Close the door. Pressing "start" button stops the buzzer. No other buttons work. SAMSUNG ELECTRONICS CO., LTD... -
Page 19: Test Mode
7. Troubleshooting 7-2 Test Mode 7-2-1 Test Mode : WATER LEVEL + POWER 1. Entering : Press the power key while pressing down the WATER LEVEL button. 2. Ò Ò is displayed on the display. 3. If you press the COURSE key, the test mode changes step by step. →... - Page 20 ¥ When connecting the lead wire, take care not to let it touch hight components of metal sugared. This is a "wloow" SAMSUNG ELECTRONICS CO., LTD...
- Page 21 7. Troubleshooting 7-4 Troubleshooting 7-4-1 Troubleshooting of the Power Supply Board If any of the following occurs, the PCB is defective. Replace the PCB. 1. Pressing a selection button illuminates the LED display, but the buzzer does not sound. 2. Pressing a selection button sounds the buzzer, but does not illuminate the LED. 3.
- Page 22 Is the Replace the water valve. connection of the water valve with the water level sensor terminal Replace the water level sensor. Does the pulsator rotate? Replace the PCB assembly. SAMSUNG ELECTRONICS CO., LTD...
- Page 23 7. Troubleshooting ¥Water Stop Error The water supply does not stop. Pull out the plug. The water valve is defective. Does the water supply stop? * Remove the foreign material in the water velve. Is there water in Air is leaking. Check the connection, the water level sensor and apply the adhesives.
- Page 24 Is the V belt Install the V belt correctly. positioned correctly? The motor is defective. Check for a racing motor due to excessively strong or weak tension of the V - belt. Replace the PCB assembly. SAMSUNG ELECTRONICS CO., LTD...
- Page 25 7. Troubleshooting ¥ Defective Rotation during Washing The pulsator rotates one - side. Is the connection Securely connect it. of the housing all right? Is the winding wire on the one side of the motor Replace the motor. disconnected? Replace the PCB assembly. ¥...
- Page 26 "woong" Spread the laundry evenly, Is operation sound, the condenser ia of the motor alone and start again.) possible? defective, or one side of the motor windings is shorted. Change the PCB assembly. SAMSUNG ELECTRONICS CO., LTD...
- Page 27 7. Troubleshooting ¥ Draining Water is not Possible. Water cannot drain. Lower the hose. Is the drain hose lowered? Correct the hose. Is the drain hose bent? Press the Start/Hold button 3 to 4 times during the drain and dehydration cycles. Any there operating sounds from the drain motor?
- Page 28 Adjustment of horizontal level Adjust the height of the two adjusting legs (front of the washing machine) so that of the washing machine the washing machine is horizontally level. SAMSUNG ELECTRONICS CO., LTD 7-11...
-
Page 29: Exploded Views
8. Exploded Views WASHING MACHINE... - Page 30 COVER - TOP WHITE DC90 - 11109A ASS'Y - MAIN WIRE HARNESS SW70X1 (P) HOT+COLD DC90 - 11131A ASS'Y - MAIN WIRE HARNESS SW70X1 (P) COLD ONLY DC90 - 11128A ASS'Y - MAIN WIRE HARNESS SW70X1 (P) HOT+COLD+RINSE SAMSUNG ELECTRONICS CO., LTD...
- Page 31 8. Exploded Views 17-1 WASHING MACHINE...
- Page 32 DC66 - 10045D BELT - V M20.5 (M20.6) 50 Hz DC66 - 10145E BELT - V M20 (M20.1) 60 Hz DC61 - 40053A SADDLE SBHG1 - A DC60 - 20064C SCREW - TAPPING 6.2 x 20 SAMSUNG ELECTRONICS CO., LTD...
- Page 33 WASHING MACHINE...
- Page 34 DC61 - 50160A LEG - RUBBER BUTYL DC60 - 20054F SCREW - TAPPING 1 - 4 x 14 DC61 - 20211A (PAN - SILENT) SHUTTER OPTION DC60 - 20054F SCREW - TAPPING 1 - 4 x 14 FROM+BASE SAMSUNG ELECTRONICS CO., LTD...
-
Page 35: Power Cord
(DC90 - 10096D) (DC39 - 10144A) WHITE BROWN BLACK BLUE GREEN GREEN / YELLOW (DC90 - 11175C) (DC90 - 10111A) WHITE WHITE BLACK BLACK GREEN GREEN CP2-D (DC90 - 10065C) (DC90 - 10079A) WHITE BLACK BLACK WHITE GREEN SAMSUNG ELECTRONICS CO., LTD...