Cisco 1240AG Series Quick Start Manual
Hide thumbs
Also See for 1240AG Series:
- Hardware installation manual (135 pages) ,
- Datasheet (10 pages) ,
- Hardware installation manual (126 pages)
Table of Contents
Advertisement
Quick Links
- 1 Radio and Ip Address Configuration
- 2 Obtaining and Assigning an Ip Address
- 3 Using a Telnet Session to Access the Cli
- 4 Configuring Basic Settings
- 5 Enabling the Radio Interfaces
- 6 Configuring Security Settings
- 7 Checking the Access Point Leds
- 8 Using the Web Browser Interface
- Download this manual
Read This First
Note
If you purchased a 1242G access point, this quick start guide refers
occasionally to an 802.11a radio. However, your 1242G access point
does not contain an 802.11a radio; it only contains an 802.11b or
802.11g radio. Please disregard the sections in your quick start guide
that refer specifically to an 802.11a radio.
You should review this table and the instructions for opening the top cover.
The table contains important information that you need to know so that you
can successfully configure your access point.
Setting
Login
Password
IP address
Service Set Identifier (SSID)
Quick Start Guide Cisco Aironet 1240AG Series Access Point
Default
Cisco (case sensitive)
Cisco (case sensitive)
Determined by DHCP server
See the
"Radio and IP Address
Configuration" section on page
2.
1
Advertisement
Table of Contents

Related Manuals for Cisco 1240AG Series


Summary of Contents for Cisco 1240AG Series
- Page 1 Setting Default Login Cisco (case sensitive) Password Cisco (case sensitive) IP address Determined by DHCP server Service Set Identifier (SSID) See the “Radio and IP Address Configuration” section on page Quick Start Guide Cisco Aironet 1240AG Series Access Point...
-
Page 2: Radio And Ip Address Configuration
Status LED Status Description Blue Normal operating condition and at least one wireless client device is associated with the access point. Light green Normal operating condition, but no wireless client devices are associated with the access point. Amber or red Error condition. -
Page 3: Before You Start
SNMP file attribute (if SNMP is in use) • The Media Access Control (MAC) address from the label on the bottom of the access point (such as 0016462584c), if you plan to use the Cisco IP Setup Utility to find an access point IP address. •... -
Page 4: Safety Information
The use of wireless devices in hazardous locations is limited to the constraints posed by the safety directors of such environments. Warnings Translated versions of the following safety warnings are provided in Appendix A of the Cisco Aironet 1240AG Series Access Point Hardware Installation Guide. OL-16714-01... - Page 5 Do not operate your wireless network device near unshielded blasting caps or in an explosive environment unless the device has been modified to be especially qualified for such use. Statement 245B Quick Start Guide Cisco Aironet 1240AG Series Access Point...
- Page 6 Overview This guide is designed to help you minimally configure a Cisco Aironet 1240AG Series Access Point by using its GUI through your web browser. The GUI is the primary configuration tool. Configuration can also be performed by using the command-line interface (CLI). For instructions on using the CLI, see the Cisco IOS Software Configuration Guide for Cisco Aironet Access Points.
- Page 7 Wireless-Aware Network (SWAN) or Cisco’s Wireless LAN Solution Engine (WLSE) is not covered in this guide. Refer to the appropriate SWAN or WLSE documentation for configuration information. These documents are also available on Cisco.com. Quick Start Guide Cisco Aironet 1240AG Series Access Point...
- Page 8 This table lists documents related to the 1240AG series access point. Topic Document Performing an advanced Cisco IOS Software Configuration Guide for configuration Cisco Aironet Access Points Cisco Aironet Command Reference for Cisco Aironet Access Points and Bridges Mounting the access point Cisco Aironet 1240AG Series Access Point...
-
Page 9: Unpacking The Access Point
Package Contents Each access point package contains the following items: • Cisco Aironet 1240AG Series Access Point • Cisco Aironet 1240AG Series Power Module (universal power module)—optional • Mounting hardware kit Quick Start Guide Cisco Aironet 1240AG Series Access Point... - Page 10 – One 10 x 24 nut (for ground stud on mounting bracket) – Four rubber foot pads – Two cable tie wraps • Quick Start Guide: Cisco Aironet 1240AG Series Access Point • Safety Warnings for Cisco Aironet 1240AG Series Access Points •...
- Page 11 H z R IG H T / P R IM A R Y Note The 2.4-GHz and 5-GHz antennas pictured here are not supplied with the access point. Antennas must be ordered separately. Quick Start Guide Cisco Aironet 1240AG Series Access Point...
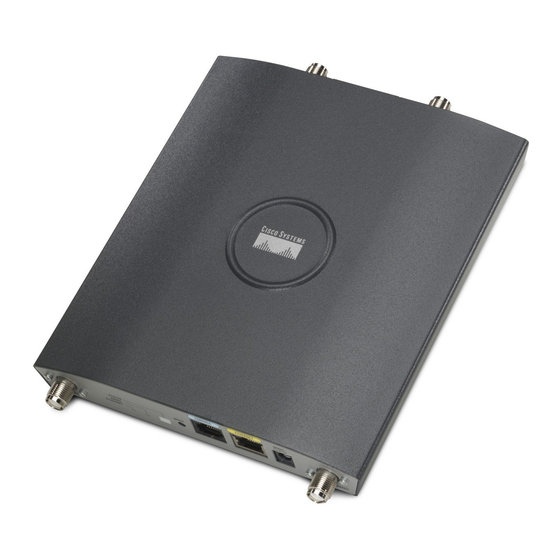
- Page 12 This illustration shows the connections and components on the 2.4-GHz end of the access point. CONSOLE ETHERNET 48VDC STATUS MODE RADIO ETHERNET 2.4 GHz RIGHT/PRIMARY 2.4 GHz LEFT 2.4-Ghz antenna connector Console port (left) Ethernet status LED Ethernet port Radio status LED 48 VDC power port Status LED 2.4-GHz antenna connector...
- Page 13 This illustration shows the connectors and components on the 5-GHz end of the access point. 5 GHz ANTENNA w/RP-TNC LEFT RIGHT / PRIMARY 5-GHz antenna connector (left) 3 Security lock keyhole 5-GHz antenna connector (right/primary) Quick Start Guide Cisco Aironet 1240AG Series Access Point...
-
Page 14: Installation Summary
• Enabling the radio interfaces • Configuring security settings Mounting the Access Point Detailed mounting instructions are in the Cisco Aironet 1240AG Series Access Point Hardware Installation Guide. This document is available on Cisco.com at the following URL: http://www.cisco.com/en/US/docs/wireless/access_point/1240/installation/g uide/1240hig5.html... -
Page 15: Connecting Power
SERIES 100Ba se-FX SYST STAT UTIL DUPLX SPEED 10Bas e-T MODE / 100Ba se-TX Catal yst 2950 SERIES 100Ba se-FX Power injector Power cord Universal power supply Access Point Option 3 Quick Start Guide Cisco Aironet 1240AG Series Access Point... - Page 16 – Other inline power switches supporting the IEEE 802.af inline power standard • Option 2—Switches without sufficient inline power can use the power injector: – Cisco Aironet Power Injector (AIR-PWRINJ3 or AIR-PWRINJ-FIB) • Option 3—Local power using a power module OL-16714-01...
- Page 17 After all three LEDs turn green to show the starting of the Cisco IOS operating system, the Status LED blinks green to show that Cisco IOS is operational. When in an operational status, the Ethernet LED is steady green when no traffic is being passed and off when traffic is being passed.
-
Page 18: Obtaining And Assigning An Ip Address
Note If your access point is connected to inline power, do not connect the power module to the access point. Using two power sources on the access point might cause the access point to shut down to protect internal components and might cause the switch to shut down the port to which the access point is connected. -
Page 19: Connecting To The Access Point Locally
– Connect to the access point console port and use a Cisco IOS command to display the IP address, such as show interface bvi1. – Provide your organization’s network administrator with your access point MAC address. Your network administrator will query the DHCP server using the MAC address to identify the IP address. -
Page 20: Assigning An Ip Address Using The Cli
Note The Cisco part number for the serial cable is AIR-CONCAB1200. 2. Set up a terminal emulator on your PC to communicate with the access point. Use the following settings for the terminal emulator connection: 9600 baud, 8 data bits, no parity, 1 stop bit, and no flow control. -
Page 21: Using A Telnet Session To Access The Cli
Telnet in the entry field, and press Enter. 2. When the Telnet window appears, click Connect and select Remote System. 3. In the Host Name field, type the access point IP address and click Connect. Quick Start Guide Cisco Aironet 1240AG Series Access Point... -
Page 22: Configuring Power
1. Open your browser and enter the access point IP address in the address field. A login and password screen appears. 2. Enter the username Cisco and password Cisco. The username and password are case sensitive. 3. When the access point does not receive enough power for full operations, it is in low power mode. - Page 23 Cisco Negotiation selected auto Intelligent Power Power Injector: Unchecked Management feature Cisco PSE not Power Settings: Prestandard power inline supporting Cisco Compatibility selected auto Intelligent Power Power Injector: Unchecked Management feature Quick Start Guide Cisco Aironet 1240AG Series Access Point...
- Page 24 Power Source System Power Settings Switch Status Cisco Aironet Power Power Settings: Power power inline Injector with a Cisco Negotiation selected never PSE supporting Power Injector: Unchecked Intelligent Power Management feature Cisco Aironet Power Power Settings: Power power inline Injector with a Cisco...
-
Page 25: Configuring Basic Settings
Check the release notes for your power sourcing equipment to determine which Cisco IOS version supports Cisco Intelligent Power Management. For some PSEs, support for Cisco Intelligent Power Management might not be available yet. MAC address is the 12- character hexadecimal address of the switch port to which the access point is attached. - Page 26 2. Enter the username Cisco and password Cisco. The username and password are case sensitive. 3. Press Enter. The Summary Status page appears. OL-16714-01...
- Page 27 4. If required, configure the power settings as described in the previous section. Otherwise, Click Express Setup. The Express Setup page appears. Quick Start Guide Cisco Aironet 1240AG Series Access Point...
- Page 28 5. Configure the settings using the following sections as a guide. OL-16714-01...
- Page 29 Default Gateway—The default gateway identifies the address the access point uses to access another network. This gateway is provided by your network administrator. If DHCP is enabled, leave this field blank. Quick Start Guide Cisco Aironet 1240AG Series Access Point...
- Page 30 • Web Server—This setting specifies the type of HTTP used to access the access point using a web browser. – Standard (HTTP)—Standard protocol used to transfer HTML using unencrypted traffic between web browsers. – Secure (HTTPS)—Protocol used to transfer secure data by using encrypted traffic to and from the user by means of a Secure Socket Layer (SSL).
- Page 31 Ethernet hub or switch. The workgroup bridge must associate to a Cisco Aironet access point or bridge. – Scanner—Specifies that the unit is configured by a Cisco WLSE and operates as a scanner and reports network traffic to the Cisco WLSE. •...
- Page 32 • Aironet Extensions—By default, the access point uses Cisco Aironet 802.11 extensions to detect the capabilities of Cisco Aironet client devices and to support features that require specific interaction between the access point and associated client devices. Aironet extensions must...
-
Page 33: Default Settings On The Express Setup Page
IP Subnet Mask Assigned by DHCP Default Gateway Assigned by DHCP Role in Radio Network Access point Web Server Standard (HTTP) SNMP Community default Community Optimize Radio Network for Throughput Aironet Extensions Enable Quick Start Guide Cisco Aironet 1240AG Series Access Point... -
Page 34: Enabling The Radio Interfaces
3 seconds). Enabling the Radio Interfaces In Cisco IOS Release 12.3(7)JA, the access point radios are disabled by default, and there is no default SSID. You must create an SSID and enable the radios before the access point allows wireless associations from other devices. -
Page 35: Configuring Basic Security Settings
Just as you use the Express Setup page to assign basic settings, you can use the Express Security page to create unique SSIDs and assign one of four security types to them. For detailed security information, refer to the Cisco IOS Software Configuration Guide for Cisco Aironet Access Points. - Page 36 OL-16714-01...
-
Page 37: Understanding Express Security Settings
SSIDs to eliminate the conflict. If any VLANs are defined on the access point, the trunk port on the switch must be limited to allow only the VLANs defined on the access point. Quick Start Guide Cisco Aironet 1240AG Series Access Point... -
Page 38: Express Security Types
Static WEP Key—More secure than no security. Static WEP keys are vulnerable to attack. There are two different lengths for WEP keys: 40-bit and 128-bit (hexadecimal or ASCII characters). Cisco access points use hexadecimal characters. Client adapters can use either, depending on how the vendor chooses to configure them. -
Page 39: Express Security Limitations
• You cannot configure combinations of authentication types on the same SSID (such as MAC address authentication and EAP authentication). To configure combinations of authentication types, choose Security > SSID Manager. Quick Start Guide Cisco Aironet 1240AG Series Access Point... -
Page 40: Using The Express Security Page
Using the Express Security Page Follow these steps to create an SSID using the Express Security page: 1. Type the SSID in the SSID entry field. The SSID can contain up to 32 alphanumeric characters. Note These characters are not allowed in the SSID: +, ], /, “, TAB, and trailing SPACE. - Page 41 If you do not use VLANS on your wireless LAN, the security options that you can assign to multiple SSIDs are limited. Refer to the Cisco IOS Software Configuration Guide for Cisco Aironet Access Points for VLAN details. 6. Click Apply. The SSID appears in the SSID table at the bottom of the page.
-
Page 42: In Case Of Difficulty
If you do experience difficulty, the following sections provide basic troubleshooting information. Before contacting Cisco, look for a solution to your problem in this guide or the troubleshooting chapter of the Cisco Aironet 1240AG Series Access Point Hardware Installation Guide. - Page 43 — Sending or receiving Ethernet green packets. — — Blinking Sending or receiving radio green packets. Blinking dark Green or Blinking Software upgrade in progress. blue blinking green or off green Quick Start Guide Cisco Aironet 1240AG Series Access Point...
-
Page 44: Checking Basic Settings
Various Boot loader errors For more details on these LED status codes, see the “Troubleshooting” chapter of the Cisco Aironet 1240AG Series Access Point Hardware Installation Guide. Checking Basic Settings Mismatched basic settings are the most common causes of lost connectivity with wireless clients. -
Page 45: Security Settings
However, the access point does not need to use WEP Key 3 as the transmit key. Refer to the Cisco IOS Software Configuration Guide for Cisco Aironet Access Points for instructions on setting the access point WEP keys. -
Page 46: Resetting To Default Configuration
Resetting to Default Configuration If you forget your password that allows you to configure the access point, you might need to completely reset the configuration. You can use the MODE button on the access point to reset the configuration. Note These steps reset all configuration settings to factory defaults, including passwords, WEP keys, the IP address, and the SSID. -
Page 47: Using The Web Browser Interface
Enter. An Enter Network Password screen appears. 3. Enter the username Cisco in the User Name field. 4. Enter the password Cisco in the Password field and press Enter. The Summary Status page appears. 5. Click System Software. The System Software screen appears. -
Page 48: Compliance Information
The Declarations of Compliance for this product relevant to the European Union and other countries following EU Directive 1999/5/EC (R&TTE Directive) can be found in the Cisco Aironet 1240AG Series Access Point Hardware Installation Guide. This guide is available on Cisco.com.