Table of Contents
Advertisement
Record in the space below the listed information for future reference.
SERIAL NUMBER
DATE OF PURCHASE
PURCHASED FROM
The manufacturer strives for continuous improvement. For this reason, the text and
illustrations in this manual are subject to change without notice.
Page 1
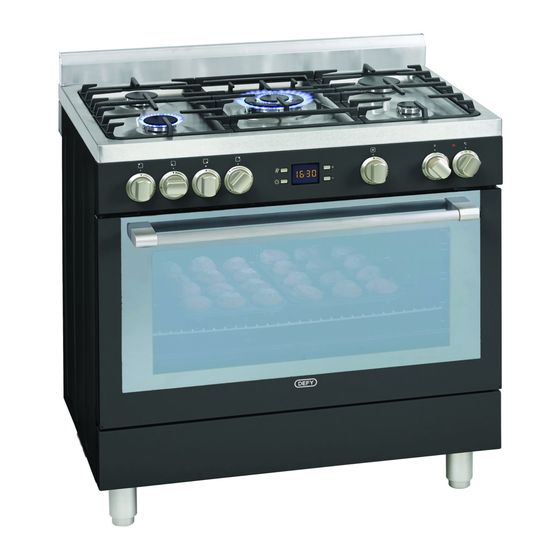
STOVE DEFY
5 GAS/ELECTRIC S
Users Manual
DGS162
PERMIT NUMBER
1037-37/1-RSA-12-A
..
...
..
.
Advertisement
Table of Contents

Related Manuals for Defy DGS162


Summary of Contents for Defy DGS162
- Page 1 DGS162 PERMIT NUMBER 1037-37/1-RSA-12-A STOVE DEFY 5 GAS/ELECTRIC S Users Manual Record in the space below the listed information for future reference. SERIAL NUMBER DATE OF PURCHASE PURCHASED FROM The manufacturer strives for continuous improvement. For this reason, the text and illustrations in this manual are subject to change without notice.
- Page 2 Dear Customer, Your new Defy appliance was manufactured in a state of the art facility and has passed the strictest quality control procedures. Please read this manual carefully before installing and using your hob for the first time and then store it within easy reach for future reference. Safety instructions must be strictly followed.
-
Page 3: Table Of Contents
Table of contents 1 General information 6 How to operate the oven Overview General information on baking, roasting and Technical specifications grilling Injector table How to operate the electric oven Package contents Operating modes Using the oven clock 2 Important safety instructions Cooking time table General safety How to operate the grill... -
Page 4: General Information
1 General Information Overview Splashback Front door Burner plate Bottom part Control panel Handle Grill switch Foot Shelf positions Tray Wire shelf Normal burner Rear left Wok burner Middle Normal burner Front left Function knob Auxiliary burner Front right Thermostat lamp Rapid burner Rear right Thermostat knob Digital timer... -
Page 5: Technical Specifications
GENERAL External dimensions (height / width / depth) 865 mm (min) - 920 mm max//900 mm/655 mm Voltage / frequency 220-240 V ~ 50 Hz Total power consumption 2900 W Fuse min. 16 A Cable type / section H05VV-FG 3G x 1.5 mm Cable length max. -
Page 6: Package Contents
Package contents Accessories supplied can vary Splash back assembly depending on the appliance model. Not all accessories in the user manual may be on your appliance. User manual and Oven tray The oven tray is used for pastries, frozen foods and big roasts. 1 Splash back assembly Wire Shelf Remove the splash back assembly from the... -
Page 7: Important Safety Instructions
2 Important safety instructions This section contains safety instructions that Do not heat closed tins and glass jars in • will help you avoid risk of injury and damage. the oven. The pressure that would build All warranties will become void if you do not up in the tin/jar may cause it to burst. -
Page 8: Safety For Children
Particular attention shall be given to the Do not use or store inflammable products • relevant requirements regarding (alcohol, petrol, benzene etc.) near the ventilation; See Before installation. appliance as these pose a fire risk. Safety for children CAUTION: cooking appliances results in the production of Packaging materials are dangerous to •... -
Page 9: If You Smell Gas
If odour persists contact your nearest dish cloths etc. by hanging them on the oven • Defy Service Centre for assistance. door handles. This product should also not If you still smell gas leave the property. be used for room heating purposes. -
Page 10: Installation
3 Installation Installation is the buyer’s responsibility. The manufacturer accepts no liability for this service. Any action that the manufacturer has to take as a result of an erroneous installation will not be covered by the warranty. The necessary installation, including gas and electrical connections, must be carried out by qualified personnel in accordance with current and local regulations. -
Page 11: Room Ventilation
This appliance requires an operating pressure of 2.8-3.0 kPa. A suitable LPG regulator that complies with requirements of SANS 1237 must be used. The manufacturer and the seller do not accept responsibility for any damage due incorrect installation connection. Gas bottles should be located outdoors in a suitable ventilated lock-up. -
Page 12: Important Information For The Installer
Important information for the installer • Flexible hose - Not supplied. Any hose that is used to connect the stove to the gas system shall comply with This appliance may only be installed by a SANS 1156-2 or BS 3212. registered LPG Gas installer registered with Liquefied... -
Page 13: Electrical Connection
Installation and connection Connection must comply with national • This appliance can only be installed and regulations. connected in accordance with the statutory The mains supply data must correspond to • installation rules. the data specified on the type label of the appliance. -
Page 14: Leakage Control
Connecting the gas hose Leakage control at the connection point Have your appliance connected so that it Ensure that the control knobs on the hob • • will be close to the gas connection. are in the OFF position. Ensure that there is no gas leakage. Open the valve on the Gas bottle. -
Page 15: Final Check
Final check Unless there is an abnormal 1. Open gas supply. condition, do not attempt to remove 2. Check gas installations for secure fitting the gas burner taps. You must call and tightness. an authorised service agent if it is 3. -
Page 16: Preparation
4 Preparation Tips for saving energy Press '–' or '+' (5/6) keys to set the time after The following information will help you to use the oven is energized for the first time your appliance in an ecological way, and to save energy: Use dark coloured or enamel coated •... -
Page 17: First Cleaning Of The Appliance
Changing screen brightness adjustment Smell and smoke may emit during Press (11) key to activate screen the first heating. This is not a fault and is quite normal and is due to brightness symbol '7' for screen brightness any production residues or layers adjustment. -
Page 18: Using The Hob
5 Using the hob Gas cooking General information about cooking The size of the cooking vessel and the • flame must be suited to each other. Adjust DANGER the gas flames so that they do not extend Risk of fire by overheated oil! past the bottom of the cooking vessel and When heating oil, do not leave it ensure that the cooking vessel is centered... - Page 19 Gas shut off safety system (in models Wok burner with thermic component) As a counter measure against blow out due to fluid overflows at burners or should the flame extinguish for whatever reason, the flow of gas to the burner will Wok burners help you to cook faster.
-
Page 20: How To Operate The Oven
6 How to operate the oven General information on baking, roasting Tips for grilling and grilling When meat, fish and poultry are grilled, • they quickly get brown and develop a crust WARNING and do not easily dry out. Flat cuts of Hot surfaces may cause burns! meat, sausages and meat skewers are Do not touch the hot surfaces of... -
Page 21: Operating Modes
1. Set the Temperature knob to the desired Fan supported bottom/top heating temperature. Top heating, bottom heating plus fan 2. Set the Function knob to the desired (in the rear wall) are in operation. Hot operating mode. air is evenly distributed throughout the oven rapidly by means of the fan. -
Page 22: Using The Oven Clock
Using the oven clock Once the cooking time is set, the cooking symbol will be displayed continuously. Set the end of cooking time to a later time: After setting the cooking time on the clock, the end of cooking time can be set to a later time. - Page 23 Using the keylock The alarm clock has no influence on the Activating the keylock functions of the oven. It is only used as a Prevent the oven from being used by warning. For example, this is useful when activating the Keylock function. you want to turn food in the oven at a certain point in time.
-
Page 24: Cooking Time Table
Rack Cooking time Dish Cooking level number Mode Temperature (°C) position (approx. in min.) **Cakes in tray One level 25 ... 35 **Cakes in mould One level 40 ... 50 **Cakes in One level 25 ... 35 cooking paper 2 levels 30 ... -
Page 25: Cooking Time Table For Grilling
Cooking time table for grilling Grilling with electric grill Food Insertion level Grilling time (approx.) Fish 3...4 20...25 min. Sliced chicken 3...4 15...20 min. Lamb chops 3...4 12...15 min. Roast beef 3...4 15...25 min. Veal chops 3...4 15...25 min. depending on thickness Page 25... -
Page 26: Maintenance And Care
Every twelve months the appliance should • applications. be serviced by a Defy Service agent to Remove the burners and wipe them with • ensure continued efficient and safe a thin damp cloth or a non-abrasive operation. -
Page 27: Removing The Oven Door
Removing the oven door 1. Open the front door (1). 2. Open the clips at the hinge housing (2) on the right and left hand sides of the front door by pressing them down as illustrated in the figure. 1 Metal part 4 Lower plastic slot 2 Plastic carrier 5 Fixing foot... -
Page 28: Gas Jet Cleaning Procedure
This may be done using a Gas Jet Cleaning Kit which • may be purchased from your nearest Defy Service Centre. The kit comprises of a sliding T-bar (A) a socket (B) •... -
Page 29: Troubleshooting
8 Troubleshooting Problem solving guide—before calling for technical support Oven emits steam when it is in use: It is normal that steam escapes during operation. This is not a fault. Water drops occur during cooking: Steam that arises during cooking can condense and form water droplets when it comes into contact with cold surfaces of the appliance. -
Page 30: Service Centres
Never attempt to repair a defective appliance yourself. Other areas are serviced by over 200 authorised agents. For further details 9 Service Centres please consult the nearest regional Defy Technical Support centre. BLOEMFONTEIN 160 Long Street, Hilton, Bloemfontein 9301. -
Page 31: Warranty
10 Warranty This certificate is issued by DEFY APPLIANCES (PTY) LTD manufacturers of Defy and Ocean products, hereinafter the Company, to the original purchaser only, of the appliance described on the certificate and shall constitute the only warranty given in respect of this appliance. -
Page 32: Installers Details
Installer’s details to be recorded below INSTALLER’S NAME AND COMPANY INSTALLER’S REGISTRATION NUMBER HAVE YOU RECEIVED A WRITTEN COMPLETION CERTIFICATE?......HAS THE INSTALLER EXPLAINED THE OPERATIONAL DETAILS OF YOUR STOVE TO YOU?......................... DGS162 Please register your product at www.defy.co.za Page 32...