Table of Contents
Advertisement
Advertisement
Table of Contents

Related Manuals for BenQ Joybook R53 Series


Summary of Contents for BenQ Joybook R53 Series
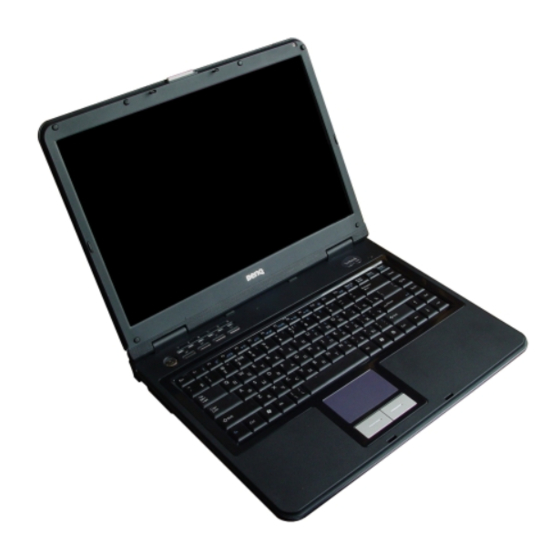
- Page 1 Joybook R53 Series User’s Manual Welcome...
- Page 2 Copyright Copyright 2005 by BenQ Corporation. All rights reserved. No part of this publica- tion may be reproduced, transmitted, transcribed, stored in a retrieval system or translated into any language or computer language, in any form or by any means, electronic, mechanical, magnetic, optical, chemical, manual or otherwise, without the prior written permission of this company.
-
Page 3: Table Of Contents
Table of Contents BenQ Joybook R53 Quick Start Guide.............1 PowerDirector Workspace..............26 Package Contents ..................1 The Movie-Making Process ..............27 Getting Your Joybook Ready for Use............1 Step 1: Loading Clips into the Library..........27 Expanding the Capabilities of Your Joybook ........... 3 Step 2: Managing Clips in the Workspace.......... - Page 4 Battery Maintenance ..................49 Cleaning Your Joybook ................49 Service and Support..................50 BenQ Joybook Global Online Service ............50 Joybook Online Registration..............50 Table of Contents...
-
Page 5: Benq Joybook R53 Quick Start Guide
BenQ Joybook R53 Quick Start Guide Package Contents 2. Connecting the power Before using your Joybook R53 for the first time, please check if you have all the items with you. For details about what should be included in the package, refer to the package contents label on the accessory box. - Page 6 Chapter 1 “Touring Your Joybook” on page 5 and 7. instructions to complete the initial Windows XP setup. 3. Opening your Joybook To open your Joybook, slide the latch to the right, and then lift the lid up. BenQ Joybook R53 Quick Start Guide...
-
Page 7: Expanding The Capabilities Of Your Joybook
Connect a telephone line to the modem port of your Joybook and dial-up to the port of your Joybook. Internet. Connect USB peripherals to the USB port of your Joybook. Access local area network (LAN) by connecting a network cable to the LAN port of your Joybook. BenQ Joybook R53 Quick Start Guide... - Page 8 Connect an earphone or microphone to the earphone or microphone jack to out- Output video images on your Joybook to a TV or AV device by connecting it to put or record sounds. the S-Video socket on your Joybook. BenQ Joybook R53 Quick Start Guide...
-
Page 9: Touring Your Joybook
Touring Your Joybook Wireless Network Indicator • When WLAN is on, it lights up in blue. • When Bluetooth is on, it lights up in amber. • When WLAN and Bluetooth are Power Switch with LED both on, it lights up in blue and amber. -
Page 10: Left Side View
Left Side View (8) PC Card Ejection Button Kensington Lock Hole USB 2.0 Ports You can use this button to eject an inserted PC Card. To For connecting peripherals such as mice, digital cam- You can attach a Kensington-type lock and cable to this eject a PC Card: eras and MP3 players that use the USB interface. -
Page 11: Right Side View
Right Side View (5) Wireless Device Switch (4) DVD-ROM/Combo/DVD-dual/Super-Multi Drive Earphone/SPDIF Audio Output Jack Press this switch to turn on/off wireless connection (Optional) function (WLAN and Bluetooth, Bluetooth is optional Supports multi-functional optical module for reading Can be used to connect to an earphone/headset or depending on your model). -
Page 12: Rear View
Rear View Modem Port VGA Port For connecting external display devices, such as Accepts an analog telephone line for use with the inter- monitors and projectors. nal modem. Power Jack S-Video Out For connecting AC power supply. Allows Joybook to outputs video signals to a television set or VCR via an S-Video cable. -
Page 13: Function Hotkeys
Function Hotkeys You can use the function hotkeys to access commonly used functions or make quick settings. To use the hotkeys, press and hold the Fn (Function) key at the lower left corner of the keyboard, and then press the desired hotkey. Fn + F1 Opens function keys on-line Help. - Page 14 Functionally equivalent to clicking the Start button on + M Cancels minimization of all windows. Windows Key Shift + the Windows desktop. + Tab Makes the next item on the Windows task bar active. + R Activates the Run dialogue box. Activates or deactivates the numeric keypad integrated in Opens the My Computer window for browsing disks Num lk...
-
Page 15: Getting Started With Windows Xp
Getting Started with Windows XP Your Joybook comes installed with Windows XP, Microsoft's latest operating sys- 4. Click the Advanced tab. tem for consumer PCs. The first time you start up your Joybook, Windows XP will ask you a few questions. Answer the questions to ensure that your full rights are If you are asked to select the type of keyboard and you are not protected. -
Page 16: Using The Qmedia Bar
Using the QMedia Bar Setting Up the QMedia Bar The QMedia Bar integrates a number of software appli- Right-click on the QMedia Bar and a menu will appear on it. cations to enhance the multimedia experience on your Joybook. Click on the small triangle button and a rotating button bar will appear. - Page 17 2. If the program you want is not on the menu, select ..An Open dialogue box will appear. 3. Browse to select the executable (.exe) file of the desired program and click Open. Using the QMedia Bar...
-
Page 18: Sending And Receiving E-Mail
For detailed information on tem administrator/ISP, or contact BenQ Customer Service for help. accounts, passwords and other settings, please consult your system administrator/ ISP, or contact BenQ Customer Service for help. -
Page 19: Using The Built-In Wireless Lan Function
Using the Built-In Wireless LAN Function With the built-in wireless LAN card on your Joybook, you can access Ethernet 10. You may update the security settings on this page and enter a password if nec- network wirelessly without the constraints of network cables. essary. -
Page 20: Using Bluetooth (Optional)
Using Bluetooth (Optional) The Bluetooth function allows you to get connected to various devices and ser- 4. Click on the Bluetooth icon on the Windows system tray located at the vices that support Bluetooth transmission. You can get rid of those annoying lower-right-hand corner of the Desktop to bring up the pop-up box. - Page 21 6. The system will begin searching for available Bluetooth devices nearby. After it 8. You have completed adding a new Bluetooth device. Click Finsih. finishes searching, you will see a list of found devices. Highlight a device and click Next. 7.
-
Page 22: Sending A File To A Bluetooth Device
Sending a File to a Bluetooth Device 3. Click Browse to find a file on your Joybook to be sent to the Bluetooth device. Click Next. 1. After your Joybook is connected to a Bluetooth device, click the Bluetooth icon on the system tray to bring up the pop-up box and select “Send a File”. -
Page 23: Listening To Music And Creating Custom Music Collections
Music Library Lists your music file collections. music files are deleted, error will occur. This is where you can store the songs to be My Sync updated to your Joybee MP3 Player or BenQ mobile phone. Using the QMedia Bar... -
Page 24: Converting Cd Music Into Mp3 Format
Converting CD Music into MP3 Format 1. Insert a music CD into the optical drive of your Joybook. 2. The songs on the music CD will automatically appear on the Song List. Click to select the songs you wish to convert, or uncheck the unwanted ones. 3. -
Page 25: Viewing Digital Photographs, Creating Slide Shows And Calendars
Viewing Digital Photographs, Creating Slide Shows and Calendars Photo Explorer can help you manage your digital photographs and other images, The Preview Pane allows you to preview the letting you easily view, print, and edit them, as well as create customized slide Preview Pane image file or play the audio/video file selected in shows. -
Page 26: Making A Calendar
7. To set different display durations and add sound annotation to individual Making a Calendar images, select the image(s) in the Slideshow Storyboard and the Slideshow 1. With a thumbnail selected in the Browse Pane, click Tools on the Viewer Tool- Options button. -
Page 27: Watching Dvd/Vcd Movies
Watching DVD/VCD Movies Configuration settings are all located Configuration Ctrl+C Click the button on the QMedia Bar to open PowerDVD. With Power- here. DVD, you can watch DVD/VCD movies or play music with your Joybook. 10 About Ctrl+A Displays information about PowerDVD. When PowerDVD is opened, a control panel and a movie window will appear on Allows you to upgrade your program, if the screen. -
Page 28: Region Code Settings
Region Code Settings Enter Accepts the selected option. 1 - +10 Number pad. Most of the DVD titles in today's markets are governed by a regional code that divides the world into six separate regions. This ensures maximization of revenues Karaoke Switches among karaoke modes. - Page 29 Playing Media Files The simplest way to play media files is to drag and drop a file directly onto the PowerDVD control panel or movie window. This includes all media file types that are supported by PowerDVD and playlist formats (.m3u and .pls). 1.
-
Page 30: Making Your Own Movies
Making Your Own Movies Your Joybook can help you edit video files to create a movie that you can share Workspace View Click to switch between Timeline and Storyboard with family and friends. With a digital video camera or other source of digital Buttons views. -
Page 31: The Movie-Making Process
The Movie-Making Process 3. Locate the folder you want to open, then click OK. All of the media files in that folder are loaded into the Library. The digital movie production process involves a combination of artistry and tech- nology, beginning with raw video footage and ending with a movie production. Step 2: Managing Clips in the Workspace PowerDirector provides the easiest way to produce your finished movie and pub- Once you have loaded media files into the Library, they are ready to be used in... -
Page 32: Step 4: Producing A Movie Disc
2. Select an effect from the Library and drag it into the desired position in the cor- 9. Have a blank disc ready in the CD-burner and click rect track in Timeline view. (This position is directly beneath the clip(s) in the Video track that you want to affect.) For more information on how to use PowerDirector and Power Producer, please refer to the on-line Help by selecting Help. -
Page 33: Burning Cd/Dvd Using Nero Express
Burning CD/DVD Using Nero Express The Nero Express software that comes with your Joybook allows you to burn dif- 4. Browse to select the music files in the dialogue box that appears and then click ferent types of data to CD by simply following the easy step-by-step instructions. Add. - Page 34 6. The total selected file size will be calculated and displayed by a blue bar at the 8. Nero Express will start burning files on to the CD. bottom part of the window. If the blue bar goes over the dotted red line, you have to delete some files from the selected files list by right-clicking a file and select Delete.
- Page 35 11. You can now choose to burn another CD with the same selection of files again, burn a CD with different files, enter Cover Designer to design the cover for the CD you just burned or save the setting of this CD for future use. Or, you can simply click Exit to exit Nero Express.
-
Page 36: Using Qpower
Using QPower QPower is an advanced system power management tool specifically designed for 2. A submenu that contains several power profiles will follow. Click to select a your Joybook. In addition to the standard power management functions provided desired power profile. by the Windows system, QPower incorporates several features which allow you to precisely and meanwhile easily adjust system power settings. -
Page 37: Associating Application Programs With Power Profiles
3. The following QPower window will appear. The higher the screen bright- Bright- For adjusting the brightness level of ness, the more ness the screen. power consumes. Display For specifying the period of inactiv- Turn-off ity before the Joybook turns off the timer screen. -
Page 38: Removing The Association Between Programs And Power Profiles
4. Click to select a profile from the Profiles box. When doing so, the description of Removing the Association Between Programs and Power Pro- the selected profile and the application programs already associated with the files profile will appear in the Profile description and Associated Applications boxes. In addition to associating application programs with power profiles, you can also 5. -
Page 39: Qpresentation (Optional)
QPresentation (Optional) Sound Manager When you plug an overhead projector into the VGA port of your Joybook, QPre- You can adjust the audio configurations in Sound Manager to reduce microphone sentation automatically performs the following functions. noise and cancel the echo effects during an Internet meeting. This makes your voice sound clearer. -
Page 40: Connecting To External Display Devices
Connecting to External Display Devices Connecting to a VGA Display Device When giving a presentation, you can output Joybook's video signal to an external display device, such as a projector or monitor. Press the Fn + F3 hotkey combination to switch between Joybook's own screen and the external display device, or use simultaneous display. -
Page 41: Before Connecting Your Joybook To A Projector
Before connecting your Joybook to a projector 3. Click and drag the Screen resolution slider to set the screen resolution to 1024 x 768 pixels, and then click Apply, OK. The wide screen design of your Joybook allows you to comfortably view mutlime- dia contents such as DVD movies and images. -
Page 42: S-Video Output
S-Video Output The S-Video Out port allows you to output display signals to a television set or VCR for viewing or recording. To do so, follow the steps below: 1. Turn off Joybook and connect it to the TV or VCR using an S-Video cable. 2. -
Page 43: Installing Additional Memory
Installing Additional Memory You can replace the existing memory module with a higher-capacity one. Before you upgrade or replace memory, please check on the BenQ web site to determine the module which can be used, or contact BenQ distributor or customer service center. - Page 44 2. Slide the battery retainers to the open position. 3. Remove the battery as shown. 4. Use a screwdriver to remove the screw that secures the memory cover. 5. Open the cover. Installing Additional Memory...
- Page 45 6. Align the memory module with the slot, and then insert it. When inserting, pay 7. Gently push the free edge downwards until the module locks into place. attention to the direction of the memory module. 8. Replace the cover, and use a screwdriver to secure it with the screw. 9.
-
Page 46: Recovering Your System
Using the Quick Recovery Function drive. Do not delete this partition, or the Quick Recovery function will become unavailable. If this happens, please contact your local BenQ service center for help. Your Joybook provides you with a Quick Recovery method from its hard drive. -
Page 47: Using The Recovery Cds
• Recover using the Recovery CDs will cause the Quick Recovery function to become unavailable. If this happens, please contact your local BenQ service cen- ter for help. Besides, you will also need to install the device drivers manually from Recovery CD Disc 2. -
Page 48: Faq And Troubleshooting
What is Joybook? What are the differences between Joybooks and traditional notebooks? My computer won't start up with the battery inserted? BenQ call it Joybook, because BenQ has combined entertainment and stylish • Make sure the battery is properly inserted. design with traditional notebook's functions. For example, enhanced 3D process- •... -
Page 49: Connection
AC 2. Double click Network adapters. When the name of the network adapter of Joy- power cord may be defective. Consult your BenQ dealer for help and mainte- book appears, double-click on it. - Page 50 How do I update the driver? longer run when Windows starts. However, you can still run them by double Please visit BenQ on-line product support (http://Support.BenQ.com) to search clicking their icons in the folder created in step 1. for updated sound driver software.
- Page 51 • An earphone or external speakers may be connected to the audio-out jack, auto- If Disk Defragmenter start itself over and over, it means that some hidden back- ground software program is still accessing the hard drive. Restart the computer matically turning off the computer's internal speakers.
-
Page 52: Display
It is a normal phenomenon. If your Joybook cannot display images at the default resolution, please visit the BenQ website to download and update the latest Joybook display drivers. How can I reduce the wearing of the screen spindle when I open the screen? -
Page 53: Information On Safety, Cleaning, And Battery Maintenance
AC adapter or power cord. 11. The AC adapter is a high-voltage component. Do not attempt to repair it on your own. If it becomes damaged, please contact an authorized BenQ distribu- tor or service center. 12. Make sure that the modem port is used only with a regular analog phone line. -
Page 54: Service And Support
Joybook Online Registration Welcome to BenQ Joybook Global Online Service (http://support.BenQ.com). In Register now to get free product news and latest information about BenQ! To reg- order to ensure you an enjoyable experience with your Joybook, the following ister, follow the steps below: supports are provided so you can get assisted whenever and wherever you are.