
Related Manuals for Lindy 25004


Summary of Contents for Lindy 25004
- Page 1 8 Port Gigabit Smart Switch Manual English LINDY No. 25004 www.lindy.com © LINDY ELECTRONICS LIMITED & LINDY-ELEKTRONIK GMBH - FIRST EDITION (July 2008)
-
Page 3: Managing The Switch
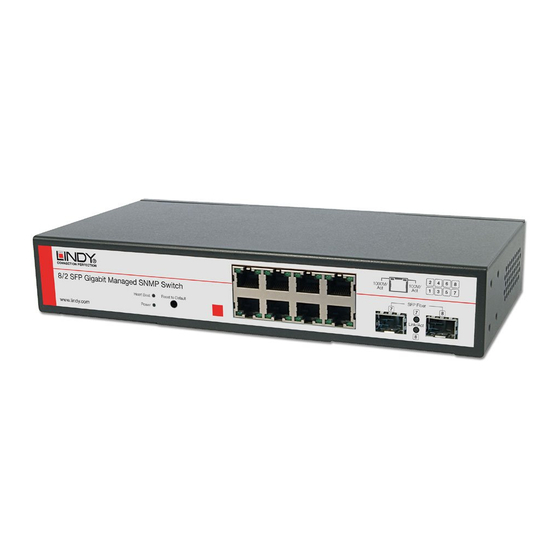
User Manual Introduction Thank you for purchasing the LINDY 8 Port Gigabit Smart Switch with 2 shared mini GBIC ports. This high-performance Layer 2 network switch is ideal for use in either the home or the office All of its ports are capable of 10, 100 or 1000Mbps auto-negotiation, while the 10/100/1000Mbps auto-sensing ability provides the easiest, most hassle-free way to migrate from a Fast Ethernet to a Gigabit Ethernet network. -
Page 4: Web Management
Type “u” or “/” to go back to previous page Web Management When your login has been successfully validated, the switch’s home page will appear. The left part of the page provides the function menus and the right part provides the individual configuration or system parameters values. - Page 5 By default DHCP is turned off, so a Default IP or user defined IP address is used when the switch is turned on. If the switch needs an IP assigned from a DHCP server, then tick the “DHCP Enabled” box and click on “Apply”. Note: if you are in web page mode, connection to the switch will be lost.
-
Page 6: Tag Vlan Management Group (Cpu Port)
The default port number of the HTTP command is 80, unauthorised users may access the switch if they know the IP address. You may set the HTTP port number to any other value, from 1024 to 65535. Note: once the HTTP port number has been changed you will lose connection to the switch. -
Page 7: Port-Based Vlan
User Manual English Select the changes you want to apply: Eg. If you choose port 1 to have Flow Control enabled, tick the box and then press “Apply”, the screen below will then appear upon refresh. An example diagram is shown below: Port-based VLAN Port-based VLAN groups ports by group ID which mean ports on different VLANs (different IDs) can’t communicate with each other. -
Page 8: Tag-Based Vlan
VLAN ID. You can only manage the switch if one of the VLAN groups are in the VLAN ID of the CPU port. An example diagram is... - Page 9 User Manual English The default VLAN ID group for all ports is VID=1, this is to allow any port to be used for web management communication with the CPU. If you wish to isolate ports on a separate VLAN, then you must delete the ports from VLAN=1 and create another VLAN ID.
- Page 10 Set Port VID = value (1 ~ 4096), then untagged ingress frames will bear this value as its VID. Usually this port is connected to an un-tagged device (legacy device), then this frame becomes a tagged frame. This will allow it to be handled inside the switch as a member of same VID group 5.
-
Page 11: Port Trunking
User Manual Port Trunking The default diagram is shown below, and up to 4 groups are provided: Choose and click the trunk ports you want to group, for example, choose port 1, port 2 into group 1, then press “Apply”. An example diagram is shown below: Port Mirroring Choose and click the ports you want to monitor, for example, mirror port 2 with port 5. -
Page 12: Quality Of Service
An example diagram is shown below with Strict Queue Mode: When you choose 802.1P priority, the frames have VLAN Tag inside the switch. The priority in the Tagged frame (2 bytes Tag in total) must be set by the application... -
Page 13: Storm Control
User Manual English 5.11 Storm Control A default diagram is shown below, Choose the type of storm you want to control, for example, if you choose Broadcast storm with 3,964 fps as the upper limit, once this frame rate is reached the port will be disabled. - Page 14 User Manual English 5.12 LACP Similar to static port trunking, LACP provides another way to dynamically aggregate a port to a group (trunk) according to IEEE 802.3ad. Once the protocol is enabled, the ports to be trunked by LACP will be executed automatically after pressing “apply”. An example diagram is shown below: Protocol Enabled: To enable/disable LACP protocol for a port.
-
Page 15: System Configuration
User Manual English 5.13 RSTP The Spanning-Tree Protocol (STP) is the IEEE 802.1d standardised method for avoiding loops in switched networks. Enable STP to ensure that only one path at a time is active between any two nodes on the network. The Rapid-Spanning-Tree-Protocol (RSTP) is a more advanced protocol than STP according to the IEEE 802.1w standard. - Page 16 Edge: Enable/Disable to expect a port to be an edge port (an end station) or a link to another STP device Path Cost: A value on a port the switch uses to determine which port are the forwarding ports. The lowest number is forwarding ports. The value can be set from 1 to 200000000 or “auto”...
- Page 17 User Manual English Ethernet section, there is only one Querier, and this is usually the router For example, video traffic comes from port 8 which is connected to a router, and port 3,4,5 are Connected to IGMP member, then the configuration may be set as below 5.15 802.1x A default diagram is shown below, user must contact the manager of RADIUS server, and then get the IP, UDP port number (usually fixed at 1812) and secret password to...
-
Page 18: Lacp Status
User Manual Monitoring Port Statistics The diagram below shows a statistical overview of all ports: LACP Status The diagram below shows an LACP Port Status Overview: English... -
Page 19: Rstp Status
The diagram below shows an IGMP Status Overview: This can be refreshed at any time. The IGMP v1, v2, & v3 frames will be shown in the network, the switch will only support IGMP V2, but it will handle some IGMP V3 frames. If this switch is a Querier, it will show Querier state and Query frames it transmitted, if it is not a Querier, it will only show how many Querier frames it receives. -
Page 20: Warm Reboot
User Manual Ping Insert the IP address you want to ping, set the Time Out time and Counts. For example, IP=192.168.1.141, count=5, time out=5 sec, then “Apply” and “refresh”. An example diagram is shown below: Maintenance Warm Reboot Select “yes” to perform a warm reboot Are you sure you want to perform a warm reboot? Factory Default Select “yes”... -
Page 21: Firmware Update
User Manual Firmware Update Once the firmware update has completed choose yes to activate your new software version. An example diagram is shown below: Once you select “yes” you will get a new code to execute. Ten seconds after activating the new code press the “reset button” on the front panel so that the new default setting will be also updated. - Page 22 User Manual English Key in “Command” and then key in “?”, second level will be shown, for example:...
- Page 23 User Manual English To check the IP related information: Type “up” or “/” go back to previous page...
- Page 24 WEEE in leggi statali in varie misure. Fare riferimento alle leggi del proprio Stato quando si dispone di un apparecchio elettrico o elettronico. Per ulteriori dettagli fare riferimento alla direttiva WEEE sul riciclaggio del proprio Stato. müssen den lokalen Sammelsystemen bzw. örtlichen www.lindy.com LINDY No. 25004 Edition July 2008...