Table of Contents
Advertisement
Quick Links
Advertisement
Table of Contents

Related Manuals for Nanoxia Deep Silence 6


Summary of Contents for Nanoxia Deep Silence 6
-
Page 2: Table Of Contents
_______________________________________________________________02 I. Introduction ___________________________________________________________02 • Specifications _____________________________________________________________02 • Accessories • Features ________________________________________________________________03 II. Installation Instructions ____________________________________________________07 1. Installation of the motherboard _______________________________________________07 _______________________________________________08 2. Installation of the power supply _________________________________________________09 3. Installation of external drives __________________________________________________________09 3.1 Optical drives 3.2 Utilizing the external 3.5 inch bay __________________________________________09 4. -
Page 3: Introduction
- the Deep Silence 6 is perfect for you. The enormous space that the case off ers allows the installati on of a 360/280/240/140/120 mm radiator under the top cover, as well as a 280/140/240/120 mm radiator in the specially designed mounti ng frame on the HDD cage. -
Page 4: Features
- 2-channel fan control for up to 8 fans Noise Insulation The Nanoxia Deep Silence 6 has been developed with the aim to offer the buyer a low-noise case, while at the same time allowing for extremely low system temperatures. - Page 5 All air intake openings (front, bottom, if applicable left side panel) are readily accessible and have easy to clean dust filters. Behind the lower front door of the Deep Silence 6 are two “Easy Access Panels”, allowing an easy access to both the dust filter and the front 140 mm fans.
- Page 6 The innovati ve Nanoxia Acti ve Air Chimney makes it easy to adapt the case to your needs. Under extreme conditi ons you can counteract heat generati on under the top cover eff ecti vely: The two pre-installed fans under the cover will be automati cally enabled if the chimney is opened.
- Page 7 Active Air Chimney One of the main features of the Nanoxia Deep Silence 6 case is without a doubt the Active Air Chimney. The Air Chimney can easily be opened or closed using the slider on the side of the top cover and fulfils various functions.
-
Page 8: Installation Instructions
II. Installation Instructions 1. Installing the Motherboard You can mount HPTX, E-ATX, XL-ATX, ATX, M-ATX and Mini-ITX motherboards in the Deep Silence 6. In order to ensure an easy installation of your motherboard, we suggest the following procedure: a) Please consult the following charts to find your motherboard form factor: HPTX E-ATX XL-ATX, ATX... -
Page 9: Installation Of The Power Supply
d) Next you should mount the CPU cooler - for very large CPU coolers, the att achment of the EPS extension cable aft er installati on can be diffi cult. e) Now place the motherboard gently inside the case and lead the EPS extension cable through the opening provided in the top left of the mainboard tray. -
Page 10: Installation Of External Drives
3. Installati on of external drives You can install up to four external drives in the Deep Silence 6. Two adapter frames for mounti ng 3.5 inch drives are included. 3.1 Opti cal drives To install the opti cal drives, please remove both side panels. The installati on of opti cal drives is tool-free. -
Page 11: Installation Options Of Hdd's
4. Installation options for hard drives The Deep Silence 6 allows you the decoupled mounting of 13 hard disk drives. By using the 5.25 inch to 3.5 adaptors, you can mount a total of 15 data storage disks in your case. -
Page 12: Utilizing The Additional 3-Bay Hdd-Cage
4.2 Uti lising the additi onal 3-bay HDD-cage The Deep Silence 6 is equipped with an additi onal 3-bay HDD-cage, which is screwed to the bott om of the case. If you wish, you can purchase additi onal cages at retailers and thus signifi cantly increase the hard disk capacity of the Deep Silence 6. -
Page 13: Fan Assembly
SWITCH 6. Fan assembly Five 140 mm fans are pre-installed in your Deep Silence 6. You can mount up to twelve fans in total. We recommend the use of the 120 or 140 mm Nanoxia Deep Silence fans, available separately. -
Page 14: Fans Under The Top Cover
You can remove the fan by pushing away the The dust filters can easily be pulled out, as retaining lugs a little bit from the fan and then you can see here (picture 6C). pull the fan out (picture 6B). picture 6B picture 6C Please note, that the filter elements must be fully inserted to guarantee the proper operati-... -
Page 15: Fans In The Mounting Bracket Behind The Hdd-Cage
6.3 Fans in the mounti ng bracket behind the HDD cage If you want to mount additi onal fans inside the case, for example to opti mise disk venti lati on, you can use the specially developed mounti ng bracket that is screwed to the hard drive cage. For this, fi rst remove the screws and then take the bracket out. -
Page 16: Fans On The Bottom Of The Case
Additi onal case fans in the side panel and on the bott om of the Deep Silence 6 should be mounted so that cooler air is introduced into the case (fan rear side facing inwards). -
Page 17: Operation Of The Fan Control
The controller has two channels (A and B), with each channel able to control up to four 3-pin fans, therefore a total of eight fans can be controlled. The fan controller is not designed for the operati on of powerful fans. Please take this into account in parti cular when using fans from other manufacturers. -
Page 18: The Active Air Chimney
8. The Active Air Chimney The innovative Nanoxia Active Air Chimney allows the easy dissipation of hot air in case of a heat buildup under the top cover: Once the Air Chimney is opened, the connected fans are automatically activated. When the Active Air Chimney is closed, the fans are switched off again. -
Page 19: Installation Of A Water Cooling
9. Installing a water cooling soluti on In the Nanoxia Deep Silence 6, you can install both in the specially designed mounti ng bracket, as well as under the cover radiators or compact water cooling soluti ons. 9.1 Installati on of a radiator or compact water cooling soluti on on the mounti ng bracket... -
Page 20: Installation Of A Radiator Or Compact Water Cooling Under The Top Cover
9.2 Installati on of a radiator or compact water cooling under the top cover For the installati on of the radiator under the top cover, please use the off set mounti ng holes, as shown in the diagrams below. The off set ensures the best possible compati bility with current motherboards, even when using extra thick radiators. -
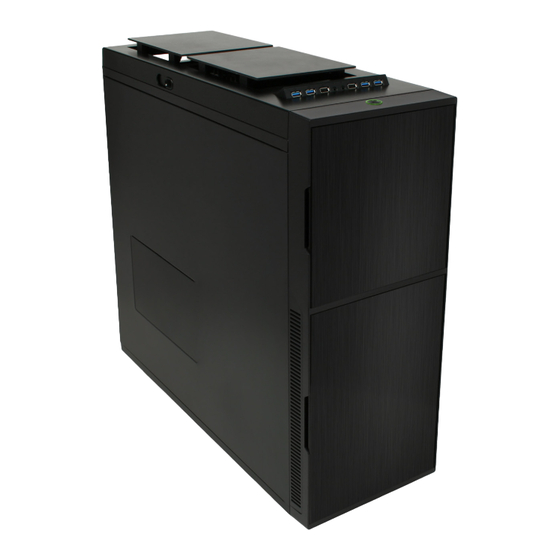
Page 21: The I/O-Panel
The I/O panel can be retracted into the case when not in use, this helps to protect the connectors while maintain the clean looks of the Deep Silence 6. To retract the I/O panel, press it down gently unti l you hear a click. The I/O panel is now closed. -
Page 22: Usb 3.0
Pin assignment of the front panel USB cable plug Diagram 11A Connecting USB cables plug with internal USB port of the motherboard Diagram 11B 11.2 USB 3.0 Diagram 11C shows the typical pin assignment of the internal 19-Pin USB 3.0. The pins are assigned in a way to fit on current motherboards (diagram 11D). -
Page 23: Hd Audio
11.3 HD Audio Diagram 11E shows the pin assignment of the standard HD audio cable plug. The pins are assigned in a way to fit on current motherboards. By referring to the motherboard manual, please check that the HD audio port is identical to the one shown in diagram 11E. -
Page 24: Support
For general inquiries, comments, suggestions and the like please refer to: info@nanoxia-world.com We are sure that you will be satisfied with Nanoxia Deep Silence 6 for many years to come, so please enjoy your new PC case. Your Nanoxia Support-Team...