Table of Contents
Advertisement
Advertisement
Table of Contents

Related Manuals for Nanoxia Deep Silence 4

Summary of Contents for Nanoxia Deep Silence 4
-
Page 2: Table Of Contents
________________________________________________________________02 I. Introduction __________________________________________________________02 • Specifications ________________________________________________________________02 • Accessories ________________________________________________________________03 • Features _________________________________________________________06 II. Installation Instructions ___________________________________________________06 1. Installation of the motherboard ______________________________________________________07 2. Installation of the power supply ________________________________________________07 3. Installation of external drives ___________________________________________________07 3.1 Optical drives ______________________________________08 3.2 Utilizing the external 3.5 inch bay _________________________________________09 4. -
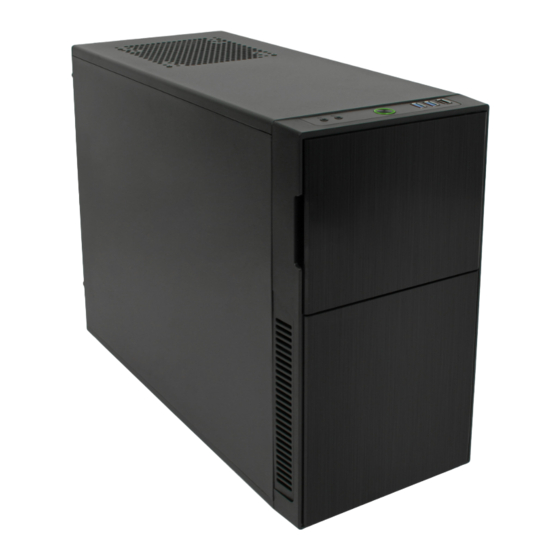
Page 3: Introduction
I. Introducti on Congratulati ons on the purchase of your new Nanoxia Deep Silence 4 mini tower. We are confi - dent that you will be delighted by your new PC case for many years to come. Nanoxia’s Deep Silence series have been designed and developed by an experienced team of developers in Germany. -
Page 4: Features
- Nanoxia VentCover (noise indulated): 1 x top cover Noise Insulation The Nanoxia Deep Silence 4 has been developed with the aim to offer the buyer a low-noise case, while at the same time allowing for extremely low system temperatures. The sound insu-... - Page 5 HDDs. The power supply is isolated from the case by a fl exible rubber framework and also rests on rubber contact points on the bott om of the PSU. The whole concept of sound proofi ng of the Deep Silence 4 meets the highest expectati ons. Venti lati on System The Deep Silence Nanoxia 4 has an integrated venti lati on system consisti ng of two 120 mm Deep Silence fans and a built-in 2-channel fan controller.
- Page 6 Watercooling-ready The Nanoxia Deep Silence 4 like any other Nanoxia case has been prepared for the installation of a water cooling system. Therefore you can install radiators or a compact water cooling solution behind the front cover. Front: 120 mm radiator Behind the front panel, a 120 mm radiator can be mounted.
-
Page 7: Installation Instructions
II. Installati on Instructi ons 1. Installing the Motherboard You can mount M-ATX and Mini-ITX motherboards in the Deep Silence 4. In order to ensure an easy installati on of your motherboard, we suggest the following procedure: a) Please consult the following charts to... -
Page 8: Installation Of The Power Supply
PSU screws. 3. Installati on of external drives You can install up to two external drives in the Deep Silence 4. An adapter frame for mounti ng a 3.5 inch drive is included. 3.1 Opti cal drives To install the opti cal drives, please remove both side panels. -
Page 9: Utilizing The External 3.5 Inch Bay
Remove the 5.25 inch cover by pulling the lateral ti lti ng lever cauti ously towards you and take out the cover. Then loosen the lock on both sides by dragging the black slider backwards (1). Then slide the drive into the desired positi on. -
Page 10: Installation Options Of Hdd's
4. Installati on opti ons for hard drives The Deep Silence 4 allows you the decoupled mounti ng of six hard disk drives in the partly modular HDD-cages. 4.1 Mounti ng of hard drives Install the 2.5 or 3.5 inch hard drives in the illustrated mounti ng frames. In order to extract the frame, squeeze the protruding brackets and pull the slide out gently. -
Page 11: Installation Of A 2.5 Inch Ssd Alongside The Hdd Cages
4.3 Removing the HDD-cages The Deep Silence 4 is equipped with two modular HDD-cages (1 x 3-bay, 1 x 2-bay). The cages can be removed or swapped at will. Due to this unique variability, you can:... -
Page 12: Removing The Front Panel
6. Fan assembly Two 120 mm fans are pre-installed in your Deep Silence 4. You can mount up to three fans in total. You can, of course, connect the additi onal fans to the fan controller (see Chapter The fan in the front is equipped with an easy to clean dust fi lter. -
Page 13: Fans Under The Top Cover
7. The 2-channel fan controller The Deep Silence 4 is equipped with a stepless 2-channel fan control for up to six case fans. You can operate up to three fans per channel. 7.1 Connecting the fans to the fan control The fan controller is powered by a 4-pin Molex connector that is connected directly to the power supply. -
Page 14: Operation Of The Fan Control
Due to the modular HDD cages, you can install a 120 mm radiator or a compact water cooling solution behind the front panel of the Deep Silence 4. For the installation, please remove the upper two modular HDD-cages (see Chapter 4.2). -
Page 15: The I/O-Panel
Finally, reinstall the fan. For maximum cooling performance, you can also mount an additi onal fan on the back of the radiator. Radiator Radiator with 2 fans with 1 fan mounted mounted 9. The I/O-Panel The I/O panel includes connectors for external USB devices (1 x USB 2.0, 2 x USB 3.0), and the microphone and headphone ports. -
Page 16: Connecting The Front Connectors To The Motherboard
10. Connecti ng the front connectors to the motherboard 10.1 USB 2.0 Diagram 10A shows the standard pin assignment of the USB cable plug. The pins are assigned in a way to fi t on current motherboards as shown in diagram 10B. -
Page 17: Hd Audio
Diagram 10C Diagram 10D 10.3 HD Audio Diagram 10E shows the pin assignment of the standard HD audio cable plug. The pins are assi- gned in a way to fit on current motherboards. By referring to the motherboard manual, please check that the HD audio port is identical to the one shown in diagram 10E. - Page 18 Referring to your motherboard manual, please check if that the AC 97 port is identical to the typical shown in diagram 10G. If the pin allocation of the AC 97 plug and the one shown in diagram 10G are the same, please connect the cable.
-
Page 19: Support
For general inquiries, comments, suggestions and the like please refer to: info@nanoxia-world.com We are sure that you will be satisfied with Nanoxia Deep Silence 4 for many years to come, so please enjoy your new PC case. Your Nanoxia Support-Team... - Page 20 Copyright © 2013 Nanoxia UG...