
Related Manuals for Lindy 70536


Summary of Contents for Lindy 70536
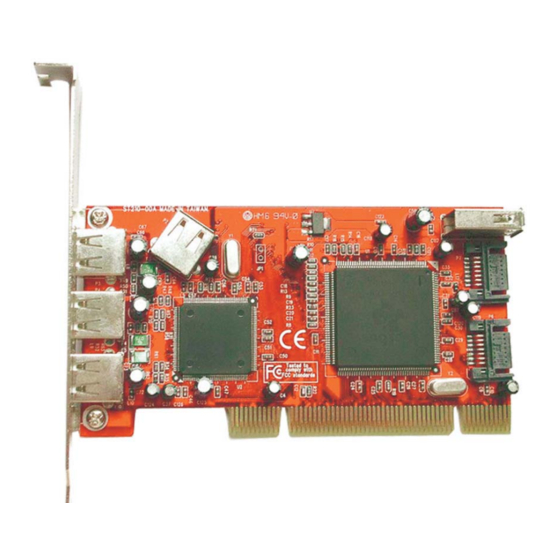
- Page 1 Raid SATA-150+USB2.0 Combo Low Profile PCI User Manual English LINDY No. 70536 www.LINDY.com © LINDY ELECTRONICS LIMITED & LINDY-ELEKTRONIK GMBH - FIRST EDITION (November 2004)
-
Page 2: Pci Interface
1. Introduction This Low Profile PCI Host Adapter is a PCI controller board to support Low profile PCI and regular size PCI both in one card. The card can upgrade your desktop computer to have 2 ports Serial ATA to support RAID 0 / RAID 1 features, and five USB2.0 / USB1.1 ports. -
Page 3: Usb Interface
Provides RAID 1 (Mirroring) to protect the data from a disk failure by writing identical data on 2 drives. Fully compliant with Serial ATA 1.0 specifications. Independent 256-byte FIFOs (32 bit * 64 deep) per Serial ATA channel for host reads and writes. -
Page 4: Disk Mirroring (Raid 1)
Disk Mirroring (RAID 1) Disk mirroring creates an identical twin for a selected disk by having the data simultaneously written to two disks. This redundancy provides instantaneous protection from a single disk failure. If a read failure occurs on one drive, the system reads the data from the other drive. -
Page 5: Software Installation
6. Press CTRL+E and then press Y to exit the setup. 7. Continue with conventional Fdisk and Format steps as if you are installing a conventional hard drive. 8.Your RAID configuration is complete. Please proceed to software installation section. 3.3. Deleting RAID Sets 1. -
Page 6: Windows 2000 Installation
Follow the instructions in this section if you are performing a new installation of Windows 2000/XP, and you wish to boot from a device attached to the SATA port. 1. Power off the system. Insert Combo Card into an available PCI slot. Connect serial ATA cable(s) between the SATA port and serial ATA device(s). -
Page 7: Windows Xp Installation
installing the driver. 13. The wizard will now copy the required files to the system and start the Driver. After starting the driver the wizard will display a completion dialog, click 'Finish' to exit the wizard. 4.3. Windows XP installation Power off the system. -
Page 8: Windows 98Se Installation
USB Root Hub The driver has started correctly. 4. Double click on 'SCSI and RAID Controllers', if there is no yellow '!' or '?' in front of 'Silicon Image SiI 3112 SATARaid Controller' the driver has started correctly. 5. To view information about the devices attached to the controller, right click the 'Devices' and select Properties from the context menu, then select the tab labeled 'General'. - Page 9 standard PCI-to-PCI bridge', click 'Next'. Select 'Search for the best driver for your device [Recommended]' and click 'Next'. 3. Select 'Floppy disk drives' and click 'Next'. 4. When the wizard indicates that it found a driver for the device click 'Next'. Then click 'Finish' to exit the wizard.
-
Page 10: Windows Me Installation
SiI 3112 Controller. 4.7. Windows ME installation 1. Power off the system. Insert Combo Card into an available PCI slot. Power up the system. 2. During the system boot up, the Hardware Wizard will display that it found 'PCI standard PCI-to-PCI bridge', select 'Automatic search for a better driver (Recommended)', click 'Next'. - Page 11 'General'. This device complies with Part 15 of the FCC Rules. Operation is subject to the following two conditions: (1) this device may not cause harmful interference, and (2) this device must accept any interference received, including interference that may cause undesired operations.