Table of Contents
Advertisement
User Guide
Wi-Fi Connect
SP-AC2015
Dual Band 3x3 802.11AC Gigabit Router
The ultra-thin and stylish Wi-Fi Connect SP-AC2015 features a 2.4GHz and
5GHz dual bands for an unmatched concurrent wireless HD streaming; SMB
server, UPnP AV server, and FTP server for 24/7 file sharing; a capability to
handle 300,000 sessions; and the ASUS Green Network Technology, which
provides up to 70% power-saving solution.
Advertisement
Table of Contents

Related Manuals for Asus SP-AC2015 Wi-Fi Connect


Summary of Contents for Asus SP-AC2015 Wi-Fi Connect
-
Page 1: User Guide
5GHz dual bands for an unmatched concurrent wireless HD streaming; SMB server, UPnP AV server, and FTP server for 24/7 file sharing; a capability to handle 300,000 sessions; and the ASUS Green Network Technology, which provides up to 70% power-saving solution. - Page 2 Product warranty or service will not be extended if: (1) the product is repaired, modified or altered, unless such repair, modification of alteration is authorized in writing by ASUS; or (2) the serial number of the product is defaced or missing. ASUS PROVIDES THIS MANUAL “AS IS” WITHOUT WARRANTY OF ANY KIND,...
-
Page 3: Table Of Contents
Table of contents A Quick Look Package Contents ..................5 Your Wi-Fi Connect ..................5 Creating Your Network Positioning Your Router ................8 What You Need ..................... 9 Setting Up Your Wi-Fi Connect ..............10 Wired Connection ................10 Wireless Connection ................11 Mounting To The Stand ................12 Before You proceed ...................13 Configuring Via The Web User Interface... - Page 4 Table of contents Restoring/Saving/Uploading Settings ........32 Setting Up Your Network Printer ............33 Troubleshooting Troubleshooting ..................37 ASUS DDNS Service ..................40 Frequently Asked Questions (FAQs) ..........40 Appendices Notices ......................42 ASUS Contact information ..............56 Networks Global Hotline Information ..........57 Networks Global Hotline Information ..........58...
-
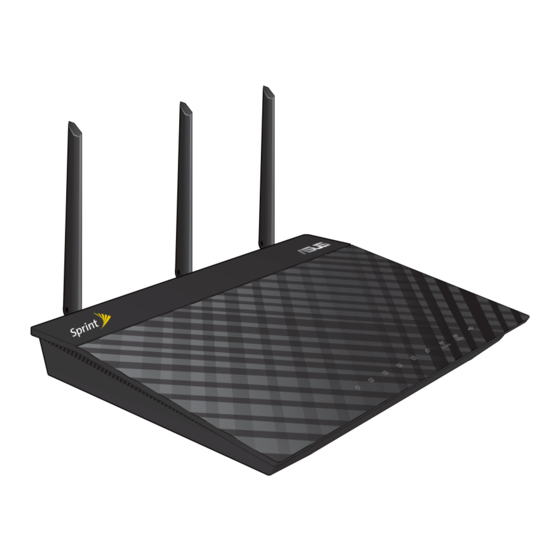
Page 5: Quick Look
Network cable Quick Start Guide Stand NOTES: • If any of the items is damaged or missing, contact ASUS for technical inquiries and support, Refer to the ASUS Support Hotline list at the back of this user manual. • Keep the original packaging material in case you would need future warranty services such as repair or replacement. Your Wi-Fi Connect Power LED Off: No power. -
Page 6: Power Button
LAN LED Off: No power or no physical connection. On: Has physical connection to a local area network (LAN). WAN LED Off: No power or no physical connection. On: Has physical connection to a wide area network (WAN). 2.4GHz LED / 5GHz LED Off: No 2.4GHz or 5GHz signal. - Page 7 WAN (Internet) port Connect a network cable into this port to establish WAN connection. LAN 1 ~ 4 ports Connect network cables into these ports to establish LAN connection. WPS button This button launches the WPS Wizard. NOTES: • Use only the adapter that came with your package. Using other adapters may damage the device.
-
Page 8: Creating Your Network
• Always update to the latest firmware. Visit the ASUS website at http://www.asus.com to get the latest firmware updates. • To ensure the best wireless signal, orient the three detachable antennas as shown in the drawing below. 90°... -
Page 9: What You Need
What You Need To set up your network, you need one or two computers that meet the following system requirements: • E thernet RJ-45 (LAN) port (10Base-T/100Base- TX/1000BaseTX) • IEEE 802.11a/b/g/n/ac wireless capability • An installed TCP/IP service • W eb browser such as Internet Explorer, Firefox, Safari, or Google Chrome NOTES: • If your computer does not have built-in wireless capabilities, you may install an IEEE 802.11a/b/g/n/ac WLAN adapter to your computer to connect to the network. -
Page 10: Setting Up Your Wi-Fi Connect
Setting Up Your Wi-Fi Connect IMPORTANT! • Use wired connection in setting up your Wi-Fi Connect to avoid possible setup problems due to wireless uncertainty. • Before setting up your ASUS Wi-Fi Connect, do the following: • I f you are replacing an existing router, disconnect it from your network. • D isconnect the cables/wires from your existing modem setup. If your modem has a backup battery, remove it as well. -
Page 11: Wireless Connection
Using the bundled network cable, connect your computer to your Wi-Fi Connect’s yellow LAN port. Using another network cable, connect your modem to your Wi-Fi Connect’s blue WAN port. Insert your Wi-Fi Connect’s AC adapter to the DC-IN port and plug it to a power outlet. -
Page 12: Mounting To The Stand
NOTES: • For details on connecting to a wireless network, refer to the WLAN adapter’s user manual. • To set up the security settings for your network, refer to the section Setting up the wireless security settings in this user manual. Mounting To The Stand To mount to the stand: Align and insert the stand’s mounting hooks to the Wi-Fi Connect’s mounting holes. Slide the mount until it locks in place. -
Page 13: Before You Proceed
Before You proceed NOTE: Before configuring your Wi-Fi Connect, do the steps described in this section for your host computer and network clients. A. Disable the proxy server, if enabled. Windows® 7 Click Start > Internet Explorer to launch the browser. - Page 14 MAC OS 10.10.3 From your Safari browser, click Safari > Preferences > Advanced > Change Settings... From the Network screen, deselect FTP Proxy and Web Proxy (HTTP). Cllick Apply Now when done. NOTE: Refer to your browser's help feature for details on disabling the proxy server.
- Page 15 To obtain the IPv4 IP settings automatically, tick Obtain an IP address automatically. To obtain the IPv6 IP settings automatically, tick Obtain an IPv6 address automatically. Click OK when done. MAC OS 10.10.3 Click the Apple icon located on the top left of your screen.
- Page 16 Disable the dial-up connection, if enabled. Windows® 7 Click Start > Internet Explorer 8 to launch the browser. Click Tools > Internet options > Connections tab. Tick Never dial a connection. Click OK when done. NOTE: Refer to your browser's help feature for details on disabling the dial-up connection.
-
Page 17: Configuring Via The Web User Interface
Configuring Via The Web User Interface Logging Into The Web User Interface Your ASUS Wi-Fi Connect comes with an intuitive Web User Interface that allows you to easily configure its various features through a web browser such as Internet Explorer, Firefox, Safari, or Google Chrome. - Page 18 The Wi-Fi Connect’s Web User Interface launches. Use the navigation menu on the left to view and configure various settings.
-
Page 19: Setting Up The Internet Connection
Setting Up The Internet Connection NOTE: When setting the Internet connection for the first time, press the Reset button on your Wi-Fi Connect to reset it to its factory default settings. Quick Internet Setup (QIS) The Quick Internet Setup (QIS) function guides you in quickly setting up your Internet connection. - Page 20 NOTES: • The auto-detection of your ISP connection type takes place when you configure the Wi-Fi Connect for the first time or when your Wi-Fi Connect is reset to its default settings. • If QIS failed to detect your Internet connection type, click Skip to manual setting and manually configure your connection settings. • If QIS failed to launch automatically, manually launch your Wi- Fi Connect's Web User Interface to access the QIS page. To do this, follow these steps: 1.
-
Page 21: Configuring Your Wireless Security Settings
Configuring Your Wireless Security Settings To protect your wireless network from unauthorized access, you need to configure its security settings. To set up the wireless security settings: Launch a web browser and enter http://192.168.27.1 or http://sprint.router From the login screen, enter the default user name (admin) and password (admin), then click OK. -
Page 22: Smart Connect
Smart Connect Smart Connect dynamically and seamlessly switches devices between Wi-Fi bands (2.4GHz and 5GHz) based on location, signal strength, and wireless protocol, ensuring optimization for each device using your Wi-Fi Connect. Smart Connect is enabled by default and requires only a single password. -
Page 23: Monitoring Your Usb Device
Monitoring Your USB Device The ASUS Wi-Fi Connect provides two USB 2.0 ports for connecting USB devices such as a USB storage device and USB printer, to allow you to monitor the working environment, share files, and printer with clients in your network. - Page 24 NOTES: • For more details, refer to the section Using the Network Place (Samba) Share service. • On USB External HDD/Flash disk: • T he Wi-Fi Connect works with most USB HDDs/Flash disks (up to 2TB size) and supports read-write access for FAT16, FAT32, EXT2, EXT3, and NTFS. • T o safely remove the USB disk, launch the web GUI (http://192.168.1.1), then in the upper right corner of >...
-
Page 25: Using The Usb Application
Using The USB Application Application menu provides features for Media Services and Servers and Network Printer Server. Using The Media Server Service Your Wi-Fi Connect allows UPnP (Universal Plug and Play) multimedia devices, such as PS3 and XBox 360, to access multimedia files from the USB disk connected to your Wi-Fi Connect. -
Page 26: Using The Network Place (Samba) Share Service
Using The Network Place (Samba) Share Service Network Place (Samba) Share allows you to set the account and permission for samba service. To use Samba share: Launch your Wi-Fi Connect’s Web User Interface. Click USB Application from the navigation menu on the left. Click the Network Place (Samba) Share tab. -
Page 27: Creating Your Guest Network
Creating Your Guest Network The Guest Network provides Internet connectivity for temporary visitors without providing access to your private network. To create your guest network: Launch the Wi-Fi Connect’s Web User Interface. On the Guest Network screen, click Enable to create a network for your visitors. -
Page 28: Using The Traffic Manager
Using The Traffic Manager Traffic Monitor The traffic monitor feature allows you to access the bandwidth usage and speed of your Internet, wired, or wireless networks. It allows you to monitor network traffic in real-time or on a daily basis. It also offers an option to display the network traffic within the last 24 hours. -
Page 29: Configuring The Advanced Settings
You may enable the DHCP Server function in your Wi-Fi Connect so your network clients can automatically obtain IP addresses from your Wi-Fi Connect. NOTE: Your ASUS Wi-Fi Connect can support up to 253 IP addresses for your network. To set up the DHCP server: Launch your Wi-Fi Connect’s Web User Interface. -
Page 30: Upgrading The Firmware
2 and 254) • IP Pool Starting Address should not be greater than the IP Pool Ending Address. Upgrading The Firmware NOTE: Download the latest firmware from the ASUS website at http://www.asus.com To upgrade the firmware: Launch your Wi-Fi Connect’s Web User Interface. Click Administration from the navigation menu on the left. - Page 31 NOTE: If the upgrade process fails, the Wi-Fi Connect automatically enters the rescue mode and the power LED indicator at the front panel flashes slowly. To recover or restore the system, use the Firmware Restoration utility.
-
Page 32: Restoring/Saving/Uploading Settings
Restoring/Saving/Uploading Settings To restore/save/upload the settings: Launch your Wi-Fi Connect’s Web User Interface. Click Administration from the navigation menu on the left. Click the Restore/Save/Upload Setting tab. You can perform the following tasks: • T o restore to the default factory settings, click Restore, and click OK in the confirmation message. • T o save the current system settings, click Save, and click Save in the file download window to save the system file in your preferred path. -
Page 33: Setting Up Your Network Printer
Use the Network Printer Setup utility to set up a USB printer on your Wi-Fi Connect and allow network clients to access the USB printer. NOTES: • To check if your USB printer is compatible with your ASUS Wi- Fi Connect, refer to the Printer Support List at http://event.asus.com/2009/networks/printersupport/SP- AC2015.htm • The Wi-Fi Connect's printer server function is not supported on Windows®... - Page 34 Unzip the downloaded file and double-click the Printer icon to run the network printer setup program. Follow the onscreen instructions to set up your hardware, then click Next.
- Page 35 Wait for a few minutes for the initial setup to finish. Click Finish to complete the installation.
- Page 36 Follow the Windows® OS instructions to install the printer driver. 10. Once the driver is installed, network clients can now use the printer.
-
Page 37: Troubleshooting
Troubleshooting NOTE: If you encounter problems that are not mentioned in this chapter, contact the ASUS Technical Support. Troubleshooting I cannot access a web browser for configuring the router. • Delete the cookies and files in your web browser. To do this, follow these steps: 1. From your Internet Explorer 8, click Tools > Internet Options... - Page 38 Cannot find the router: • P ress the Reset button at the rear panel for more than five seconds. • C heck the setting in the wireless adapter such as SSID and encryption settings. Cannot access the Internet via wireless LAN adapter. • Move the router closer to the wireless client. • Check whether the wireless adapter is connected to the correct Wi-Fi Connect. • Check whether the wireless channel in use conforms to the channels available in your country/area. • Check the encryption settings. • Check if the ADSL or Cable connection is correct.
- Page 39 The following are the factory default settings: User Name: admin Password: admin Enable DHCP: Yes (if WAN cable is plugged in) IP address: 192.168.27.1 Domain Name: (Blank) Subnet Mask: 255.255.255.0 DNS Server 1: 192.168.27.1 DNS Server 2: (Blank) SSID (2.4GHz): ASUS SSID (5GHz): ASUS_5G...
-
Page 40: Asus Ddns Service
I did not register the ASUS DDNS for the router I bought six months ago. Can I still register it? Yes, you can still register the ASUS DDNS service for your router. - Page 41 Different ISPs may have different interval time for IP updating. Is the ASUS DDNS service free, or is it just a trial version? The ASUS DDNS service is a free and embedded service in some ASUS routers. Check your ASUS router if it supports the...
-
Page 42: Appendices
Appendices Notices ASUS Recycling/Takeback Services ASUS recycling and takeback programs come from our commitment to the highest standards for protecting our environment. We believe in providing solutions for you to be able to responsibly recycle our products, batteries, other components, as well as the packaging materials. - Page 43 This equipment generates, uses and can radiate radio frequency energy and, if not installed and used in accordance with the instructions, may cause harmful interference to radio communications. However, there is no guarantee that interference will not occur in a particular installation. If this equipment does cause harmful interference to radio or television reception, which can be determined by turning the equipment off and on, the user is encouraged to try to correct the interference by one or more of...
-
Page 44: Safety Information
Safety Information To maintain compliance with FCC’s RF exposure guidelines, this equipment should be installed and operated with minimum distance 20cm between the radiator and your body. Use on the supplied antenna. Declaration of Conformity for R&TTE directive 1999/5/EC Essential requirements – Article 3 Protection requirements for health and safety –... - Page 45 Canada, Industry Canada (IC) Notices This Class B digital apparatus complies with Canadian ICES-003 and RSS-210. Operation is subject to the following two conditions: (1) this device may not cause interference, and (2) this device must accept any interference, including interference that may cause undesired operation of the device.
- Page 46 Canada, avis d’Industry Canada (IC) Cet appareil numérique de classe B est conforme aux normes canadiennes ICES-003 et RSS-210. Son fonctionnement est soumis aux deux conditions suivantes: (1) cet appareil ne doit pas causer d’interférence et (2) cet appareil doit accepter toute interférence, notamment les interférences qui peuvent a ecter son fonctionnement.
-
Page 47: Licensing Information
GNU General Public License Licensing information This product includes copyrighted third-party software licensed under the terms of the GNU General Public License. Please see The GNU General Public License for the exact terms and conditions of this license. We include a copy of the GPL with every CD shipped with our product. - Page 48 When we speak of free software, we are referring to freedom, not price. Our General Public Licenses are designed to make sure that you have the freedom to distribute copies of free software (and charge for this service if you wish), that you receive source code or can get it if you want it, that you can change the software or use pieces of it in new free programs;...
- Page 49 the program proprietary. To prevent this, we have made it clear that any patent must be licensed for everyone’s free use or not licensed at all. The precise terms and conditions for copying, distribution and modification follow. Terms & conditions for copying, distribution, & modification This License applies to any program or other work which contains a notice placed by the copyright holder saying it...
- Page 50 copy, and you may at your option offer warranty protection in exchange for a fee. You may modify your copy or copies of the Program or any portion of it, thus forming a work based on the Program, and copy and distribute such modifications or work under the terms of Section 1 above, provided that you also meet all of these conditions: a) You must cause the modified files to carry prominent...
- Page 51 the intent is to exercise the right to control the distribution of derivative or collective works based on the Program. In addition, mere aggregation of another work not based on the Program with the Program (or with a work based on the Program) on a volume of a storage or distribution medium does not bring the other work under the scope of this License.
- Page 52 and so on) of the operating system on which the executable runs, unless that component itself accompanies the executable. If distribution of executable or object code is made by offering access to copy from a designated place, then offering equivalent access to copy the source code from the same place counts as distribution of the source code, even though third parties are not compelled to copy the source along with the object code.
- Page 53 If, as a consequence of a court judgment or allegation of patent infringement or for any other reason (not limited to patent issues), conditions are imposed on you (whether by court order, agreement or otherwise) that contradict the conditions of this License, they do not excuse you from the conditions of this License.
- Page 54 distribution is permitted only in or among countries not thus excluded. In such case, this License incorporates the limitation as if written in the body of this License. The Free Software Foundation may publish revised and/ or new versions of the General Public License from time to time.
- Page 55 OF MERCHANTABILITY AND FITNESS FOR A PARTICULAR PURPOSE. THE ENTIRE RISK AS TO THE QUALITY AND PERFORMANCE OF THE PROGRAM IS WITH YOU. SHOULD THE PROGRAM PROVE DEFECTIVE, YOU ASSUME THE COST OF ALL NECESSARY SERVICING, REPAIR OR CORRECTION. 12 IN NO EVENT UNLESS REQUIRED BY APPLICABLE LAW OR AGREED TO IN WRITING WILL ANY COPYRIGHT HOLDER, OR ANY OTHER PARTY WHO MAY MODIFY AND/OR REDISTRIBUTE THE PROGRAM AS PERMITTED ABOVE, BE...
-
Page 56: Asus Contact Information
ASUS COMPUTER INTERNATIONAL (America) Address 800 Corporate Way, Fremont, CA 94539, USA Telephone +15107393777 +15106084555 Website usa.asus.com Online support support.asus.com ASUS COMPUTER GmbH (Germany and Austria) Address Harkort Str. 21-23, D-40880 Ratingen, Germany Telephone +491805010923* +492102959911 Website www.asus.de Online contact www.asus.de/sales... -
Page 57: Networks Global Hotline Information
180014410573 Poland 00225-718-033 Polish 9:00-17:00 Mon. to Fri. 00225-718-040 8:30-17:30 Portugal 707-500-310 Portuguese 9:00-17:00 Mon. to Fri. Russia +8-800-100-ASUS; +7- Russian/ 9:00-18:00 Mon. to Fri. 495-231-1999 English +65-6720-3835 (Check Repair Detail Singapore English 11:00-19:00 Mon. to Fri. Status Only) -66221701... -
Page 58: Networks Global Hotline Information
Mon. to Fri United Kingdom 0044-870-1208340; English 9:00-17:00 Mon. to Fri. 0035-31890719918 8:30-12:00am Mon. to Fri. (5:30am- 9:00pm PST) USA/Canada 1-812-282-2787 English 9:00am- Sat. to Sun. 6:00pm EST (6:00am- 3:00pm PST) NOTE: For more information, visit the ASUS support site at: http://support.asus.com... - Page 59 ASUSTeK Computer Inc. Manufacturer: Tel: +886-2-2894-3447 Address: No. 150, LI-TE RD., PEITOU, TAIPEI 112, TAIWAN ASUS Computer GmbH Authorised representative Address: HARKORT STR. 21-23, 40880 in Europe: RATINGEN, GERMANY BOGAZICI BIL GISAYAR SAN. VE TIC. Authorised A.S. distributors Tel: +90 212 3311000 in Turkey: Address: AYAZAGA MAH.