Advertisement
LSC Radio User Guide Information and Guidelines
The following user guide applies to both the Motorola VL50 and CLS1410 Radio's. Below are guidelines
established for usage.
1) Radios and headsets are to be signed out at the beginning of each day.
2) Radios are to be returned at the end of each day. It has been found that the majority of damage
to both the headsets and radios occur when stuffed into a personal carrying bag.
3) The Chief Judges or their designee is responsible for issuing at the beginning of the day and
collection at the end of each day.
4) The chief judge should have the radios set to the proper channels before issuing. It is advised
that the keyboard should be locked out before issuing in order to avoid settings from being
accidentally changed.
5) Any problems with either the headset or radio should be noted on the sign‐out/in log.
6) We understand that accidents happen, please note any at the time of return.
Thanks for volunteering, your time and effort is appreciated by the LSC, Coaches and most of all our
swimmers. Have a great meet!
LSC Officials Committee
Advertisement
Table of Contents

Related Manuals for Motorola VL50


Summary of Contents for Motorola VL50
- Page 1 LSC Radio User Guide Information and Guidelines The following user guide applies to both the Motorola VL50 and CLS1410 Radio’s. Below are guidelines established for usage. 1) Radios and headsets are to be signed out at the beginning of each day. 2) Radios are to be returned at the end of each day. It has been found that the majority of damage to both the headsets and radios occur when stuffed into a personal carrying bag. 3) The Chief Judges or their designee is responsible for issuing at the beginning of the day and collection at the end of each day. 4) The chief judge should have the radios set to the proper channels before issuing. It is advised that the keyboard should be locked out before issuing in order to avoid settings from being accidentally changed. 5) Any problems with either the headset or radio should be noted on the sign‐out/in log. 6) We understand that accidents happen, please note any at the time of return. Thanks for volunteering, your time and effort is appreciated by the LSC, Coaches and most of all our swimmers. Have a great meet! LSC Officials Committee ...
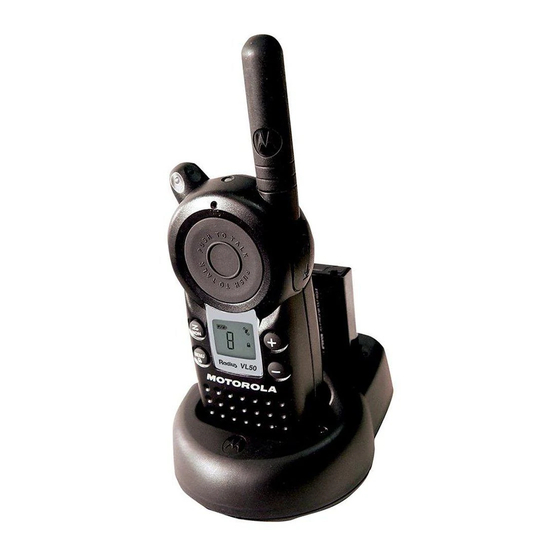
- Page 2 VL50 Two-Way Radio User Guide...
-
Page 3: Radio Controls
Radio Controls Microphone Use P to: Turn radio on/off Adjust radio volume Use B to: Transmit call tone Accessory Jack Use Push to Talk to: Talk Exit a menu Change channels Change menu settings Monitor the frequency Scan channels Speaker Lock the keypad 020976o Scroll through menus... - Page 4 Charging Status LEDs On the drop-in charger, the radio and battery charging pockets have their own LEDs. On the MUC, each of the 6 charging pockets has an LED. The LEDs are grouped into pairs to show which charging pockets are paired (for cloning, see page 27). The LED is solid red when the battery is charging, and solid green when charging is complete.
- Page 5 Turning Your Radio On and Off See page 8 for a basic radio diagram. Turn clockwise to turn the radio on, and counterclockwise to turn the radio off. When the radio is on, the transmit light on the top of the radio flashes every 3 seconds. When you turn the radio on, the radio chirps and the display briefly shows all features and display segments.
- Page 6 Adjusting the Volume Turn clockwise to increase the volume, and counterclockwise to decrease the volume. Note: Do not hold the radio too close to your ear when adjusting the volume. Reading the Display ® VibraCall Alert Indicator Signal Strength and Channel Busy Indicator Frequency and Interference Eliminator Battery Meter...
-
Page 7: Signal Strength And Channel Busy Indicators
Talking and Receiving Basic Radio Operation 1. Press and hold to check for channel activity. If you hear static, the channel is clear to use. Do not transmit if someone is speaking on the channel. Press again to stop monitoring. 2. - Page 8 With Compatible VOX Accessories 1. Turn the radio off. 2. Open the accessory cover. 3. Plug the audio accessory firmly into the accessory jack. 4. Turn the radio on. The radio displays g. If g is flashing and you are setting up the VOX accessory for the first time, set the VOX sensitivity level (see page 19).
-
Page 9: Locking The Keypad
Setting the VOX Sensitivity You can adjust the sensitivity of your radio’s accessory or microphone during VOX operation to suit different operating environments. These menus appear only when the VOX feature is in use, which is indicated by g. 1. Press until g displays. -
Page 10: Entering Programming Mode
3. Press and hold Push to Talk to exit programming mode, or press continue programming. Note: See page 34 for information on frequencies for communicating with other business radios. If you are matching your VL50 radio to an existing Spirit GT radio, see page 40. -
Page 11: Advanced Features
Advanced Features You can set the following features by pressing and holding additional buttons while turning the radio on. Press This Button Default To Do This While Turning Setting the Radio On Turn Keypad Tones On/Off Turns keypad beeps off for silent keypad operation. Turn End-of-Transmission Tone On/Off If enabled, your two-way radio transmits a tone when you finish transmitting (like saying Roger or Over). - Page 12 Press This Button Default To Do This While Turning Setting the Radio On Restore Factory Defaults Push to Talk Returns radio to its original factory settings.
-
Page 13: Troubleshooting
Frequency may be in use. Change on all radios if possible (see noises or conversation on page 23 and 24). a channel Bandwidth does not match. For optimal audio quality when Poor audio communicating with VL50 radios, the bandwidth of other radios quality should be set to 12.5 kHz, if possible. - Page 14 Symptom Try This: Steel and/or concrete structures, heavy foliage, buildings, or vehicles decrease range (see page 17). Check for clear line of Limited talk sight to improve range. range Wearing radio close to body such as in a pocket or on a belt decreases range.
- Page 15 Symptom Try This: Reinsert radio and/or battery. Clean battery and/or charger contacts. Charger light Verify that the charging pin on the transformer is inserted does not come correctly into the drop-in charger. AAA cells installed in radio. Remove and replace with Li-Ion battery.
-
Page 16: Use And Care
Use and Care Use a soft damp cloth Do not immerse Do not use alcohol or to clean the exterior. in water. cleaning solutions. If the radio is submerged in water... Turn radio off and Do not use radio until Dry with soft cloth. - Page 17 VL50 Radio Programming Quick Reference To enter programming mode, press and hold Push to Talk for 3 seconds while turning the radio on. The radio beeps and displays , the channel number flashes, and the frequency (indicated by ) and code (indicated by display alternately.
- Page 18 VL50 Radio Programming Quick Reference Press until E display.s Set a Call Press to select1, 2, or Tone 3 for audible call tones, 4 for VibraCall, or 0 for off (default). Press until g and ? display. Set the Press...