
Related Manuals for Ioline I/S 60

Summary of Contents for Ioline I/S 60
- Page 1 Qu ic k S ta r t Gui d e I/S Series SC Series I/S 60, 85, 110, 130 and 100 System SC-40 & -48 Ioline SmarTrac™...
-
Page 2: User Notice
User Guide. It is the responsibility of the operator of the cutter to follow all safety precautions and warnings that are described in this User Guide. Ioline is not responsible for inju- ries that may occur as a result of unsafe operating procedures. -
Page 3: Safety & Cautions
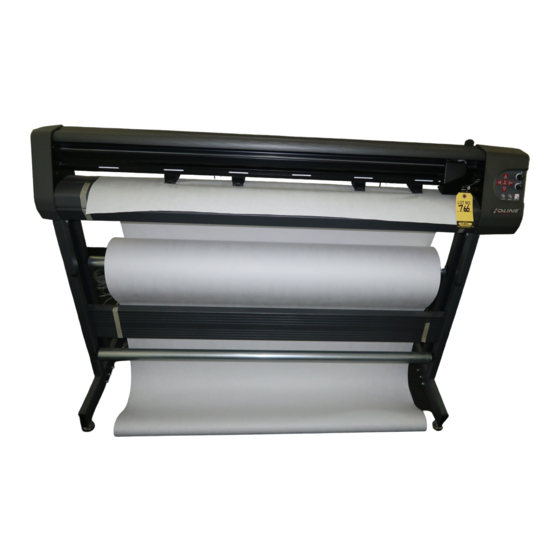
Using the Autoloop function (enabled in the Control Center) will create the required service loop by gently pulling a set amount of material from the roll before cutting. Ioline recommends using the Autoloop function when plotting on a roll of material. - Page 4 A. Dust Cover E. Idler Wheel B. Drive Shaft Marker Drive Shaft C. Carriage G. Pinchwheel D. Blade Holder H. Pinchwheel Lever Figure 1. The Ioline SmarTrac I/S Cutter Front View.
-
Page 5: Visual Reference Guide
Visual Reference Guide Keypad M. Media Roller N. Platen Stand Leg K. Stand Leveling Foot O. Traverse L. Cross-member LED Sensor Figure 2. The Ioline SmarTrac Contour (SC) Cutter Front View. -
Page 6: Quick Setup
Quick Setup This Quick Start Guide shows how to assemble and setup the Ioline Caution I/S, SC-40 and SC-48 model cutters. Consult the SmarTrac User Guide on the CD-ROM for more detailed information about installa- Caution: The SmarTrac tion and operation. The User Guide may be printed from the pro-... - Page 7 Quick Setup Connect the Cross-Member and Legs The cross-member is reversible and can be attached upside down or from either Cross-member side. Fit the cross- member snugly into the rectangular Figure 6. Connect the cross-member. groove in one leg. Align the holes in the leg with the threaded holes in the cross-member.
- Page 8 Ioline SmarTrac Quick Start Guide Place Cutter on the Cradle (optional on I/S 60) Have one person hold the cutter while the other person posi- tions the cutter. Slide Back bottom tabs of the Front cutter outside the top of both cradle feet.
- Page 9 Note Center software. The Setup program also allows installation of the electronic User Install USB Drivers Guides and the necessary viewer. Please see the guide labeled Installing USB Drivers for Ioline Products on the CD-ROM for the driver installation process.
- Page 10 Ioline SmarTrac Quick Start Guide Step 5: Prepare to Cut Load the Material Roll Place a roll of mate- rial onto the media rollers. With the pinchwheels up, thread the material through the machine. Figure 15. Material loaded on media roller.
- Page 11 Quick Setup Position the Material Do not let the material become suddenly tight between the cutter and the material roll. Manually unroll a few feet of material from the roll to create a slack loop behind the machine. Use the Arrow keys on the keypad to move material through the cutter to check align-...
-
Page 12: Customer Service
Customer Service Ioline Corporation is committed to providing quality service and support to our customers. If you need assistance with an Ioline prod- uct, contact your local dealer or Ioline authorized service center. You may also contact:...