
Related Manuals for Zoom UAC-2


Summary of Contents for Zoom UAC-2
- Page 1 Operation Manual © 2015 ZOOM CORPORATION Copying or reprinting this manual in part or in whole without permission is prohibited.
-
Page 2: Table Of Contents
Hi-Z connections. The gain can be raised by up to 60 dB, and +48V phantom power can be supplied. dedicated mixer application Use this application to make internal mixer and monitoring effect settings. For details about , see the ZOOM website (http://www.zoom.co.jp/downloads/). -
Page 3: Usage And Safety Precautions
Do not do anything that could exceed the ratings of outlets and other Then, contact the retailer where you purchased it or Zoom support and provide the electrical wiring equipment or supply power other than AC100V. -
Page 4: Part Names
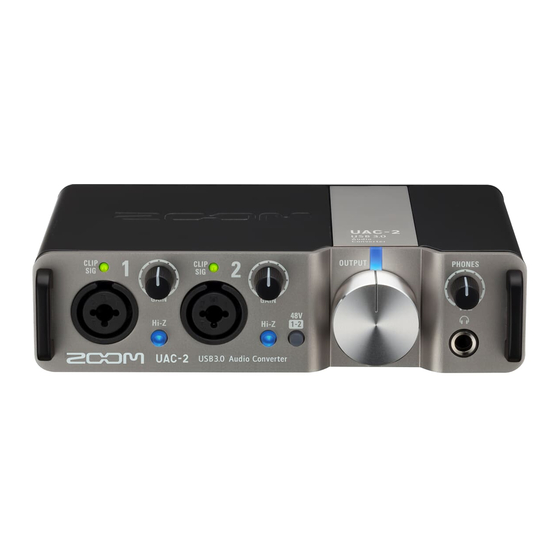
Part Names Top Panel Level indicators GAIN knobs PHONES knob Power indicator INPUT 2 jack Hi-Z switches OUTPUT knob INPUT 1 jack PHANTOM switch PHONES jack TIP : HOT RING : COLD 1 : GND 2 : HOT SLEEVE : GND 3 : COLD... - Page 5 Rear Panel POWER switch DIRECT MONITOR switch USB 3.0 port AC ADAPTER connector MIDI OUT jack OUTPUT jacks CLASS COMPLIANT MIDI IN jack MODE switch...
-
Page 6: Connecting With A Computer
Connecting with a Computer Installing the Driver Do not connect the until installation completes. Download the ZOOM UAC-2 Driver from http://www.zoom. co.jp/downloads/ to your computer. NOTE Launch the installer and install the driver. NOTE... -
Page 7: Turning The Power On
Turning the Power ON Before turning the power on, minimize the volumes of the connected devices. Use a USB cable to connect the and the computer. NOTE <Rear> Although also compatible with enables operation with even higher performance. to ON. NOTE cannot be used if it is not connected to a computer. -
Page 8: Ipad Connection (Class Compliant Mode)
iPad connection (class compliant mode) By using the optional power adapter for this unit (AD-14), you can connect it to an iPad. <Rear> to ON. NOTE If the power is already ON, changing the CLASS COMPLIANT MODE switch will have no effect. - Page 9 Connect the and the iPad using an Apple iPad Camera Connection Kit or Lightning to USB Camera Adapter. <Rear> to ON. <Rear> After the turns on, it will connect to the iPad.
-
Page 10: Recording
Connecting Instruments Connect instruments to INPUTS 1/2 using TRS/mono phone cables. <Front> Keyboard (TRS cables) Bass guitar Guitar (mono phone cable) Using the Hi-Z Function an INPUT, press its so that it lights. an INPUT, press its so that it becomes unlit. - Page 11 Connecting Mics Using XLR cables, connect mics to INPUTS 1/2. <Front> Dynamic mic (XLR cable) Condenser mic (XLR cable) Using Phantom Power so that it lights. Phantom power is supplied when this switch is lit.
- Page 12 You can adjust the gain of each INPUT. Check the status of the input signal. Lit green: Input signal present. Lit red: Input signal is clipping. Adjust the input gain. Turn the HINT...
-
Page 13: Playback
Connecting Headphones and Speakers Connect headphones to the PHONES jack and speakers to the OUTPUT jacks. Then, adjust the volume. Connect headphones or speakers. <Front> <Rear> Headphones Speakers Adjust the headphones/speakers volume. Turn Headphones volume: Turn Speakers volume:... -
Page 14: Using Direct Monitoring
Using Direct Monitoring Sound inputs into the can be directly output without passing through the computer. This enables monitoring without latency. <Rear> Set the Direct monitoring setting INPUT 1 jack INPUT 2 jack MONO Output from the PHONES jack and both L/R OUTPUT jacks. STEREO Output from the PHONES Output from the PHONES... -
Page 15: Connecting Midi Devices
Connecting MIDI Devices Use MIDI cables to connect MIDI devices to the MIDI IN and MIDI OUT jacks. <Rear> MIDI keyboard, MIDI controller Sound module MIDI OUT jack MIDI IN jack MIDI OUT jack MIDI IN jack NOTE making settings. might not function properly otherwise. -
Page 16: Restoring Factory Default Settings
Restoring Factory Default Settings Follow these instructions to initialize settings, restoring them to their factory defaults. Turn the power ON while pressing . (→P .7) Initialize the settings. Execute Press Execute: Press Cancel: Cancel... -
Page 17: Troubleshooting
Troubleshooting Cannot select or use the device Sound skips during playback or recording Confirm that the is connected to the If you can adjust the audio buffer size of the computer correctly. software that you are using, increase the buffer size. -
Page 18: Specifications
Specifications Inputs Connector Input gain 0–60 dB (in 1dB steps) Input impedance 1 M (when Hi-Z ON) Maximum input level Phantom power +48V Outputs OUTPUT Connector TRS jack (balanced) Maximum output level +14 dBu (at 0 dBFS) Output impedance PHONES Connector Standard stereo phone jack Maximum output level +8 dBu (at 0 dBFS) -
Page 19: Zoom Corporation
The recycling of materials will help to conserve natural resources. For more detailed information about recycling of this product, please contact your local city office, your household waste disposal service or the shop where you purchased the product. ZOOM CORPORATION http://www.zoom.co.jp Z2I-2314-02... -
Page 20: Included Items
Included items The package should contain the following items. Please con rm that they have all been included. Cubase LE download Cubase LE USB 3.0 cable Operation manual access code sheet startup guide...
Need help?
Do you have a question about the UAC-2 and is the answer not in the manual?
Questions and answers