Table of Contents
Advertisement
Quick Links
Advertisement
Chapters
Table of Contents

Related Manuals for Yamaha PSR-E353


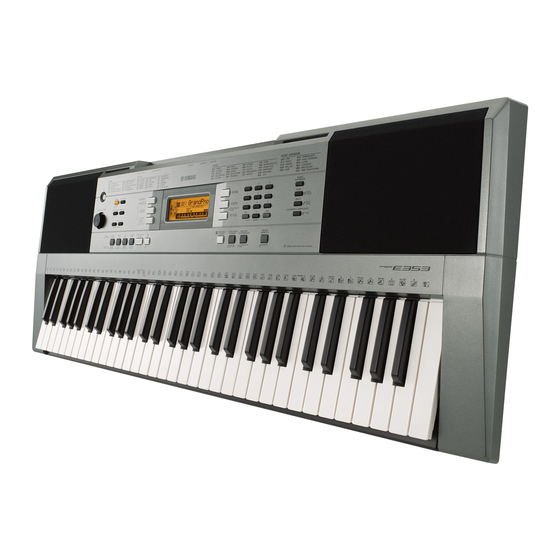
Summary of Contents for Yamaha PSR-E353
- Page 1 DIGITAL KEYBOARD DIGITAL KEYBOARD Owner’s Manual Owner’s Manual...
-
Page 2: Special Message Section
This product should be used only with the components supplied or; a rectly. Mismatches or incorrect installation may result in overheating and cart, rack, or stand that is recommended by Yamaha. If a cart, etc., is battery case rupture. used, please observe all safety markings and instructions that accom- Warning: pany the accessory product. - Page 3 Yamaha Corporation of America or its subsidiaries. devices. Compliance with FCC regulations does not guarantee * This applies only to products distributed by YAMAHA CORPORATION OF AMERICA. (class B) PSR-E353 Owner’s Manual...
-
Page 4: Important Safety Instructions
(1) this device may not cause harmful interference, and (2) this device must accept any interference received, including interference that may cause undesired operation. CAN ICES-3 (B)/NMB-3(B) • This applies only to products distributed by Yamaha Canada Music Ltd. • Ceci ne s’applique qu’aux produits distribués par Yamaha Canada Musique Ltée. (can_b_01) -
Page 5: About The Manuals
Contains instructions about computer-related functions. iPhone/iPad Connection Manual Explains how to connect the instrument to smart devices, such iPhone, iPad, etc. To obtain these manuals, access the Yamaha Downloads, enter “PSR-E353” (for example) to the Model Name box, then click [SEARCH]. Yamaha Downloads http://download.yamaha.com/... -
Page 6: Table Of Contents
Thank you for purchasing this Yamaha Digital Keyboard! We recommend that you read this manual carefully so that you can fully take advantage of the advanced and convenient functions of the instrument. We also recommend that you keep this manual in a safe and handy place for future reference. - Page 7 For AC adaptor WARNING CAUTION • This AC adaptor is designed for use with only Yamaha electronic • When setting up, make sure that the AC outlet is easily accessible. instruments. Do not use for any other purpose. If some trouble or malfunction occurs, immediately turn off the power switch of the instrument and disconnect the AC adaptor •...
- Page 8 - Do not attempt to recharge batteries that are not designed to be Then have the device inspected by Yamaha service personnel. charged. - The power cord or plug becomes frayed or damaged.
-
Page 9: About This Manual
Yamaha cannot be held responsible for damage caused by improper use or modifications to the instrument, or data that is lost or destroyed. Always turn the power off when the instrument is not in use. -
Page 10: Setting Up
Panel Controls and Terminals Setting Up Front Panel Voice List Music Database List Song List Display Style List (page 56) (page 66) (page 64) (page 15) (page 65) PSR-E353 Owner’s Manual... -
Page 11: Rear Panel
Each of these indicates the drum or percussion instrument assigned to the corresponding key for “Standard Kit 1.” is pressed and held. Hold down this button until the function is called up. PSR-E353 Owner’s Manual... -
Page 12: Setting Up
Make sure that the power of the instrument is off. Although the instrument will run either from an AC Open the battery compartment cover located on adaptor or batteries, Yamaha recommends use of an the instrument’s bottom panel. AC adaptor whenever possible. An AC adaptor is more environmentally friendly than batteries and does not deplete resources. -
Page 13: Using The Music Rest
• Before connecting the instrument to other electronic com- ponents, set all volume levels to the minimum, then turn off the power for all components. PSR-E353 Owner’s Manual... -
Page 14: Auto Power Off Function
This can be set via Function number 007 (page 40). CAUTION • Do not use this instrument at a high volume level for a long period of time, or your hearing may be damaged. PSR-E353 Owner’s Manual... -
Page 15: Display Items And Basic Operations
Press and hold either button to continuously increase or decrease the value in the corresponding direction. Example: Selecting Voice 003, Harpsichord. Press briefly to Press briefly to Press number buttons decrease. increase. [0], [0], [3], or simply press [3]. PSR-E353 Owner’s Manual... -
Page 16: Reference
Style or Song (excepting the Song To set the Metronome Volume: inputted from the [AUX IN] jack). Simply select This can be set via Function number 038 (page 42). Voice number “000” to activate this feature. PSR-E353 Owner’s Manual... -
Page 17: Layering A Dual Voice
Press the [SPLIT] button again to exit from Split. To select a different Split Voice: Press and hold the [Split] button to call up “S.Voice” (Function 016; page 41), then use the number buttons [0]–[9], [+], [-]. PSR-E353 Owner’s Manual... -
Page 18: Playing With Enhanced, More Spacious Sound (Ultra-Wide Stereo)
• Even if you turn on Panel Sustain, there are some Voices to Press and hold the [ULTRA-WIDE STEREO] button which sustain is not applied. to call up “Wide” (Function 025; page 41), then use the Number buttons. PSR-E353 Owner’s Manual... -
Page 19: Adding Harmony Or Arpeggio
Style (page 22) and press chords in the auto accompaniment range of the key- board. To turn the Harmony or Arpeggio off, press the [HARMONY/ARPEGGIO] but- ton again. PSR-E353 Owner’s Manual... - Page 20 Main Voice will turn on Arpeggio and Split auto- matically. To adjust the Harmony Volume: This can be adjusted via Function number 029 (page 41). To adjust the Arpeggio Velocity: This can be adjusted via Function number 030 (page 41). PSR-E353 Owner’s Manual...
-
Page 21: Playing The Keyboard With Two Persons (Duo Mode)
• When a Dual Voice is selected from Voice numbers 162 to 188, the left Voice section sounds only the Main Voice. power, and turn the power back on again • Certain functions such as Lesson, Harmony/Arpeggio normally. and Dual cannot be used in the Duo mode. PSR-E353 Owner’s Manual... -
Page 22: Playing Styles
Steps 2–4 on this page. number 006 (page 40). Adjusting the Style Volume To adjust the volume balance between Style play- back and keyboard, you can adjust the Style Volume. This can be set via Function number 001 (page 40). PSR-E353 Owner’s Manual... -
Page 23: Using The Music Database
If necessary, select the desired Style by using the [+] or [-] button. Press the [0] button. A confirmation message for the register operation will appear. Press the [+/YES] button to actually reg- ister the file. PSR-E353 Owner’s Manual... -
Page 24: Style Variations-Sections
While Song or Style playback is stopped, tap the [TEMPO/TAP] button several times Auto Accompa- to start playback at the tapped tempo—four times for niment range a 4-beat Song or Style or three times for a 3-beat Song or Style. PSR-E353 Owner’s Manual... -
Page 25: Chord Types For Style Playback
(three keys altogether). PSR-E353 Owner’s Manual... -
Page 26: Looking Up Chords Using The Chord Dictionary
Press the “G” key in the section to the right When you’ve played the chord properly, a bell of “ROOT ” so that the “G” is shown as sound signals your success and the chord name the root note. in the display flashes. PSR-E353 Owner’s Manual... -
Page 27: Playing Songs
Press the [SONG] button, then use the back and keyboard, you can adjust the Song Volume. Number buttons to select the desired This can be set via Function number 002 (page 40). Song. Refer to the Song List (page 64). PSR-E353 Owner’s Manual... -
Page 28: Bgm Playback
Song’s original melody Voice. tion 043; page 42) is called up, then select “Normal” NOTE or “Random.” • Selecting another Song will cancel the changed Melody Voice. • You cannot change the melody Voice of a User Song. PSR-E353 Owner’s Manual... -
Page 29: A-B Repeat
Song, press the [A-B REPEAT] button before starting playback. To cancel repeat playback, press the [A-B REPEAT] button. To stop playback, press the [START/STOP] but- ton. NOTE • The A-B Repeat function will be canceled when you select another Song mode. PSR-E353 Owner’s Manual... -
Page 30: Playing An External Audio Device With The Built-In Speakers
• After connecting, first turn on the power to the exter- Press the [MELODY SUPPRESSOR] but- nal audio device then to this instrument. Reverse this order when you turn the power off. ton again to turn it off. PSR-E353 Owner’s Manual... -
Page 31: Using The Song Lesson Feature
Practice the phrase in the current Step. Press the [KEYS TO SUCCESS] button Referring to the notation in the Song Book and to engage this lesson. the notes shown on the display, press the notes. PSR-E353 Owner’s Manual... - Page 32 Select the desired Song, enable Keys to Success, select the desired Step, then hold down the [KEYS TO SUCCESS] button for longer than three seconds. A “Cleared” message will appear on the display. NOTE • This operation cannot be executed during playback. PSR-E353 Owner’s Manual...
-
Page 33: Listening, Timing And Waiting
NOTE BothHand • Songs 115 to 154 are not compatible with the Listening, Timing and Waiting Lessons. NOTE • In this step, “No LPart” may appear, indicating that the current Song does not contain a left-hand part. PSR-E353 Owner’s Manual... -
Page 34: Keys To Success With Listening, Timing Or Waiting
• You can set Phrases A and B also when playback is stopped by selecting the Phrase number via the [+] and [-] buttons. • Specifying only Point A results in repeat playback between Point A and the end of the Song. Repeat playback of this section PSR-E353 Owner’s Manual... -
Page 35: Hearing And Experiencing The Sound Of The Chords (Chord Study)
Song, you should turn off any parts you don’t intend to have played back (page 29), to avoid exceeding the maximum number of simultaneous notes. NOTE • You can use the waiting function (page 33) by pressing the [1 LISTENING 2 TIMING 3 WAITING] button. PSR-E353 Owner’s Manual... -
Page 36: Playing Chords Along With Chord Progressions Of A Song
(excluding the range of C5–B5, which are used to Press the [PHRASE REPEAT] button change the key of a Song), as well as different inversions of the chords, the playback will progress. again to turn the Chord Progression function off. PSR-E353 Owner’s Manual... -
Page 37: Recording Your Performance
Never attempt to turn the power off while this is shown in the display. Doing so can damage the internal memory and result in a loss of data. To play back the recorded Song, press the [START/STOP] button. PSR-E353 Owner’s Manual... -
Page 38: Recording To A Specified Track
Transpose and Tuning settings. • The following settings and buttons are not available, or if operated, the new settings cannot be recorded: ACMP ON/OFF, Split Point, Reverb Type, Chorus Type, Harmony/Arpeggio Type, [FUNCTION] but- ton, [PORTABLE GRAND] button. PSR-E353 Owner’s Manual... -
Page 39: Memorizing Your Favorite Panel Settings
Other settings: Panel Sustain on/off, Transpose, Voice output * When a Song is selected, the Style settings cannot be recorded or called up. Also, in the Duo mode, only Style settings can be recorded or called up. PSR-E353 Owner’s Manual... -
Page 40: The Functions
Touch Response is off and the volume level does not change at all 4 (Fixed) regardless of whether you play the keyboard soft or hard. Style file Select and register a Style file from flash files that are loaded from Style Register StyleReg 001–nnn – computer (page 23). PSR-E353 Owner’s Manual... - Page 41 1 (Sustain) Pdl Func Pedal Function 2 (Arp Hold) Refer to the page 20. 3 (Hold+Sus) Computer (page 42) Optimizes the MIDI settings when you connect to a computer PC mode PC mode PC1/PC2/OFF (page 42). PSR-E353 Owner’s Manual...
- Page 42 MIDI TRANSMIT OF STYLE ** MIDI TRANSMIT OF KEYBOARD ** * An expanded version of the PC2 setting is for future use. ** Cannot be set independently. NOTE • MIDI Transmit of Song can be used with User Songs. PSR-E353 Owner’s Manual...
-
Page 43: Using With A Computer Or Iphone/Ipad
Digital Interface) and can transmit/receive keyboard • Style: (.sty) performance information (MIDI messages) or Song/ • Backup File: PSR-E353.BUP * * Backup parameters (as described below) other than Style data (MIDI files) to/from the computer con- “Passing status of Song and Step” can be transferred nected via a USB cable. -
Page 44: Appendix
Function settings (Function 045; page 42). When the instrument is turned on, power is turned off This is normal. If an AC adaptor other than the one specified is used, power suddenly and unexpectedly. may be turned off suddenly and unexpectedly. PSR-E353 Owner’s Manual... - Page 45 Memo PSR-E353 Owner’s Manual...
-
Page 46: Song Book Sample
First Half Review ..............17 Diligent Practice Time ..............17 Warm-up Exercise - “The Jump Competition” ........18 “EEEEE!” ................18 “Left! Right! Left! Right!” ............19 Second Half Review ..............19 Play the Whole Song! ..............19 PSR-E353 Owner’s Manual... - Page 47 Quarter note rest (Flat) Lower a semitone Eighth note Eighth note rest (Natural) Return to normal pitch Sixteenth note Sixteenth note rest Time Signatures and Counting Time 4/4 time 2/2 time 2/4 time 3/4 time 6/8 time 9/8 time PSR-E353 Owner’s Manual...
-
Page 48: Für Elise
Play with both hands as if gently telling a story. It might help to sing or hum the melody as you play. Similar melody lines and rhythms are repeated in this song, so there aren’t as many sections to practice as you might think. Enjoy learning each section as you build proficiency. From here... PSR-E353 Owner’s Manual... - Page 49 Song Book Sample Song No.004 Für Elise Basic Song No.004 Für Elise Basic ...to here From here..to here PSR-E353 Owner’s Manual...
-
Page 50: Warm-Up Exercise - "The Semitone Mystery
We’ll start by ascending and descending the white and black keys. Check out the illustrations until you understand how the fingers are supposed to move, then get started! You’ll find it easier to play if you bend your fingers slightly. Tip-toe Go back to the beginning and play it again. PSR-E353 Owner’s Manual... -
Page 51: Diligent Practice Time
Right! Now that we’re warmed up let’s try playing along with the orchestra in 3/4 time. The melody will be built up little by little. Compare each line... notice that many of the shapes formed by the notes are very similar. Short break Almost done PSR-E353 Owner’s Manual... -
Page 52: Warm-Up Exercise - "Basic Accompaniment
Connect the notes smoothly, as if the left hand were passing them to the right hand. You’ll be able to play smoothly if you move the left hand into position for the next phrase as soon as it finishes playing the first phrase. PSR-E353 Owner’s Manual... -
Page 53: First Half Review
It might be easier to grasp the key release timing if you sing along with the melody. Don’t panic and play too strongly where the left hand has to play short notes. Always have left-hand finger 5 ready to play the next note! PSR-E353 Owner’s Manual... -
Page 54: Warm-Up Exercise - "The Jump Competition
The first note has a staccato dot. Spread your fingers wide and jump quickly to the next note! “EEEEE!” The only note in this step is E! Make the connection between the left and right hands as smooth as possible. PSR-E353 Owner’s Manual... -
Page 55: Left! Right! Left! Right
This is the finishing step! Don’t be afraid of making mistakes. Just concentrate on playing the entire song from start to finish. Practice this with the lessons learned in each step in mind, and gradually you’ll master the whole song. PSR-E353 Owner’s Manual... -
Page 56: Voice List
Overdriven Guitar Techno Brass Distortion Guitar Synth Brass BASS FLUTE Dynamic Electric Bass Sweet! Flute Finger Bass Flute Acoustic Bass Piccolo Pick Bass Pan Flute Fretless Bass Recorder Slap Bass Ocarina Funk Bass SYNTH Synth Bass Square Lead PSR-E353 Owner’s Manual... - Page 57 ** Selecting a Voice number between 215 and 234 will turn on – – – Electric Piano Pad – – – Full Organ Arpeggio. – – – Octave Jazz Guitar – – – Octave Strings – – – Orchestra Section – – – Octave Pizzicato Strings PSR-E353 Owner’s Manual...
- Page 58 Church Organ 1 Slow Violin Church Organ 3 Viola Church Organ 2 Cello Notre Dame Contrabass Organ Flute Tremolo Strings Tremolo Organ Flute Slow Tremolo Strings Reed Organ Suspense Strings Puff Organ Pizzicato Strings Accordion Orchestral Harp PSR-E353 Owner’s Manual...
- Page 59 Nylon Harp Piccolo Harp Vox Flute Atmosphere Pad Recorder Brightness Pan Flute Goblins Goblins Synth Blown Bottle Creeper Whistle Ocarina Ritual XG SYNTH LEAD To Heaven Square Lead 1 Night Square Lead 2 Glisten LM Square Bell Choir PSR-E353 Owner’s Manual...
- Page 60 Scratch Cut Scratch Split Wind Chime Telephone Ring 2 Car Engine Ignition Car Tires Squeal Car Passing Car Crash Siren Train Jet Plane Starship Burst Roller Coaster Submarine Laugh Scream Punch Heartbeat Footsteps Machine Gun Laser Gun PSR-E353 Owner’s Manual...
-
Page 61: Drum Kit List
4 Wood Block L 4 Cuica Mute Scratch Push Scratch Push 4 Cuica Open Scratch Pull Scratch Pull G# 5 4 Triangle Mute 4 Triangle Open A# 5 4 Shaker 4 Jingle Bells 5 Bell Tree C# 6 D# 6 PSR-E353 Owner’s Manual... - Page 62 4 Scratch Pull Muyu Mid-Low Khomokh Mute G# 5 Zhongluo Open Khomokh Mltatk Muyu Middle Madal-A2 A# 5 Xiaoluo Open Madal-A#2 Triangle Mute Madal-B2 Triangle Open Madal-C3 C# 6 Madal-C#3 Madal-D3 D# 6 Madal-D#3 Madal-E3 Madal-F3 Madal-F#3 Madal-G3 PSR-E353 Owner’s Manual...
- Page 63 Dholak 2 Open Horse Laser Gun Applause 1 Dholak 2 Slide Bird Tweet 2 Explosion Applause 2 Dholak 2 Rim 1 Firework Applause 3 Dholak 2 Rim 2 Applause 4 Dholak 2 Ring Dholak 2 Slap Maou PSR-E353 Owner’s Manual...
-
Page 64: Song List
Song Name Song No. Song Name Top Picks Favorite with Style Demo 1 (Yamaha Original) O du lieber Augustin (Traditional) Demo 2 (Yamaha Original) Mary Had a Little Lamb (Traditional) Demo 3 (Yamaha Original) When Irish Eyes Are Smiling (E. R. Ball) -
Page 65: Style List
4/4Standart Arpeggio Garage1 Rumba2/4 Habanera Garage2 Saeidy SlowRock TechnoParty WehdaSaghira 8BeatPianoBallad UKPop IranianElec 6/8PianoMarch HipHopGroove Emarati PianoWaltz HipShuffle AfricanGospelReggae HipHopPop HighLife DISCO IndianPop ModernDisco Bhangra 70sDisco Bhajan LatinDisco BollyMix SaturdayNight Tamil DiscoHands Kerala SWING&JAZZ GoanPop BigBandFast Rajasthan PSR-E353 Owner’s Manual... -
Page 66: Music Database List
Mn Rivr TicoSmb OnMyMnd WaveBosa OverRbow COUNTRY ReleseMe BoxerGtr SavingLv CntryRds SmokyEye Jambala WhisprBd TopWorld R & B YlwRose AmazingG BALLROOM BoogiePf BrazilBr Clock Rk CheryApl CU later DanubeWv HappyDay TangoAc RisingSn Tea4Two ShookUp TRADITIONAL TeddyBer CampRace PSR-E353 Owner’s Manual... -
Page 67: Effect Type List
Arpeggio Name UpOct SuperArp Hybrid1 DownOct AcidLine Hybrid2 UpDwnOct TekEcho Hybrid3 SynArp1 VelGruv Hybrid4 SynArp2 Planet Hybrid5 SynArp3 Trance1 PfArp1 SynArp4 Trance2 PfArp2 SyncEcho Trance3 PfArp3 PulsLine ChordAlt PfArp4 StepLine SynChrd1 PfClub1 Random SynChrd2 PfClub2 Down&Up Syncopa PfBallad PSR-E353 Owner’s Manual... - Page 68 Plate 1–2 Simulated steel plate reverb. No effect. Chorus Types Chorus Type Description 01–03 Chorus 1–3 Conventional chorus program with rich, warm chorusing. 04–05 Flanger 1–2 This produces a rich, animated wavering effect in the sound. No effect. PSR-E353 Owner’s Manual...
-
Page 69: Specifications
• USB MIDI Interface for iPhone/iPod touch/iPad (i-UX1) * The contents of this manual apply to the latest specifications as of the printing date. Since Yamaha makes continuous improvements to the product, this manual may not apply to the specifications of your particular product. To obtain the latest manual, access the Yamaha website then download the manual file. -
Page 70: Index
PC Mode ......41 , 42 Function ........40 Wide Type ......... 41 Pedal Function ......41 Function List ......40 Phrase Repeat ....31 , 34 Playback ........28 XGlite .......... 5 Power Requirements ....12 Your Tempo ....... 42 PSR-E353 Owner’s Manual... - Page 71 * La forma del enchufe varía según la región. * Die Form des Steckers variiert je nach Land. * O formato do plugue varia de acordo com a localidade. * В разных странах штепсельные вилки отличаются по форме. PSR-E353 Owner’s Manual...
- Page 72 Note for the battery symbol (bottom two symbol examples): This symbol might be used in combination with a chemical symbol. In this case it complies with the requirement set by the Directive for the chemical involved. (weee_battery_eu_en_01) PSR-E353 Owner’s Manual...
- Page 73 Warranty service will only be provided for defective products within the Warranted Area. Contact your local authorized Yamaha dealer who will advise you of the procedures to be followed. If this is not successful, contact Yamaha at the address, telephone number or website shown below. Yamaha may request that you send the defective product to a local authorized Yamaha Servicer or authorize return of the defective product to Yamaha for repair.
- Page 74 PSR-E353 Owner’s Manual...
- Page 75 For details of products, please contact your nearest Yamaha representative or the authorized distributor listed below. MALTA NORTH AMERICA ASIA Olimpus Music Ltd. CANADA THE PEOPLE’S REPUBLIC OF CHINA The Emporium, Level 3, St. Louis Street Msida Yamaha Canada Music Ltd.
- Page 76 Yamaha Global Site http://www.yamaha.com/ Yamaha Downloads http://download.yamaha.com/ Manual Development Department © 2015 Yamaha Corporation Published 01/2015 PO##*.*-**A0 Printed in China ZN22380...