Garmin rino 120 Quick Start Manual
2-way radio & personal navigator
Hide thumbs
Also See for rino 120:
- Owner's manual (124 pages) ,
- Owner's manual and reference manual (103 pages) ,
- Features (2 pages)
Advertisement
Table of Contents
Advertisement
Table of Contents

Related Manuals for Garmin rino 120


Summary of Contents for Garmin rino 120
- Page 1 2-way radio & ® personal navigator quick start guide...
-
Page 2: Installing The Batteries
Installing the Batteries Quick Start The Rino operates on three “AA” batteries (not included), which are located in the back of the unit. Battery Rechargeable Alkaline, NiMH, NiCad or Lithium batteries Installation (see Reference Manual for setting battery type) may also be used. -
Page 3: Unit Overview
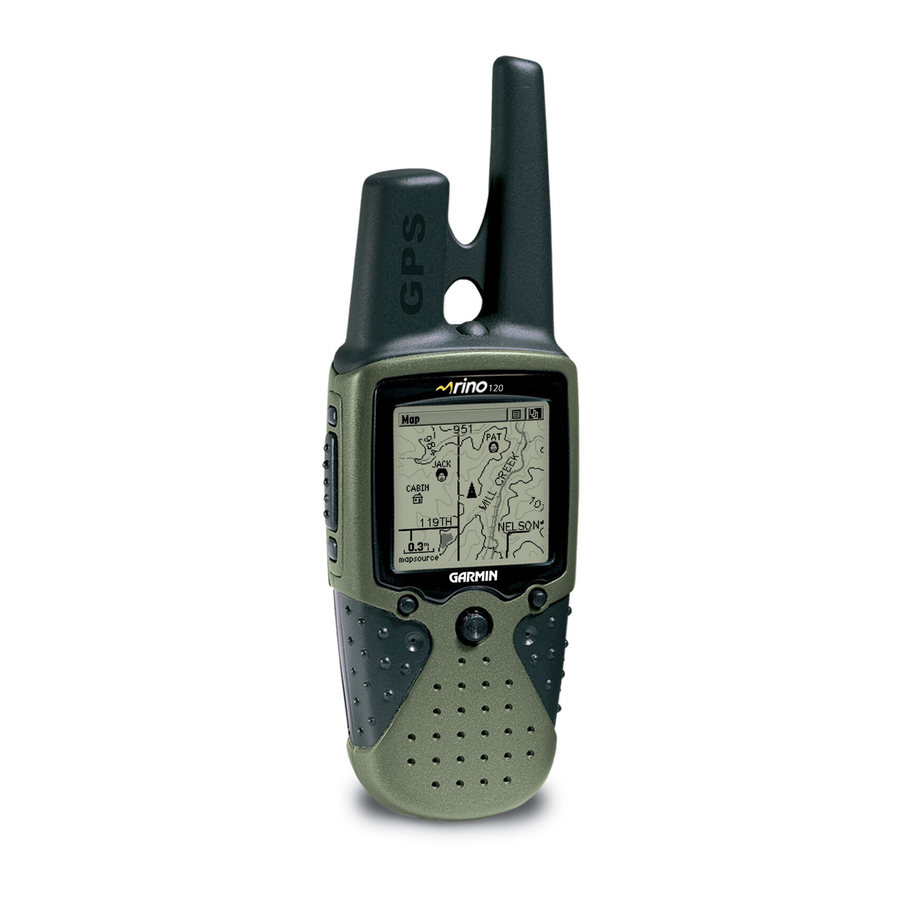
Quick Start Unit Overview POWER button: • Press and hold to turn the unit On/Off. • Press to adjust contrast and backlighting LCD DISPLAY CALL button: • Press to send out Call Tone. • Will send position when released (if enabled). TALK button: •... - Page 4 Quick Start Unit Overview 2-WAY FRS/GMRS ANTENNA GPS ANTENNA BELT CLIP CONNECTOR MOUNT EXTERNAL POWER AND DATA CONNECTOR WEATHERCAP BATTERY COMPARTMENT D-RING HEADSET CONNECTOR WEATHERCAP BATTERY COMPARTMENT COVER MOUNT ALIGNMENT NOTCHES...
-
Page 5: Backlighting And Contrast
Quick Start Display Backlighting and Contrast Set Up If lighting conditions make it hard for you to see the Backlighting display screen, you can adjust the contrast or turn on the backlight. Contrast To turn on the backlighting: 1. Briefly press and release the POWER button from any page on the unit to display the Backlight and Contrast adjustment. -
Page 6: Main Display
Quick Start Moving between the main pages All of the information you need to operate the Rino Main Display can be found on fi ve default main pages (or display Pages screens). You can simply press and release the PAGE button to cycle through the Radio Page, Map Page, Navigation Page, Trip Computer, and Main Menu Page. -
Page 7: Entering Data
Quick Start Entering data and changing unit settings There will be many times that you will need to enter Entering Data data in the Rino or make changes to the unit settings. Let’ s practice by entering a user ID (My ID) and changing the user symbol. -
Page 8: Radio Setup
Quick Start Radio Setup The Rino comes set from the factory to transmit on the Setting Up the FRS (Family Radio Service) frequencies. Your Rino will Radio allow you talk with other FRS users, but if the other radio is a Rino, several other features are available. The Rino can transmit on fourteen FRS channels and has thirty eight squelch codes to block unintended con- verstations from being heard on your radio. -
Page 9: Initializing The Gps
Quick Start Initializing the GPS Before the Rino can be used for navigation, the GPS Initializing receiver has to be initialized. The initialization process the GPS allows the Rino to receive and store satellite information, and begin using the satellites for navigation. The initializa- tion is automatic, should only take a few minutes and only needs to be done the fi... - Page 10 Quick Start Change to the Map Page and begin walking. Walk- away from your original location for at least three minutes. Basic Navigaiton As you are walking, notice that a breadcrumb trail of your path is left on the map. This trail is called a Track Log. DESTINATION When you feel that you are a suffi...
-
Page 11: Putting It All Together
Quick Start Since it takes at least two Rino’ s to show all of the Rino’ s features, this exercise will explain Rino to Rino Putting it all operation. First, make sure that both Rinos are set on the together same channel and squelch code, and both are tracking satellites. - Page 12 Rino. If you have further questions or just want to learn more about the operation of Rino, please refer to the Refer- Sending a Location ence Manual. The Reference Manual will provide detailed information about all of your Rino’ s features. Thanks again for choosing GARMIN!
- Page 13 For the latest free software updates throughout the life of your GARMIN products, visit the GARMIN web site at www.garmin.com. © Copyright 2002 GARMIN Ltd. or its subsidiaries GARMIN International, Inc. 1200 E 151 Street, Olathe, KS 66062 U.S.A. GARMIN (Europe) Ltd.