Table of Contents
Advertisement
Service
This manual is to be used by qualified appliance
technicians only. Maytag does not assume any
responsibility for property damage or personal
injury for improper service procedures done by
an unqualified person.
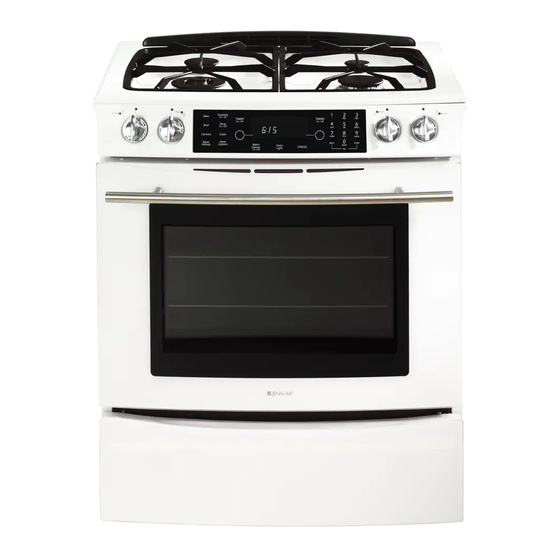
Gas
Slide-In
Range
This Base Manual covers general information
Refer to individual Technical Sheet
for information on specific models
This manual includes, but is
not limited to the following:
JGS8750BD*
JGS8850BD*
JGS8860BD*
JGS9900BD*
16026923
March 2006
©
2006 Maytag Services
Advertisement
Table of Contents

Related Manuals for Jenn-Air JGS8750BD Series


Summary of Contents for Jenn-Air JGS8750BD Series
- Page 1 Service This manual is to be used by qualified appliance technicians only. Maytag does not assume any This Base Manual covers general information responsibility for property damage or personal Refer to individual Technical Sheet injury for improper service procedures done by an unqualified person.
-
Page 2: Important Information
Important Information Maytag will not be responsible for personal injury or property damage from improper service procedures. Pride and workmanship go into every product to provide our customers with quality products. It is possible, however, that during its lifetime a product may require service. Products should be serviced only by a qualified service technician who is familiar with the safety procedures required in the repair and who is equipped with the proper tools, parts, testing instruments and the appropriate service information. -
Page 3: Table Of Contents
Table of Contents Important Information ........... 2 Manifold Assembly Removal ........25 Important Safety Information Control Panel Assembly Removal ......25 What to Do if You Smell Gas ........4 Electronic Control Replacement ......25 Oven Fires ............... 4 Burner Switch Replacement ........25 Safety Practices for Servicer ........ -
Page 4: Important Safety Information
Important Safety Information As with all appliances, there are certain rules to follow WARNING for safe operation. Verify everyone who operates oven is familiar with the operations and with these precautions. This gas appliance contains or produces a chemical or chemicals which are known to the state of Use appliance only for its intended purpose as California to cause cancer, birth defects, or other described. -
Page 5: Receiving Oven
Important Safety Information 3. Checking for gas leaks—Never check for leaks with • Do not allow anyone to climb, stand or hang on the any kind of open flame. Soap and water solution door. They could damage the range and cause severe should be used for this purpose. -
Page 6: Baking, Broiling, And Roasting
Important Safety Information Regulator must be set CAUTION for the type of gas being used Natural or LP. Do not store items of interest to children in cabinets After servicing regulator, above range. Children may climb on oven to reach make certain it is set these items and become seriously injured. -
Page 7: General Information
Brushed Chrome Amana Traditional White Magic Chef Traditional Almond Graffer & Prostyle Sattler Monochromatic Bisque Hardwick Stainless Jenn-Air Traditional Bisque Maytag W White on White Norge Frost White (True Color White) Universal Natural Bisque (True Color Bisque) Crosley Listing Fuel... -
Page 8: Specifications
Refer to individual Technical Sheet for specification Complete enclosed registration card and promptly return. information. If registration card is missing: • For Jenn-Air product call 1-800-536-6247 or visit the Web Site at www.jennair.com Placement of the Oven • For Maytag product call 1-800-688-9900 or visit the This freestanding range must be placed in the kitchen or Web Site at www.jennair.com... -
Page 9: Grounding
General Information Grounding W ARNIN G NOTE: This appliance must be properly grounded, for Attaching adapter ground terminal to wall receptacle personal safety. cover screw does not ground appliance unless the Power cord on this appliance is equipped with a three- cover screw is metal and not insulated, and wall prong grounding plug. -
Page 10: Range Description
Range Description Top Surface Shut-off Valve/ Burners and Grates Pressure Regulator (Backside of Range) Burner Control Valves Burner Control Valves Electronic Control and Touchpad Oven Cavity Bake Burner Broil Burner Convection Fan and Element Storage or Warming Drawer Rating Label Model Number 16026923 ©... -
Page 11: Troubleshooting Procedures
Troubleshooting Procedures WARNING To avoid risk of electrical shock, personal injury, or death, disconnect power and gas to range before servicing, unless testing requires power and/or gas. Troubleshooting Chart Problem Possible Cause Correction Poor ground on burner cap ....• Clean burner cap. Weak or failed spark module .... - Page 12 Troubleshooting Procedures WARNING To avoid risk of electrical shock, personal injury, or death, disconnect power and gas to range before servicing, unless testing requires power and/or gas. Problem Possible Cause Correction Ignitor positioned too far from burner..• Reposition ignitor closer to bake/broil burner.
-
Page 13: Description Of Fault Codes For Eoc Iii
Troubleshooting Procedures WARNING To avoid risk of electrical shock, personal injury, or death, disconnect power and gas to range before servicing, unless testing requires power and/or gas. Description of Fault Codes for EOC III Each fault code consists of 4 digits and is structured as follows: (Leftmost) Digit: Digit: Alpha-Character Digit: Secondary... -
Page 14: Oven Sensor, Meat Probe And Cooling Fan Temperature Charts
Troubleshooting Procedures WARNING To avoid risk of electrical shock, personal injury, or death, disconnect power and gas to range before servicing, unless testing requires power and/or gas. Oven Sensor, Meat Probe and Cooling Fan Temperature Charts OVEN SENSOR Sensor Type: RTD 1000 Ω platinum 1654 Ω... -
Page 15: Testing Procedures
Testing Procedures WARNING To avoid risk of electrical shock, personal injury or death; disconnect power and gas to range before servicing, unless testing requires power and/or gas. Component Testing Procedures Illustration Component Test Procedure Results Oven light & housing Disconnect connector and test Verify bulb is properly inserted. - Page 16 Testing Procedures WARNING To avoid risk of electrical shock, personal injury or death; disconnect power and gas to range before servicing, unless testing requires power and/or gas. Illustration Component Test Procedure Results Convection motor, Measure voltage ........120 VAC. single speed Check motor windings to ground....
- Page 17 Testing Procedures WARNING To avoid risk of electrical shock, personal injury or death; disconnect power and gas to range before servicing, unless testing requires power and/or gas. Illustration Component Test Procedure Results Orifice holder, Verify gas pressure........5" Natural. dual ring burner 10"...
-
Page 18: Cooling Fan Temperature Chart
Testing Procedures WARNING To avoid risk of electrical shock, personal injury or death; disconnect power and gas to range before servicing, unless testing requires power and/or gas. Control Component Test Procedure Results Switch membrane assembly Closed circuitry resistance Trace Measurement 2 &... -
Page 19: Electronic Oven Control (Eoc Iii) Testing Procedures
Testing Procedures WARNING To avoid risk of electrical shock, personal injury or death; disconnect power and gas to range before servicing, unless testing requires power and/or gas. Electronic Oven Control (EOC) III Testing Procedures Warm Drawer ATM PADS ELECTRONIC OVEN CONTROL (EOC) III TESTING/PROGRAMMING PROCEDURES Feature Access Procedure Modification Procedure... - Page 20 Testing Procedures WARNING To avoid risk of electrical shock, personal injury or death; disconnect power and gas to range before servicing, unless testing requires power and/or gas. Feature Access Procedure Modification Procedure Press the Setup pad, then press the right ATM Press the right ATM pad to scroll to the desired Tone Options Determines cook tones, timer...
-
Page 21: Relay Logic For Eoc Iii
Testing Procedures WARNING To avoid risk of electrical shock, personal injury or death; disconnect power and gas to range before servicing, unless testing requires power and/or gas. Relay Logic for EOC III NOTE: Subsequent changes implemented after the release of this technical sheet may have altered the parameters identified in this chart. -
Page 22: Quick Test" Mode For Eoc Iii
Testing Procedures WARNING To avoid risk of electrical shock, personal injury or death; disconnect power and gas to range before servicing, unless testing requires power and/or gas. "Quick Test" Mode for EOC III Follow the procedure below to perform the EOC III quick test. Once the control is in the quick test mode, any relay may be activated in any sequence. -
Page 23: Description Of Fault Codes For Eoc Iii
Testing Procedures WARNING To avoid risk of electrical shock, personal injury or death; disconnect power and gas to range before servicing, unless testing requires power and/or gas. Description of Fault Codes for EOC III Each fault code consists of 4 digits and is structured as follows: (Leftmost) Digit: Digit: Alpha-Character Digit: Secondary... -
Page 24: Disassembly Procedures
Disassembly Procedures To avoid risk of electrical shock, personal injury or death; disconnect power and gas before servicing, unless testing requires power and/or gas. Removing and Replacing Range Maintop Assembly Removal (Select Models) 1. Turn off power and remove gas supply from unit. 1. -
Page 25: Spark Module Replacement
Disassembly Procedures To avoid risk of electrical shock, personal injury or death; disconnect power and gas before servicing, unless testing requires power and/or gas. Spark Module Replacement Burner Switch Replacement 1. Remove unit from installation position, see 1. Remove control panel, see "Control Panel Assembly “Removing and Replacing Range”... -
Page 26: Cooling Fan Replacement
Disassembly Procedures To avoid risk of electrical shock, personal injury or death; disconnect power and gas before servicing, unless testing requires power and/or gas. Cooling Fan Replacement 3. Remove screws securing convection element and fan 1. Remove power from unit. cover (on rear wall of oven cavity). -
Page 27: Regulator Removal
Disassembly Procedures To avoid risk of electrical shock, personal injury or death; disconnect power and gas before servicing, unless testing requires power and/or gas. 7. Remove screw securing light socket to oven cavity. Regulator Removal 8. Label and disconnect wire terminals from light socket. 1. -
Page 28: Oven Door Latch Replacement
Disassembly Procedures To avoid risk of electrical shock, personal injury or death; disconnect power and gas before servicing, unless testing requires power and/or gas. Oven Door Latch Replacement Storage Drawer Track Disassembly 1. Remove control panel, see "Control Panel Removal" (Select Models) procedure. -
Page 29: Warming Drawer Hi-Limit Switch Replacement (Select Models)
Disassembly Procedures To avoid risk of electrical shock, personal injury or death; disconnect power and gas before servicing, unless testing requires power and/or gas. Warming Drawer Hi-Limit Switch Warming Drawer Disassembly Replacement (Select Models) 1. Remove warming door, see "Warming Drawer 1. -
Page 30: Oven Door, Warming Drawer/Storage Drawer And Access Panel Disassembly Illustration
Disassembly Procedures To avoid risk of electrical shock, personal injury or death; disconnect power and gas before servicing, unless testing requires power and/or gas. Oven Door, Warming Drawer/ Door Gasket Storage Drawer and Access Panel Disassembly Door Lining Inner Glass Glass Frame Outer Glass Upper Shield... - Page 31 The Installation information provided in this service manual is representative of a limited number of models. Reference the customer’s Installation literature included with the product, order a copy (if needed), or consult Jenn-Air’s website for the specific model. www.jennair.com 16026923 A –...
- Page 32 Installation Instructions Jenn-Air Updraft Gas Slide-In Range Cuisinière à gaz encastrable à circulation ascendante Jenn-Air/ Estufa deslizante a gas de corriente ascendente Jenn-Air Installation Instructions/Instructions d’installation/Instrucciones de Instalación INSTALLER: Leave these instructions with the appliance./INSTALLATEUR : Laissez ces instructions avec l’appareil./ INSTALADOR: Deje estas instrucciones con el electrodoméstico.
- Page 33 Installation Instructions Jenn-Air Updraft Gas Slide-In Range I N S T A L L A T I O N I N S T R U C T I O N S PLEASE KEEP THIS MANUAL FOR FUTURE REFERENCE This manual is intended to assist in the initial installation and adjustments of the range.
- Page 34 Installation Instructions CONNECTING THE RANGE (cont) Gas Supply W A R N I N G Installation of this range must conform with local codes or, in the absence of local codes, with the National Fuel Gas Code, ANSI Z223.1- latest edition. In Canada the range must be installed in accordance Gas leaks may occur in your system and result in a dangerous with the current CGA Standard CAN/CGA-B149 - Installation Codes for Gas Burning Appliances and Equipment and/or local codes.
-
Page 35: Installation Instructions
Installation Instructions IMPORTANT: Keep for Local Inspector/IMPORTANT : À conserver pour l’inspecteur local/ IMPORTANTE: Guarde esta información para el inspector local. C o m b u s t i b l i l d i r s e l l s / C o m c o m b u s... - Page 36 Installation Instructions IMPORTANT: Keep for Local Inspector (cont)/IMPORTANT : À conserver pour l’inspecteur local (suite)/ IMPORTANTE: Guarde esta información para el inspector local (cont.) DÉGAGEMENTS La cuisinière peut être installée avec un dégagement nul contre des matériaux combustibles à l’arrière et sur les côtés en dessous de la table de cuisson.
- Page 37 Installation Instructions Dimensions/Dimensions/Dimensiones If end cabinet is not present, side If cabinet backsplash behind unit is not present, panel kit UXA1100AA (B= black, kit UXA9107AA (B= black, S=stainless, W= W= white, S= Stainless) may be white) may be ordered ordered from dealer. from dealer.
- Page 38 Installation Instructions 5/16" Included./Compris./Se incluye. Not Included./Non inclus./No se Tools Needed./Outils nécessaires./ incluye. Herramientas Necesarias. If you have LP (propane) it is recommended to initiate the conversion prior to installation. The conversion instruction kit can be found on the regulator shelf behind the shield./ Avec le GPL, il est recommandé...
- Page 39 Installation Instructions TURN OFF GAS SUPPLY TO PRODUCT. COUPEZ L'ALIMENTATION EN GAZ DE L'APPAREIL. CIERRE EL SUMINISTRO DE GAS AL PRODUCTO. Apply pipe thread compound approved for LP gas to all threads. Always hold the regulator in stable position while attaching gas supply line./Appliquez sur tous les filetages un composé...
- Page 40 Installation Instructions Insert plug into grounded outlet./Insérez la fiche dans la prise mise à la Slide range into position. Installer, take caution not to damage floor. Do not tilt range side-to-side; may damage end trim./ Introduisez la terre./Conecte el enchufe en un tomacorriente puesto a tierra. cuisinière en place.
- Page 41 The Use and Care information provided in this service manual is representative of a limited number of models. Reference the customer’s Use and Care literature included with the product, order a copy (if needed), or consult Jenn-Air’s website for the specific model. www.jennair.com 16026923 B –...
-
Page 42: Use And Care
Use & Care ® OWNDRAFT LIDE ANGE & C UIDE ® B – 2 16026923 © 2006 Maytag Services... - Page 43 Use & Care URFACE OOKING High: Use to bring liquid to a boil, or reach Low: Use to simmer foods, keep foods pressure in a pressure cooker. Always warm and melt chocolate or butter. Some reduce setting to a lower heat when liquids cooking may take place on the Low begin to boil or foods begin to cook.
-
Page 44: Burner Grates
Use & Care Cooktop Burner Grates The grates must be properly positioned before cooking. To prevent the cooktop from discoloring When installing the grates, place the tab ends toward the or staining: center, matching the straight bars. • Clean cooktop after each use. Improper installation of the grates may result in chipping of •... - Page 45 Use & Care Ventilation System • Filter: Turn off ventilation system before removing. The filter is a permanent type and should be cleaned when soiled. The built-in ventilation system removes cooking vapors, odors Clean in sink with warm water and detergent or in and smoke from foods prepared on your cooktop and grill.
- Page 46 Use & Care OOKING Control Panel I J K L The control panel is designed for ease in programming. The display window shows options for each function and moves from step to step through the programming process. Control panel features vary by model. Oven display above is programmed for a bake operation.
- Page 47 Use & Care Activating and canceling the clock/day 3. Press the number pads to enter the new desired time. of week display: 4. Press Enter pad. 1. Press Setup pad. Canceling the Timer: 2. Select CLOCK. 1. Press the TIMER 1 or TIMER 2 pad twice. 3.
- Page 48 Use & Care Baking heat at the selected time and cooks for the specified length of time. When that time has elapsed, the oven will keep the food To set Bake: warm for up to an hour then automatically turn off. 1.
-
Page 49: Convect Bake
Use & Care 3. Select CNVT ROAST using the Quickset pads. Notes: • The oven control comes from the factory set for Auto Convect Conversion. When using Convect Bake enter the conventional baking temperature. The control automatically converts the temperature to 25° less than the conventional temperature. - Page 50 Use & Care • The oven has a variable broil feature which means that Notes: a lower broil temperature can be selected (300°-550° F). To select a lower temperature, press the appropriate • For best results, use rack position 2 or 3 when using the number pads.
- Page 51 Use & Care PTIONS More Options 5. The display will show CONVECT DELAY, the selected function, the preset temperature and the delay time countdown. When the delay time has expired, the cook time will be displayed and Cook & Hold the oven will begin to preheat.
-
Page 52: Keep Warm
Use & Care Keep Warm Meat Probe The Keep Warm feature is used to safely keep hot foods warm Using the probe supplied with your oven assures excellent or for warming breads and plates. roasting results every time. 1. Press More Options pad. Insert the probe into the food item. - Page 53 Use & Care When the selected internal temperature of the food has Notes: been reached, the oven will shut off and a beep will sound. 10. Remove the probe from the oven receptacle. The probe • The probe must be removed from the oven when it is not will be hot.
- Page 54 Use & Care 5. Select ENTER to save name. 2. Press arrow key to scroll. 6. Select cooking mode, such as BAKE, CONVECT BAKE, 3. Select EDIT RECIPE. CONVECT ROAST, etc. 4. Select desired recipe to edit. You may need to press arrow 7.
-
Page 55: Sabbath Mode
Use & Care To reactivate Auto Convect Conversion: 5. Select ON or OFF. 1. Press Setup pad. 6. Press Setup pad to exit the Setup menu. 2. Select AUTO CONVECT. To cancel Sabbath Mode: 3. Select ON. Press and hold the Setup pad for five seconds. The Bake mode may be cancelled by pressing 4. - Page 56 Service Select 1 BEEP to hear one beep only at the end of cooking. 5. Press the Setup pad to exit. This area of the oven control displays the Jenn-Air Customer Service toll-free phone number. To change the timer beeps: 1.
- Page 57 Appendix C 16026923 C – 1 © 2006 Maytag Services...
-
Page 58: Appendix C: Gas Conversion Instructions
Gas Conversion Instructions, JGS8750BD* Part No. 8101P684-60 This range is equipped with fixed orifices on all burners and a convertible appliance regulator. The unit serial plate states which gas it was adjusted for at the factory. To convert the unit to either Natural gas or LP gas will require LP Propane replacement of the oven orifice hoods, and the top burner orifice hoods, and adjustment of the oven burner shutters and the appliance pressure regulator converter cap. - Page 59 Gas Conversion Instructions, JGS8750BD* NATURAL/NATUREL/GAS NATURAL PROPANE/PROPANE/PROPANO Unscrew the regulator cap./Dévissez le capuchon du Remove the plastic cap./Retirez le capuchon en Flip the regulator cap and replace the plastic détendeur./Desenrosque la tapa del regulador. plastique./Retire la tapa de plástico. cap./Abattez le capuchon du détendeur et installez le capuchon en plastique./Invierta la tapa del regulador y vuelva a colocar la tapa de plástico.
- Page 60 Gas Conversion Instructions, JGS8750BD* Green/ Vert/ .0430 Verde .0430 Reposition the broiler burner and tighten screw. Re-assemble Place the broil burner on the broil orifice hood. Install green .0430 LP broil orifice hood. oven. (See steps 2-4)/Remettez en place le brûleur de gril et CAUTION: Carefully insert burner pin in oven back./ (4-5 turns-DO NOT OVERTIGHTEN)/Installez la tête du serrez la vis.
- Page 61 Gas Conversion Instructions, JGS8750BD* Low Flow Adjustment/Réglage bas débit/Ajuste del flujo minimo 1/8" Flat head Screwdriver/ Tournevis à lame plate de 1/8 po/ Destornillador de 1/8” de cabeza plana NOTE: Repeat steps 33-37 for all burners. Adjust each surface burner one at a time. Light burner Hold knob stem in LOW position.
- Page 62 Gas Conversion Instructions, JGS8850BD*, JGS8860BD* Rev 1-1/06 Gas Updraft/Part No. 8101P724-60 This range is equipped with fixed orifices on all burners and a convertible appliance regulator. The unit serial plate states which gas it was adjusted for at the factory. To convert the unit to either Natural gas or LP gas will require LP Propane replacement of the oven orifice hoods, and the top burner orifice hoods, and adjustment of the oven burner shutters and the appliance pressure regulator converter cap.
- Page 63 Gas Conversion Instructions, JGS8850BD*, JGS8860BD* Caution: Burner igniter is fragile./Attention: L’allumeur de brûleur est fragile./Precaución: El encendedor del quemador es frágil. Lift up and remove oven bottom./Soulevez la sole du Remove bake burner screws./Retirez les vis du Swing bake burner to the side and lift bake burner off four et retirez-la./Levante y retire el fondo del horno.
- Page 64 Gas Conversion Instructions, JGS8850BD*, JGS8860BD* Remove #49 natural oven orifice hood./Retirez la tête Screw the cap securely back into place. DO NOT OVER Locate oven orifice hood from the front./Identifiez la tête de gicleur du four n° 49 pour gaz naturel./Retire la TIGHTEN./ Revissez bien le chapeau.
- Page 65 Gas Conversion Instructions, JGS8850BD*, JGS8860BD* Green/ Vert/ .0430 Verde .0430 Remove #52 natural broil orifice hood./Retirez la tête Install green .0430 LP broil orifice hood. Place the broil burner on the broil orifice hood. du gicleur de gril n° 52 pour gaz naturel./Retire la DO NOT OVERTIGHTEN./Installez la tête du gicleur de gril, CAUTION: Carefully insert burner pin in oven back./ Mettez le brûleur de gril sur la tête du gicleur de gril.
- Page 66 Gas Conversion Instructions, JGS8850BD*, JGS8860BD* NATURAL/NATUREL/GAS NATURAL White Blanc Blanco Orange .80 mm .55 mm Orange Naranja 1.65mm .97 mm IMPORTANT: Remove and keep old natural gas orifice Replace with LP gas orifice hoods. DO NOT Replace burner heads and screws. hoods./IMPORTANT: Retirez et conservez les anciennes OVERTIGHTEN./Remplacez-les avec des têtes de gicleur (Hand tighten.) Drop in LP choke./Réinstallez les têtes...
- Page 67 Gas Conversion Instructions, JGS8850BD*, JGS8860BD* Adjust flame height with screwdriver./Ajustez la NOTE: Double burner only./REMARQUE: Brûleur double Adjust double surface burner. Light burner and turn to hauteur de la flamme avec le tournevis./Ajuste la altura uniquement./NOTA: Quemador doble solamente. lowest setting where both inner and outer ring are lit. de la llama con el destornillador.
- Page 68 Gas Conversion Instructions, JGS8850BD*, JGS8860BD* Replace panel and screws./Remettez le panneau et les Replace warming drawer./Replacez le tiroir de Replace oven rack./Remettre la grille de four./Vuelva a vis./Vuelva a instalar el panel y los tornillos. réchauffage./Vuelva a instalar el cajón de instalar la rejilla del horno.
- Page 69 Gas Conversion Instructions, JGS9900BD* Rev 2-1/06 Gas Downdraft/Part No. 8101P725-60 This range is equipped with fixed orifices on all burners and a convertible appliance regulator. The unit serial plate states which gas it was adjusted for at the factory. To convert the unit to either Natural gas or LP gas will require LP Propane replacement of the oven orifice hoods, and the top burner orifice hoods, and adjustment of the oven burner shutters and the appliance pressure regulator converter cap.
- Page 70 Gas Conversion Instructions, JGS9900BD* 1/2" You MUST start bake and broil hoods (12.5 cm) by hand to avoid cross threading. .047/ Orange/ 0,047/ Orange/ .047 Naranja Vous DEVEZ insérer les têtes de gicleur de cuisson et de gril à la main afin d’éviter qu’un filetage ne soit faussé.
- Page 71 Gas Conversion Instructions, JGS9900BD* NATURAL/NATUREL/GAS NATURAL PROPANE/PROPANE/PROPANO Unscrew the regulator cap./Dévissez le capuchon du Remove the plastic cap./Retirez le capuchon en Flip the regulator cap and replace the plastic détendeur./Desenrosque la tapa del regulador. plastique./Retire la tapa de plástico. cap./Abattez le capuchon du détendeur et installez le capuchon en plastique./Invierta la tapa del regulador y vuelva a colocar la tapa de plástico.
- Page 72 Gas Conversion Instructions, JGS9900BD* NOTE: When reversing an LP conversion back to natural gas, the LP choke in step 29 MUST Turn on gas and electrical be removed. supply to product. REMARQUE : Lorsque vous faites une Ouvrez le gaz et l'électricité reconversion du GPL au gaz naturel, alimentant l'appareil.
- Page 73 Gas Conversion Instructions, JGS9900BD* CORRECT CORRECTO YELLOW (Open shutter to correct) JAUNE Ouvrez l'obturateur pour rectifier AMARILLA Abra el obturador para corregir la situación. BLUE LIFTING (Close shutter to correct) FLAMME BLEUE SE SOULEVANT Fermez l'obturateur pour rectifier AZUL QUE SE SEPARA DEL QUEMADOR Cierre el obturador para corregir la situación.