Lexmark E350d User Manual
Lexmark printer user's guide
Hide thumbs
Also See for E350d:
- Service manual (141 pages) ,
- Menus and messages manual (36 pages) ,
- Setup & installation (2 pages)
Table of Contents
Advertisement
E350d and E352dn
User's Guide
June 2006
www.lexmark.com
Lexmark and Lexmark with diamond design are trademarks of Lexmark International, Inc.,
registered in the United States and/or other countries.
© 2006 Lexmark International, Inc. All rights reserved.
740 West New Circle Road
Lexington, Kentucky 40550
Advertisement
Table of Contents

Related Manuals for Lexmark E350d


Summary of Contents for Lexmark E350d
- Page 1 E350d and E352dn User’s Guide June 2006 www.lexmark.com Lexmark and Lexmark with diamond design are trademarks of Lexmark International, Inc., registered in the United States and/or other countries. © 2006 Lexmark International, Inc. All rights reserved. 740 West New Circle Road...
- Page 2 Eire, send to Lexmark International Ltd., Marketing and Services Department, Westhorpe House, Westhorpe, Marlow Bucks SL7 3RQ. Lexmark may use or distribute any of the information you supply in any way it believes appropriate without incurring any obligation to you. To obtain additional copies of publications related to this product, visit the Lexmark Web site at www.lexmark.com.
-
Page 3: Table Of Contents
Conserving supplies ... 35 Ordering supplies ... 35 Photoconductor kit end-of-life ... 39 Maintenance kit ... 42 Recycling Lexmark products ... 42 Chapter 6: Clearing jams ... 43 Identifying jams ... 43 Understanding jam messages ... 43 Clearing a jam ... 44... - Page 4 Electronic emission notices ... 65 Noise emission levels ... 67 Product energy consumption ... 67 Waste from Electrical and Electronic Equipment (WEEE) directive ... 68 Laser notice ... 68 Statement of Limited Warranty for Lexmark E350d and E352dn ... 68 Index ... 71...
-
Page 5: Chapter 1: Learning About The Printer
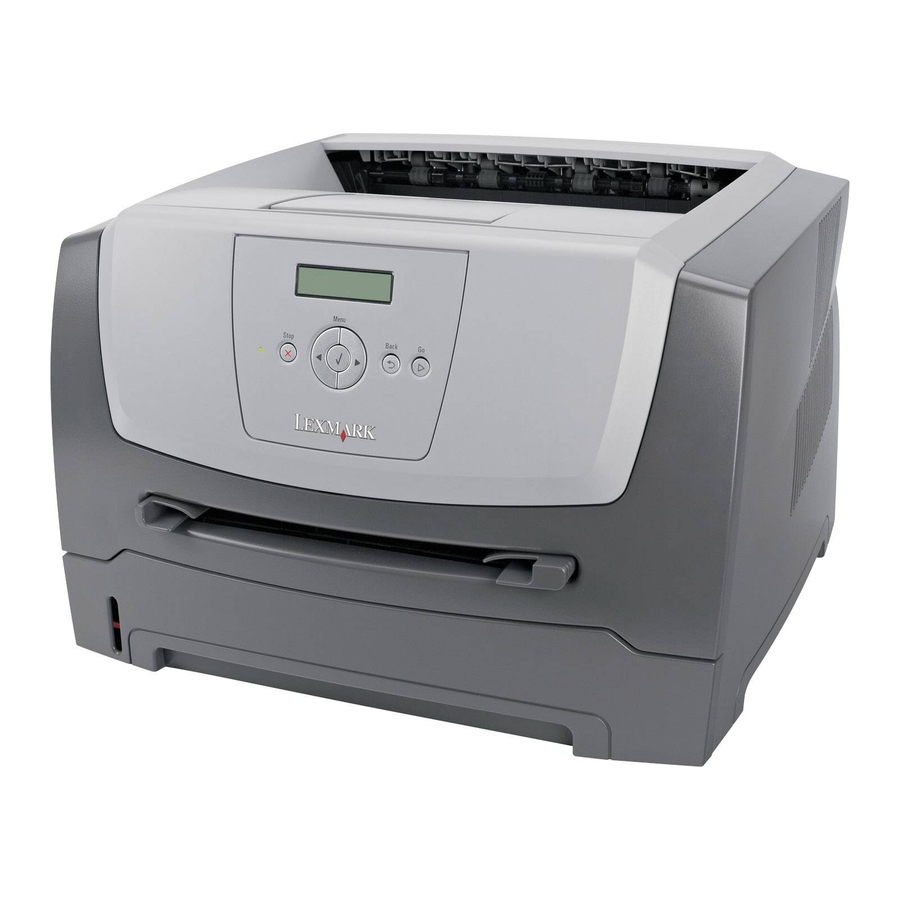
Learning about the printer Printer overview CAUTION: as the power cord or telephone, during a lightning storm. The following illustration shows a front view of the printer with its features labeled. 150-sheet output bin Paper support Control panel and Menu buttons... - Page 6 The following illustration shows a rear view of the printer with its features labeled. Rear exit Power button Power connect Dust cover (not available for some models) USB connect Parallel connect Ethernet connect Printer overview...
- Page 7 A number of menus are available to make it easy for you to change printer settings. The diagram shows the menu index on the control panel and the menus and items available under each menu. For more information about menus and menu items, see the Menus and Messages guide on the Software and Documentation CD.
-
Page 8: Understanding The Control Panel
• An indicator light Note: A label located on the inside front door shows the control panel buttons in your language. An additional translated label is included in the printer box. , Select , and Right Menu Understanding the control panel... - Page 9 Press and release the Back button to return to the previous menu group. If at the top of the menu group, the button functions as a Go button. Press and release the Go button to place the printer in the Ready state after an off line situation (to exit menus, to clear most messages).
-
Page 10: Chapter 2: Understanding Print Media Guidelines
• Avoiding jams For more details about the types of paper and specialty media your printer supports, see the Card Stock & Label Guide available on our Lexmark Web site at www.lexmark.com. Selecting the right paper or other print media reduces printing problems. For best print quality, try a sample of the paper or other print media you are considering before buying large quantities. -
Page 11: Selecting Print Media
The following paper characteristics affect print quality and reliability. It is recommended that these guidelines are followed when evaluating new paper stock. For detailed information, see the Card Stock & Label Guide available on the Lexmark Web site at www.lexmark.com/ publications. -
Page 12: Unacceptable Paper
Condition paper while it is still in the original wrapper. To condition it, store it in the same environment as the printer for 24 to 48 hours before printing to let the paper stabilize in the new conditions. Extend the time several days if the storage or transportation environment is very different from the printer environment. -
Page 13: Selecting Paper
Make sure the paper is properly loaded in the source. Selecting preprinted forms and letterhead Use the following guidelines when selecting preprinted forms and letterhead paper for the printer: • Use grain long papers for best results for 60 to 90 g/m •... -
Page 14: Printing On Letterhead
175°C (350°F). Use only transparencies that are able to withstand these temperatures without melting, discoloring, offsetting, or releasing hazardous emissions. For detailed information, see the Card Stock & Label Guide, available on the Lexmark Web site at www.lexmark.com/ publications. - Page 15 Try a sample of any label you are considering using with the printer before purchasing a large quantity. When printing on labels: • Set the Paper Type menu item to Labels in the Paper menu. Set the Paper Type from the printer control panel, the printer driver, or from MarkVision Professional. •...
-
Page 16: Storing Print Media
Cardstock can only be printed from the Manual Feeder. • Set the Paper Type menu item in the Paper Menu to Card Stock from the control panel, from the printer driver, or from MarkVision Professional. Set the Paper Weight to CardStock Weight, and select the CardStock Weight as Normal or Heavy for the value. -
Page 17: Avoiding Jams
Use appropriate print media (paper, transparencies, labels, and card stock) to help ensure trouble-free printing. For more information, see What types of print media can be loaded? on page10. Note: Try a limited sample of any print media you are considering using with the printer before purchasing large quantities. -
Page 18: Chapter 3: Printing
Avoiding jams on page17 or Storing print media on page16. Loading the 250-sheet tray Your printer has a 250-sheet tray. You may have also purchased an optional 250-sheet drawer or 550-sheet drawer. Print media is loaded into both components in the same way. - Page 19 Adjust the rear paper guide, to the correct position for the size print media you are loading. Note: There should be a slight gap between the rear paper guide and the paper stack. Flex the sheets back and forth to loosen them, then fan them. Do not fold or crease the print media. Straighten the edges of the paper stack on a level surface.
- Page 20 Adjust the two side paper guides to touch lightly against the sides of the paper stack. Insert the 250-sheet tray. Loading the 250-sheet tray...
- Page 21 To load legal-size or folio-size paper, extend the paper tray. You may also attach a dust cover (if available) on the back of the printer to protect the tray while it is extended. Press down on the latch at the back of the tray.
- Page 22 The dust cover helps protect the tray from the environment. It also keeps the tray from being knocked out of position while it is extended. Attach the dust cover to the back of the printer by aligning the tabs on the cover to the holes on the printer, then snap the cover into place.
-
Page 23: Loading The Manual Feeder
Loading the manual feeder The manual feeder is located at the front of the printer and can only feed one sheet of print media at a time. For information on acceptable print media to use in the manual feeder, see What types of print media can be loaded? on page10. -
Page 24: Linking Trays
To support all the printer features, use the Lexmark custom printer drivers supplied with your printer. Updated drivers, as well as a complete description of the driver packages and Lexmark driver support, are available from the Lexmark Web site. You can also use the system drivers built into your operating system. -
Page 25: Canceling A Print Job
Canceling a job from a computer running Windows Canceling a job from the taskbar When you send a job to print, a small printer icon appears in the right corner of the taskbar. Double-click the printer icon. A list of print jobs appears in the printer window. -
Page 26: Printing The Menu Settings Page
Press Delete. Printing the menu settings page You can print a menu settings page to review the default printer settings and to verify printer options are installed correctly. Make sure the printer is on and Ready appears. From the control panel, press Press until Print Menus appears. -
Page 27: Printing A Network Setup Page
Printing a network setup pag e If the printer is attached to a network, print a network setup page on the printer to verify the network connection. This page also provides important information that helps in configuring for network printing. -
Page 28: Chapter 4: Installing Options
Installing options Accessing the system board CAUTION: To install memory, you must access the printer system board. Turn the printer off, and unplug the power cord from the wall outlet before continuing. Remove the 250-sheet paper tray. Installing options... - Page 29 Press the button on the left side of the printer to release and lower the front door. Open the rear exit door. Accessing the system board...
- Page 30 Press both buttons on the front right side of the machine to release the side access door. Loosen the four screws on the cover, but do not remove them completely. Slide the cover to the left until the screws fit into the keyholes on the cover. Remove the cover and set it aside.
-
Page 31: Adding A Memory Card
If you are installing a memory card after setting up the printer, turn the printer off, and unplug the power cord from the wall outlet before continuing. Note: Memory options designed for other Lexmark printers may not work with your printer. Access the system board (see Accessing the system board on page28 ). -
Page 32: Adding A Flash Memory Card
If you are installing a flash memory card after setting up the printer, turn the printer off, and unplug the power cord from the wall outlet before continuing. Note: Flash memory card options designed for other Lexmark printers may not work with your printer. Access the system board (see Accessing the system board on page28 ). -
Page 33: Installing An Optional 250-Sheet Drawer Or 550-Sheet Drawer
Installing an optional 250-sheet drawer or 550-sheet drawer CAUTION: Turn the printer off, and unplug the power cord from the wall outlet before continuing. Place the printer unit directly on top of the 250-sheet drawer or 550-sheet drawer. Installing an optional 250-sheet drawer or 550-sheet drawer... -
Page 34: Recognizing Installed Options
Recognizing installed options The printer driver should automatically recognize the newly-installed option when the printer is turned on. If it does not, you can add the appropriate option manually. Note: If you have not installed your printer driver yet, follow the appropriate instructions on the Setup sheet supplied with your printer. -
Page 35: Chapter 5: Maintaining The Printer
To order supplies in the U.S., contact Lexmark at 1-800-539-6275 for information about Lexmark Authorized Supplies Dealers in your area. In other countries or regions, visit the Lexmark Web site at www.lexmark.com, or contact the place where you bought your printer. - Page 36 The recommended supplies specifically designed for the printer are: Part number Description World Wide E250X22G Photoconductor kit For the USA and Canada E250A21A Toner Cartridge E250A11A Return Program Toner Cartridge E352H21A High Yield Toner Cartridge E352H11A High Yield Return Program Toner Cartridge...
-
Page 37: Ordering A Toner Cartridge
88 Toner low message appears. You need to have a new toner cartridge available when the current one no longer prints satisfactorily. Changing a toner cartridge Turn the printer off. Press the button on the left side of the printer to release and lower the front door. Ordering supplies... - Page 38 Note: You can use the packing material from the new toner cartridge to ship the old toner cartridge back to Lexmark for recycling. For more information, see Recycling Lexmark products on page42. Firmly shake the toner cartridge in all directions to distribute the toner.
-
Page 39: Photoconductor Kit End-Of-Life
110% of its life. The message 84 Replace Photoconductor is displayed when the printer reaches this point. If the Toner Alarm setting is set to Single or Continuous (default is Off), the printer automatically notifies you before the photoconductor kit reaches this point and displays the message 84 Photoconductor Life Warning. - Page 40 Extended light exposure can cause print quality problems. Turn the printer off. Remove the print cartridge assembly. Press the button on the left side of the printer to release the front door. Lower the front door. Grasp the toner cartridge handle, and pull up and out.
- Page 41 Install the print cartridge assembly into the printer by aligning the green arrows on the guides of the print cartridge assembly with the green arrows on the tracks in the printer and pushing the print cartridge assembly in as far as it will go.
-
Page 42: Maintenance Kit
80 Scheduled maintenance appears on the display after 120,000 pages have printed to let you know it is time to replace printer maintenance items. Order a maintenance kit when 80 Scheduled maintenance first appears on the display. The maintenance kit contains a media exit guide and all the items necessary to replace the pick rollers, the fuser, and the transfer roller. -
Page 43: Chapter 6: Clearing Jams
To resolve the paper jam messages, you must clear the entire paper path, and then press resume printing. The printer prints a new copy of the page that jammed if Jam Recovery is set to On or Auto; however, the Auto setting does not guarantee the page will print. -
Page 44: Clearing A Jam
Clearing a jam We recommend clearing the entire paper path when a paper jam occurs. Open the 250-sheet tray. If necessary, remove the tray from the printer. Remove the jammed media. Clearing a jam... - Page 45 Press down on the green duplex flap to release jammed pages from the duplex area, and then remove any crumpled paper. Install the 250-sheet tray. Clearing a jam...
- Page 46 Open the front door, and remove the print cartridge assembly. Lift the green flap at the front of the printer, and then remove the jammed pages beneath it. CAUTION: The fuser or fuser area may be hot. Clearing a jam...
- Page 47 Open the rear exit, and remove the jammed pages. After you have cleared the jams, reinstall the print cartridge assembly, and make sure all printer doors are closed. Press Note: Jam recovery is set to Auto by default. When jam recovery is set to Auto, the memory that holds the image of a page may be reused after the page is printed but before it has successfully exited the printer if that memory is needed for another use.
- Page 48 Clearing a jam in the manual feeder Remove the paper from the manual feeder. Open the front door, and remove the print cartridge assembly. Clearing a jam...
- Page 49 Lift the green flap at the front of the printer, and then remove the jammed pages beneath the flap. Open the rear exit door, and remove the jammed pages. After you have cleared the jams, reinstall the print cartridge assembly, and make sure all printer doors are closed.
-
Page 50: Chapter 7: Troubleshooting
Note: This application is not available with Windows NT or Windows 2000. The Lexmark Status Messenger informs you when there are errors requiring printer intervention. When a printer error occurs, a message appears on your computer screen telling you what the error is, and points you to the appropriate recovery information in the User’s Guide. -
Page 51: Printing Multiple-Language Pdfs
WindowsServer2003. Verify that you have properly configured the printer for network printing. For more information, see the drivers CD or the Lexmark Web site. Make sure you are using a recommended interface cable. Make sure the connection is secure. Reduce the complexity of your print job by eliminating the number and size of fonts, the number and complexity of images, and the number of pages in the job. -
Page 52: Turning On Reduced Curl Mode
Turning on Reduced Curl mode If the print media is curled once it exits the printer, Reduced Curl mode can be turned on to help reduce the problem. However, before turning this mode on, you should try the possible solutions offered in Troubleshooting. For more information, see The paper is curled once it exits the printer. -
Page 53: Solving Option Problems
If an option does not operate correctly after it is installed or if it quits working: • Turn the printer off, wait for about 10 seconds, and turn the printer on. If this does not fix the problem, unplug the printer from the wall outlet, and check the connection between the option and printer. -
Page 54: Solving Service Message Issues
Solution A service message indicates printer failure that may require service. Turn the printer off, wait about 10 seconds, and then turn the printer on. If the error recurs, write down the error number, the problem, and a detailed description. Call for service. -
Page 55: Solving Print Quality Problems
Open and close the front door to run the printer setup cycle and clean the transfer roll. Toner fog or background • Check the photoconductor kit to make sure it is installed correctly. - Page 56 • Change the Print Resolution setting in the Quality menu to 600 dpi, 1200 dpi, or 2400 or uneven edges. Image Q. • Enable Enhance Fine Lines. • If you are using downloaded fonts, verify the fonts are supported by the printer, the host computer, and the application. Solving print quality problems...
- Page 57 Print is skewed or inappropriately slanted. Transparency print • Use only transparencies recommended by the printer manufacturer. quality is poor. • Make sure the Paper Type setting in the Paper menu is set to Transparency. Solving print quality problems...
- Page 58 In addition, the Enhance Fine Lines and Gray Correction options can be enabled to improve print quality. These settings are available on the driver and on the printer Embedded Web Server (EWS) interface. For more information about these options, see the driver Help.
-
Page 59: Cleaning The Printhead Lens
Some print quality problems can be solved by cleaning the printhead lens. Turn the printer off. Press the button on the left side of the printer to release and lower the front door. Remove the print cartridge assembly by pulling on the toner cartridge handle. - Page 60 Install the print cartridge assembly into the printer by aligning the arrows on the guides of the print cartridge assembly with the arrows on the tracks in the printer and pushing the print cartridge assembly in as far as it will go.
-
Page 61: Chapter 8: Administrative Support
Administrative support Disabling control panel menus Since many people could be using the printer, an administrator may choose to lock the control panel menus to keep others from changing menu settings from the control panel. Note: Disabling the control panel menus does not prevent access to Print and Hold functionality. -
Page 62: Restoring Factory Default Settings
Restoring factory default settings When you first enter the printer menus from the control panel, you may notice an asterisk (*) to the left of a value in the menus. This asterisk indicates the factory default setting. These settings are the original printer settings. (Factory defaults may vary for different regions.) -
Page 63: Setting The System Password
Web server network communications between the PC and the printer. To connect to the SSL port: Open your Web browser. In the address line, enter the IP address of the printer you want to configure using the format: https: //ip_address/. -
Page 64: Locking The Control Panel Menus
PIN at the control panel. The PIN does not affect any access through the EWS. To lock control panel menus: Open your Web browser. In the address line, enter the IP address of the printer you want to configure using the format: http://ip_address/. -
Page 65: Notices
Federal Communications Commission (FCC) compliance information statement The Lexmark E350d and E352dn (4512-420 and 4512-430) have been tested and found to comply with the limits for a Class B digital device, pursuant to Part 15 of the FCC Rules. Operation is subject... - Page 66 Warning: Electrical surges can be very destructive to equipment connected to AC power sources. If you plan to operate your printer at a voltage exceeding the voltage range(s) in the following table, you must attach a suitably rated and certified power-regulating device (such as a voltage stabilizer or UPS device) to the printer power supply. Your warranty may not cover damages caused by power surges.
-
Page 67: Noise Emission Levels
The power consumption levels listed in the previous table represent time-averaged measurements. Instantaneous power draws may be substantially higher than the average. Sleep / Power Saver mode can be modified from the printer control panel. The default time out to Sleep / Power Saver mode is 30 minutes. -
Page 68: Waste From Electrical And Electronic Equipment (Weee) Directive
This limited warranty applies to the United States and Canada. For customers outside the U.S., refer to the country-specific warranty information that came with your product. This limited warranty applies to this product only if it was originally purchased for your use, and not for resale, from Lexmark or a Lexmark Remarketer, referred to in this statement as “Remarketer.”... -
Page 69: Extent Of Limited Warranty
Your sole remedy under this limited warranty is set forth in this document. For any claim concerning performance or nonperformance of Lexmark or a Remarketer for this product under this limited warranty, you may recover actual damages up to the limit set forth i n the following paragraph. - Page 70 This limited warranty gives you specific legal rights. You may also have other rights that vary from state to state. Statement of Limited Warranty for Lexmark E350d and E352dn...
-
Page 71: Index
13 loading print media 250-sheet tray 18 manual feeder 23 lock feature, security 64 maintaining the printer 35 cleaning the printhead lens 59 maintenance kit 42 manual feeder 5, 14 maximum paper fill indicators 13, 19 memory card... - Page 72 42 preprinted forms 13 print cartridge See toner cartridge print media jams avoiding 17 print media specifications 11 printer settings 7 printhead lens, cleaning 59 printing 18 problems control panel 51 blank 51 displays black diamonds 51 incorrect characters print 52 job didn’t print 51...