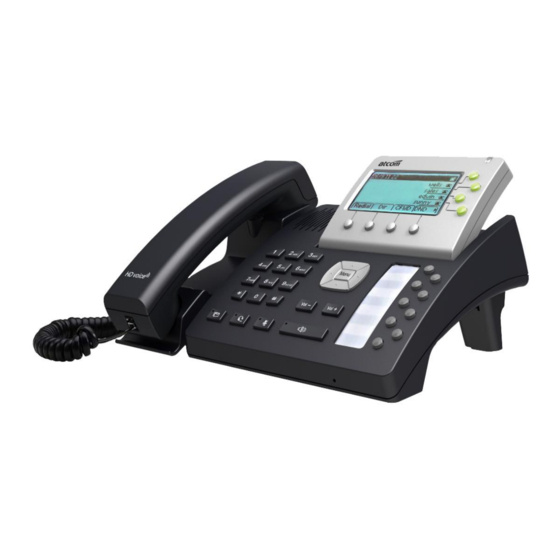
ATCOM AT840 User Manual
Hide thumbs
Also See for AT840:
- User manual (45 pages) ,
- Quick start manual (9 pages) ,
- Features (2 pages)
Table of Contents
Advertisement
Quick Links
Download this manual
See also:
User Manual
AT840 Series User Manual
AT840 series User Manual
Version: 1.3
2014-03-31
Version
Changed note
1.0
First Release
1.1
Page 9: Packing List
1. Add Ethernet Cable(1.5m)
1.2
Web Settings -> Account
Add parameters:
1.Session Timer Enable
2.Early Update Enable
3.Caller ID Display
4.AutoSubscribeMWBEnable
5.Server List
6.Dns Mode
7.Blf List Uri
8.G711A
9.G711U
10.AVT
11.G722
12.G723
13.G729ab
14.iLBC
15.G726-16
16.G726-24
17.G726-32
18.G726-40
Web Settings -> Account
1.3
Add parameter:
1.SIP Redundancy Server
NAM TRUONG GIANG
Release note
Editor
Stefen
Jessie
Jason
Aimee
www.lapdattongdaidienthoai.com
Date
2013-1-25
2013-5-13
2013-8-26
2014-3-31
2
Advertisement
Table of Contents
Troubleshooting

Related Manuals for ATCOM AT840


Summary of Contents for ATCOM AT840
- Page 1 AT840 Series User Manual AT840 series User Manual Version: 1.3 2014-03-31 Release note Version Changed note Editor Date First Release Stefen 2013-1-25 Page 9: Packing List Jessie 2013-5-13 1. Add Ethernet Cable(1.5m) Web Settings -> Account Jason 2013-8-26 Add parameters: 1.Session Timer Enable...
-
Page 2: Table Of Contents
AT840 Series User Manual Content Contact ATCOM ............................. 5 1. AT840 Series Overview ......................6 1) Interfaces ................................7 2) Hardware ................................7 3) Software ................................7 4) Network ................................8 5) Management and Maintenance ........................8 6) Protocol ................................8 7) Compliant Standard............................ - Page 3 AT840 Series User Manual 5.2. Line ............................35 5.3. Features ..............................35 5.4. Voice ..............................37 5.5. Ring ............................38 5.6. Tone................................ 38 5.7. Programmable key ..........................39 5.7. Ext Key ..............................40 6) Update ................................41 6.1. Manual Update ............................ 41 6.2.
-
Page 4: Contact Atcom
The Introduction of ATCOM ATCOM is the leading VoIP hardware manufacturer in global market. We have been keeping innovating with customer’s needs oriented , working with partners to establish a total solution for SMB VoIP with IP phone , IP PBX and Asterisk cards With over 10 years’... -
Page 5: Interfaces
headset indicator, 1 mute indicator, 1 hand-free indicator Expander board: 20 BLF keys on each expander board, can connect at most expander boards on a AT840. 3) Software Sip 2.0 (RFC3261) and other related SIP RFCs 4 SIP lines ... -
Page 6: Network
AT840 Series User Manual BLF, SMS, Blacklists, Dial plan, IP to IP call Auto answer, Block Anonymous call, Block Call-ID STUN, SNTP Jitter Buffer,VAD,CNG HD voice G.168 compliant 96ms echo cancellation SIP UDP,TCP, TLS ... -
Page 7: Operating Requirement
Use Ethernet cable to connect AT840‟s WAN port and your computer. on the same switch, AT840 default to use DHCP to obtain IP from switch. Check AT840 IP by press MENU -> 9.Network ->2.Current IP (default password:123). Then open web browser and key in the IP, you will see the login page of AT840, the default username is admin for administrator and user for user, no password was set for them, you can set password in webpage by yourself. - Page 8 AT840 Series User Manual Feet installation instruction 1) Desktop position: A. Put the bottom side of the IP phone upside and press the plate with letter “PUSH” into the slot, please refer the picture as below: B. Press the other plate into the slot in accordance with the direction of the arrow C.
- Page 9 AT840 Series User Manual D. Disassemble the feet: Press the plate with word “PUSH” and pull the feet with the direction of arrow. When the plate is pull out of the slot (there will be a sound of “pa”) you can take off the feet 2) On wall position A.
-
Page 10: Keypad Of Ip Phone
AT840 Series User Manual Attention: Please rotate the hook to the position as in picture with a coin or other tools D. Disassemble the feet way: Press the plate with word “PUSH” and pull the feet with the direction of arrow. When the plate is pull out of the slot (there will be a sound of “pa”) you can take off the feet... -
Page 11: Describe Of The Buttons And Screen
AT840 Series User Manual 1) Describe of the buttons and Screen Soft buttons Press to select an feature shown in the soft button features. Soft button Shows available choices based on current phone function features displayed on the last line of LCD screen. -
Page 12: Basic Functions And Operations
AT840 Series User Manual AT840 supports BLF in two ways, one is integrated on the IP phone, the other one is extended interface. The BLF indicator status: When boot up,all the light blink for once. When there is a coming call,the corresponding line key and status light will blink. -
Page 13: Speed Dial
4) Multiple line dial-up AT840 IP phone supports 4 SIP lines. That means user can register on 4 different sip accounts simultaneity in the same IP phone. The User can choose line1, line2, line 3 or line 4 by press corresponding line key, System default to use Line1 if you didn't choose line. -
Page 14: Message Waiting Indication(Mwi)
"dial" to blind transfer the call to this target. 7) Message waiting indication(MWI) The AT840 has an MWI key on the phone with an envelop ico. If user doesn't set the voicemail number, pressing MWI key will require the setup of voicemail number. Then pressing the MWI key can directly access the mailbox. -
Page 15: Sms Function
AT840 Series User Manual 6) Press right navigation key then press "Save" soft button to save this number. Method 2: 1) Press the "MENU" button. 2) Press the navigation button to choose “Call History” and then press OK button. 3) Press the navigation button to choose “Missed Calls”, press soft button OK. -
Page 16: Check The Phone"S Ip
Any one of a set of terminating events triggers the AT840 to both accept the user-dialed sequence, and transmit it to initiate a call, or else reject it as invalid. The terminating events are: •... - Page 17 AT840 Series User Manual Numeric ranges are allowed within the brackets: digit „-„digit (e.g. [2-9] means „2‟ or „3‟ or … or „9‟) Ranges can be combined with other keys: e.g. [235-8*] means „2‟ or „3‟ or „5‟ or „6‟ or „7‟ or „8‟ or „*‟.
-
Page 18: Web Settings
(P5 <:1000> | xxxx) 4. Web settings Enter AT840 IP addresses in the web browser to go to the log on page, then you will access AT840's user webpage. Click "admin" which is on the right corner to enter administrator webpage. -
Page 19: System Status
AT840 Series User Manual 1) System status This page shows the IP phone's system status. Product Information shows the product name, protocol, software and hardware version, Mac address and serial number. Network Information shows the type, IP, netmask, gateway, DNS, host name, domain and VPN information. -
Page 20: Advance
Advance 1.2. Web Server Enable Web Server: enable or disable web access. If choose "no", you can not access AT840 webpage. Admin password: set admin webpage access password.(username:admin) User password: set user webpage access password.(username:user) ... - Page 21 AT840 Series User Manual VPN Enable: whether enable VPN VPN Type: only support L2TP VPN Server address: VPN server address Username: VPN account's username Password: VPN account's password After apply, the phone will reboot. The VPN ip will show on the System Status page.
-
Page 22: Sip Setting
AT840 Series User Manual Voice Qos: Quality of service for RTP (Diffserv) Syslog Enable Syslog: whether to enable syslog. Log level: None,Alert,Critical,Error,Warning,Notice,Info,Debug. The debug level is the most detailed. Syslog Server: Syslog Server address. Port: Syslog port, which usually is 514. - Page 23 AT840 Series User Manual The configured dynamic payloads are used for outbound calls only where the SPA presents the SDP offer. For inbound calls with a SDP offer, SPA with follow the caller's dynamic payload type assignments. AVT Dynamic Payload---AVT dynamic payload type. Defaults to 101 ...
-
Page 24: Account
DNS SRV record if there is a DNS which supports specifying the location of the server or domain for SIP protocol. Only when AT840 fails to register to the SIP Server, it will try to register to the SIP Redundancy Server. - Page 25 ISP. Outbound Proxy Port: Set your proxy server port. Register Expires: register expire time, default is 60 seconds. AT840 will auto configure this expire time to the server recommended setting if it is different from the SIP server.
-
Page 26: Phone Setting
AT840 Series User Manual G722/G723/G726-16/G726-24/G726-32/G726-40/Lin16-16) However, the actual codec used in a call still depends on the outcome of the codec negotiation protocol. User Prefer Codec Only: Only use the preferred codec for all calls. The call will fail if the far ... - Page 27 AT840 Series User Manual Language Support customizable multi-language. Output Volume(1~8) Handset Volume: Specify handset volume grade SpeakerPhone Volume: Specify hand-free volume grade Headset Volume: Specify headset volume grade Input Gain Handset Gain: Specify handset gain, the bigger the gain is the louder the other end heard.
- Page 28 AT840 Series User Manual Date And Time NTP Server: Network time protocol service, default is pool.ntp.org. Time Zone: Choose your own time zone. Daylight Saving Time: whether to enable Daylight saving time. Daylight Saving Time Rule: This parameter is a rule with three fields, each field is separated ...
-
Page 29: Line
Always Target: every incoming call will forward to this target. Busy Target: The incoming call will forward to this target when AT840 is busy. No Answer: The incoming call will forward to this target when there is no answer. -
Page 30: Voice
When enable Do Not Disturb on the webpage or on the phone, all the incoming call will be no answer, and Missed Call information will show on the LCD. Block Call ID When enable Block caller ID, AT840 will call others as anonymous. Block Anc Call When enable block anonymous call, AT840 will reject anonymous caller. -
Page 31: Ring
delay.After finishing, click submit button to save changes.. 5.5. Ring Administer can upload 2 user define ring for AT840. The ring file sould be wav(8k, 8bit, u-law) and no larger than 200k. 5.6. Tone Set the ToneScript for each tone. -
Page 32: Programmable Key
AT840 Series User Manual Outside Dial Tone:An alternative to <Dial Tone> usually used to prompt the user to enter an external phone number (versus an internal extension). This is triggered by a “,” character encountered in the dial plan. -
Page 33: Ext Key
Number: which number to set for CFWD, speed dial, BLF etc. 5.7. Ext Key After connect extension module to AT840's EXT port, AT840 will auto detect the extension module. There are 20 keys on each extension module. Event: ... -
Page 34: Reset & Reboot
AT840 Series User Manual Boot Loader: Download Boot file on ATCOM's webpage, then select the file from your PC to upgrade. Firmware: Download firmware on ATCOM's webpage, then select firmware from your PC to upgrade. Language Package: Download Language Package on ATCOM's webpage, then select the ... -
Page 35: Phone Book
AT840 Series User Manual 7) Phone Book New Contact: Add a new phonebook item. Mode: Directory or Blacklist. Numbers in Blacklist will be reject when calling. Name: name of a number ,when the call of this number comes in the LCD will show the ... -
Page 36: Upgrade Firmware Under Safe Mode
AT840 Series User Manual B. Factory reset through web, please refer to Reset & Reboot; 1.2 Upgrade firmware under safe mode If the phone could not start up normally, upgrade firmware under safe mode. Steps are: 1. Build a TFTP server and set its IP address as 192.168.1.200;...