ATCOM AT840 User Manual
At840 series
Hide thumbs
Also See for AT840:
- User manual (43 pages) ,
- Quick start manual (9 pages) ,
- Features (2 pages)
Table of Contents
Advertisement
Quick Links
Advertisement
Table of Contents
Troubleshooting

Related Manuals for ATCOM AT840


Summary of Contents for ATCOM AT840
- Page 1 AT840 series User Manual Version: 1.2 2013-08-26...
- Page 2 AT840 Series User Manual Release note Version Changed note Editor Date First Release Stefen 2013-1-25 Page 9: Packing List Jessie 2013-5-13 1. Add Ethernet Cable(1.5m) Web Settings -> Account Jason 2013-8-26 Add parameters description: 1.Session Timer Enable 2.Early Update Enable 3.Caller ID Display...
-
Page 3: Table Of Contents
AT840 Series User Manual Content Contact ATCOM ............................5 1. AT840 Series Overview ........................6 1) Interfaces ................................7 2) Hardware ................................7 3) Software ................................7 4) Network ................................8 5) Management and Maintenance ........................8 6) Protocol ................................8 7) Compliant Standard ............................ - Page 4 AT840 Series User Manual 5.2. Line ............................35 5.3. Features ..........................35 5.4. Voice ............................ 37 5.5. Ring ............................38 5.6. Tone ............................. 38 5.7. Programmable key ......................39 5.7. Ext Key ..........................40 6) Update ................................41 6.1. Manual Update ........................41 6.2.
-
Page 5: Contact Atcom
The Introduction of ATCOM ATCOM is the leading VoIP hardware manufacturer in global market. We have been keeping innovating with customer’s needs oriented , working with partners to establish a total solution for SMB VoIP with IP phone , IP PBX and Asterisk cards With over 10 years’... -
Page 6: At840 Series Overview
AT840 Series User Manual 1. AT840 Series Overview AT840 is almost the same with AT840P without PoE AT840/AT840P AT840/AT840P with extension module Type Power adapter AT840 Standard accessory AT840P Optional accessory ATCOM TECHNOLOGY CO., LIMITED www.atcom.cn... -
Page 7: Interfaces
headset indicator, 1 mute indicator, 1 hand-free indicator Expander board: 20 BLF keys on each expander board, can connect at most 5 expander boards on a AT840. 3) Software Sip 2.0 (RFC3261) and other related SIP RFCs ... -
Page 8: Network
AT840 Series User Manual 4) Network WAN/PC:Support bridge mode Support PPPoE(ADSL,cable modem use for Internet connecting) Support VLAN(DATA VLAN and VOICE VLAN) Support L2TP VPN WAN support Primary and Secondary DNS WAN support DHCP Client ... -
Page 9: Operating Requirement
Use Ethernet cable to connect AT840‟s WAN port and your computer. on the same switch, AT840 default to use DHCP to obtain IP from switch. Check AT840 IP by press MENU -> 9.Network ->2.Current IP (default password:123). Then open web browser and key in the IP, you will see the login page of AT840, the default username is admin for administrator and user for user, no password was set for them, you can set password in webpage by yourself. - Page 10 AT840 Series User Manual Internet Switch SIP Server AT840 AT840 AT840 AT840 Feet installation instruction 1) Desktop position: A. Put the bottom side of the IP phone upside and press the plate with letter “PUSH” into the slot, please refer the picture as below: B.
- Page 11 AT840 Series User Manual D. Disassemble the feet: Press the plate with word “PUSH” and pull the feet with the direction of arrow. When the plate is pull out of the slot (there will be a sound of “pa”) you can take off the feet 2) On wall position A.
- Page 12 AT840 Series User Manual Attention: Please rotate the hook to the position as in picture with a coin or other tools D. Disassemble the feet way: Press the plate with word “PUSH” and pull the feet with the direction of arrow. When the plate is pull out of the slot (there will be a sound of “pa”) you can take off the feet...
-
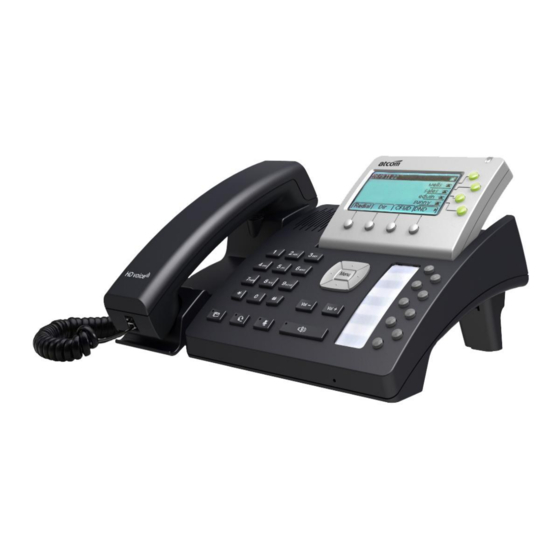
Page 13: Keypad Of Ip Phone
AT840 Series User Manual 2. Keypad of IP Phone 1) Describe of the buttons and Screen Soft buttons Press to select an feature shown in the soft button features. Soft button Shows available choices based on current phone function features displayed on the last line of LCD screen. -
Page 14: Blf Indicator Status
Check the Voicemail status, if there are voicemail, the button will light on. 2) BLF indicator status AT840 supports BLF in two ways, one is integrated on the IP phone, the other one is extended interface. The BLF indicator status: When boot up,all the light blink for once. -
Page 15: Basic Functions And Operations
AT840 Series User Manual 3. Basic functions and operations 1) Answer the calls When there is an incoming call, AT840 will remind user with ringing. There are 5 ways to answer the call A. Answer by handset Pick up the handset and talk with the caller. If you want to hang up, just put back the handset. -
Page 16: Speed Dial
4) Multiple line dial-up AT840 IP phone supports 4 SIP lines. That means user can register on 4 different sip accounts simultaneity in the same IP phone. The User can choose line1, line2, line 3 or line 4 by press corresponding line key, System default to use Line1 if you didn't choose line. -
Page 17: Message Waiting Indication(Mwi)
"dial" to blind transfer the call to this target. 7) Message waiting indication(MWI) The AT840 has an MWI key on the phone with an envelop ico. If user doesn't set the voicemail number, pressing MWI key will require the setup of voicemail number. Then pressing the MWI key can directly access the mailbox. -
Page 18: 3-Way Conference Calls
11) Call History AT840 supports 200 missed calls, 200 incoming calls and 200 dialed calls. When the storage is full, the latest call will update the history. Press "redial" soft button when standby, all the incoming(->) outgoing(<-) and missed calls(!) will be listed. -
Page 19: Sms Function
AT840 Series User Manual 6) Press the navigation button to choose “Call History” and then press OK button. 7) Press the navigation button to choose “Answered Calls”, press soft button OK. 8) Press the navigation button to browse the incoming call records. If there is no record, the LCD screen display “List is Empty”. -
Page 20: Check The Phone"S Ip
Any one of a set of terminating events triggers the AT840 to both accept the user-dialed sequence, and transmit it to initiate a call, or else reject it as invalid. The terminating events are: •... - Page 21 AT840 Series User Manual The timeout duration depends on the matching state. If no candidate sequences are as yet complete (as dialed), the Interdigit_Long_Timeout applies. If a candidate sequence is complete, but there exists one or more incomplete candidates, then the Interdigit_Short_Timeout applies.
- Page 22 AT840 Series User Manual Thus, “L=8, (. . .)” would set the interdigit long timeout to 8 seconds for the line associated with this dial plan. And, “L: 8, S: 4, (. . .)” would override both the long and the short timeout values.
-
Page 23: Web Settings
(P5 <:1000> | xxxx) 4. Web settings Enter AT840 IP addresses in the web browser to go to the log on page, then you will access AT840's user webpage. Click "admin" which is on the right corner to enter administrator webpage. -
Page 24: System Status
AT840 Series User Manual 1) System status This page shows the IP phone's system status. Product Information shows the product name, protocol, software and hardware version, Mac address and serial number. Network Information shows the type, IP, netmask, gateway, DNS, host name, domain and VPN information. -
Page 25: Network
PPPoE: If connect AT840 to modem, you should fill ADSL account and the password which assigned by your network service provider. Advance 1.2. Web Server Enable Web Server: enable or disable web access. If choose "no", you can not access AT840 ATCOM TECHNOLOGY CO., LIMITED www.atcom.cn... - Page 26 User password: set user webpage access password.(username:user) HTTP port: set port for HTTP(default is 80) For example, the AT840's ip is 192.168.1.223 HTTP port was set as 100, you have to type "http://192.168.1.223:100" in web browser to enter AT840 webpage. ...
-
Page 27: Sip Setting
AT840 Series User Manual Choose the type of the WAN/PC network port link WAN Port Link: Auto negotiate, full duplex 10Mbps, full duplex 100Mbps, half duplex 10Mbps, half duplex 100Mbps. PC Port Link: Auto negotiate, full duplex 10Mbps, full duplex 100Mbps, half duplex 10Mbps, ... - Page 28 AT840 Series User Manual Sip T1: RFC 3261 T1 value (RTT Estimate). Range: 0 – 64 sec Sip T2: RFC 3261 T2 value (Maximum retransmit interval for non-INVITE requests and INVITE responses). Range: 0 – 64 sec Sip T4: RFC 3261 T4 value (Maximum duration a message will remain in the network). Range: ...
-
Page 29: Account
AT840 Series User Manual the SDP offer. For inbound calls with a SDP offer, SPA with follow the caller's dynamic payload type assignments. AVT Dynamic Payload---AVT dynamic payload type. Defaults to 101 G729b Dynamic Payload---G729b dynamic payload type. Defaults to 18 ... - Page 30 ISP. Outbound Proxy Port: Set your proxy server port. Register Expires: register expire time, default is 60 seconds. AT840 will auto configure this expire time to the server recommended setting if it is different from the SIP server.
- Page 31 AT840 Series User Manual AutoSubscribeMWI Enable: Enable this account to subscribe for message summary automatically. Server List: the SIP server list supported, can be common and Broadsoft, default to common. DNS mode: enable the account to use DNS SRV query. Default to no which use DNS A query.
- Page 32 AT840 Series User Manual Call Feature Setting Message Waiting: whether to prompt if there is a voicemail. Voice Mail Number: if you set voicemail number, then you can just press the voicemail key to auto dial voicemail number then enter voicemail box.
-
Page 33: Phone Setting
AT840 Series User Manual 5) Phone Setting 5.1. Preference Language Support customizable multi-language. Output Volume(1~8) Handset Volume: Specify handset volume grade SpeakerPhone Volume: Specify hand-free volume grade Headset Volume: Specify headset volume grade Input Gain ... - Page 34 AT840 Series User Manual Interdigit Long Timer: Long timeout between entering digits when dialing. Range: 0 – 64 Interdigit Short Timer: Short timeout between entering digits when dialing. Range: 0 – 64 Recorder Delay: Delay after far end hangs up before reorder tone is played. 0 = plays ...
-
Page 35: Line
AT840 Series User Manual saving starts or ends on the <weekday >on or after the given date if <day> is positive, or on or before the given date if <day> is negative. If <day> is -1, it means the <weekday> on or before the end-of-the –month (in other words the last occurrence of <weekday>... - Page 36 Always Target: every incoming call will forward to this target. Busy Target: The incoming call will forward to this target when AT840 is busy. No Answer: The incoming call will forward to this target when there is no answer.
-
Page 37: Voice
AT840 Series User Manual When enable Block caller ID, AT840 will call others as anonymous. Block Anc Call When enable block anonymous call, AT840 will reject anonymous caller. Auto Answer When a call in coming, the phone will answer the call by handfree automatically. -
Page 38: Ring
AT840 Series User Manual 5.5. Ring Administer can upload 2 user define ring for AT840. The ring file sould be wav(8k, 8bit, u-law) and no larger than 200k. 5.6. Tone Set the ToneScript for each tone. For example, MWI Dial Tone: 350@-19,440@-19;2(.1/,1/1=2);10(*/0/1+2) -
Page 39: Programmable Key
AT840 Series User Manual Country stands: select a country standard tone as default. Dial Tone:Played when prompting the user to enter a phone number. Outside Dial Tone:An alternative to <Dial Tone> usually used to prompt the user to enter an ... -
Page 40: Ext Key
Number: which number to set for CFWD, speed dial, BLF etc. 5.7. Ext Key After connect extension module to AT840's EXT port, AT840 will auto detect the extension module. There are 20 keys on each extension module. Event: ... -
Page 41: Update
Number: which number to set for CFWD, speed dial, BLF etc. 6) Update 6.1. Manual Update Boot Loader: Download Boot file on ATCOM's webpage, then select the file from your PC to upgrade. Firmware: Download firmware on ATCOM's webpage, then select firmware from your PC to ... -
Page 42: Reset & Reboot
AT840 Series User Manual 6.2. Reset & Reboot Reset Reset will set AT840 to factory default, please backup the config.xml, phonebook.xml and attendant_keypad.xml before reset. Reboot Reboot will terminate all active calls, and cost a little time. 7) Phone Book New Contact: Add a new phonebook item. -
Page 43: Call Log
AT840 Series User Manual Notice:Maximum records of phone book is 200. 8) Call Log Redial: Record of dial list, maximum 200 items. Received: Record of received list, maximum 200 items. Missed: Record of Missed list, maximum 200 items. -
Page 44: How To Make Direct Ip Call
AT840 Series User Manual AT840.FW; 3. Make sure the TFTP server and the phone are contacting with the same switch and reachable to each other; 4. Long hold “#” key and start up the phone until the LCD display “Upgrading…”;... -
Page 45: Only One Part Can Hear The Voice During The Call
AT840 Series User Manual 2.3 Only one part can hear the voice during the call A. Make an IP dial-up call to make sure the telephone receiver and Mic are normal. B. Enable STUN on web page. C. Set STUN server as stun.3cx.com.