Advertisement
Available languages
Available languages
Acondicionado
Installation & Operations Manual
Manual de Instalación y Funcionamiento
ENGLISH
Installation ................................ 3
Operation .................................. 6
Maintenance ............................ 7
ESPAÑOL
de seguridad ............................ 8
Instalación ................................ 9
Funcionamiento ........................ 12
Mantenimiento .......................... 14
Para mayor información
Por favor llame al
01 800 248 9675
o mande un correo a
supportcenter@mx.york.com
EL FABRICANTE SE RESERVA EL
DERECHO DE MODIFICAR O
DESCONTINUAR LAS
ESPECIFICACIONES DE DISENO
SIN INCURRIR EN OBLIGACIONES
Gracias por seleccionar el aire acondicionado YORK.
Por favor guarde este Manual de Propietario para las
Instrucciones y su Garantía.
Lea las instrucciones de Manera cuidadosa así como
la Reglamentación para una Operación Segura.
Manual de
Instalación y
Funcionamiento
MARCA:
York
MODELOS: Y7USC12-2R
Y7USC12-6R
Y7UEC12-6R
Y7USH12-6R
Y7USC18-6R
Y7USH18-6R
Advertisement
Table of Contents

Related Manuals for York Y7USC12-2R


Summary of Contents for York Y7USC12-2R
-
Page 1: Table Of Contents
Y7USC12-6R ESPECIFICACIONES DE DISENO Y7UEC12-6R SIN INCURRIR EN OBLIGACIONES Y7USH12-6R Gracias por seleccionar el aire acondicionado YORK. Y7USC18-6R Por favor guarde este Manual de Propietario para las Y7USH18-6R Instrucciones y su Garantía. Lea las instrucciones de Manera cuidadosa así como... -
Page 2: Important Safety Instructions
Electrical Requirements & Safety Precautions • Do not operate this air conditioner • Do not introduce objects in the air Warning without proper time delay circuit discharge area. This could cause protection. Refer to serial plate for permanent damage to your unit. proper power supply requirements. -
Page 3: Installation
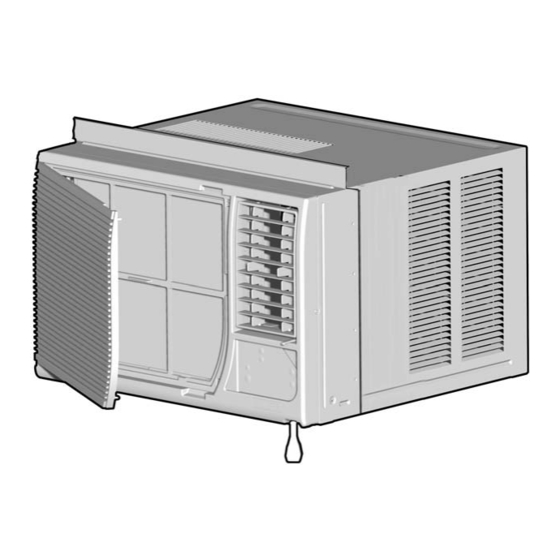
Installation Cleaning the Air Filter Tools Needed Removing the Chassis 1. Remove the two (2) shipping Clean the filter every two weeks screws from the rear bottom side 1. Turn Master Control to OFF. of the cabinet. These shipping 2. Remove the air filter by opening the screws may be discarded. - Page 4 Thru-the-Wall Installation Through-the-wall Installation Installing the Chassis into the Cabinet 3. Install the finished frame in the wall Slide the chassis into the opening square and level, nail or This air conditioner is designed as a cabinet. screw it securely to the wall and slide-out type chassis, making it possible place the cabinet into the framed Replace the two antitheft screws...
- Page 5 Wood frame Fig. 1 1” wood screws Cabinet Bottom Bar Interior wall Decorative Front Minimum 1x6 wood support (nailed or screwed to wood frame) 2” Wood frame 1 1/2” space 1 1/4” space Brick veneer Lintel angle Caulking Fig. 2 Flashing (drip rail) Side louvers Wood filler strip...
-
Page 6: Operation
Operation Power Control Fan Speed Control - Electronic Control (Cooling Only) High, The Power Control turns the unit on and off. Medium, Low and Auto Set Temperature/ Timer Display The settings are adjusted with the Fan Speed Shows the set temperature when the unit is in Control, each time the button is depressed it operation and hours when the timer is being changes the setting. -
Page 7: Maintenance
Troubleshooting Air Conditioner Remote Control The functions work the same as your air conditioner’s touch controls. Batteries: Remove the cover on the back of the remote controller and insert the batteries with the (+) and (-) poles pointing in the proper direction. 1.5V IEC R03 "... -
Page 8: Instrucciones Importantes De Seguridad
Instrucciones importantes de seguridad • Use solamente conductores de cobre y Precauciones de Seguridad Adicionales Advertencia fusibles de calibre y capacidad adecuada. • No corte, modifique ni retire ningún • No modifique el cordón ni el enchufe del pedazo de poliestireno expandido extremo. -
Page 9: Instalación
Instalación Herramientas Necesarias Desmontaje del Chasis Retire los dos (2) tornillos de embarque* del costado inferior trasero del gabinete. Retire los dos (2) tornillos antirrobo de ambos lados delanteros inferiores del gabinete. CONSERVE ESTOS TORNILLOS, ellos serán usados posteriormente Desarmador en la instalación. - Page 10 Instalación Empotrado en la Pared 3. Instale el marco terminado en la Instalación Empotrado en la Pared Instalación del Chasis cavidad mural de manera que quede en el Gabinete Este aire acondicionado sido a escuadra y nivelado, luego clávelo o diseñado como un chasis deslizable, Deslice el chasis hacia el interior del atorníllelo firmemente en la pared e...
- Page 11 Marco de madera Fig. 1 Tornillos de madera de 1” Gabinete Barra inferior Pared Panel decorativo delantero Soporte de madera de por lo menos 1 x 6 (clavado o atornillado en el marco de madera) Marco de madera de 2" por todo el rededor Fig.
-
Page 12: Funcionamiento
Funcionamiento Control de Alimentación Control Electrónico (Enfriamiento Solamente) Este botón pone en marcha y apaga el aire acondicionado. Indicador de Temperatura de Ajuste/Temporizador El indicador muestra la temperatura de ajuste cuando el aire acondicionado está en funcionamiento y las horas cuando se ha activado el temporizador. EL INDICADOR LA TEMPERATURA SOLAMENTE... - Page 13 Funcionamiento Limpieza del Filtro del Aire Control de la Velocidad del Control del Temporizador Ventilador – Limpie el filtro cada dos semanas Alta, Mediana, Baja y (El temporizador puede ser ajustado ya sea Automática para encender o apagar el aire 1.
-
Page 14: Mantenimiento
Servicio Para ahorrar tiempo y dinero, verifique lo siguiente antes de llamar a un centro de servicio autorizado. Problema Causa Posible Soluciones El aire acondicionado no funciona • El enchufe mural está desconectado. Inserte bien el enchufe en el tomacorriente mural. •... - Page 16 23-11-2263N-003...