Table of Contents
Advertisement
Advertisement
Table of Contents

Related Manuals for Goldmund PH3.8


Summary of Contents for Goldmund PH3.8
- Page 1 USER MANUAL Goldmund PH3.8 Phono Preamplifier...
- Page 2 The guiding principle at Goldmund is to produce a precise sound with the least possible loss of quality through the different stages. Goldmund will never adopt a technology before it is sufficiently developed to satisfy the high quality standards we set.
-
Page 3: Table Of Contents
Table of Contents UNPACKING CHOICE LOCATION AND COOLING LINE VOLTAGE ADJUSTMENT CONNECTIONS REAR PANEL CONTROLS FRONT PANEL CONTROLS SOUND QUALITY OPTIMIZATION MAINTENANCE TECHNICAL DATA REAR PANEL Goldmiund PH3.8 – Phono Preamplifier - 3... - Page 4 Only careful installation and use can provide the satisfaction you are expecting. The installation instructions must be carried out in full and the mentioned precautions taken to get the expected result and to avoid impairing performance. Goldmiund PH3.8 – Phono Preamplifier - 4...
-
Page 5: Unpacking
- This manual. ATTENTION Please keep the packaging in case you need to transport the PH3.8 at a later date or if you have to send it for maintenance. This packaging has been designed specifically to protect the PH3.8 in transit. Use of alternative packaging is likely to result in damage, invalidating warranty cover. -
Page 6: Line Voltage Adjustment
Use a 1A slow-blow fuse for 220V and 110V. CONNECTIONS Connect the power cord to the back of the PH3.8 and plug it into the nearest wall socket. Use a 3 lug grounded plug for safety. To get the best sound from the PH3.8, avoid any multiple plugs or extension cords. -
Page 7: Rear Panel Controls
It is normal for a slight sound to be heard from the speakers when the Phono Preamplifier is turned ON or OFF. The PH3.8 is self-protected and the sound heard is corresponding to the charging and discharging of the capacitors. - Page 8 One selector controls the right input, the other one the left input. Switch position Load applied on the input 10 Ohms 20 Ohms 50 Ohms 100 Ohms 470 Ohms 1.5 kOhms 4.7 kOhms 15 kOhms 47 kOhms Goldmiund PH3.8 – Phono Preamplifier - 8...
- Page 9 The following values are parallel capacitors load applied to the MM inputs. One selector controls the right input, the other the left one. Switch position Load applied on the input 20 pF 50 pF 100 pF 220 pF 470 pF 1 nF 2.2 nF 4.7 nF Goldmiund PH3.8 – Phono Preamplifier - 9...
-
Page 10: Front Panel Controls
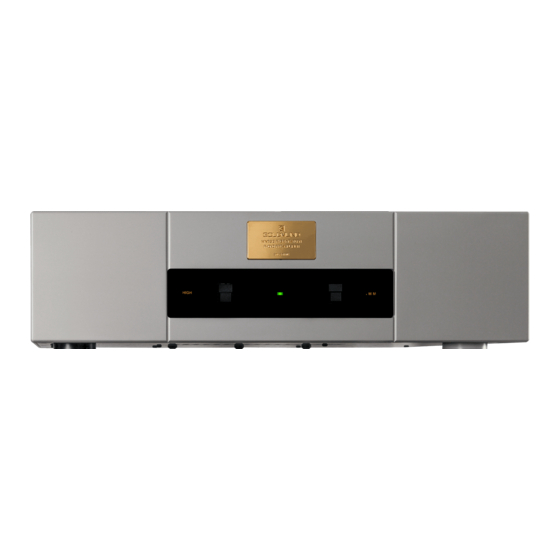
FRONT PANEL CONTROLS On the front panel of the GOLDMUND PH3.8 Phono Preamplifier you will find two switches. The left switch selects the global gain (low or hi) of the preamplifier, the right switch selects the MM or MC cartridge. -
Page 11: Technical Data
- 3 dB 0.12Hz - 760 kHz at 70dB gain (without RIAA correction). Slew rate: • > 80 V/us. Rise time: • < 400 ns. Distortion: • < 0.007% (20Hz-20kHz at 4V rms output). Output Impedance: • 50 Ohms. Max output level: • 32Vpp POWER. Goldmiund PH3.8 – Phono Preamplifier - 11... - Page 12 Information and product specifications contained in this manual are subject to change without prior notice. Updated versions of this manual will be posted on our website at www.goldmund.com. Please visit our support page at http://www.goldmund.com/support/register to register your Goldmund product for warranty. Goldmiund PH3.8 – Phono Preamplifier - 12...
-
Page 13: Rear Panel
REAR PANEL Goldmiund PH3.8 – Phono Preamplifier - 13 Rev A...