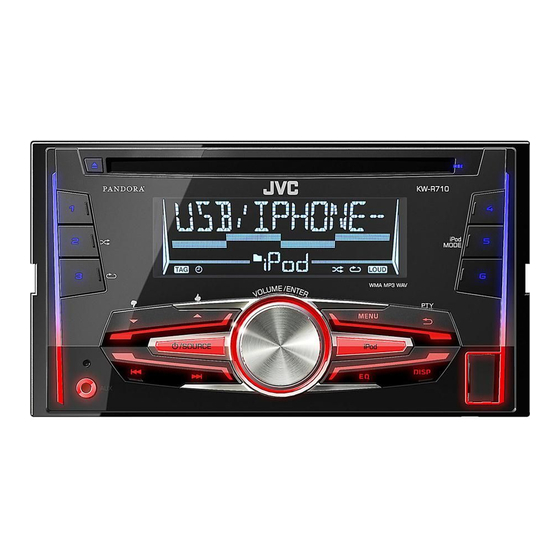
JVC KW-R710 Instruction Manual
Cd receiver
Hide thumbs
Also See for KW-R710:
- Instruction manual (24 pages) ,
- Instruction manual (56 pages) ,
- User manual (20 pages)
Table of Contents
Advertisement
Available languages
Available languages
KW-R710 / KW-R510
CD RECEIVER
INSTRUCTION MANUAL
RÉCEPTEUR CD
MANUEL D'INSTRUCTIONS
Please read all instructions carefully before
operation to obtain the best possible performance
from the unit.
Veuillez lires les instructions attentivement avant
d'utiliser l'appareil afin d'obtenir les meilleures
performances possibles de l'appareil.
GET0949-001A [E/EN]
ENGLISH
FRANÇAIS
Advertisement
Chapters
Table of Contents

Related Manuals for JVC KW-R710


Summary of Contents for JVC KW-R710
-
Page 1: Instruction Manual
ENGLISH FRANÇAIS KW-R710 / KW-R510 CD RECEIVER Please read all instructions carefully before INSTRUCTION MANUAL operation to obtain the best possible performance from the unit. RÉCEPTEUR CD Veuillez lires les instructions attentivement avant MANUEL D’INSTRUCTIONS d’utiliser l’appareil afin d’obtenir les meilleures performances possibles de l’appareil. - Page 2 For Israel Information on Disposal of Old Electrical and Electronic Equipment and Batteries (applicable for EU countries that have adopted separate waste collection systems) Products and batteries with the symbol (crossed-out wheeled bin) cannot be disposed as household waste. Old electrical and electronic equipment and batteries should be recycled at a facility capable of handling these items and their waste byproducts.
- Page 3 Class 1. It means that the unit is utilizing laser beams that are of a weaker class. There is no danger of hazardous radiation outside the unit. EU Representative’s: JVC Technical Services Europe GmbH Marquage des produits utilisant un laser Konrad-Adenauer-Allee 1-11, D-61118 Bad Vilbel, Germany L’étiquette est attachée au châssis/boîtier de l’appareil et indique que l’appareil utilise des...
-
Page 4: Table Of Contents
• Do not touch the recording surface of the disc. KW-R710. • English language is used for • Do not stick tape etc. on the disc, or use a disc with tape stuck on it. -
Page 5: Basics
BASICS Faceplate Remote control (RM-RK52) (not supplied) How to reset KW-R710 can be remotely controlled with an Display window optionally purchased remote control. Loading slot Remote sensor (Do not expose to bright sunlight.) Your preset adjustments will also be erased. Pull out the insulation sheet when using for the first time. -
Page 6: Getting Started
Turn the volume knob to select [12 HOUR] or [24 HOUR], then press the SYSTEM knob. Press MENU to exit. F/W xxxx YES: Starts upgrading the firmware. ; NO: Cancels (upgrading is not activated). For details on how to update the firmware, see: <http://www.jvc.net/cs/car/>. * Not displayed when the corresponding source is selected. -
Page 7: Cd / Usb / Ipod
Press 3 B repeatedly to make a selection. iPod/iPhone (for KW-R710) • Audio CD or JVC Playlist Creator (JPC) / JVC Music Control (JMC) file ( 13): TRACK RPT, RPT OFF USB input terminal • MP3/WMA/WAV file: TRACK RPT, FOLDER RPT, RPT OFF •... - Page 8 Repeat steps 1 to 4 to select the following drives. Selectable items: [DRIVE 1] to [DRIVE 5] Select a song by name (For KW-R710) Change the playback speed of the Audiobook While listening to the iPod and [HEAD MODE] is selected ( 5)..
-
Page 9: Radio
RADIO • To select a stored station: Press J / K or one of the number buttons (1 to 6). (or) Press MENU, then turn the volume knob to select a preset number and press the knob to confirm. Search for your favorite program (PTY Search) Available only for FM source. -
Page 10: Other Settings
RADIO Other settings MONO* ON: Improves the FM reception, but the stereo effect will be lost. ; OFF: Cancels. Press and hold MENU. Turn the volume knob to select [TUNER], then press the knob. NEWS-STBY* ON: The unit will temporarily switch to News Programme if available. ; Turn the volume knob to make a selection (see the following table), OFF: Cancels. -
Page 11: Aux
AUDIO SETTINGS Use a portable audio player Do this Select a preset Connect a portable audio player (commercially available). Press EQ repeatedly. equalizer (or) 3.5 mm stereo mini plug with “L” shaped connector Press EQ, then turn the volume knob within (commercially available) 2 seconds. - Page 12 AUDIO SETTINGS Default: XX FADER * R06 — F06 (0): Adjusts the front and rear speaker output balance. EQ SETTING BALANCE * L06 — R06 (0): Adjusts the left and right speaker output balance. EQ PRESET FLAT / HARD ROCK / JAZZ / POP / R&B / TALK / USER1 / USER2 / VOL ADJUST –05 — +05 (00): Presets the volume adjustment level of each source VOCAL BOOST / BASS BOOST / CLASSICAL / DANCE: Selects a preset (compared to the FM volume level).
-
Page 13: Display Settings
3 Set the brightness level (00 to 31). COLOR GUIDE ON: Changes the button, display and USB input terminal illumination when (Default: KW-R710: DAY: 31 ; NIGHT: 11 settings are performed on menu and list search. Display zone will automatically KW-R510: BUTTON ZONE: DAY: 25 ; NIGHT: 09 change depending on volume level. ;... -
Page 14: More Information
• If some operations are not performed correctly or as It depends on the disc format used (includes 4 extension knob. intended, visit: <http://www.jvc.net/cs/car/>. characters—<.mp3> or <.wma>). Turn the volume knob to adjust the - ISO 9660 Level 1 and 2: 32 characters... -
Page 15: Troubleshooting
Sound cannot be heard. • Adjust the volume to the optimum level. • When you play audio file with song data added using the JVC Playlist Creator or JVC Music Control, you • Check the cords and connections. can search for audio file by Genres, Artists, Albums, Playlists, and Songs. -
Page 16: Installation / Connection
INSTALLATION / CONNECTION TROUBLESHOOTING Warning Symptom Remedy • The unit can only be used with a 12 V DC power supply, negative ground. “CANNOT PLAY” flashes • Check whether the connected device is compatible with this • Disconnect the battery’s negative terminal before wiring and mounting. and/or connected device unit and ensure the files are in supported formats. - Page 17 INSTALLATION / CONNECTION How to remove the unit Part list for installation Installing the unit (in-dash mounting) (A) Trim plate Do the required wiring. ( 16) Bend the appropriate tabs to hold the sleeve firmly in place. (B) Mounting sleeve Dashboard of your car (C) Wiring harness...
- Page 18 INSTALLATION / CONNECTION Wiring connection Signal cord Remote wire (not supplied) To Blue/white wire of the (not supplied) KW-R710 KW-R510 wiring harness (C) JVC Amplifier Front output Rear/subwoofer output Rear/subwoofer output Fuse (10 A) Aerial terminal For some VW/Audi or Opel (Vauxhall) automobiles...
-
Page 19: Specifications
SPECIFICATIONS FM Frequency Range 87.5 MHz to 108.0 MHz (50 kHz step) USB Standard USB 1.1, USB 2.0 (Full speed) Usable Sensitivity (S/N = 26 dB) 0.71 μV/75 Ω Compatible Devices Mass storage class Quieting Sensitivity 2.0 μV/75 Ω File System FAT12/ 16/ 32 (DIN S/N = 46 dB) Maximum Supply Current DC 5 V 1 A Frequency Response (±3 dB) 30 Hz to 15 kHz MP3 Decode Compliant with MPEG-1/2 Audio Layer-3 Signal-to-Noise Ratio (MONO) -
Page 20: Avant L'utilisation
• Ne pas toucher la surface d’enregistrement du disque. de la façade du KW-R710 • Ne pas coller de ruban adhésif, etc. sur les disques et ne pas utiliser de disque avec du ruban adhésif collé dessus. • La langue anglaise est utilisée pour •... -
Page 21: Fonctionnement De Base
FONCTIONNEMENT DE BASE Façade Télécommande (RM-RK52) (non fournie) Comment réinitialiser KW-R710 peut être commandé à distance avec une télécommande vendue séparément. Fenêtre d’affichage Fente d’insertion Capteur de télécommande (Ne l’exposez Pas à la lumière directe du soleil.) Vos ajustements préréglés sont aussi effacés. -
Page 22: Prise En Main
Pour en savoir plus sur la mise à niveau du micrologiciel, référez-vous à: Jour Heure Minute <http://www.jvc.net/cs/car/>. Tournez le bouton de volume pour choisir [24H/ 12H] , puis appuyez sur * Pas d’affichage quand la source correspondante est sélectionnée. -
Page 23: Cd / Usb / Ipod
Appuyez répétitivement sur la touche pour faire un choix. iPod/iPhone (pour KW-R710 • CD Audio ou fichier JVC Playlist Creator (JPC) / JVC Music Control (JMC) ( 13) : TRACK RPT, Prise d’entrée USB RPT OFF • Fichier MP3/WMA/WAV: TRACK RPT, FOLDER RPT, RPT OFF •... - Page 24 Options sélectionnables: [DRIVE à [DRIVE (Pour KW-R710 Pendant l’écoute de l’iPod et quand [HEAD MODE] est sélectionné ( 5) ..Change la vitesse de lecture des livres audio Si vous avez beaucoup de dossiers ou de plages/fichiers, vous pouvez faire une recherche...
-
Page 25: Radio
RADIO • Pour choisir une station mémorisée: Appuyez sur ou sur l’une des touches numériques ( à (ou) Appuyez sur MENU , puis tournez le bouton de volume pour choisir un numéro préréglé, puis appuyez sur le bouton pour valider. Recherche de votre programme préféré... - Page 26 RADIO MONO : Améliore la réception FM mais l’effet stéréo sera perdu. ; : Annulation. Autres paramètres NEWS-STBY : L’appareil commute temporairement sur le programme d’information s’il est disponible. ; MENU Maintenez enfoncée : Annulation. Tournez le bouton de volume pour choisir [TUNER] , puis appuyez sur le REGIONAL : Commute sur une autre station uniquement dans la région spécifiée, à...
-
Page 27: Aux
RÉGLAGES AUDIO Pour Faire Utilisation d’un lecteur audio portable Choisissez Appuyez répétitivement sur Connectez un lecteur audio portable (en vente dans le commerce). un égaliseur (ou) Mini fiche stéréo de 3,5 mm avec connecteur préréglé Appuyez sur , puis tournez le bouton de volume en forme de “L”... - Page 28 RÉGLAGES AUDIO Défaut: FADER * — ( ): Règle la balance de sortie des enceintes avant et arrière. BALANCE * EQ SETTING — ( ): Règle la balance de sortie des enceintes gauche et droite. EQ PRESET FLAT HARD ROCK JAZZ R&B TALK USER1 USER2...
-
Page 29: Réglages D'affichage
RÉGLAGES D’AFFICHAGE KW-R710 KW-R510 Défaut: COLOR (pour KW-R710 PRESET ALL ZONE ZONE 1 DISP ZONE Vous pouvez sélectionner une couleur séparément pour [ ], [ ], [ ZONE 2 ALL ZONE ou [ ]. Pour [ ], vous pouvez aussi sélectionner un motif de couleur. -
Page 30: Plus D'informations
• Si certaines opération ne sont pas effectuées correctement ou comme vous Nombre maximum de caractères pour le nom d’un • Tournez le bouton de volume pour choisir le souhaitez, consultez: <http://www.jvc.net/cs/car/>. fichier/dossier: [BUTTON ZONE] ou [DISP ZONE] , puis appuyez sur Ca dépend du format de disque utilisé... -
Page 31: Guide De Dépannage
Le son ne peut pas être entendu. • Ajustez le volume sur le niveau optimum. • Quand vous reproduisez un fichier audio avec des données de chanson ajoutée en utilisant JVC Playlist Creator ou JVC Music • Vérifiez les cordons et les connexions. -
Page 32: Installation / Raccordement
INSTALLATION / RACCORDEMENT GUIDE DE DÉPANNAGE Symptôme Remède Avertissement • L’appareil peut uniquement être utilisé avec une alimentation de 12 V CC, à masse négative. “CANNOT PLAY” clignote et/ou le • Vérifiez si le périphérique connecté est compatible avec cet appareil et •... - Page 33 INSTALLATION / RACCORDEMENT Liste des pièces pour l’installation Comment retirer l’appareil Installation de l’appareil (montage encastré) Plaque d’assemblage Réalisez les connexions nécessaires. Tordez les languettes appropriées pour maintenir le manchon en place. Manchon de montage Tableau de bord de votre voiture Faisceau de fils Lors d’une installation sans manchon de montage...
- Page 34 INSTALLATION / RACCORDEMENT Connexions Cordon de signal Fil de télécommande (non fournie) Le fil bleu/blanc du faisceau de (non fournie) KW-R710 KW-R510 fils (C) JVC Amplificateur Sortie avant Sortie arrière/caisson de grave Sortie arrière/caisson de grave Fusible (10 A) Prise d’antenne...
-
Page 35: Spécifications
SPÉCIFICATIONS FM Plage de fréquences 87,5 MHz à 108,0 MHz (pas de 50 kHz) Standard USB USB 1.1, USB 2.0 (vitesse maximale) Sensibilité utilisable (S/B = 26 dB) 0,71 μV/75 Ω Périphériques compatibles À mémoire de grande capacité Seuil de sensibilité (DIN S/N = 46 dB) 2,0 μV/75 Ω... - Page 36 • iPhone, iPod, iPod classic, iPod nano, and iPod touch are trademarks of Apple Inc., registered in the U.S. and other countries. • Lightning is a trademark of Apple Inc. • Android is trademark of Google Inc. © 2013 JVC KENWOOD Corporation 1213DTSMDTJEIN...