
Related Manuals for JVC KW-R520


Summary of Contents for JVC KW-R520
-
Page 1: Instruction Manual
ENGLISH ไทย KW-R520 CD RECEIVER INSTRUCTION MANUAL เครื ่ อ งเล น CD คู ่ ม ื อ การใช้ ง าน B5A-0826-00 [M]... - Page 2 • Microsoft and Windows Media are either registered trademarks or trademarks of Microsoft Corporation in the United States and/or other countries. • Android is trademark of Google Inc. libFLAC Copyright (C) 2000,2001,2002,2003,2004,2005,2006,2007,2008,2009 Josh Coalson Redistribution and use in source and binary forms, with or without modification, are permitted provided that the following conditions are met: - Redistributions of source code must retain the above copyright notice, this list of conditions and the following disclaimer.
- Page 3 The marking of products using lasers The label is attached to the chassis/case and says that the component uses laser beams that have been classified as Class 1. It means that the unit is utilizing laser beams that are of a weaker class.
-
Page 4: Table Of Contents
CONTENTS BEFORE USE BEFORE USE IMPORTANT • To ensure proper use, please read through this manual before using this product. It is especially important BASICS that you read and observe Warning and Caution in this manual. GETTING STARTED • Please keep the manual in a safe and accessible place for future reference. 1 Cancel the demonstration Warning 2 Set the clock... -
Page 5: Basics
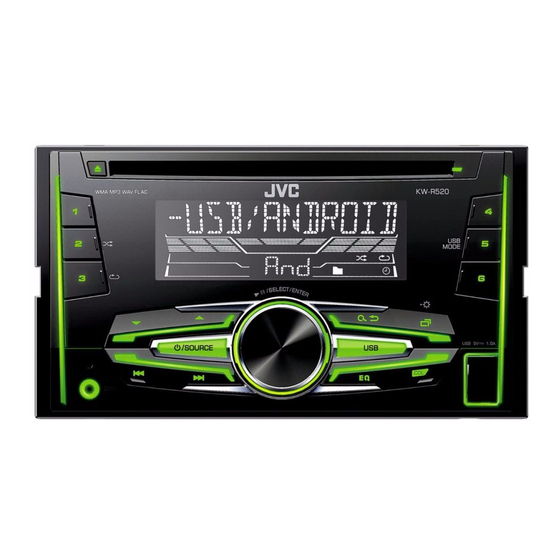
BASICS Faceplate Remote control (RM-RK52) How to reset Remote sensor (Do not expose Loading slot Display window to bright sunlight.) Your preset adjustments will be erased except stored radio stations. Pull out the insulation sheet when using for the first time. How to replace the battery Volume knob On the faceplate... -
Page 6: Getting Started
YES: Starts upgrading the firmware. ; NO: Cancels (upgrading is not activated). Press and hold For details on how to update the firmware, see: <http://www.jvc.net/cs/car/>. Turn the volume knob to select [CLOCK], then press the knob. Turn the volume knob to select [CLOCK SET], then press the knob. -
Page 7: Cd / Usb / Android
Do not leave the cable inside the car when not using. When connecting an Android device, “Press [VIEW] to install JVC MUSIC PLAY APP” is shown. Follow the instructions to install the application. You can also install the latest version of JVC MUSIC PLAY application on your Android device before connecting. -
Page 8: Radio
CD / USB / ANDROID Select control mode While in ANDROID source, press repeatedly. Control Android device from this unit via JVC MUSIC PLAY AUTO MODE: application installed in the Android device. AUDIO MODE: Control Android device using the Android device itself via other media player applications installed in the Android device. - Page 9 RADIO Select a stored station LOCAL SEEK ON: Searches only AM/SW1/SW2 stations with good reception. ; OFF: Cancels. Press or one of the number buttons (1 to 6). • Settings made are applicable only to the selected source/station. Once (or) you change the source/station, you need to make the settings again. Press Turn the volume knob to select a preset number, then press the IF BAND...
-
Page 10: Aux
AUDIO SETTINGS Use a portable audio player Connect a portable audio player (commercially available). 3.5 mm stereo mini plug with “L” shaped connector (commercially available) Portable audio player Auxiliary input jack Select [ON] for [AUX] in [SRC SELECT]. ( 4) Press repeatedly to select AUX. - Page 11 AUDIO SETTINGS Other settings AUDIO Press and hold BASS BOOST +01 — +05 (+01): Selects your preferred bass boost level. ; Turn the volume knob to select an item (see the following table), OFF: Cancels. then press the knob. LOUD 01 / 02: Boosts low or high frequencies to produce a well-balanced Repeat step until the desired item is selected/activated or follow sound at low volume. ;...
- Page 12 AUDIO SETTINGS Connection via speaker leads AMP GAIN LOW POWER: Limits the maximum volume level to 25. (Select if the maximum power of each speaker is less than 50 W to prevent damaging For connections without using an external amplifier. However, with this the speakers.) ;...
-
Page 13: Display Settings
DISPLAY SETTINGS BRIGHTNESS Set the button, display and USB input terminal brightness for day and night separately. 1 DAY / NIGHT: Select day or night. 2 Select a zone. ( Illustration on left column) 3 Set the brightness level (00 to 31). (Default: DAY: 31 ; NIGHT: 15) SCROLL * ONCE: Scrolls the display information once. ;... -
Page 14: References
It depends on the disc format used (includes 4 extension characters—<.mp3> or <.wma>). More information - ISO 9660 Level 1 and 2: 32 characters Visit also the following website <http://www.jvc.net/cs/car/> for: - Romeo: 32 characters – Latest firmware updates and latest compatible item list - Joliet: 32 characters –... -
Page 15: Troubleshooting
TROUBLESHOOTING REFERENCES About Android device Symptom Remedy • This unit supports Android OS 4.1 and above. Sound cannot be heard. • Adjust the volume to the optimum level. • Some Android devices (with OS 4.1 and above) may not fully support Android Open Accessory •... -
Page 16: Specifications
• If this does not solve the problem, the connected Android 11 580 kHz — 18 135 kHz device is unable to route the audio signal to unit. ( 13) (5 kHz step) Cannot playback at [AUTO • Make sure JVC MUSIC PLAY APP is installed on the Channel Space Selection Band 1: 9 kHz MODE]. - Page 17 SPECIFICATIONS Laser Diode GaAIAs Maximum Output Power 50 W × 4 or 50 W × 2 + 50 W × 1 (Subwoofer = 4 Ω) Digital Filter (D/A) 8 times over sampling Full Bandwidth Power 22 W × 4 Spindle Speed 500 rpm — 200 rpm (CLV) (at less than 1 % THD) Wow & Flutter Below measurable limit Speaker Impedance 4 Ω — 8 Ω...
-
Page 18: Basic Procedure
Warning Part list for installation • The unit can only be used with a 12 V DC power supply, negative ground. (A) Trim plate (B) Wiring harness (C) Flat head screw (D) Round head screw • Disconnect the battery’s negative terminal before wiring and mounting. (M5 ×... -
Page 19: Wiring Connection
Wiring connection Signal cord (not supplied) Rear/subwoofer JVC Amplifier * IMPORTANT output We recommend installing the unit with a commercially available custom wiring harness specific for your car and leave this job to professionals for your safety. Consult your Fuse (10 A) car audio dealer. - Page 20 สารบั ญ ก่ อ นใช้ ง าน ก่ อ นใช้ ง าน ข้ อ มู ล สํ า คั ญ • เพื ่ อ ให แ น ใ จว า ใช ง านถู ก ต อ ง กรุ ณ าอ า นคู ม ื อ นี ้ ก อ นใช ผ ลิ ต ภั ณ ฑ คุ ณ จํ า เป น ต อ งอ า นและดู ค ํ า เตื อ นและข อ ควรระวั ง ในคู ม ื อ นี ้ ข้...
- Page 21 ข้ อ มู ล เบื ้ อ งต้ น แผงหน้ า ปั ด รี โ มทคอนโทรล (RM-RK52) วิ ธ ี ก ารรี เ ซ็ ต ช อ งถาดใส แ ผ น ดิ ส ก รี โ มทเซ็ น เซอร (อย า วางให ถ ู ก แสงแดดจั ด ) หน...
- Page 22 ค้ า งไว้ สํ า หรั บ รายละเอี ย ดเกี ่ ย วกั บ วิ ธ ี ก ารอั พ เดตเฟ ร ม แวร โปรดดู : <http://www.jvc.net/cs/car/> หมุ น ปุ่ มปรั บ ระดั บ เสี ย งเพื ่ อ เลื อ ก [ ] จากนั...
- Page 23 นอกจากนี ้ ย ั ง สามารถติ ด ตั ้ ง แอปพลิ เ คชั น JVC MUSIC PLAY เวอร ช ั ่ น ล า สุ ด บนอุ ป กรณ แ อนดรอยด ก อ นเชื ่ อ มต อ (...
- Page 24 ขณะที ่ อ ยู ่ ใ นแหล่ ง สั ญ ญาณจาก ANDROID กดปุ่ ม ซํ ้ า ควบคุ ม อุ ป กรณ Android จากเครื ่ อ งนี ้ ผ า นแอปพลิ เ คชั ่ น JVC MUSIC PLAY ที ่ ต ิ ด ตั ้ ง ใน AUTO MODE อุ...
- Page 25 วิ ท ยุ การเลื อ กสถานี ท ี ่ บ ั น ทึ ก ไว้ : ค น หาเฉพาะสถานี AM/SW1/SW2 ที ่ ร ั บ สั ญ ญาณได ด ี ; : ยกเลิ ก LOCAL SEEK กด หรื อ ปุ่ มตั ว เลขปุ่ มใดปุ่ มหนึ ่ ง ( ถึ...
- Page 26 การตั ้ ง ค่ า ระบบเสี ย ง ใช้ เ ครื ่ อ งเล่ น เสี ย งแบบพกพา เชื ่ อ มต่ อ เครื ่ อ งเล่ น เสี ย งแบบพกพา (ที ่ ม ี ข ายทั ่ ว ไป) ขั...
- Page 27 การตั ้ ง ค่ า ระบบเสี ย ง การตั ้ ง ค่ า อื ่ น ๆ AUDIO — ): เลื อ กระดั บ เสี ย งเบสที ่ ค ุ ณ ชื ่ น ชอบ ; : ยกเลิ ก BASS BOOST กด...
- Page 28 การตั ้ ง ค่ า ระบบเสี ย ง การเชื ่ อ มต่ อ ผ่ า นสายลํ า โพง : จํ า กั ด ระดั บ เสี ย งสู ง สุ ด ที ่ 25 (เลื อ กรายการนี ้ หาก AMP GAIN LOW POWER สํ...
- Page 29 หน้ า จอแสดงผลการตั ้ ง ค่ า ตั ้ ง ค า ปุ ม แสดงและความสว า งขั ้ ว อิ น พุ ต USB แยกกั น สํ า หรั บ กลางวั น และกลางคื น BRIGHTNESS : เลื อ กกลางวั น หรื อ กลางคื น 1 DAY NIGHT เลื...
- Page 30 - ISO 9660 Level 1 และ 2: 32 ตั ว อั ก ษร - Romeo: 32 ตั ว อั ก ษร สามารถเข้ า เยี ่ ย มชมได้ ท ี ่ เ ว็ บ ไซต์ <http://www.jvc.net/cs/car/> สํ า หรั บ : - Joliet: 32 ตั ว อั ก ษร...
- Page 31 การแก้ ไ ขปั ญ หาเบื ้ อ งต้ น อ้ า งอิ ง เกี ่ ย วกั บ อุ ป กรณ์ Android อาการ วิ ธ ี ก ารแก้ ไ ข • เครื ่ อ งนี ้ ร องรั บ Android OS 4.1 เวอร ช ั ่ น ที ่ ส ู ง กว า •...
- Page 32 แบนด 3 (SW2): 9 500 kHz — 10 135 kHz / ไม ส ามารถเล น ได ใ น [ • ให แ น ใ จว า มี JVC MUSIC PLAY APP ติ ด ตั ้ ง บนอุ ป กรณ แ อน AUTO 11 580 kHz —...
- Page 33 ข้ อ มู ล จํ า เพาะ เลเซอร ไ ดโอด GaAIAs กํ า ลั ง เอาต พ ุ ต สู ง สุ ด 50 W × 4 หรื อ 50 W × 2 + 50 W × 1 (ซั บ วู ฟ เฟอร = 4 Ω) ฟ...
- Page 34 คํ า เตื อ น รายชื ่ อ ชิ ้ น ส่ ว นสํ า หรั บ การติ ด ตั ้ ง • เครื ่ อ งเล น สามารถใช ร ว มกั บ แหล ง จ า ยไฟ DC 12 V และต อ กราวน ล บเท า นั ้ น ทริ...
- Page 35 สั ญ ญาณเสี ย งออกด า น ข้ อ มู ล สํ า คั ญ อร ข อง JVC หลั ง /ซั บ วู ฟ เฟอร แนะนํ า ให ต ิ ด ตั ้ ง เครื ่ อ งด ว ยชุ ด สายไฟเฉพาะที ่ ก ํ า หนดซึ ่ ง มี จ ํ า หน า ย...
- Page 36 ﺍﺗﺼﺎﻝ ﺳﻴﻢ ﻛﺸﯽ (ﺳﻴﻢ ﺳﻴﮕﻨﺎﻝ )ﻋﺮﺿﻪ ﻧﻤﯽ ﺷﻮﺩ ﻣﻬﻢ /ﺧﺮﻭﺟﯽ ﻋﻘﺐ JVC ﺁﻣﭙﻠﯽ ﻓﺎﻳﺮ ﻣﺎ ﭘﻴﺸﻨﻬﺎﺩ ﻣﯽ ﻛﻨﻴﻢ ﺩﺳﺘﮕﺎﻩ ﺭﺍ ﺑﺎ ﻳﮏ ﺩﺳﺘﻪ ﺳﻴﻢ ﺳﻔﺎﺭﺷﯽ ﺳﺎﺏ ﻭﻭﻓﺮ ﻣﺨﺼﻮﺹ ﺧﻮﺩﺭﻭی ﺧﻮﺩ ﻛﻪ ﺩﺭ ﺑﺎﺯﺍﺭ ﻣﻮﺟﻮﺩ ﺍﺳﺖ ﻧﺼﺐ ﻛﻨﻴﺪ ﻭ ﺑﺮﺍی ﺍﻳﻤﻨﯽ ﺧﻮﺩ، ﺍﻳﻦ ﻛﺎﺭ ﺭﺍ ﺑﻪ ﺍﻓﺮﺍﺩ ﺣﺮﻓﻪ ﺍی ﻭﺍﮔﺬﺍﺭ ﻧﻤﺎﻳﻴﺪ. ﺑﺎ...
- Page 37 ﻓﻬﺮﺳﺖ ﻗﻄﻌﺎﺕ ﺑﺮﺍی ﻧﺼﺐ ﺍﺧﻄﺎﺭ . ﻣﻨﻔﯽ ﺯﻣﻴﻦ ﺍﺳﺘﻔﺎﺩﻩ ﺷﻮﺩDC • ﺍﻳﻦ ﺩﺳﺘﮕﺎﻩ ﻓﻘﻂ ﻣﯽ ﺗﻮﺍﻧﺪ ﺑﺎ ﻣﻨﺒﻊ ﺗﻐﺬﻳﻪ 21 ﻭﻟﺖ ( ﭘﻴﭻ ﺳﺮﮔﺮﺩD) ( ﭘﻴﭽﻬﺎی ﺻﺎﻑC) ( ﻣﻬﺎﺭ ﺳﻴﻢB) ( ﻗﺎﺏ ﺩﻭﺭ ﺿﺒﻂA) .• ﻗﺒﻞ ﺍﺯ ﺳﻴﻢ ﻛﺸﯽ ﻳﺎ ﻧﺼﺐ، ﺗﺮﻣﻴﻨﺎﻝ ﻣﻨﻔﯽ ﺑﺎﺗﺮی ﺭﺍ ﺟﺪﺍ ﻛﻨﻴﺪ (...
- Page 38 ﺗﻮﺿﻴﺤﺎﺕ ﺣﺪﺍﻛﺜﺮ ﻗﺪﺭﺕ ﺧﺮﻭﺟﯽ ﺩﻳﻮﺩ ﻟﻴﺰﺭی 05 ﻭﺍﺕ × 4 ﻳﺎ GaAIAs (05 ﻭﺍﺕ × 2 + 05 ﻭﺍﺕ × 1 )ﺳﺎﺏ ﻭﻭﻓﺮ = 4 ﺍﻫﻢ ﻧﻤﻮﻧﻪ ﮔﻴﺮی ﺯﻳﺎﺩ 8 ﺑﺮﺍﺑﺮ (D/A) ﻓﻴﻠﺘﺮ ﺩﻳﺠﻴﺘﺎﻝ 4 × 22 ﻭﺍﺕ (1 % THD ﻗﺪﺭﺕ ﭘﻬﻨﺎی ﺑﺎﻧﺪ ﻛﺎﻣﻞ )ﺑﺎ ﻛﻤﺘﺮ ﺍﺯ ﺳﺮﻋﺖ...
- Page 39 085 11 ﻛﻴﻠﻮ ﻫﺮﺗﺰ — 531 81 ﻛﻴﻠﻮ ﻫﺮﺗﺰ ﭘﺨﺶ ﺩﺭ ﺣﺎﻟﺖ ()ﮔﺎﻡ 5 ﻛﻴﻠﻮﻫﺮﺗﺰی ﺭﻭی ﺩﺳﺘﮕﺎﻩJVC MUSIC PLAY APP • ﻣﻄﻤﺌﻦ ﺷﻮﻳﺪ ﻛﻪ ﺑﺮﻧﺎﻣﻪ [ ﺍﻣﻜﺎﻥ ﭘﺬﻳﺮAUTO MODE] (5 ) .ﺍﻧﺪﺭﻭﻳﺪ ﺷﻤﺎ ﻧﺼﺐ ﺷﺪﻩ ﺑﺎﺷﺪ ﺍﻧﺘﺨﺎﺏ ﻓﻀﺎی ﻛﺎﻧﺎﻝ...
- Page 40 ﻋﻴﺐ ﻳﺎﺑﻲ ﻣﻨﺎﺑﻊ ﺩﺭﺑﺎﺭﻩ ﺩﺳﺘﮕﺎﻩ ﺍﻧﺪﺭﻭﻳﺪ ﻧﺤﻮﻩ ﺗﻌﻤﻴﺮ ﻋﻮﺍﺭﺽ .• ﺍﻳﻦ ﺩﺳﺘﮕﺎﻩ ﺍﺯ ﺳﻴﺴﺘﻢ ﻋﺎﻣﻞ ﺍﻧﺪﺭﻭﻳﺪ ﻧﺴﺨﻪ 1.4 ﻭ ﺑﺎﻻﺗﺮ ﭘﺸﺘﻴﺒﺎﻧﯽ ﻣﯽ ﻛﻨﺪ .• ﺍﻧﺪﺍﺯﻩ ﺻﺪﺍ ﺭﺍ ﺑﺮ ﺭﻭ ﻣﻴﺰﺍﻥ ﺑﻬﻴﻨﻪ ﺁﻥ ﺗﻨﻈﻴﻢ ﻧﻤﺎﻳﻴﺪ .ﺻﺪﺍﻳﯽ ﺑﮕﻮﺵ ﻧﻤﯽ ﺭﺳﺪ • ﺑﺮﺧﯽ ﺩﺳﺘﮕﺎﻩ ﻫﺎی ﺍﻧﺪﺭﻭﻳﺪ )ﺑﺎ ﻧﺴﺨﻪ 1.4 ﻭ ﺑﺎﻻﺗﺮ( ﻣﻤﻜﻦ ﺍﺳﺖ ﺑﻪ ﻃﻮﺭ ﻛﺎﻣﻞ ﺍﺯ .•...
- Page 41 : 23 ﺣﺮﻑRomeo - ﺳﺎﻳﺮ ﺍﻃﻼﻋﺎﺕ : 23 ﺣﺮﻑJoliet - :< ﻣﺮﺍﺟﻌﻪ ﻛﻨﻴﺪhttp://www.jvc.net/cs/car/> ﻫﻤﭽﻨﻴﻦ ﺑﺮﺍی ﻣﻮﺍﺭﺩ ﺯﻳﺮ ﺑﻪ ﻭﺏ ﺳﺎﻳﺖ - ﻧﺎﻡ ﻓﺎﻳﻞ ﻃﻮﻻﻧﻰ ﻭﻳﻨﺪﻭﺯ: 23 ﺣﺮﻑ – ﺁﺧﺮﻳﻦ ﺑﻪ ﺭﻭﺯﺭﺳﺎﻧﯽ ﻫﺎی ﻣﻴﺎﻥ ﺍﻓﺰﺍﺭ ﻭ ﻓﻬﺮﺳﺖ ﺁﺧﺮﻳﻦ ﺍﻗﻼﻡ ﺳﺎﺯﮔﺎﺭ JVC MUSIC PLAY ﺑﺎ ﻧﺎﻡAndroid™ – ﺑﺮﻧﺎﻣﻪ...
- Page 42 ﺗﻨﻈﻴﻤﺎﺕ ﻧﻤﺎﻳﺶ ﺭﺍ ﺑﻪ ﺻﻮﺭﺕ ﺟﺪﺍﮔﺎﻧﻪ ﺑﺮﺍیUSB ﺩﻛﻤﻪ، ﺻﻔﺤﻪ ﻧﻤﺎﻳﺶ ﻭ ﺭﻭﺷﻨﺎﻳﯽ ﺗﺮﻣﻴﻨﺎﻝ ﻭﺭﻭﺩی BRIGHTNESS .ﺭﻭﺯ ﻭ ﺷﺐ ﺗﻨﻈﻴﻢ ﻣﯽ ﻛﻨﺪ . : ﺭﻭﺯ ﻳﺎ ﺷﺐ ﺭﺍ ﺍﻧﺘﺨﺎﺏ ﻛﻨﻴﺪNIGHT/DAY 1 (2 ﻧﺎﺣﻴﻪ ﺍی ﺍﻧﺘﺨﺎﺏ ﻛﻨﻴﺪ. ) ﺗﺼﻮﻳﺮ ﺩﺭ ﺳﺘﻮﻥ ﺳﻤﺖ ﭼﭗ : 13 ؛DAY :3 ﺳﻄﺢ...
- Page 43 ﺗﻨﻈﻴﻤﺎﺕ ﺻﺪﺍ ﺍﺗﺼﺎﻝ ﺍﺯ ﻃﺮﻳﻖ ﺳﻴﻢ ﻫﺎی ﺑﻠﻨﺪﮔﻮ : ﺣﺪﺍﻛﺜﺮ ﻣﻴﺰﺍﻥ ﻭﻟﻮﻡ ﺻﺪﺍ ﺭﺍ ﺑﻪ 52 ﻣﺤﺪﻭﺩ ﻣﯽ ﻛﻨﺪ. )ﺍﮔﺮ ﺣﺪﺍﻛﺜﺮLOW POWER AMP GAIN ﺗﻮﺍﻥ ﻫﺮ ﻳﮏ ﺍﺯ ﺑﻠﻨﺪﮔﻮﻫﺎ ﻛﻤﺘﺮ ﺍﺯ 05 ﻭﺍﺕ ﺍﺳﺖ، ﺑﺮﺍی ﺟﻠﻮﮔﻴﺮی ﺍﺯ ﺁﺳﻴﺐ ﺩﻳﺪﻥ ﺑﺮﺍی ﺍﺗﺼﺎﻻﺗﯽ ﻛﻪ ﺑﺪﻭﻥ ﺍﺳﺘﻔﺎﺩﻩ ﺍﺯ ﺁﻣﭙﻠﯽ ﻓﺎﻳﺮ ﺧﺎﺭﺟﯽ ﻣﯽ ﺑﺎﺷﺪ. ﺑﺎ ﺍﻳﻦ ﺣﺎﻝ، ﺑﺎ ﺍﻳﻦ ﺗﻨﻈﻴﻤﺎﺕ ﻧﻴﺰ ﻣﯽ ﺗﻮﺍﻧﻴﺪ : ﺣﺪﺍﻛﺜﺮ...
- Page 44 ﺗﻨﻈﻴﻤﺎﺕ ﺻﺪﺍ ﺳﺎﻳﺮ ﺗﻨﻈﻴﻤﺎﺕ AUDIO .ﺭﺍ ﻓﺸﺎﺭ ﺩﺍﺩﻩ ﻭ ﻧﮕﻪ ﺩﺍﺭﻳﺪ 10+ — 50+ )10+(: ﺳﻄﺢ ﺗﻘﻮﻳﺖ ﺻﺪﺍی ﺑﺎﺱ ﻣﻮﺭﺩ ﺩﻟﺨﻮﺍﻩ ﺷﻤﺎ ﺭﺍ BASS BOOST ﺟﻬﺖ ﺍﻧﺘﺨﺎﺏ ﻳﮏ ﮔﺰﻳﻨﻪ )ﺑﻪ ﺟﺪﻭﻝ ﺫﻳﻞ ﺭﺟﻮﻉ ﻛﻨﻴﺪ(، ﺩﻛﻤﻪ ﻭﻟﻮﻡ ﺭﺍ ﺑﭽﺮﺧﺎﻧﻴﺪ، ﺳﭙﺲ ﺩﻛﻤﻪ ﺭﺍ ﻓﺸﺎﺭ .: ﻟﻐﻮ...
- Page 45 ﺗﻨﻈﻴﻤﺎﺕ ﺻﺪﺍ ﺍﺳﺘﻔﺎﺩﻩ ﺍﺯ ﻳﮏ ﭘﺨﺶ ﻛﻨﻨﺪﻩ ﺻﻮﺗﯽ ﻗﺎﺑﻞ ﺣﻤﻞ .ﻳﮏ ﭘﺨﺶ ﻛﻨﻨﺪﻩ ﺻﻮﺗﯽ ﻗﺎﺑﻞ ﺣﻤﻞ )ﻛﻪ ﺑﺮﺍی ﺧﺮﻳﺪ ﻣﻮﺟﻮﺩ ﺍﺳﺖ( ﺭﺍ ﻭﺻﻞ ﻛﻨﻴﺪ “ ﻣﺎﻧﻨﺪL”ﻓﻴﺶ ﻣﻴﻨﯽ ﺍﺳﺘﺮﻳﻮ 5.3 ﻣﻴﻠﯽ ﻣﺘﺮی ﺑﺎ ﺭﺍﺑﻂ ()ﺑﺮﺍی ﺧﺮﻳﺪ ﻣﻮﺟﻮﺩ ﺍﺳﺖ ﭘﺨﺶ ﻛﻨﻨﺪﻩ ﺻﻮﺗﯽ ﭘﺎﻳﻪ...
- Page 46 ﺭﺍﺩﻳﻮ ﻳﮏ ﺍﻳﺴﺘﮕﺎﻩ ﺫﺧﻴﺮﻩ ﺷﺪﻩ ﺭﺍ ﺍﻧﺘﺨﺎﺏ ﻛﻨﻴﺪ ﺑﺎ ﺩﺭﻳﺎﻓﺖ ﺧﻮﺏ ﺭﺍ ﺟﺴﺘﺠﻮ ﻣﯽ ﻛﻨﺪ. ؛SW2/SW1/AM : ﻓﻘﻂ ﺍﻳﺴﺘﮕﺎﻩ ﻫﺎیON LOCAL SEEK .: ﻟﻐﻮ ﻣﻰ ﺷﻮﺩOFF .ﻳﺎ ﻳﻜﯽ ﺍﺯ ﺩﻛﻤﻪ ﻫﺎی ﻋﺪﺩی )1 ﺗﺎ 6( ﺭﺍ ﻓﺸﺎﺭ ﺩﻫﻴﺪ .• ﺗﻨﻈﻴﻤﺎﺕ ﺍﻧﺠﺎﻡ ﺷﺪﻩ ﻓﻘﻂ ﺑﺮﺍی ﻣﻨﺒﻊ/ﺍﻳﺴﺘﮕﺎﻩ ﺍﻧﺘﺨﺎﺑﯽ ﻗﺎﺑﻞ ﺍﻋﻤﺎﻝ ﻣﯽ ﺑﺎﺷﺪ ()ﻳﺎ...
- Page 47 .ﺭﺍ ﭼﻨﺪﺑﺎﺭ ﻓﺸﺎﺭ ﺩﻫﻴﺪ ،ANDROID ﻫﻨﮕﺎﻡ ﺑﺎﺯ ﺑﻮﺩﻥ ﻣﻨﺒﻊ .JVC MUSIC PLAY ﻛﻨﺘﺮﻝ ﺩﺳﺘﮕﺎﻩ ﺍﻧﺪﺭﻭﻳﺪ ﺍﺯ ﺭﻭی ﺍﻳﻦ ﺩﺳﺘﮕﺎﻩ ﺑﺎ ﺩﺍﺷﺘﻦ ﺑﺮﻧﺎﻣﻪ :AUTO MODE : ﻛﻨﺘﺮﻝ ﺩﺳﺘﮕﺎﻩ ﺍﻧﺪﺭﻭﻳﺪ ﺑﺎ ﺍﺳﺘﻔﺎﺩﻩ ﺍﺯ ﺧﻮﺩ ﺩﺳﺘﮕﺎﻩ ﺍﻧﺪﺭﻭﻳﺪ ﺍﺯ ﻃﺮﻳﻖ ﺳﺎﻳﺮ ﺑﺮﻧﺎﻣﻪ ﻫﺎیAUDIO MODE ﭘﺨﺶ...
- Page 48 .* ﻭﻗﺘﯽ ﺍﺯ ﺩﺳﺘﮕﺎﻩ ﺍﺳﺘﻔﺎﺩﻩ ﻧﻤﯽ ﻛﻨﻴﺪ، ﻛﺎﺑﻞ ﺭﺍ ﺩﺍﺧﻞ ﺧﻮﺩﺭﻭ ﺭﻫﺎ ﻧﻜﻨﻴﺪ ،“ ﻧﻤﺎﻳﺶ ﺩﺍﺩﻩ ﻣﯽ ﺷﻮﺩ. ﺑﺮﺍی ﻧﺼﺐ ﺑﺮﻧﺎﻣﻪPress [VIEW] to install JVC MUSIC PLAY APP” * ﻫﻨﮕﺎﻣﯽ ﻛﻪ ﺩﺳﺘﮕﺎﻩ ﺍﻧﺪﺭﻭﻳﺪی ﺭﺍ ﻣﺘﺼﻞ ﻛﻨﻴﺪ، ﭘﻴﺎﻡ ﺭﺍ ﺭﻭی ﺩﺳﺘﮕﺎﻩ ﺍﻧﺪﺭﻭﻳﺪJVC MUSIC PLAY ﺩﺳﺘﻮﺭﺍﻟﻌﻤﻞ ﻫﺎ ﺭﺍ ﺩﻧﺒﺎﻝ ﻛﻨﻴﺪ. ﻫﻤﭽﻨﻴﻦ ﻣﯽ ﺗﻮﺍﻧﻴﺪ ﻗﺒﻞ ﺍﺯ ﻣﺘﺼﻞ ﻛﺮﺩﻥ ﺩﺳﺘﮕﺎﻩ، ﺁﺧﺮﻳﻦ ﻧﺴﺨﻪ ﺑﺮﻧﺎﻣﻪ...
- Page 49 :ﺑﺮﺍی ﺍﻃﻼﻉ ﺍﺯ ﺟﺰﺋﻴﺎﺕ ﺩﺭﺑﺎﺭﻩ ﺑﻪ ﺭﻭﺯ ﺭﺳﺎﻧﯽ ﻣﻴﺎﻥ ﺍﻓﺰﺍﺭ، ﻣﺮﺍﺟﻌﻪ ﻛﻨﻴﺪ ﺑﻪ .[، ﺩﻛﻤﻪ ﻭﻟﻮﻡ ﺭﺍ ﺑﭽﺮﺧﺎﻧﻴﺪ، ﺳﭙﺲ ﺩﻛﻤﻪ ﺭﺍ ﻓﺸﺎﺭ ﺩﻫﻴﺪCLOCK] ﺟﻬﺖ ﺍﻧﺘﺨﺎﺏ .<http://www.jvc.net/cs/car/> .[، ﺩﻛﻤﻪ ﻭﻟﻮﻡ ﺭﺍ ﺑﭽﺮﺧﺎﻧﻴﺪ، ﺳﭙﺲ ﺩﻛﻤﻪ ﺭﺍ ﻓﺸﺎﺭ ﺩﻫﻴﺪCLOCK SET] ﺟﻬﺖ ﺍﻧﺘﺨﺎﺏ .ﭘﻴﭻ ﻣﻴﺰﺍﻥ ﺻﺪﺍ ﺭﺍ ﺑﭽﺮﺧﺎﻧﻴﺪ ﺗﺎ ﺗﻨﻈﻴﻤﺎﺕ ﺍﻧﺠﺎﻡ ﺷﻮﻧﺪ ﻭ ﺳﭙﺲ ﭘﻴﭻ ﺭﺍ ﻓﺸﺎﺭ ﺩﻫﻴﺪ...
- Page 50 ﻧﻜﺎﺕ ﺍﻭﻟﻴﻪ ﺻﻔﺤﻪ ﺟﻠﻮﻳﯽ (RM-RK52) ﻛﻨﺘﺮﻝ ﺍﺯ ﺭﺍﻩ ﺩﻭﺭ ﻧﺤﻮﻩ ﺗﻨﻈﻴﻢ ﻣﺠﺪﺩ ﺳﻨﺴﻮﺭ ﺍﺯ ﺭﺍﻩ ﺩﻭﺭ )ﺩﺭ ﺑﺮﺍﺑﺮ (.ﻧﻮﺭ ﺧﻮﺭﺷﻴﺪ ﻗﺮﺍﺭ ﻧﺪﻫﻴﺪ ﺷﻜﺎﻑ ﺑﺎﺭﮔﺰﺍﺭی ﭘﻨﺠﺮﻩ ﻧﻤﺎﻳﺶ ،ﺗﻨﻈﻴﻤﺎﺕ ﻓﻌﻠﯽ ﺷﻤﺎ ﭘﺎک ﺧﻮﺍﻫﺪ ﺷﺪ .ﺑﻪ ﺟﺰ ﺍﻳﺴﺘﮕﺎﻩ ﻫﺎی ﺫﺧﻴﺮﻩ ﺷﺪﻩ ﺭﺍﺩﻳﻮ ،ﺩﺭ ﺻﻮﺭﺕ ﺍﺳﺘﻔﺎﺩﻩ ﺑﺮﺍی ﺍﻭﻟﻴﻦ ﺑﺎﺭ .ﻭﺭﻕ...
- Page 51 ﻓﻬﺮﺳﺖ ﻣﻄﺎﻟﺐ ﻗﺒﻞ ﺍﺯ ﺍﺳﺘﻔﺎﺩﻩ ﻗﺒﻞ ﺍﺯ ﺍﺳﺘﻔﺎﺩﻩ ﻣﻬﻢ “• ﺑﺮﺍی ﺍﻃﻤﻴﻨﺎﻥ ﺍﺯ ﺍﺳﺘﻔﺎﺩﻩ ﺻﺤﻴﺢ، ﻟﻄﻔ ﺎ ﹰ ﺍﻳﻦ ﺩﻓﺘﺮﭼﻪ ﺭﺍﻫﻨﻤﺎ ﺭﺍ ﻗﺒﻞ ﺍﺯ ﺍﺳﺘﻔﺎﺩﻩ ﺍﺯ ﺍﻳﻦ ﻣﺤﺼﻮﻝ ﻣﻄﺎﻟﻌﻪ ﻛﻨﻴﺪ. ﻣﻄﺎﻟﻌﻪ ﻭ ﺭﻋﺎﻳﺖ ”ﺍﺧﻄﺎﺭ“ ﻫﺎ ﻭ ”ﺍﺣﺘﻴﺎﻁ ﻧﻜﺎﺕ ﺍﻭﻟﻴﻪ .ﻫﺎی ﻣﻨﺪﺭﺝ ﺩﺭ ﺍﻳﻦ ﺩﻓﺘﺮﭼﻪ ﺍﺯ ﺍﻫﻤﻴﺖ ﺧﺎﺻﯽ ﺑﺮﺧﻮﺭﺩﺍﺭ ﺍﺳﺖ ﺷﺮﻭﻉ...
- Page 52 ﺗﻮﺻﻴﻞ ﺍﻷﺳﻼﻙ ﻫﺎﻡ (ﻛﺎﺑﻞ ﺍﻹﺷﺎﺭﺓ )ﻏﻴﺮ ﻣﺮﻓﻘﺔ ﺃﻃﺮﺍﻑ ﺍﻟﺘﻮﺻﻴﻞ JVC ﻣﻀﺨﻢ ﺍﻟﺨﻠﻔﻴﺔ/ﺧﺮﺝ ﻧﻨﺼﺢ ﺑﺘﺮﻛﻴﺐ ﺍﻟﺠﻬﺎﺯ ﻣﻊ ﺿﻔﻴﺮﺓ ﺍﺳﻼﻙ ﻛﻬﺮﺑﺎﺋﻴﺔ ﺧﺎﺻﺔ ﺍﻟﺼﺒﻮﻭﻓﺮ ﻣﺘﻮﻓﺮﺓ ﺗﺠﺎﺭﻳﺎ ﻣﺨﺼﺼﺔ ﻟﺴﻴﺎﺭﺗﻚ ﻭﺇﻳﻜﺎﻝ ﻫﺬﻩ ﺍﻟﻤﻬﻤﺔ ﻟﻠﻤﺨﺘﺼﻴﻴﻦ ﻭﺫﻟﻚ ﻟﻀﻤﺎﻥ ﺳﻼﻣﺘﻚ. ﺍﺳﺘﺸﻴﺮ ﺑﺎﺋﻊ ﺃﺟﻬﺰﺓ .ﺍﻟﺼﻮﺗﻴﺎﺕ ﺍﻟﺨﺎﺻﺔ ﺑﺎﻟﺴﻴﺎﺭﺍﺕ ﺍﻟﻘﺮﻳﺐ ﻣﻨﻚ...
- Page 53 ﺗﺤﺬﻳﺮ ﻗﺎﺋﻤﺔ ﻗﻄﻊ ﺍﻟﻐﻴﺎﺭ ﺍﻟﻤﺴﺘﺨﺪﻣﺔ ﻓﻲ ﺍﻟﺘﺮﻛﻴﺐ • ﻳﻤﻜﻦ ﺍﺳﺘﺨﺪﺍﻡ ﺍﻟﻮﺣﺪﺓ ﻓﻘﻂ ﻓﻲ ﺳﻴﺎﺭﺓ ﺑﻬﺎ ﻣﺼﺪﺭ ﺗﻴﺎﺭ ﻣﺒﺎﺷﺮ 21 ﻓﻮﻟﺖ، ﻭﺗﺄﺭﻳﺾ ( ﺑﺮﺍﻏﻲ ﻣﺴﺘﺪﻳﺮﺓ ﺍﻟﺮﺃﺱD) ( ﺑﺮﺍﻏﻲ ﺑﺮﺅﻭﺱ ﻣﺴﻄﺤﺔC) ( ﺿﻔﻴﺮﺓ ﺍﻷﺳﻼﻙB) ( ﻭﺣﺔ ﺍﻟﺰﻳﻨﺔA) .ﺳﻠﺒﻲ ( × 8 ﻣﻢM5) (...
- Page 54 ﺍﻟﻤﻮﺍﺻﻔﺎﺕ 05 ﻭﺍﻁ × 4 ﺃﻭ ﻗﺪﺭﺓ ﺍﻟﺨﺮﺝ ﺍﻟﻘﺼﻮﻯ ﺩﺍﻳﻮﺩ ﺍﻟﻠﻴﺰﺭ GaAIAs 05 ﻭﺍﻁ × 2 + 05 ﻭﺍﻁ × 1 )ﻣﺠﻬﺎﺭ ﺍﻟﺘﺮﺩﺩﺍﺕ 8 ﻣﺮﺍﺕ ﺃﻋﻠﻰ ﻣﻦ ﺍﻟﻌﻴﻨﺔ (D/A) ﺍﻟﻔﻠﺘﺮ ﺍﻟﺮﻗﻤﻲ (ﺍﻟﺨﻔﻴﻀﺔ ﺍﻟﻔﺮﻋﻲ = 4 ﺍﻭﻡ (CLV) 005 ﻟﻔﺔ ﻓﻲ ﺍﻟﺪﻗﻴﻘﺔ — 002 ﻟﻔﺔ ﻓﻲ ﺍﻟﺪﻗﻴﻘﺔ ﺳﺮﻋﺔ...
- Page 55 ﺍﻟﻤﻮﺻﻮﻝ ﻏﻴﺮ ﻗﺎﺩﺭ ﻋﻠﻰ ﺗﻮﺟﻴﻪ ﺍﺷﺎﺭﺓ ﺍﻟﺼﻮﺕ ﺍﻟﻰAndroid 085 11 ﻛﻴﻠﻮ ﻫﺮﺗﺰ — 531 81 ﻛﻴﻠﻮ ﻫﺮﺗﺰ ) .ﺍﻟﻮﺣﺪﺓ ()5 ﻛﻴﻠﻮ ﻫﺮﺗﺰ ﻟﻠﺨﻄﻮﺓ ﻓﻲ ﺟﻬﺎﺯJVC MUSIC PLAY APP • ﺗﺄﻛﺪ ﻣﻦ ﺗﺜﺒﻴﺖ ﺍﻟﺘﻄﺒﻴﻖ ﻻ ﻳﻤﻜﻦ ﺍﻟﺘﺸﻐﻴﻞ ﻓﻲ 9 ﻛﻴﻠﻮ ﻫﺮﺗﺰ 1: ﺍﻟﻤﻮﺟﺔ...
- Page 56 ﺍﻟﺒﺤﺚ ﻋﻦ ﺍﻻﻋﻄﺎﻝ ﻭﺍﻻﺻﻼﺡ ﻣﺮﺍﺟﻊ Android ﺑﺨﺼﻮﺹ ﺟﻬﺎﺯ ﻣﻌﺎﻟﺠﺔ ﺍﻷﻋﻄﺎﻝ ﺍﻻﻋﺮﺍﺽ . ﻭﺍﻋﻠﻰAndroid OS 4.1 • ﻫﺬﻩ ﺍﻟﻮﺣﺪﺓ ﺗﺪﻋﻢ ﻧﻈﺎﻡ ﺍﻟﺘﺸﻐﻴﻞ .• ﺍﺿﺒﻂ ﻣﺴﺘﻮﻯ ﻗﻮﺓ ﺍﻟﺼﻮﺕ ﻋﻠﻰ ﺍﻓﻀﻞ ﻣﺴﺘﻮﻯ ﻣﻤﻜﻦ .ﻻ ﻳﻤﻜﻦ ﺳﻤﺎﻉ ﺍﻟﺼﻮﺕ ﻭﺍﻋﻠﻰ( ﻗﺪ ﻻ ﺗﺪﻋﻢ ﻭﻇﻴﻔﺔ ﺑﺸﻜﻞOS 4.1 )ﺍﻟﻤﺠﻬﺰﺓ ﺑﻨﻈﺎﻡ ﺍﻟﺘﺸﻐﻴﻞAndroid • ﺑﻌﺾ ﺍﺟﻬﺰﺓ .•...
- Page 57 .(<.wma> .< ﺃﻭmp3> — ﻳﻌﺘﻤﺪ ﻋﻠﻰ ﺗﻨﺴﻴﻖ ﺍﻟﻘﺮﺹ ﺍﻟﻤﺴﺘﺨﺪﻡ )ﻳﺘﻀﻤﻦ 4 ﺃﺣﺮﻑ ﺍﻣﺘﺪﺍﺩ ﻣﺰﻳﺪ ﻣﻦ ﺍﻟﻤﻌﻠﻮﻣﺎﺕ ، ﺍﻟﻤﺴﺘﻮﻯ 1 ﻭﺍﻟﻤﺴﺘﻮﻯ 2: 23 ﺣﺮﻓﺎISO 9660 - :< ﻣﻦ ﺍﺟﻞhttp://www.jvc.net/cs/car/> ﻛﻤﺎ ﻳﺮﺟﻰ ﺯﻳﺎﺭﺓ ﺍﻟﻤﻮﻗﻊ ﺍﻟﺘﺎﻟﻲ : 23 ﺣﺮﻓﺎRomeo - : 23 ﺣﺮﻓﺎJoliet - –...
- Page 58 ﺇﻋﺪﺍﺩﺍﺕ ﺍﻟﺸﺎﺷﺔ ﻟﻠﻴﻞ ﻭﺍﻟﻨﻬﺎﺭ ﺑﺸﻜﻞUSB ﺗﻌﻴﻴﻦ ﺳﻄﻮﻉ ﺍﻟﺰﺭ ﻭﺷﺎﺷﺔ ﺍﻟﻌﺮﺽ ﻭﻃﺮﻑ ﺇﺩﺧﺎﻝ BRIGHTNESS .ﻣﻨﻔﺼﻞ . : ﻳﺤﺪﺩ ﺍﻟﻨﻬﺎﺭ ﺃﻭ ﺍﻟﻠﻴﻞNIGHT/DAY 1 (2 ﺍﺧﺘﺮ ﻣﻨﻄﻘﺔ. ) ﺗﻮﺿﻴﺢ ﻓﻲ ﺍﻟﻌﻤﻮﺩ ﺍﻷﻳﺴﺮ : 13 ؛DAY :3 ﻳﻀﺒﻂ ﻣﺴﺘﻮﻯ ﺍﻟﺴﻄﻮﻉ )00 ﺇﻟﻰ 13(. )ﺍﻓﺘﺮﺍﺿﻲ (15 :NIGHT : ﻳﻜﺮﺭ...
- Page 59 ﺇﻋﺪﺍﺩﺍﺕ ﺍﻟﺼﻮﺕ ﺍﻟﺘﻮﺻﻴﻞ ﻋﺒﺮ ﺳﻠﻚ ﺍﻟﺴﻤﺎﻋﺔ : ﻳﺤﺪﺩ ﻣﺴﺘﻮﻯ ﺍﻟﺼﻮﺕ ﺍﻷﻗﺼﻰ ﺣﺘﻰ 52. )ﻳ ﹸ ﺤﺪﺩ ﺇﺫﺍ ﻛﺎﻧﺖLOW POWER AMP GAIN ﺍﻟﻘﺪﺭﺓ ﺍﻟﻘﺼﻮﻯ ﻟﻜﻞ ﺳﻤﺎﻋﺔ ﺃﻗﻞ ﻣﻦ 05 ﻭﺍﺕ ﻟﻤﻨﻊ ﺗﻠﻒ ﺍﻟﺴﻤﺎﻋﺎﺕ.( ؛ ﻟﻠﺘﻮﺻﻴﻼﺕ ﺑﺪﻭﻥ ﺍﺳﺘﺨﺪﺍﻡ ﻣﻀﺨﻢ ﺻﻮﺕ ﺧﺎﺭﺟﻲ. ﻟﻜﻦ، ﺑﻮﺍﺳﻄﺔ ﻫﺬﺍ ﺍﻹﻋﺪﺍﺩ ﻳﻤﻜﻦ ﺍﻳﻀﺎ .35 : ﻣﺴﺘﻮﻯ...
- Page 60 ﺇﻋﺪﺍﺩﺍﺕ ﺍﻟﺼﻮﺕ ﺇﻋﺪﺍﺩﺍﺕ ﺃﺧﺮﻯ AUDIO ﺍﺿﻐﻂ ﻣﻊ ﺍﻻﺳﺘﻤﺮﺍﺭ ﻋﻠﻰ 10+ — 50+ )10+(: ﻳﺤﺪﺩ ﻣﺴﺘﻮﻯ ﺭﻓﻊ ﺍﻟﺠﻬﻴﺮ ﺍﻟﻤﻄﻠﻮﺏ. ؛ BASS BOOST ﺃﺩﺭ ﻗﺮﺹ ﻣﺴﺘﻮﻯ ﺍﻟﺼﻮﺕ ﻟﺘﺤﺪﻳﺪ ﺑﻨﺪ )ﺭﺍﺟﻊ ﺍﻟﺠﺪﻭﻝ ﺍﻟﺘﺎﻟﻲ(، ﺛﻢ ﺍﺿﻐﻂ .: ﺍﻟﻐﺎﺀOFF .ﺍﻟﻘﺮﺹ 10 / 20: ﻳﻌﺰﺯ ﺍﻟﺘﺮﺩﺩﺍﺕ ﺍﻟﻤﻨﺨﻔﻀﺔ ﺃﻭ ﺍﻟﻌﺎﻟﻴﺔ ﻣﻦ ﺃﺟﻞ ﺗﻜﻮﻳﻦ ﺻﻮﺕ ﺍﻟﻰ...
- Page 61 ﺇﻋﺪﺍﺩﺍﺕ ﺍﻟﺼﻮﺕ ﺍﺳﺘﺨﺪﻡ ﻣﺸﻐﻞ ﺍﻟﺼﻮﺕ ﺍﻟﻤﺤﻤﻮﻝ .(ﺍﻻﺗﺼﺎﻝ ﺑﺠﻬﺎﺯ ﻣﺸﻐﻞ ﺍﻟﺼﻮﺕ ﺍﻟﻤﺤﻤﻮﻝ )ﻣﺘﺎﺡ ﻟﻠﺸﺮﺍﺀ ﻗﺎﺑﺲ ﺻﻐﻴﺮ ﻟﻠﺼﻮﺕ ﺍﻟﻤﺠﺴﻢ 5.3 ﻣﻢ ﻣﻊ ﻣﻮﺻﻞ ﻋﻠﻰ (“ )ﻣﺘﺎﺡ ﻟﻠﺸﺮﺍﺀL” ﺷﻜﻞ ﺣﺮﻑ ﻣﻘﺒﺲ ﺗﻮﺻﻴﻞ ﺍﻟﺠﻬﺎﺯ ﺍﻹﺿﺎﻓﻲ ﻣﺸﻐﻞ ﺻﻮﺕ ﻣﺤﻤﻮﻝ (4 ) .[SRC SELECT] [ ﻓﻲAUX] [ ﻟـON] ﺣﺪﺩ .AUX ﺑﺸﻜﻞ...
- Page 62 ﺭﺍﺩﻳﻮ ﺍﺧﺘﺮ ﻣﺤﻄﺔ ﻣﺨﺰﻧﺔ ﺫﺍﺕ ﺍﻻﺳﺘﻘﺒﺎﻝ ﺍﻟﺠﻴﺪ ﻓﻘﻂ. ؛SW2/SW1/AM : ﺍﻟﺒﺤﺚ ﻋﻦ ﺍﻟﻤﺤﻄﺎﺕON LOCAL SEEK .(6 ﺃﻭ ﺃﺣﺪ ﺃﺯﺭﺍﺭ ﺍﻷﺭﻗﺎﻡ ﺍﻟﺘﺎﻟﻴﺔ )ﻣﻦ 1 ﺇﻟﻰ ﺍﺿﻐﻂ ﻋﻠﻰ .: ﺍﻟﻐﺎﺀOFF ()ﺃﻭ • ﺍﻹﻋﺪﺍﺩﺍﺕ ﺍﻟﺘﻲ ﻳﺘﻢ ﺗﻨﻔﻴﺬﻫﺎ ﻗﺎﺑﻠﺔ ﻟﻠﺘﻄﺒﻴﻖ ﻋﻠﻰ ﺍﻟﻤﺼﺪﺭ/ﺍﻟﻤﺤﻄﺔ ﺍﺿﻐﻂ ﺍﻟﻤﺨﺘﺎﺭﺓ...
- Page 63 ﻣﻦ ﻫﺬﺍ ﺍﻟﺠﻬﺎﺯ ﻋﺒﺮ ﺗﻄﺒﻴﻖAndroid ﻗﻢ ﺑﺎﻟﺘﺤﻜﻢ ﺑﺠﻬﺎﺯ :AUTO MODE .Android ﺍﻟﻤﺜﺒﺖ ﻓﻲ ﺟﻬﺎﺯJVC MUSIC PLAY ﻧﻔﺴﻪ ﻋﺒﺮAndroid ﺑﺎﺳﺘﺨﺪﺍﻡ ﺟﻬﺎﺯAndroid : ﻗﻢ ﺑﺎﻟﺘﺤﻜﻢ ﺑﺠﻬﺎﺯAUDIO MODE . ﻟﻜﻦ، ﻻ ﻳﺰﺍﻝAndroid ﺗﻄﺒﻴﻘﺎﺕ ﻣﺸﻐﻞ ﻭﺳﺎﺋﻂ ﺍﺧﺮﻯ ﻣﺜﺒﺘﺔ ﻓﻲ ﺟﻬﺎﺯ...
- Page 64 .* ﻻ ﺗﺘﺮﻙ ﺍﻟﻜﺎﺑﻞ ﺑﺪﺍﺧﻞ ﺍﻟﺴﻴﺎﺭﺓ ﻋﻨﺪ ﻋﺪﻡ ﺍﺳﺘﺨﺪﺍﻣﻪ “. ﺍﺗﺒﻊ ﺍﻟﺘﻌﻠﻴﻤﺎﺕ ﻟﺘﻨﺼﻴﺐ ﺍﻟﺘﻄﺒﻴﻖ. ﻛﻤﺎ ﻳﻤﻜﻦPress [VIEW] to install JVC MUSIC PLAY APP” ، ﻳﺘﻢ ﻋﺮﺽAndroid * ﻋﻨﺪ ﺗﻮﺻﻴﻞ ﺟﻬﺎﺯ ) . ﻋﻠﻰ ﺟﻬﺎﺯ ﻗﺒﻞ ﺍﻟﺘﻮﺻﻴﻞJVC MUSIC PLAY ﺗﺮﻛﻴﺐ ﺍﺣﺪﺙ ﺍﺻﺪﺍﺭ ﻣﻦ ﺍﻟﺘﻄﺒﻴﻖ...
- Page 65 .[، ﺛﻢ ﺍﺿﻐﻂ ﻋﻠﻰ ﺍﻟﻘﺮﺹCLOCK] ﺃﺩﺭ ﻗﺮﺹ ﻣﺴﺘﻮﻯ ﺍﻟﺼﻮﺕ ﻟﺘﺤﺪﻳﺪ :ﻟﻠﺤﺼﻮﻝ ﻋﻠﻰ ﺗﻔﺎﺻﻴﻞ ﺣﻮﻝ ﻛﻴﻔﻴﺔ ﺗﺤﺪﻳﺚ ﺍﻟﺒﺮﻧﺎﻣﺞ ﺍﻟﺜﺎﺑﺖ، ﺍﻧﻈﺮ [، ﺛﻢ ﺍﺿﻐﻂ ﻋﻠﻰCLOCK SET] ﺃﺩﺭ ﻗﺮﺹ ﻣﺴﺘﻮﻯ ﺍﻟﺼﻮﺕ ﻟﺘﺤﺪﻳﺪ .<http://www.jvc.net/cs/car/> .ﺍﻟﻘﺮﺹ ﺃﺩﺭ ﻗﺮﺹ ﻣﺴﺘﻮﻯ ﺍﻟﺼﻮﺕ ﻟﺘﺤﺪﻳﺪ ﺍﻹﻋﺪﺍﺩﺍﺕ، ﺛﻢ ﺍﺿﻐﻂ ﻋﻠﻰ...
- Page 66 ﺃ ﹶ ﺳﺎﺳ ﹺ ﻴ ﹼ ﺎﺕ (RM-RK52) ﻭﺣﺪﺓ ﺍﻟﺘﺤﻜﻢ ﻋﻦ ﺑﻌﺪ ﻭﺍﺟﻬﺔ ﺍﻟﺠﻬﺎﺯ ﻛﻴﻒ ﻳﻤﻜﻦ ﺇﻋﺎﺩﺓ ﺍﻟﻀﺒﻂ ﺣﺴﺎﺱ ﺍﻟﺘﺤﻜﻢ ﻋﻦ ﺑﻌﺪ )ﺗﺠﻨﺐ (.ﺍﻟﺘﻌﺮﻳﺾ ﻟﻀﻮﺀ ﺍﻟﺸﻤﺲ ﺍﻟﺴﺎﻃﻊ ﻓﺘﺤﺔ ﺍﻟﺘﺤﻤﻴﻞ ﻧﺎﻓﺬﺓ ﺍﻟﻌﺮﺽ ﺳﻴﺘﻢ ﻣﺴﺢ ﻋﻤﻠﻴﺎﺕ ﺍﻟﻀﺒﻂ ﺍﻟﻤﺴﺒﻖ ﺑﺎﺳﺘﺜﻨﺎﺀ ﻣﺤﻄﺎﺕ ﺍﻟﺮﺍﺩﻳﻮ .ﺍﻟﻤﺨﺰﻧﺔ ﻗﻢ...
- Page 67 ﻗﺒﻞ ﺍﻻﺳﺘﺨﺪﺍﻡ ﺍﻟﻤﺤﺘﻮﻳﺎﺕ ﻗﺒﻞ ﺍﻻﺳﺘﺨﺪﺍﻡ ﻫﺎﻡ ﺃ ﹶ ﺳﺎﺳ ﹺ ﻴ ﹼ ﺎﺕ • ﻟﻀﻤﺎﻥ ﺍﻻﺳﺘﺨﺪﻟﻢ ﺍﻟﻤﻨﺎﺳﺐ، ﻳﺮﺟﻰ ﻗﺮﺍﺀﺓ ﻫﺬﺍ ﺍﻟﺪﻟﻴﻞ ﺑﺘﻤﻌﻦ ﻗﺒﻞ ﺍﺳﺘﺨﺪﺍﻡ ﻫﺬﺍ ﺍﻟﻤﻨﺘﺞ. ﻣﻦ ﺍﻟﻤﻬﻢ ﺟﺪﺍ ﺍﻥ ﺗﻘﺮﺃ ﻭﺗﺮﺍﻗﺐ ﺍﻟﺘﺤﺬﻳﺮﺍﺕ .ﻭﺍﻟﺘﻨﺒﻴﻬﺎﺕ ﺍﻻﺣﺘﻴﺎﻃﻴﺔ ﻓﻲ ﻫﺬﺍ ﺍﻟﺪﻟﻴﻞ ﺍﻟﺸﺮﻭﻉ ﻓﻲ ﺍﻟﻌﻤﻞ .•...
- Page 68 ﻋﺮﺑﻲ ﻓﺎﺭﺳﻰ KW-R520 ﺟﻬﺎﺯ ﺭﺍﺩﻳﻮ ﻭﻣﺸﻐﻞ ﺃﺳﻄﻮﺍﻧﺎﺕ ﺩﻟﻴﻞ ﺍﻟﺘﻌﻠﻴﻤﺎﺕ ﮔﻴﺮﻧﺪﻩ ﺳﯽ ﺩی ﺭﺍﻫﻨﻤﺎی ﺍﺳﺘﻔﺎﺩﻩ © 2015 JVC KENWOOD Corporation 1115DTSMDTJEIN...