Table of Contents
Advertisement
Advertisement
Table of Contents
Troubleshooting

Related Manuals for Handicare You-Q Luca XL


Summary of Contents for Handicare You-Q Luca XL
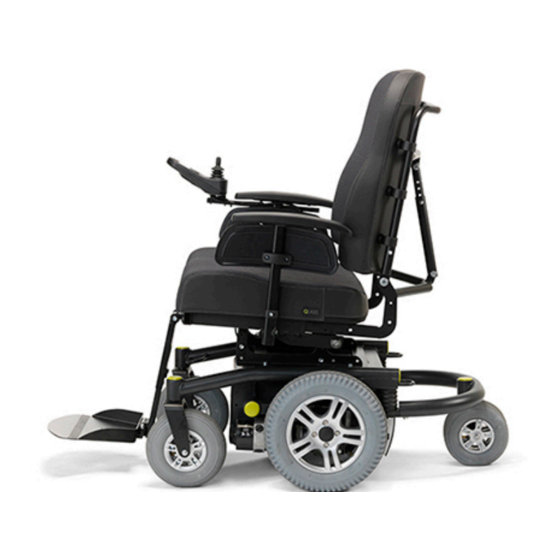
- Page 1 Service Manual Luca XL V2.0 from Jan. 1st 2015...
- Page 2 The available information has been prepared with all possible care, but Handicare BV cannot be held liable for possible errors in the information or the consequences thereof. Handicare BV accepts no liability for loss resulting from work that is executed by third parties.
-
Page 3: Table Of Contents
Table of contents Table of contents Copyright 1. Introduction 1.1. Scope of this manual 1.2. Reference documentation 1.3. Symbols used in this manual 1.4. Guidelines and useful information for maintenance 1.5. Product identification 2. Warranty and Liability 2.1. Warranty 2.2. Liability 3. -
Page 4: Introduction
Maintenance (regular maintenance and repairs) to the wheelchair may only be done by service technicians that have been trained and authorised by Handicare BV. Temporary employees and personnel in training are also allowed to do this work but only under the supervision of an authorised service technician. -
Page 5: Product Identification
• Boxed position numbers refer to the relevant separate drawing. Disposal Always handle waste materials according to the local regulations. Contact information Handicare BV Handicare BV Vossenbeemd 104 5705 CL Helmond The Netherlands... -
Page 6: Warranty And Liability
Product: the electric wheelchair manufactured Handicare BV. • User: the person who actually uses the product. • Customer: the person who obtains the product from Handicare BV. • Dealer: the person/company who supplies the product from Handicare BV to the customer. Service manual - Luca XL... -
Page 7: Warranty
Any repair to or reconditioning of the Product not authorised or performed by and/or on the instructions of Handicare BV shall not be covered by the scope of this warranty. If a Service manual - Luca XL... -
Page 8: Liability
1. In particular, Handicare BV shall not assume any liability for consequential damage in whatever form. In so far as Handicare BV – notwithstanding the provision of article 3 – is ordered by a Netherlands court or in any other forum for the settlement of disputes to pay damages other than referred to in article 1, Handicare BV shall make indemnification in accordance with the provisions of article 2. -
Page 9: Safety
Safety 3.1. Personnel qualifications Only service technicians that are trained and authorised by Handicare BV are allowed to do maintenance and repairs to the wheelchair. Temporary employees and persons in training are only allowed to do the maintenance and repairs to the wheelchair if they work under the supervision of an authorised service technician. -
Page 10: Pictograms On The Wheelchair
Safety • it cannot be excluded that electromagnetic radiation can have influence on the wheelchair. For example: • mobile telephony • large scale medical apparatus • other sources of electromagnetic radiation • it cannot be excluded that the wheelchair can interfere with electromagnetic fields. For example: •... -
Page 11: Maintenance Schedule & Tooling
Maintenance schedule & tooling Maintenance schedule & tooling 4.1. Overview of scheduled maintenance tasks No Spares NOTICE! The wheelchair must be checked regularly by an authorized service technician. System Unit Task Limit Batteries Charging Daily (by the user) Tyres Check pressure and inflate Weekly (by the user) if necessary Wheelchair and upholstery... -
Page 12: Mechanical Tools
Maintenance schedule & tooling 4.2. Mechanical tools The following tools and general supplies are needed to do the maintenance as described in this manual: Description Remark Screwdriver size: medium Screwdriver Phillips head Rubber mallet Pair of wire cutters Circlip pliers Waterpump pliers Open ended spanner sizes: 10, 13, 17, 19... -
Page 13: Electronical Tools
Maintenance schedule & tooling 4.3. Electronical tools The following tools and general supplies are needed to do the maintenance as described in this manual: Part number Description Shark R-Net 00355.0440 Dynamic Hand Held Programmer (DX-HHP- GDW) 1003236 Dynamic Wizard USB set OEM (DWIZ-KIT + DWD- OEM-U) 6000668... -
Page 14: Maintenance Tasks & Adjustments
Maintenance tasks & adjustments Maintenance tasks & adjustments 5.1. General preparations for maintenance This chapter describes the general preparations that apply for all maintenance and repairs to the wheelchair. WARNING! Only do maintenance on an empty wheelchair. Switch off the wheelchair via the button on the controller. Set both freewheel switches in 'Drive' mode. - Page 15 Maintenance tasks & adjustments Disconnect the motor cables (A) from the interconnection of the power module. Remove the screws (A) to remove the rear bridge (B). WARNING! After repairing, reprogramming or replacing parts, always check the functionality of the entire wheelchair. Pay special attention to safety features such as slowdown driving or drive inhibits when seat lift and tilt are both used.
-
Page 16: Carrier
Maintenance tasks & adjustments 5.2. Carrier 5.2.1. Disassemble a motor arm Preparation See section 5.1. Procedure Lift the wheelchair until the wheels are free from the floor. • Use a lifting platform. Remove the cap (A). Remove screw (B) and bearing holder (C). •... -
Page 17: Replace The Carbon Brushes
Maintenance tasks & adjustments 5.2.3. Replace the carbon brushes Preparation See section Procedure Remove the cap (A). Remove the old carbon brush (B). Gently blow some air through the hole (to remove any dust). Put the new carbon brush in the motor. Put the cap on the motor. -
Page 18: Install A Motor Arm
Maintenance tasks & adjustments 11. Install the motor arm on the wheelchair. See section 5.2.5. 5.2.5. Install a motor arm Preparation Make sure that the rubber suspension is installed on the carrier. Procedure Put the motor cable through the carrier. Do not connect it yet. -
Page 19: Replace The Castor Wheel On The Frontside
Maintenance tasks & adjustments 5.2.7. Replace the castor wheel on the frontside Preparation See section 5.1. Procedure Lift the wheelchair until the wheels are free from the floor. • Use a lifting platform. Remove screw, washer and nut A. Take out the old castor wheel (B) from the castor fork (C). -
Page 20: Replace A Castor Fork At The Frontside
Maintenance tasks & adjustments 5.2.9. Replace a castor fork at the frontside Preparation See section 5.1. Procedure Lift the wheelchair until the wheels are free from the floor. • Use a lifting platform. Remove cap (A). Remove screw (B) and bearing holder (C). •... -
Page 21: Replace The Batteries
Maintenance tasks & adjustments 5.2.11. Replace the batteries Preparation See section 5.1. Procedure Loosen the battery straps (A). Disconnect the power cables (C). Remove the old batteries (B). Put the new batteries in the carrier. Connect the power cables. WARNING! See the 'cables and module schemes' in section 8. -
Page 22: Legrests
Maintenance tasks & adjustments 5.3. Legrests 5.3.1. Replace the actuator of a powered legrest Preparation Lift the legrest out of the wheelchair. Procedure Remove the tie wraps and disconnect the actuator cable from the legrest. Remove the screws (A) and (C) and the tube (B). -
Page 23: Seating System
Maintenance tasks & adjustments 5.4. Seating system 5.4.1. RepIace the tilt actuator Preparation Set the seat in the maximum tilted position for easy access. See section 5.1. Procedure Make sure that the seat is kept in the tilted position. For instance by placing a support. Remove the seat cushion for easy access. -
Page 24: Maintenance On The Control System
Maintenance on the control system Maintenance on the control system 6.1. Replace the remote control (R-Net) The driving program of the R-Net controller systems is stored in the power module. Replacing the remote control can therefore be done without any programming. Replace the remote control. -
Page 25: Troubleshooting
NOTICE! If the problem is not solved with the help of the solutions in the tables, contact your dealer/distributor or the Service Department of Handicare BV. Service manual - Luca XL... -
Page 26: General Diagnostics And Faultfinding
Troubleshooting 7.1. General diagnostics and faultfinding Problem Cause Solution Wheelchair does not switch Buscables not connected Check buscable connections of the joystick module to the power module (can also be through the actuator module!) Pins in connectors are Check connectors for loose loose or damaged or damaged pins. - Page 27 Troubleshooting Problem Cause Solution Parking brake partially Check parking brake engaged function. Clicking sound at engaging/disengaging should be present. Check temperature of parking brake after driving. Wheelchair drives slower Poor batteries Check batteries and battery throughout the day (or after voltage.
- Page 28 Troubleshooting Problem Cause Solution Programming of Motor Check programming and Load Compensation is not make corrections if needed. correct Check with manufacturer for correct value. Wheelchair veers to one Programming of Load Check programming and side Compensation is not make corrections if needed. correct.
- Page 29 Troubleshooting Problem Cause Solution Motors make excessive Worn carbon brushes Check carbon brushes and noise collector. If needed replace brushes or motor. Wheelchair wobbles overall Drive wheels have radial Check for misalignment of or moves up and down misaligned tyres. Can be tyres.
- Page 30 Troubleshooting Problem Cause Solution Seating mechanism is Check mechanisme on moving poorly or with loose bolts, cracked or bent extreme friction parts. Replace parts or modules. Seating actuator moves in Wiring connections Change actuator direction wrong direction (after possibly twisted in cable or in driving program or replacement) motor...
-
Page 31: Diagnostics And Troubleshooting For R-Net Controls
Troubleshooting 7.2. Diagnostics and troubleshooting for R-Net controls WARNING! Remove both fuses from the batteries before you change any cables, fuses and/or modules. This way the power is disconnected from the wheelchair. NOTICE! For more detailed information about R-Net Controllers, specific manuals can be downloaded from the website: www.pgdt.com. - Page 32 Troubleshooting Trip Text Trip Description code Joystick error The most common cause of this error is when the joystick is not in the center position when the control system is switched on. The Joystick displaced screen is shown for 5 seconds. If the joystick is not released within this time, the system reports an error.
- Page 33 Troubleshooting Trip Text Trip Description code M2 Motor Error 3C00 The control system detects that this motor has become disconnected. • Check the motor, cables and the connections to the control system. If this does not solve the error, the power module may be defect.
- Page 34 Troubleshooting Trip Text Trip Description code Gone to Sleep The control system has been left inactive for a longer period of time than the time indicated by the Sleep Timer. An entry is made in the log each time this occurs. The control system "wake up" again when the joystick or a button is used.
-
Page 35: Cable And Module Schemes
Cable and module schemes Cable and module schemes 8.1. R-Net controls R-Net Battery & Motor connections (Drive only) Luca XL only 2x 50A 6002134 Batteries 6002135 9002484 (1.5 m) Motor Motor Cable lenghts are not drawn to scale! R-Net 1 R-Net Tilt45, Recline, Legrests, Lift (Lights can be optional) Luca XL only Legrest Right... -
Page 36: Version History
Version history Version history Version Release date Changes V0.1 Oct. 8th 2014 Draft 1 V0.2 Oct. 10th 2014 Draft 2 V1.0 Oct. 10th 2014 Final V2.0 Jan. 1st 2015 New company name. Service manual - Luca XL...