Table of Contents
Advertisement
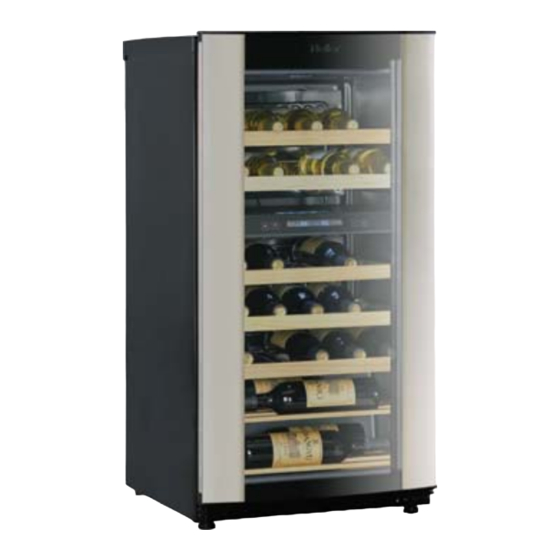
Wine Cooler
Service Manual
:JC-160GDD
Model
Features
●
●Optimized for Preservation of Wine Flavors.
●Dual compartment flex-zone wine cellar.
●46 bottle capacity with dual storage compartment
●Curved glass door with blue gray UV tint &mental trim
● Wood storage shelves
● Adjustable dual electronic control flex- zone
Haier Group
Advertisement
Table of Contents

Related Manuals for Haier JC-160GDD


Summary of Contents for Haier JC-160GDD
- Page 1 Wine Cooler Service Manual :JC-160GDD Model Features ● ●Optimized for Preservation of Wine Flavors. ●Dual compartment flex-zone wine cellar. ●46 bottle capacity with dual storage compartment ●Curved glass door with blue gray UV tint &mental trim ● Wood storage shelves ●...
-
Page 2: Table Of Contents
CONTENTS Contents 1. Content s………………………………………………… ……………………….….…. 1 2. Safety Precautions……………………………………………………………… . .…...2 3. S pecifications…………………………………………………………………………….4 4. Part s Identification………………………………………………………......6 Features…….………………………………………………..………….......7 Net Dimension………………… ……..………..….…………………………………...8 Installation……………………..….…………………….….……………………………9 5. Disassembly …………..………………………………..…………...…………………12 The Door………..………………………………………….. ……. ………………….12 The Fans…...……………………………………..…………..….………………...….12 The Light and Display Panel……………..……..……………..…..………………...13 The Main Control Panel…………………………………….…...……………………22 6. -
Page 3: Safety Precautions
SAFETY PRECAUTIONS Safety Precautions Read all of the instructions before us ing this appl iance. When usi ng this appliance ,alway s exercise basic safety precautions, including the following: 1. Use this appliance only for its intended purpose as described in this use and care guide. - Page 4 SAFETY PRECAUTIONS 7. This wi ne cellar shoul d not be recessed or built-in an enclosed cabinet ,It is designed for freestanding installation only. 8. Do not operate your wine cellar in the presence of explosive fumes. 9. Do not store foods in wine cellar as interior temperature may not be cool enough to prevent spoilage.
-
Page 5: Specifications
SPECIFICATIONS Specifications JC-160GDD product specification Model Number JC-160GDD Reference Model JC-160GD-D PHOTO Features Cap acity (Bottles) Cap acity (cubic feet) Dual Electronic - Flexible Zones T emperature Control Type Auto Setting Red & White Wines Humidit y Control Led Display... - Page 6 -5-50°C Min/Max Ambient Temperature ≤42dB Noise Level CE/GS Listing Agencies Technical Details Cabinet Insulation Double Pane Tempered Glass Door Insulation HIPS Cabinet Liner R600a Type Of Refrigerant Used Flat Back Rear Ventilation ( Rear/Side/Front) Number Of Lights Light Bulb Wattage Type Of Light Bulb ZBC1112CY Compressor Model...
-
Page 7: Part S Identification
PARTS IDENTIFICA TION 6... -
Page 8: Features
PARTS IDENTIFICA TION Features 1.Flex- temperature Zone This offers wine lovers a whole new level of storage flexibility. Flexi-temp allow s the top and bottom compartments to each be set at a temperature between 6-18°C, independent of each ot her. Allowing you to store wine according to your way. - Page 9 PARTS IDENTIFICATION open the door ,the two fans stop running. 6.Shelving. The shelves are designed for appearance and easy cleaning, Larger bottles or magnums can be more easily accommo dated at the cross shelves at the bottom of the cellar. 8...
-
Page 10: Net Dimension
PARTS IDENTIFICATION Net Dimension Model JC-160GDD Unit 506*595*1280 Dimension(W*D*H) 9... -
Page 11: Installation
PARTS IDENTIFICATION INSTALLATION Unpacking Your Wine Cellar 1.Remove all p ackaging material, This includes the foam base and al l adhesive tape hol ding the wine cell ar accessories i nside and outside ,compressor from shipping damage due to vibration and shock. 2.Inspect and rem ove any remains of p acking , t ape or pri nted materials before powering on the wine cellar. -
Page 12: Electrical Requirement
PARTS IDENTIFICATION Electrical Requirement Make sure there is a sui table power Outlet(220-240V) wi th proper grounding to power the wine cellar. Avoid the use of three pl ug adapters or cutting off the third grounding in order to accom modate a two pl ug outlet ,Thi s i s a dangerous practice si nce it provides no ef fective grounding for the wine cellar and may result i n shock hazard. -
Page 13: Disassembly
DISASSEMBLY 1. Door ① Remove the top cover: remove the two screws behind the top cover; ②Remove the screws fixed the up hinge and lift the door. 2. Fans There are two fans in the wine cellar ,each fan is assembled in the same structure. -
Page 14: The Light And Display Panel
DISASSEMBLY Take out the fan block from the comp artment and ② you can see the fan which is assembled in the block ③ Loosen the screws which connect the fan and the block,and you can t ake out the single fan from the fan block slowly. - Page 15 DISASSEMBLY Make the up lid , foam , low lid sep arated from the ③ middle partition Disassemble the lamp shade from the low lid,and ④ loosen the screws fixed the LED light. Loosen the screws which fixed the display panel. ⑤...
-
Page 16: Main Control Panel
4. Main control panel ① Disassemble the enclosure and then disassemble the main control panel box DISASSEMBLY ② The main control p anel is fixed at the p anel box by one screw 15... -
Page 17: Control And Display System
CONTROL AND DISPLAY SYSTEM 1. Control and display panel Fig.#1 Down 1.Temperature Adjustment (up) 6.LED Temperature Disply -Uppper Compartment 7.Lower Compartment Indicator 2. Temperature Adjustment ( down) 8. LED Temperature Disply - Lowe r Compartment 3.Red Wine Indicator 9.Temperature Set Button 4.White Wine Indicator 10.Interion Light Button 5.Upper Compartment Indicator... - Page 18 CONTROL AND DISPLAY SYSTEM The wine cel lar is preset in the factory to automatical ly accommodate temperature requirements for red or white wines. The wine cellar can be set to any temperature between 6°C and 18 °C in either of the com partments to acco mmodate your wine st orage requirements. To set the temperature, hol d the “set”...
-
Page 19: Failure Code Display
Failure code display Failure code Description and reason Solutions display Stop the wine cellar running until the temperature recover. Don’t use wine “LL”blinks with buzzing; that cellar in lower temperature means the related compartment environment .Check the sensor of temperature is lower than -5°C related chamber and it’s connecting status. -
Page 20: Refrigerat Ion Principles
REFRIGERATION PRINCIPLE 1.Refrigeration Flow System Chat evaporator(up) evaporator (down) filter condensator electromagnetism valve Explanation: The electromagnetism valv e includes two singl e valves.W hen the two compartment temperature does not reach the set temperature,the two valves are keeping open; when one comp artment temperat ure reaches the set temperature, the related valve i s closed and the other one k eeping open. -
Page 21: Compressor's Starting And Stopping Control
REFRIGERATION PRINCIPLE 2.Compressor’s starting and stopping control Form: The temperature display & the compressor’s and valves’ wor king status ℃ Actual ℃ Working Not working Temperature display 3.The Heaters’ working control Heaters are designed in the wine cellar in order to make the compartment temperature reach the temperature you set when the compartment temperature is lower than what you set. -
Page 22: Circuit Diagram
CIRCUIT DIAGRAM Circuit Diagram JC-110/160GDD 21... -
Page 23: The Main Control Panel
CIRCUIT DIAGRAM Display diagram C101 470PF/100V E101 L101 E106 R101 20uH/ 1A T100 CD263-470uF/ 35V 220uF/25V 12V 5% 450mA D102 D103 R100 C103 RT15X-47 RT100 C105 1N4007 1N4007 78K/2W 103/630V CBB D106 ER202 S14K350 CX100 B57237 0.01UF/ 275VAC RV100 E100 E104 22uF/ 450V 4.7K-1%... -
Page 24: T Rouble Shooting
TROUBLE SHOOTING Cleaning and Maintenance Warning: To avoid electric shock always unplug your wine cellar before cleaning, Ignoring this warning may result in death or injury. Caution: Before using cleaning products, always read and follow manufacture’s instructions and warnings to avoid personal injury or product damage. General: Prepare a cleaning solution of 3-4 tablespoons of baking soda mixed with warm water, Use sponge or soft cloth, dampened with the cleaning solution,... -
Page 25: Trouble Shooting
TROUBLE SHOOTING causes, Remove the power cord from AC outlet when a power outage occurs, When power has been restored , plug power cord to AC outlet again. Vacation and Moving Care For ling vacations or absences ,unplug the wine cellar and clean the wine cellar and door gaskets according to “General cleaning “... - Page 26 TROUBLE SHOOTING Wine temperature is too cold. If temperature control setting is too cold, adjust to a warmer setting. Wine cellar runs too frequently This may be normal to maintain constant temperature during high temperature and humid days. Doors may have been opened frequently or for an extended period of time . Clean condenser coils, Check gasket for proper seal.
-
Page 27: Normal Problems
TROUBLE SHOOTING Normal problems Problems Reasons Removing methods 1. Fuse is broken 1. Check if there is short circuit 2. The contact of plug, socket, and and solve it, if not, change capable cable is not good. Cable broken. fuse 3. - Page 28 TROUBLE SHOOTING Compressor 1. Supplement a stabilizer, adjust buzzes and to rated value. 1. Voltage is too low. cannot be 2. Change starting relay. 2. Starting relay out of order. started, 3. Change compressor. 3. The starting coil of starting thermal motor is broken.
- Page 29 TROUBLE SHOOTING Electricity 1. Change temperature controller. 1. The service time is too long. leakage 2. Use brush to remove dust. 2. The environment is too dirty. temperature 3. Make the temperature dry and 3. Humidity is too high. controller control the environment humidity.
-
Page 30: Compressor Doesn't Start
TROUBLE SHOOTING Compressor doesn’t start 29... -
Page 31: Poor Cooling
TROUBLE SHOOTING Poor cooling Poor cooling Check the diaplay temperature Change to lower nomber whether it is setted at 18°C Whether the rear side and the top is too close to the wall Avoid these Whether the cellar is under matters which sunlight directly will affect heat...