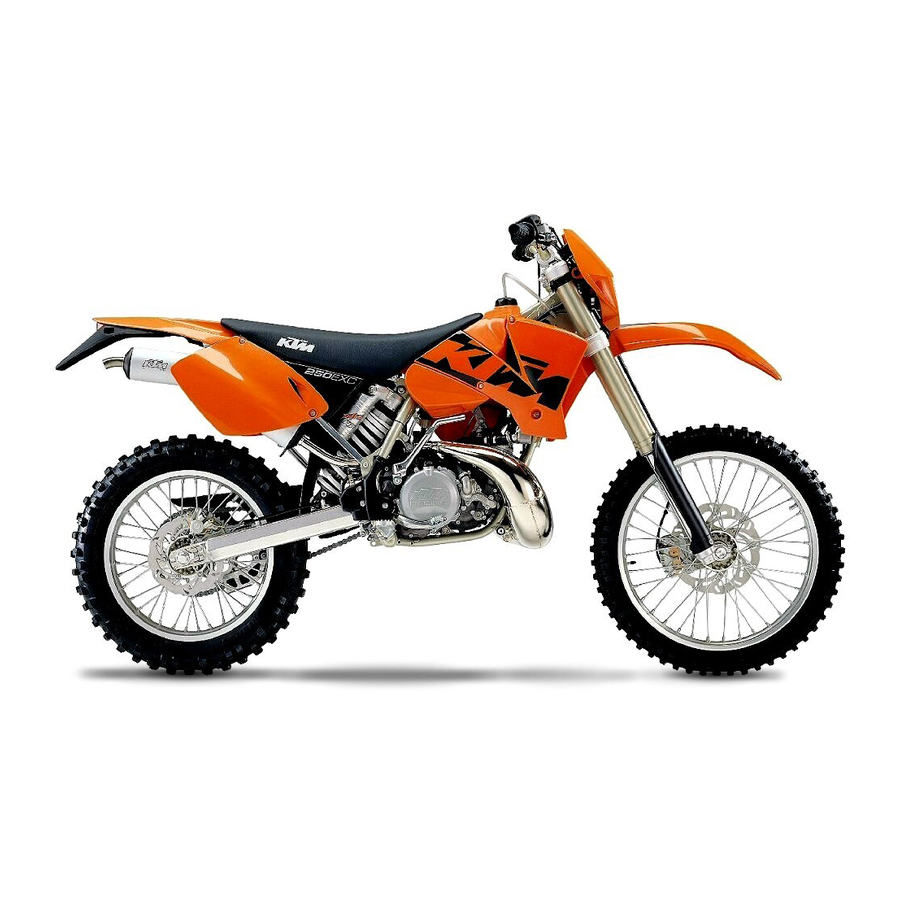
KTM 250 EXC RACING Owner's Manual
Ktm motorcycle owner's manual
Hide thumbs
Also See for 250 EXC RACING:
- Owner's manual (410 pages) ,
- Repair manual (154 pages) ,
- Owner's handbook manual (45 pages)
Table of Contents
Advertisement
Quick Links
Advertisement
Table of Contents

Related Manuals for KTM 250 EXC RACING


Summary of Contents for KTM 250 EXC RACING
- Page 2 BODY AND YOUR LIFE. IGNORING THESE INSTRUCTIONS COULD CAUSE DAMAGE TO PARTS OF YOUR MOTORCYCLE OR THAT THE MOTOR-CYCLE IS NOT ROAD-SAFE ANYMORE. Please insert the serial numbers of your motorcycle in the boxes below Frame number Engine number Key number...
- Page 3 If maintenance work should become necessary during a competition it should be performed by a trained mechanic. KTM strongly recommends that all service work to your KTM should be performed by a qualified KTM dealer.
-
Page 4: Limited Guarantee Information
IMPORTANT LIMITED WARRANTY AND LIMITED GUARANTEE INFORMATION KTM sports motorcycles are designed and constructed to resist the usual wear and tear of normal use in competitions. The motorcycles comply with the regulations and categories currently in effect with the leading international motorcycle associations. -
Page 5: Table Of Contents
GENERAL TIPS AND WARNINGS FOR STARTING THE MOTORCYCLE ....... . .16 DRIVING INSTRUCTIONS . -
Page 6: Serial Number Locations
SERIAL NUMBER LOCATIONS Chassis number The chassis number is stamped on the right side of the steering head tube. Enter this number in the field on page no 1. Engine number, engine type The engine number and the engine type are stamped into the left side of the engine below the engine sprocket. -
Page 7: Digital Speedometer, Indicator Lamps
The operating hour counter starts to count as soon as you start the engine. The displayed figure cannot be cleared. Service intervals are indicated in operating hours for some KTM offroad motorcycles, making the operating hour counter a very practical function. -
Page 8: Tripmaster Switch
The lap number is shown at the top and the lap time in hours, minutes and seconds at the bottom of the display. If no lap time is stored or the motorcycle is driving, the LAP/LAP mode will be skipped. - Page 9 The operating hour counter starts to count as soon as you start the engine. The displayed figure cannot be cleared. Service intervals are indicated in operating hours for some KTM offroad motorcycles, making the operating hour counter a very practical function.
- Page 10 SPEED/TRP2 (trip 2) display mode The TRP2 trip meter is always active and counts to 999.9. Contrary to TRP1, the displayed figure can be changed using the + and – buttons. This is a very useful function for trips taken according to a roadbook. TRP2 is activated by the first impulse received from the wheel sensor and stops automatically 3 seconds after the last impulse is received.
-
Page 11: Overview Of Tripmaster Functions
OVERVIEW OF TRIPMASTER FUNCTIONS Display no function SPEED / ODO no function SPEED / MAX starts / stops LAP SPEED / LAP figure LAP remains next figure LAP / LAP no function SPEED / CLK SPEED / H no function SPEED / TRP1 no function SPEED / AVS1... -
Page 12: Short Circuit Button (Sx/Mxc)
Short circuit button (SX/MXC) The short circuit button turns off the engine. When pressing this button, the ignition circuit is short-circuited. Combination switch (EXC) The light switch has 2, respectively 3 switch positions. = Light off (this function is not available in all models) = Low beam on = High beam on You may use button... -
Page 13: Emergency Off Switch (Exc Australia)
Emergency OFF switch (EXC Australia) The red emergency-OFF switch In this position, the E-starter is operational and the engine can be started. In this position, the E-starter and ignition circuits are interrup- ted. The E-starter cannot be actuated, and the engine will not start, not even if you attempt to start it with the kickstarter. -
Page 14: Hot Start Device
Push the side stand to the ground with your foot and load it with the motorcycle. Make sure that you put your bike on solid ground and in a secure position. For off-road riding, you can use the rubber band... -
Page 15: Compression Damping Of Fork
Control). Low and high speed refers to the movement of the shock absorber during compression and not to the speed of the motorcycle. The low and high-speed technology overlaps. The low-speed setting is primarily for slow to normal shock absorber compression rates. -
Page 16: Compression Damping Of Shock Absorber (Mxc, Exc)
Compression damping of shock absorber (MXC, EXC) The compression damping (during compression) can be adjusted for the MXC and EXC shock absorbers (Mono Compression Control). The degree of damping can be adjusted by turning adjusting screw a screwdriver. Turning in a clockwise direction will increase the damping, turning in a counterclockwise direction will decrease the damping. -
Page 17: General Tips And Warnings For Starting The Motorcycle
GENERAL TIPS AND WARNINGS FOR STARTING THE MOTORCYCLE Instructions for initial operation – Verify that your KTM dealer performed the PREPARATION OF VEHICLE jobs (see Customer Service Manual). – Read these operating instructions carefully before your first ride. – Familiarize yourself with the operating elements. -
Page 18: Driving Instructions
If the level of brake fluid falls below the minimum value, this indicates a leak in the braking system or completely worn out brake pads. Arrange for the braking system to be checked by a KTM specialist, as complete failure of the braking system can be avoided. - Page 19 SECONDS BEFORE TRYING AGAIN – D ’ T RIDE YOUR MOTORCYCLE WITH FULL LOAD AND DON WHEN COLD BECAUSE THE PISTON IS WARMING UP FASTER THAN THE WATER COOLED CYLINDER AND CAN CAUSE ENGINE DAMAGE Starting when the engine is warm 1 Open the fuel tap 2 Swing up the side stand.
-
Page 20: Stopping And Parking
MXC/EXC R STARTER ALLOWS YOU TO START AGAIN AT ANY TIME HEREFORE TURN OFF THE ENGINE IF YOU INTEND TO RUN YOUR MOTORCYCLE IN IDLE OR AT A STANDSTILL FOR LONGER PERIODS OF TIME MORE THAN MINUTES – A VOID LETTING THE CLUTCH SLIP FREQUENTLY AND FOR EXTENDED... -
Page 21: Periodic Lubrication And Maintenance-Schedule
Treat battery connections with contact grease Change hydraulic clutch fluid Change brake fluid IF MOTORCYCLE IS USED FOR COMPETITION 15 HOURS SERVICE SHOULD BE CARRIED OUT AFTER EVERY RACE. ERVICE INTERVALLS SHOULD NEVER BE EXCEEDED BY MORE THAN AINTENANCE WORK DONE BY... - Page 22 MPORTANT HECKS AND AINTENANCE TO BE ARRIED OUT BY THE IDER Before each After every For cross- start cleaning country use Check oil level Check brake fluid level Check brake pads for wear Check lights for function Check horn for function Lubricate and adjust cables and nipples Bleed fork legs regularly Remove and clean fork dust bellows regularly...
- Page 23 ECOMMENDED INSPECTION OF THE USED FOR ENDURO COMPETITIONS BY YOUR a 100 liter fuel consumption is equivalent to approx. 15 operating hours Check the clutch disks for wear Check the length of the clutch springs Check the cylinder and piston for wear Check the groove on the piston pin retainer for wear (visual check) Check the camshaft for wear (visual check) Replace the camshaft bearings...
- Page 24 ECOMMENDED INSPECTION OF THE USED FOR HOBBY ADDITIONAL ORDER FOR THE a 100 liter fuel consumption is equivalent to approx. 15 operating hours Check the clutch disks for wear Check the length of the clutch springs Check the cylinder and piston for wear Check the groove on the piston pin retainer for wear (visual check) Check the camshaft for wear (visual check) Replace the camshaft bearings...
-
Page 25: Maintenance Work On Chassis And Engine
MAINTENANCE AND ADJUSTING WORK MARKED WITH AN ASTERISK (*) REQUIRES EXPERT SKILLS AND TECHNICAL KNOW-HOW. FOR YOUR OWN SAFETY, ALWAYS HAVE SUCH WORK PERFORMED BY A SPECIALIZED KTM DEALER WHERE YOUR MOTORCYCLE WILL BE OPTIMALLY SERVICED BY APPROPRIATELY QUALIFIED, SKILLED STAFF. -
Page 26: Breather Plug Front Fork
To do this, place the motorcycle on a stand with the front wheel lifted off the ground. When riding the motorcycle mainly on the road, it will suffice to have this job performed in the course of the periodical mainte- nance service. -
Page 27: Basic Suspension Setup For The Weight Of The Driver
EXAMPLE: Motorcycle jacked up (dimension A) ......600 mm Motorcycle on ground, unloaded (dimension B) ....– 565 mm Static sag . -
Page 28: Changing Spring Preload On Telescopic Fork
The standard spring is shown in bold print. The type number of the telescopic fork is embossed on the caps on the top of the telescopic fork. If you are uncertain which spring to use, contact your KTM workshop. According to our experience, the damping rate of the compression stage can remain unchanged. -
Page 29: How To Change The Handlebar Position
How to change the handlebar position The handlebar position can be readjusted by 22 mm. Thus, you can put the handlebar in the position that is the most convenient for you. The upper tri- ple clamp includes 2 bores arranged at a distance of 15 mm (0.6 in) from one another. -
Page 30: Check Chain Tension
JUMPING OFF THE CHAIN WHEELS F THIS HAPPENS THE REAR WHEEL OR DAMAGE THE ENGINE – I N EITHER CASE THE OPERATOR IS LIKELY TO LOSE CONTROL OF THE MOTORCYCLE Correct chain tension Loosen collar nut , loosen lock nuts screws equally far. -
Page 31: Chain Maintenance
O LUBRICATION IS ALLOWED TO REACH THE REAR TIRE OR THE BRAKE DISKS WISE THE ROAD ADHERENCE AND THE REAR WHEEL BRAKING EFFECTS WOULD BE STRONGLY REDUCED AND THE MOTORCYCLE COULD EASILY LOSE CONTROL HEN MOUNTING THE CHAIN MASTERLINK CLIP CLIP MUST POINT IN RUNNING DIRECTION Also check sprockets and chain guides for wear and replace if necessary. -
Page 32: General Information About Ktm Disc Brakes
KTM dealer immediately. BRAKE FLUID: KTM fills the brake systems with SHELL ADVANCE BRAKE DOT 5.1 brake fluid, one of the best brake currently available. We recommend that you continue to use it. DOT 5.1 brake fluid is based on glycol ether and of an amber color. -
Page 33: Adjusting The Free Travel At The Hand Brake Lever
min. 1 mm Adjusting the free travel at the hand brake lever Free travel at the hand brake lever may be readjusted by using adjustment screw . In this way, the position of the point of pressure (e.g. the resis- tance you feel on the hand brake lever when the brake pads are pressed against the brake disc) can be adjusted for any hand size. -
Page 34: Replacing The Front Brake Pads
3-5mm Replacing the front brake pads * Press the brake caliper toward the brake disk, to put the brake piston in its basic position. Remove clips from the brake caliper. Clean the brake caliper and the brake caliper support with compressed air. Check the sleeves of the guide bolts for damage, and grease guide bolts if necessary. -
Page 35: Checking The Rear Brake Pads
LIE AGAINST THE BRAKE DISK AND THE PRESSURE POINT IS ESTABLISHED Dismounting and mounting the front wheel To remove the front wheel, jack the motorcycle up on its frame so that the front wheel no longer touches the ground. Loosen the 2 clamping screws Loosen and remove the collar nut the right side of the fork fist. -
Page 36: Dismounting And Mounting The Rear Wheel
T IS VERY IMPORTANT TO KEEP THE BRAKE DISK FREE FROM OIL AND FATTY MATTERS OTHERWISE THE BRAKING EFFECT WOULD BE STRONGLY REDUCED Dismounting and mounting the rear wheel Jack the motorcycle up on its frame so that the rear wheel no longer touches the ground. Loosen the collar nut... -
Page 37: Tires-Air Pressure
(see photo). A clear tone must be the result. Dull tones are indicators of loose spokes. If necessary, have the spokes retightened and the wheel centered by a KTM dealer. -
Page 38: Setting The Clock
SETUP menu NOTE: If you retrofit this Tripmaster on another motorcycle, the power can also be supplied by the 12 V vehicle electric system. You will need an additional cable harness, spare part no. 583.14.069.210, which you can order from your KTM dealer. -
Page 39: Checking/Setting Distance Of The Magnetic Sensor
Wheel circumference with standard tires = 2205 mm Check/set distance of the magnetic sensor The distance between magnet (0,08-0,16 in), otherwise malfunctions on the speedometer might occur. This distance can be corrected by screwing in or off the sensor KMH: WS = mm x 3.14 mm x 3.14 MPH:... -
Page 40: Battery (Mxc/Exc)
SHOWN IN THE ILLUSTRATION OTHERWISE ELECTROLYTE CAN ESCAPE BATTERY STORAGE: When preparing the motorcycle for a longer period of standstill, remove the battery and recharge it. Storage temperature: 0 - 35°C (30 - 95°F). Do not expose to direct sunlight. -
Page 41: Fuse (Mxc/Exc)
Replace a blown fuse only with an equivalent one. If a new fuse that has just been installed gets blown again, you are strongly advised to have it inspected by a KTM dealer. The fuse capacity is 10 Ampere. NDER NO CIRCUMSTANCES IS A STRONGER FUSE ALLOWED TO BE INSTALLED OR A FUSE “... -
Page 42: Cooling System
Air blowing in through the radiators cools the coolant. The slower the speed of the motorcycle, the less the coolant is cooled down. Dirty radiators also reduce the cooling efficiency. Pressure induced by heating of the coolant in the system is controlled by a valve in the radiator cap ;... -
Page 43: Replacing The Glassfiber Yarn Packing Of The Silencer
Then, drill open the rivets and remove the end cap. NOTE! In every exhaust repair procedure, the O-rings must be replaced by new ones. Glass fiber yarn packings are available from your licensed KTM mechanic. HE EXHAUST SYSTEM BECOMES VERY HOT WHILE THE MOTORCYCLE IS RUNNING... -
Page 44: Cleaning The Air Filter
AIR FILTER MAINTENANCE FOR CLEANING PURPOSES AND TO OIL THE AIR FILTER – N EVER START YOUR MOTORCYCLE WITHOUT ANY AIR FILTERS AND DIRT MAY PENETRATE AND CAUSE DAMAGE AND INCREASED WEAR Thoroughly wash the air filter in special cleaning fluid and allow it to dry well. -
Page 45: Changing The Original Position Of The Clutch Lever
SAE 10 hydraulic oil. Refill oil until oil is discharged from the bore the master cylinder in a bubble-free state. Make sure that the oil does not overflow. The bleeder syringe can be purchased from your KTM dealer.Having completed the bleeding procedure, you have to verify that the oil level in the master cylinder is correct.If necessary, fill up with... -
Page 46: Carburetor Adjustment
CARBURETOR – Adjust idling (Keihin-FCRMX 37/39/41) * Idling adjustment of the carburetor strongly affects the engine’s starting behavior. That is, an engine whose idling speed is adjusted correctly will be easier to start than one whose idling speed has not been adjusted correctly. The idle speed is controlled by means of the adjusting wheel mixture control screw . -
Page 47: Draining The Float Chamber Of The Carburetor
Checking the engine oil level The engine oil level can be checked with the engine either warm or cold. Place the motorcycle in an upright position and on a horizontal surface (not on the side stand). If the engine is cold, the engine oil must be visible at the lower edge of the... -
Page 48: Engine Oil
N ENGINE AT OPERATING TEMPERATURE AND THE ENGINE OIL IT CONTAINS ARE VERY DO NOT BURN OR SCALD YOURSELF Place the motorcycle on a horizontal surface, remove the plug the oil to drain into a receptacle. Clean plug (with magnet) thoroughly. -
Page 49: Changing Oil Filters
Check the O-rings of the oil filter covers for damage and, if neces- sary, replace them. Put the motorcycle on its side and fill the oil filter housings about halfway with engine oil. Fill oil filter with oil, place the long oil filter in the front and the short filter in the back of the filter box. -
Page 50: Troubleshooting
We would like to point out that many operations cannot be performed by yourself. In case of uncertainty, please contact a KTM-dealer. TROUBLE... - Page 51 Dismount seat and fuel tank and check connections, have capacitor and voltage regulator checked Dismount left side paneling and filter box cover, replace fuse Remove seat and fuel tank and check voltage regulator connections; voltage regulator and generator should be checked by a KTM dealer. REMEDY...
-
Page 52: Cleaning
– Before cleaning with water, plug the exhaust pipe to prevent water ingress – After the motorcycle has been rinsed with a soft water jet, it should be dried by air pressure and a cloth. Drain the float chamber of the carburetor. -
Page 53: Technical Specifications - Engine
TECHNICAL DATA – ENGINE 250/450/525 SX, MXC, EXC RACING 2003 Type Design Displacement Bore/Stroke 75 / 56.5 mm 95 / 63.4 mm Ratio Fuel Valve timing Camshaft Valve diameter Intake Valve diameter Exhaust Valve clearence cold Intake Valve clearence cold Exhaust Crank shaft bearing Connecting rod bearing Top end bearing... - Page 54 BASIC CARBURATOR SETTING 250 EXC RACING Type Keihin FCR-MX 37 Carburator-setting number Main jet Jet needle Idling jet Main air jet Idling air jet Needle position 3. rd from top Starting jet Mixture control screw open Slide Performance restrictor Stop pump membrane...
-
Page 55: Tightening Torques
TIGHTENING TORQUES Hexagon collar screw, engine case, clutch cover, ignition cover Oil drain plug Allan head plug oil, screen short Hexagon plug, oil screen long Collar screw for oil filter cover Plug pressure valve Jet screw and hollow screw, oil line Screws, oil pump cover Hexagon collar screw, cylinder head top section Hex.collar screw, cylinder head top section, water pump cover... -
Page 56: Technical Specifications - Chassis
TECHNICAL DATA – CHASSIS 250/450/525 SX, MXC, EXC RACING 2003 450/525 SX RACING Frame Fork Wheel travel front/rear Rear suspension Front brake Rear brake Brake disc Front tires 80/100 - 21“ Air pressure offroad 1.0 bar (14 psi) Air pressure road driver only Rear tires 110/90 - 19“... -
Page 57: Periodic Lubrication And Maintenance-Schedule
Filler cap ...12 Flasher switch ...11 Foot brake pedal...13 Fuel tap ...12 Fuse (MXC/EXC) ...40 General information about KTM disc brakes ...31 General tips and warnings for starting the motorcycle...16 Hand brake lever ...5 Hand decompression lever ...5 Headlamp switch (EXC USA)...11 Hot start device ...13... - Page 59 2003 250/450/525 EXC Racing...
- Page 62 321050...