Table of Contents
Advertisement
Available languages
Available languages
KD-R961BT / KD-R864BT / KD-R862BT / KD-R861BT
CD RECEIVER
INSTRUCTION MANUAL
RÉCEPTEUR CD
MANUEL D'INSTRUCTIONS
Please read all instructions carefully before
operation to obtain the best possible performance
from the unit.
Veuillez lires les instructions attentivement avant
d'utiliser l'appareil afin d'obtenir les meilleures
performances possibles de l'appareil.
ENGLISH
FRANÇAIS
B5A-0113-20 [E/EN]
Advertisement
Table of Contents

Related Manuals for JVC KD-R961BT


Summary of Contents for JVC KD-R961BT
-
Page 1: Instruction Manual
ENGLISH FRANÇAIS KD-R961BT / KD-R864BT / KD-R862BT / KD-R861BT CD RECEIVER Please read all instructions carefully before INSTRUCTION MANUAL operation to obtain the best possible performance from the unit. RÉCEPTEUR CD Veuillez lires les instructions attentivement avant MANUEL D’INSTRUCTIONS d’utiliser l’appareil afin d’obtenir les meilleures performances possibles de l’appareil. - Page 2 3-12, Moriya-cho, Kanagawa-ku, Yokohama-shi, Kanagawa, 221-0022, Japan Remarque: Le symbole “Pb“ ci-dessous sur des piles électrique indique que cette pile contient du plomb. EU Representative: JVC Technical Services Europe GmbH Konrad-Adenauer-Allee 1-11, D-61118 Bad Vilbel, Germany For Israel Déclaration de conformité vis à vis de la Directive 1999/5/CE de R&TTE Déclaration de conformité...
- Page 3 Hawnhekk, JVC KENWOOD, jiddikjara li dan Par la présente JVC KENWOOD déclare que Por medio de la presente JVC KENWOOD declara l’appareil KD-R961BT/KD-R864BT/KD-R862BT/ S tem JVC KENWOOD izjavlja, da je ta KD-R961BT/ KD-R961BT/KD-R864BT/KD-R862BT/KD-R861BT que el KD-R961BT/KD-R864BT/KD-R862BT/ KD-R861BT est conforme aux exigences KD-R864BT/KD-R862BT/KD-R861BT v skladu jikkonforma mal-ħtiġijiet essenzjali u ma...
-
Page 4: Table Of Contents
CONTENTS BEFORE USE BEFORE USE Warning Do not operate any function that takes your attention away from safe driving. BASICS Caution GETTING STARTED Volume setting: CD / USB / iPod / ANDROID • Adjust the volume so that you can hear sounds outside the car to prevent accidents. •... -
Page 5: Basics
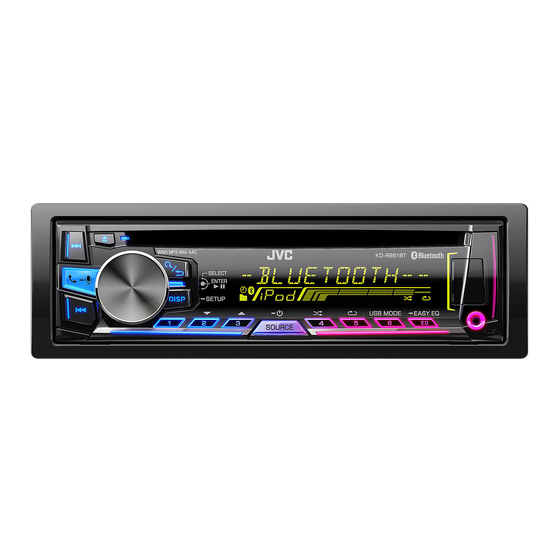
BASICS Faceplate Remote control (RM-RK52) Display window KD-R961BT can be remotely controlled with an optionally purchased KD-R961BT remote control. Remote sensor (Do not expose to bright sunlight.) Volume knob (turn/press) Loading slot Pull out the insulation sheet when using for the first time. -
Page 6: Getting Started
Press to exit. activated). For details on how to update the firmware, see: Set the clock <http://www.jvc.net/cs/car/>. Press and hold CLOCK Turn the volume knob to select [CLOCK], then press the knob. CLOCK SYNC AUTO: The clock time is automatically set using the Clock Time (CT) data Turn the volume knob to select [CLOCK SET], then press the knob. -
Page 7: Cd / Usb / Ipod / Android
SONG RND/ ALL RND/ RND OFF Do not leave the cable inside the car when not using. When connecting an Android device, “Press [VIEW] to install JVC MUSIC PLAY APP” is shown. Follow the instructions to install the ANDROID application. You can also install the latest version of JVC MUSIC PLAY application on your Android device before connecting. - Page 8 Quick Search repeatedly. If you have many files, you can search through them quickly. AUTO MODE: Control from the unit (using JVC MUSIC For MP3/WMA/AAC/WAV or JPC / JMC file: PLAY application). Turn the volume knob quickly. AUDIO MODE: Control other media player applications...
-
Page 9: Radio
RADIO Select a stored station Press one of the number buttons (1 to 6). (or) Press Turn the volume knob to select a preset number, then press the knob to confirm. “ST” lights up when receiving an FM stereo broadcast with sufficient Other settings signal strength. -
Page 10: Aux
RADIO Use a portable audio player SSM 01 – 06 / SSM 07 – 12 / SSM 13 – 18: Automatically presets up to 18 stations for FM. “SSM” stops flashing when the first 6 stations are stored. Connect a portable audio player (commercially available). Select SSM 07 – 12 / SSM 13 – 18 to store the following 12 stations. 3.5 mm stereo mini plug with “L”... -
Page 11: Connecting Microphone
Automatic pairing request is activated only if: – Bluetooth function of the connected devcie is turned on. – [AUTO CNNT] is set to [ON]. ( 13) – JVC MUSIC PLAY application is installed on the Android device. ENGLISH... -
Page 12: Receive Call
BLUETOOTH® BLUETOOTH — Mobile phone Improve the voice quality While talking on the phone..Press and hold Turn the volume knob to make a selection (see the following table), then press the knob. Repeat step until the desired item is selected or activated. -
Page 13: Make A Call
BLUETOOTH® Make the settings for receiving a call Press to enter Bluetooth mode. Turn the volume knob to make a selection (see the following table), then press the knob. Repeat step until the desired item is selected or activated. To return to the previous setting item, press Make a call You can make a call from the call history, phonebook, or dialing the number. -
Page 14: Settings In Memory
BLUETOOTH® DIAL NUMBER 1 Turn the volume knob to select a number (0 to 9) or character ( , #, Settings in memory Store a contact in memory 2 Press to move the entry position. You can store up to 6 contacts into the number buttons (1 to 6). Repeat steps until you finish entering the phone number. -
Page 15: Bluetooth Compatibility Check Mode
“ ” disappears when disconnected. been deleted, and the unit exits check mode. JVC Smart Music Control is designed to view JVC car receiver status and perform simple • To cancel, press and hold to turn off the power, then turn control operations on Android smart phones. -
Page 16: Audio Settings
AUDIO SETTINGS BLUETOOTH® BLUETOOTH — Audio On the faceplate Select a preset Press repeatedly. equalizer Press , then turn the volume knob within 2 seconds. Preset equalizer: FLAT (default), HARD ROCK, JAZZ, POP, R&B, TALK, USER1, USER2, VOCAL BOOST, BASS BOOST, CLASSICAL, DANCE Audio player via Bluetooth Store your own... - Page 17 EASY EQ 1 USER1/ USER2: Select a preset name. Level: –06 to +06 2 Adjust your own sound settings. Q1.0/ Q1.25/ Q1.5/ Q2.0 Q1.0) (For KD-R961BT) MIDDLE Frequency: 0.5/ 1.0/ 1.5/ 2.5 KHZ (Default: 1.0 KHZ SUB.W SP * 00 to +06 (Default: 03 Level: –06 to +06 SUB.W *...
- Page 18 REVERSE (180°)/ NORMAL (0°): Selects the phase of the subwoofer Connection via lineout terminals ( output to be in line with the speaker output for optimum performance. (Selectable only if a setting other than [THROUGH] is selected for (For KD-R961BT) [SUB.W LPF].) Lineout terminal Setting...
-
Page 19: Display Settings
(Selectable only when on the car headlights. * [ALL ZONE] is selected in step For KD-R961BT, the display and button colors change according to the The illumination control wire connection is required. ( 25) settings made on [COLOR]. Some characters or symbols will not be shown correctly (or will be blanked). -
Page 20: More Information
MORE INFORMATION DISPLAY SETTINGS About discs and audio files DAY COLOR Store your own day and night colors for different zone. • This unit can only play the following CDs: 1 Select a zone for setting. ( 17) 2 RED / GREEN / BLUE: Select a primary color. 3 00 to 31: Select the level. - Page 21 • This unit can recognize a total of 20 480 files, 999 folders (999 files per folder including folder • When you play audio file with song data added using the JVC Playlist Creator or JVC Music without unsupported files), and of 8 hierarchies.
-
Page 22: Troubleshooting
TROUBLESHOOTING MORE INFORMATION Change the display information Symptom Remedy Press repeatedly. Sound cannot be heard. • Adjust the volume to the optimum level. FM or AM Station name (PS)* Frequency Program type (PTY)* Title* • Check the cords and connections. Day/Clock (back to the beginning) “MISWIRING CHECK... - Page 23 ( 19) Sound is being interrupted • Reduce the distance between the unit and the Bluetooth Cannot playback at • Make sure JVC MUSIC PLAY APP is installed on the Android or skipped during audio player. [AUTO MODE].
-
Page 24: Specifications
SPECIFICATIONS TROUBLESHOOTING Symptom Remedy FM Frequency Range 87.5 MHz — 108.0 MHz (50 kHz step) Usable Sensitivity (S/N = 26 dB) 0.71 μV/75 Ω “BT DEVICE NOT The unit failed to search for the registered Bluetooth FOUND” devices during [AUTO CNNCT]. Turn on Bluetooth from Quieting Sensitivity 2.0 μV/75 Ω your device and connect manually. - Page 25 Maximum Supply Current DC 5 V 1 A Speaker Impedance 4 Ω — 8 Ω MP3 Decode Compliant with MPEG-1/2 Audio Layer-3 Preout Level/Load (CD/USB) KD-R961BT: WMA Decode Compliant with Windows Media Audio 4 800 mV/10 kΩ load KD-R864BT / KD-R862BT / KD-R861BT: AAC Decode AAC-LC “.m4a” files 2 500 mV/10 kΩ load...
-
Page 26: Basic Procedure
Warning Installing the unit (in-dash mounting) • The unit can only be used with a 12 V DC power supply, negative ground. • Disconnect the battery’s negative terminal before wiring and mounting. • Do not connect Battery wire (yellow) and Ignition wire (red) to the car chassis or Ground wire (black) to prevent a short circuit. -
Page 27: Wiring Connection
KD-R864BT/ KD-R862BT/ KD-R861BT To Blue/white wire of the car’s chassis to avoid (not supplied) Rear output the wiring harness (D) damaging the unit. JVC Amplifier * Front output Part list for Rear/subwoofer output Subwoofer output installation (A) Faceplate Fuse (10 A) Antenna terminal Microphone input jack ( 9) - Page 28 TABLE DES MATIERES AVANT L’UTILISATION AVANT L’UTILISATION Avertissement N’utilisez aucune fonction qui risque de vous distraire de la conduite sure de votre véhicule. FONCTIONNEMENT DE BASE Précautions PRISE EN MAIN Réglage du volume: • Ajustez le volume de façon à pouvoir entendre les sons extérieurs à la voiture afin d’éviter tout risque d’accident. CD / USB / iPod / ANDROID •...
-
Page 29: Fonctionnement De Base
FONCTIONNEMENT DE BASE Façade Télécommande (RM-RK52) Fenêtre d’affichage KD-R961BT peut être commandé à distance avec une télécommande vendue KD-R961BT séparément. Capteur de télécommande (Ne l’exposez Pas à la lumière directe du soleil.) Bouton de volume (tournez/appuyez) Fente d’insertion Retirez la feuille d’isolant lors de la première utilisation. - Page 30 : Démarrer la mise à niveau du micrologiciel. ; : Annulation (la mise à niveau n’ e st pas activée). Pour en savoir plus sur la mise à niveau du micrologiciel, référez-vous à: Réglez l’horloge <http://www.jvc.net/cs/car/>. Maintenez enfoncée CLOCK Tournez le bouton de volume pour choisir [ CLOCK ], puis appuyez sur le bouton.
- Page 31 ANDROID Lors de la connexion d’un périphérique Android, “Press [VIEW] to install JVC MUSIC PLAY APP” apparaît. Suivez les instructions pour installer l’application. Vous pouvez aussi intaller la dernière version de l’application JVC MUSIC PLAY sur votre périphérique Android avant la connexion. (...
- Page 32 Pour iPod: multimédia à partir du périphérique Android (sans Vous pouvez rechercher un fichier en fonction du premier caractère. utiliser l’application JVC MUSIC PLAY). Cependant, Appuyez sur ou tournez le bouton de volume rapidement pour vous pouvez encore utiliser la lecture/pause ou le sélectionner le caractère souhaité...
- Page 33 RADIO Sélectionnez une station mémorisée Appuyez sur l’une des touches numériques ( à (ou) Appuyez sur Tournez le bouton de volume pour choisir un numéro de préréglage, puis appuyez sur le bouton pour valider. “ST” s’allume lors de la réception d’une émission FM stéréo avec un signal suffisamment Autres paramètres fort.
- Page 34 RADIO Utilisation d’un lecteur audio portable SSM 01 – 06 SSM 07 – 12 SSM 13 – 18 : Prérègle automatiquement un maximum de 18 stations pour FM. “SSM” s’arrête de clignoter quand les 6 premières stations Connectez un lecteur audio portable (en vente dans le commerce). SSM 07 –...
- Page 35 La demande de pairage automatique est activée uniquement si: serre-câbles (non fourni). – La fonction Bluetooth du périphérique connecté est activée. – [ AUTO CNNT ] est réglé sur [ ]. ( – L’application JVC MUSIC PLAY est installée sur le périphérique Android. FRANÇAIS...
- Page 36 BLUETOOTH® BLUETOOTH — Téléphone portable Amélioration de la qualité des voix Quand vous parlez au téléphone..Maintenez enfoncée Tournez le bouton de volume pour réaliser une sélection voir le tableau suivant , puis appuyez sur le bouton. Répétez l’étape jusqu’à ce que l’élément souhaité...
-
Page 37: Faire Un Appel
BLUETOOTH® Réalise les réglages de réception d’un appel Appuyez sur pour entrer en mode Bluetooth. Tournez le bouton de volume pour réaliser une sélection (voir le tableau suivant), puis appuyez sur le bouton. Répétez l’étape jusqu’à ce que l’élément souhaité soit sélectionné ou activé. Faire un appel Pour retourner à... - Page 38 BLUETOOTH® DIAL NUMBER Réglages en mémoire Tournez le bouton de volume pour sélectionner un numéro (0 à 9) ou un caractère ( , #, +). Stockage d’un contact en mémoire Appuyez sur pour déplacer la position d’ e ntrée. Répétez les étapes jusqu’à...
- Page 39 Bluetooth actuellement connecté. “ ” disparaît quand la connexion est établie. JVC Smart Music Control est conçu pour voir l’ é tat de l’autoradio JVC et réaliser des commandes simple à partir de smartphones Android.
- Page 40 RÉGLAGES AUDIO BLUETOOTH® BLUETOOTH — Audio Pour Sur la façade Choisissez un Appuyez répétitivement sur égaliseur préréglé Appuyez sur , puis tournez le bouton de volume avant 2 secondes. Égaliseur préréglé FLAT (défaut), HARD ROCK JAZZ R&B TALK USER1 USER2 VOCAL BOOST BASS BOOST CLASSICAL...
- Page 41 1 USER1 USER2 : Sélectionnez un nom préréglé. –06 Niveau: à Ajustez vos propres ajustements sonores. Q1.0 Q1.25 Q1.5 Q2.0 Q1.0 (Pour KD-R961BT MIDDLE 2.5 KHZ 1.0 KHZ Fréquence: (Défaut: SUB.W SP * à (Défaut: –06 Niveau: à SUB.W * –08 à ...
- Page 42 à synchroniser avec la sortie des enceintes afin d’ o btenir des performances optimales. THROUGH (Peut être uniquement sélectionné si un réglage autre que [ ] est choisi pour (Pour KD-R961BT SUB.W LPF Prise de sortie de ligne (Pour KD-R961BT Réglage...
- Page 43 RÉGLAGES D’AFFICHAGE BRIGHTNESS Règle la luminosité des touches, de l’affichage et de la prise d’ e ntrée USB séparément pour le KD-R864BT / KD-R862BT / KD-R861BT KD-R961BT jour et la nuit. 1 DAY NIGHT : Choisissez le jour ou la nuit.
- Page 44 PLUS D’INFORMATIONS RÉGLAGES D’AFFICHAGE À propos des disques et des fichiers audio DAY COLOR Mémorisez vos propres couleurs du jour et de la nuit pour une zone différente. • Cet appareil ne peut lire que les CD suivants: ( 17) Choisissez une zone pour le réglage.
- Page 45 JVC Music Control. - Balises MP3: 64 caractères • Quand vous reproduisez un fichier audio avec des données de chanson ajoutée en utilisant JVC Playlist Creator ou JVC - Balises WMA: 64 caractères Music Control, vous pouvez rechercher des fichiers audio par genre, artiste, album, liste de lecture et chansons.
- Page 46 GUIDE DE DÉPANNAGE PLUS D’INFORMATIONS Changez l’information sur l’affichage Symptôme Remède Appuyez répétitivement sur Le son ne peut pas être entendu. • Ajustez le volume sur le niveau optimum. Nom de la station (PS)* Fréquence Type de programme (PTY)* Titre* •...
- Page 47 • Mettez cet appareil hors tension, puis de nouveau sous tension et audio Bluetooth. essayez de nouveau de connecter l’appareil. Lecture impossible en mode • Assurez-vous que JVC MUSIC PLAY APP est installé sur le périphérique • D’autres périphériques Bluetooth peuvent être en train de se connecter AUTO MODE Android. ( à...
- Page 48 SPÉCIFICATIONS GUIDE DE DÉPANNAGE Symptôme Remède FM Plage de fréquences 87,5 MHz — 108,0 MHz (pas de 50 kHz) Sensibilité utilisable (S/B = 26 dB) 0,71 μV/75 Ω “BT DEVICE NOT FOUND” La recherche des périphériques Bluetooth enregistrés a échouée pendant [AUTO CNNCT] . Mettez en service le Bluetooth sur votre périphérique Seuil de sensibilité...
- Page 49 Courant d’alimentation maximum CC 5 V 1 A Impédance d’ e nceinte 4 Ω — 8 Ω Décodage MP3 Compatible avec le format MPEG-1/2 Audio Layer-3 Niveau de préamplification/charge (CD/USB) KD-R961BT 4 800 mV/10 kΩ en charge Décodeur WMA Compatible Windows Media Audio KD-R864BT KD-R862BT KD-R861BT: Décode AAC Fichiers AAC-LC “.m4a”...
- Page 50 Avertissement Installation de l’appareil (montage encastré) • L’appareil peut uniquement être utilisé avec une alimentation de 12 V CC, à masse négative. • Déconnectez la borne négative de la batterie avant le câblage et le montage. • Ne connectez pas le fil de batterie (jaune) et le fil d’allumage (rouge) au châssis de la voiture ou au fil de masse (noir) pour éviter les courts-circuits.
- Page 51 Connexions Connectez solidement le câble de Fil de télécommande masse de l’amplificateur au châssis de Cordon de signal (non fournie) KD-R961BT KD-R864BT/ KD-R862BT/ KD-R861BT la voiture pour éviter d’ e ndommager Le fil bleu/blanc du faisceau (non fournie) Sortie arrière l’appareil.
- Page 52 • Android is trademark of Google Inc. • The Bluetooth® word mark and logos are registered trademarks owned by Bluetooth SIG, Inc. and any use of such marks by JVC KENWOOD Corporation is under license. Other trademarks and trade names are those of their respective owners.