
Related Manuals for Lab.gruppen E 4:2


Summary of Contents for Lab.gruppen E 4:2
- Page 1 E SERIES ENERGY STAR® qualified installation amplifiers ▸ E 4:2 ▸ E 8:2 ▸ E 12:2 Operation Manual...
-
Page 2: Important Safety Instructions
1. Important safety instructions 1. Important safety instructions Before using your E Series, be sure to carefully read the applicable items of this Operation Manual and the Safety Instructions. 2. Approvals Read these instructions. Keep these instructions Heed all warnings. Follow all instructions. -
Page 3: Warnings
3. Warnings 3.2 Warnings 3.3 User responsibility 3.1.1 Mains connection grounding To reduce risk of fire or electric shock, do not expose this apparatus to rain or moisture. Your amplifier must be connected to a grounded socket outlet. Français: Pour réduire les risques d’incendie ou de choc électrique, n’exposez pas l’appareil à... -
Page 4: Table Of Contents
4. Table of Contents 4. Table of Contents 1. Important safety instructions 2. Approvals 3. Warnings 3.1 Explanation of warning symbols 3.2 Warnings 3.3 User responsibility 5. Introduction 5.1. Welcome 5.2. Features 5.2.1. Class D output stage and universal power supply with low current draw 5.2.2. - Page 5 4. Table of Contents 13. Operation and performance 13.1. Introduction 13.2. Operating precautions 13.3. Signal flow and headroom 13.4. Audio input and output connections, setup and features 13.4.1. Balanced / unbalanced Input connection 13.4.2. Output operation and connection 13.4.3. Output bridge mode and asymmetric loading 13.4.4.
-
Page 6: Introduction
This manual was created for the E Series E 12:2, E 8:2 and E 4:2 amplifier models. Any references to “E Series” in this manual refer to all models in the range. -
Page 7: Amplifier Sensitivity / Gain
5. Introduction 5.2.2. Amplifier sensitivity / gain For ease of use in system integration, E Series have been designed with a fixed sensitivity of 4 dBu. Each model offers two operational modes individually selectable per channel: * “70 V” – Optimized for constant voltage systems but also can be used when load impedance is 8 ohms or higher. Input signal of 4 dBu produces 70.7 Vrms output, for gain of 35.2 dB. -
Page 8: 50 Hz High-Pass Filter
6. Unpacking and visual checks Every Lab.gruppen amplifier is carefully tested and inspected before leaving the factory and should arrive in perfect condition. If any damage is discovered, please notify the shipping carrier immediately. Save the packing materials for the carrier’s inspection and for any future shipping. -
Page 9: Installation
7. Installation 7. Installation 7.1. Mounting The amplifier is one rack unit high (1U) and will fit into a standard EIA 19” rack. The depth is 276 mm (10.9”). The weight is approximately 4.2 kg (9.3 lbs) depending on model type. Free airflow from front-to-rear of the amplifier must be allowed. -
Page 10: Operating Voltage
9. Operating voltage 9. Operating voltage All E Series amplifiers have a universal power supply that accepts mains voltages from 100-240 V @ 50 or 60 Hz. The amplifier requires 85 V to start, but will remain in service with mains voltage dips down to 60 V; however, power output will be limited if it’s less than 100 V. -
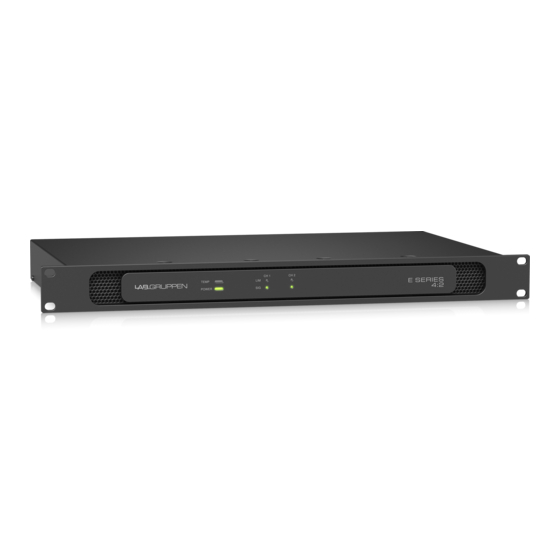
Page 11: Front Panel
11. Front panel 11. Front panel The front panel presents the following amplifier status indicators: 1 Power – Indicates standby mode with amber and on mode with green. 2 Temperature – Flashes amber to for early warning if the temperature is high in either the PSU or one of the output channels. -
Page 12: Rear Panel
12. Rear panel 12. Rear panel Locking IEC; must be grounded/earthed POWER STATE BALANCED INPUTS CHANNEL 1 CHANNEL 2 POWER BALANCED SPEAKER OUTPUTS 00-240V 50-60Hz CH 1 CH 2 E 12:2 CONTROL MONITOR CH 1 CH 2 Designed in Sweden manufactured in Thailand -10dB -10dB... -
Page 13: Input Signal Present Threshold (Spt)
12. Rear panel The following features are located on the rear panel of the E Series: 1 Attenuators – Individual attenuation for the two amplifier channels. Range is 0 dB to -infinity. The 12 o’clock position indicates -10 dB attenuation. The sensitivity for the amplifier is 4 dBu when the attenuator is at 0 dB and 14 dBu when the attenuator is at -10 dB. -
Page 14: Operation And Performance
13. Operation and performance 13. Operation and performance 13.1. Introduction The following sections provide comprehensive information on amplifier connection, setup, operation, and performance. The detailed information included here is essential to realizing the full functionality of the E Series amplifiers. 13.2. -
Page 15: Audio Input And Output Connections, Setup And Features
13. Operation and performance 13.4. Audio input and output connections, setup and features 13.4.1. Balanced / unbalanced Input connection CHANNEL 1 POWER STATE BALANCED INPUTS CHANNEL 2 POWER CONTROL MONITOR CH 1 CH 2 -10dB -10dB -10dB -10dB HIGH HIGH PASS PASS -Inf... -
Page 16: Output Bridge Mode And Asymmetric Loading
Channel 1 Channel 2 Power Power Model RSL switch Load type RSL switch Load type available available E 4:2 70 V 70 V 50 W 70 V 70 V 350 W E 4:2 70 V 70 V 200 W 70 V... - Page 17 Channel 1 Channel 2 Power Power Model RSL switch Load type RSL switch Load type available available E 4:2 70 V 70 V 50 W 70 V 8 ohms 350 W* E 4:2 70 V 70 V 300 W Lo-Z...
-
Page 18: Constant Voltage 70 V System Setup And Operation
E Series models are: • E 12:2, 18 Arms per channel • E 8:2, 16 Arms per channel • E 4:2, 14 Arms per channel 14. Appendices 14.1. Maintenance During normal operation your E Series amplifier will provide trouble-free service. The only user maintenance required is to periodically vacuum clean the air inlets in the front. -
Page 19: Thermal Dissipation
14. Appendices 14.2. Thermal dissipation E 4:2 Line Level Load Output power Watt *1) Thermal Dissipation current *2) Dissi- 120 VAC 230 VAC BTU/hr kCal/hr pated 0.32 0.72 Standby w. remote Power Off. 0.016 0.38 0.186 21.5 21.5 73.3 18.5 Power on, Idling 0.306... -
Page 20: Asymmetric Loading Data
14. Appendices E 12:2 Line Level Load Output power Watt *1) Thermal Dissipation current *2) Dissi- 120 VAC 230 VAC BTU/hr kCal/hr pated 0.032 0.70 Standby w. remote Power Off. 0.019 0.31 0.183 20.7 20.7 70.5 17.8 Power on, Idling 0.315 21.9 21.9... - Page 21 14. Appendices E 4:2 Channel RSL switch Channel load Power output Ch. 1 Ch. 2 Ch. 1 Ch. 2 Ch.1 Ch. 2 70 V 70 V 70 V 70 V 0 W @ 70 V 400 W @ 70 V...
- Page 22 14. Appendices E 8:2 Channel RSL switch Channel load Power output Ch. 1 Ch. 2 Ch. 1 Ch. 2 Ch.1 Ch. 2 unused 70 V unused 70 V unused 800 W @ 70 V 70 V 70 V 70 V 70 V 50 W @ 70 V 750 W @ 70 V...
- Page 23 14. Appendices E 8:2 Channel RSL switch Channel load Power output Ch. 1 Ch. 2 Ch. 1 Ch. 2 Ch.1 Ch. 2 unused 70 V 70 V 70 V unused 1200 W @ 70 V 70 V 70 V 70 V 70 V 100 W @ 70 V 1100 W @ 70 V...
-
Page 24: Technical Specifications
14. Appendices 14.4. Technical specifications General E 12:2 E 8:2 E 4:2 Number of powered channels Total output all channels driven 1200 W 800 W 400 W Max output voltage per channel 100 V / 70 Vrms 100 V / 70 Vrms 100 V / 70 Vrms Max. -
Page 25: Service
15 Service 15. Service International If your Lab.gruppen product requires repair, contact your Lab.gruppen dealer or distributor. Find your local distributor or sales representative via http://labgruppen.com/distributors/. A full listing of service centre is available at http://labgruppen.com/support/find_service_centre/. Factory service In the event a Lab.gruppen product requires factory service, you may contact Lab.gruppen’s service department for return instructions and a Return Authorization number. - Page 26 Notes Notes E SERIES Operation Manual rev 2.0.0...
- Page 27 IDEEA and RSL are trademarks of Lab.gruppen AB. All other trademarks remain the property of their respective owners. Copyright © 2014 Lab.gruppen AB. All rights reserved.