Samsung NX300 User Manual
Hide thumbs
Also See for NX300:
- User manual (203 pages) ,
- Manual del usuario (202 pages) ,
- Service manual (102 pages)
Table of Contents
Advertisement
Quick Links
Download this manual
See also:
Service Manual
Advertisement
Table of Contents

Related Manuals for Samsung NX300


Summary of Contents for Samsung NX300
- Page 1 USER MANUAL ENG This user manual includes detailed usage instructions for your camera. Please read this manual thoroughly.
-
Page 2: Copyright Information
• microSD™, microSDHC™, and microSDXC™ are registered trademarks of the SD Association. PlanetFirst represents Samsung Electronics' commitment to • HDMI, the HDMI logo, and the term “High sustainable development and social responsibility through Definition Multimedia Interface” are eco-driven business and management activities. -
Page 3: Health And Safety Information
Health and safety information Always comply with the following precautions and usage tips to avoid Prevent damage to subjects’ eyesight. dangerous situations and ensure peak performance of your camera. Do not use the flash in close proximity (closer than 1 m/3 ft) to people or animals. - Page 4 • Samsung is not responsible for damage or injuries caused by immediately and contact the manufacturer of the pacemaker or medical unapproved batteries, chargers, cables or accessories.
- Page 5 Do not use the camera if the screen is damaged. terminals on the battery. If the glass or acrylic parts are broken, visit a Samsung service center to This may cause a fire or electric shock. have the camera repaired.
- Page 6 You must plug the small end of the USB cable into your to solve any interference problems you experience. To prevent unwanted camera. interference, use only Samsung-approved devices or accessories. If the cable is reversed, it may damage your files. The manufacturer is not responsible for any loss of data.
-
Page 7: Indications Used In This Manual
Indications used in this manual Icons used in this manual Mode indications Icon Function Mode Indication Smart Auto Additional information Program Safety warnings and precautions Aperture Priority Camera buttons. For example, [Shutter] represents the shutter button. Shutter Priority Page number of related information Manual The order of options or menus you must select to perform Lens Priority... -
Page 8: Table Of Contents
Contents Tips Chapter 1 Concepts in Photography My Camera Shooting postures..................13 Getting started .................... 29 Holding the camera ..................... 13 Unpacking........................29 Standing photography ....................13 Camera layout ....................30 Crouching photography .................... 14 Using the DIRECT LINK button ................32 Using the display ...................... - Page 9 Contents Display icons ....................40 Shooting modes ..................53 t Smart Auto mode ..................53 In Shooting mode ..................... 40 P Program mode ....................... 55 Capturing photos ......................40 Recording videos ......................41 Program Shift ........................ 56 About the level gauge ....................41 Minimum shutter speed ....................
- Page 10 Contents Chapter 2 Optical Image Stabilization (OIS) ............. 89 Shooting Functions Drive (shooting method) ................90 Single ..........................90 Size and Resolution ..................73 Continuous ........................90 Photo size ........................73 Burst ..........................91 Quality ........................... 74 Timer ..........................91 ISO sensitivity ....................
- Page 11 Contents Chapter 3 Chapter 4 Playback/Editing Wireless network Searching and managing files ..............108 Connecting to a WLAN and configuring network settings ....123 Viewing photos ....................... 108 Connecting to a WLAN ..................123 Setting network options ..................124 Viewing image thumbnails ................. 108 Manually setting the IP address ................
- Page 12 Contents Chapter 5 Chapter 6 Camera settings menu Connecting to external devices User settings ....................146 Viewing files on an HDTV or 3D TV ............158 ISO Customizing ..................... 146 Viewing files on an HDTV ..................158 ISO Step ......................... 146 Viewing files on a 3D TV ..................
- Page 13 Contents Chapter 7 Before contacting a service center ............181 Appendix Camera specifications ................184 Glossary ....................... 189 Error messages ..................169 Optional accessories ................. 195 Maintaining the camera................170 Index ......................197 Cleaning the camera ..................... 170 Camera lens and display ..................170 FCC notice ....................
-
Page 14: Concepts In Photography
Concepts in Photography Standing photography Shooting postures Compose your shot; stand up straight with your feet shoulder-length A correct posture for stabilizing the camera is necessary for taking a good apart, and keep your elbows pointed down. photo. Even if you hold a camera correctly, the wrong posture can cause the camera to shake. -
Page 15: Crouching Photography
Concepts in Photography Crouching photography Using the display Compose your shot, crouch with one knee touching the ground, and keep To take photos at high or low angles, tilt the display up or down. You can a straight posture. tilt the display up to 90° upwards ( ) or 45°... -
Page 16: Low-Angle Shot
Concepts in Photography Low-angle shot High-angle shot A low-angle shot is a shot from a camera positioned below your eyeline, A high-angle shot is a shot from a camera positioned above your eyeline, looking up the subject. looking down on the subject. -
Page 17: Aperture
Concepts in Photography Aperture The size of the aperture is represented by a value known as an “F-number. ” The f-number represents the focal length divided by the diameter of the The aperture, a hole that controls the amount of light that enters the lens. -
Page 18: Aperture Value And The Depth Of Field
Concepts in Photography Aperture value and the depth of field The aperture housing contains several blades. These blades move together and control the amount of light passing through the center of the aperture. The You can blur or sharpen the background of a photo by controlling the number of blades also affects the shape of light when shooting night scenes. -
Page 19: Shutter Speed
Concepts in Photography Shutter speed Therefore, the faster the shutter speed, the less light will be let in. Likewise, the slower the shutter speed, the more light will be let in. Shutter speed refers to the amount of time it takes to open and close the As the photos below illustrate, a slow shutter speed allows more time shutter, and it is an important factor in the brightness of a photo, as it to let light in, so the photo becomes brighter. -
Page 20: Iso Sensitivity
Concepts in Photography ISO sensitivity Because a low ISO sensitivity means the camera will be less sensitive to light, you need more light to have an optimal exposure. When using a low The exposure of an image is determined by the sensitivity of the camera. ISO sensitivity, open the aperture more or reduce the shutter speed to This sensitivity is based on international film standards, known as ISO allow more light to enter the camera. -
Page 21: How The Aperture Setting, Shutter Speed, And Iso Sensitivity Control Exposure
Concepts in Photography How the aperture setting, shutter speed, Settings Results and ISO sensitivity control exposure The aperture setting, shutter speed, and ISO sensitivity are closely Fast speed interconnected in photography. The aperture setting controls the opening = less light Shutter speed that regulates the light that enters the camera, while the shutter speed Slow speed... -
Page 22: Correlation Between Focal Length, Angle, And Perspective
Concepts in Photography Correlation between focal length, angle, Long focal length and perspective Focal length, which is measured in millimeters, is the distance between telephoto lens the middle of the lens to its focal point. It affects the angle and perspective of captured images. -
Page 23: Depth Of Field
Concepts in Photography Depth of field What controls out-of-focus effects? Portraits or still-life photos mostly acclaimed by people are the ones on DOF depends on aperture value which the background is out of focus so the subject looks pronounced. Depending on the focused areas, a photo can be blurred or sharpened. The wider the aperture is (namely the lower the aperture value), the lower This is called ‘a low DOF’... - Page 24 Concepts in Photography DOF depends on focal length DOF depends on the distance between the subject and the camera The longer the focal length is, the lower the DOF gets. A telescope lens with a longer focal length than a wide-angle lens with a short focal length The shorter the distance between the subject and the camera is, the lower is better to capture a photo of a low DOF.
-
Page 25: Optical Preview
Concepts in Photography Optical preview Composition You can press the Custom button to view the optical preview before It is fun to capture a photo of the beauty of world with a camera. No capturing a photo. The camera adjusts the aperture to the predefined matter how the world is beautiful, however, a poor composition cannot settings and shows the results on the screen. -
Page 26: Photos With Two Subjects
Concepts in Photography Using the rule of thirds will create photos with stable and compelling Photos with two subjects compositions. Below are a few examples. If your subject is in one corner of the photo, it creates an unbalanced composition. You can stabilize the photo by capturing a second subject in the opposite corner to balance the weight of the photo. -
Page 27: Flash
Concepts in Photography Flash Flash guide number The model number of a flash refers to the flash’s power, and the maximum Light is one of the most important components in photography. It is not amount of light created is represented by a value known as a “guide easy, however, to have an enough amount of light anytime and anywhere. -
Page 28: Bounce Photography
Concepts in Photography Bounce Photography Bounce photography refers to the method of bouncing light off of the ceiling or walls so that the light spreads evenly over the subject. Normally, photos captured with flash may appear unnatural and cast shadows. Subjects in photos captured with bounce photography cast no shadows and look smooth due to evenly spread light. -
Page 29: My Camera
Chapter My Camera Learn about your camera’s layout, display icons, lens, optional accessories, and basic functions. -
Page 30: Getting Started
The illustrations may differ from your actual items. • You can purchase optional accessories at a retailer or a Samsung service center. Samsung is not responsible for any problems caused by using unauthorized accessories. For information about accessories, refer to page 195. -
Page 31: Camera Layout
My Camera Camera layout Name Name Mode dial Microphone • t: Smart Auto mode (p. 53) Hot-shoe cover • P: Program mode (p. 55) • A: Aperture Priority mode (p. 57) Hot-shoe • S: Shutter Priority mode (p. 58) Eyelet for camera strap •... - Page 32 Camera layout My Camera > Name Name Video recording button Delete/Custom button • In Shooting mode: Perform the Start recording a video. assigned function. (p. 150) EV adjust button (p. 102) • In Playback mode: Delete files. Press and hold the button, and then scroll the jog dial to adjust the exposure value.
-
Page 33: Using The Direct Link Button
Camera layout My Camera > Name USB and shutter release port Connect the camera to a computer or shutter release. Use a shutter release cable with a tripod to minimize camera movement. HDMI port Battery chamber/Memory card cover Insert a memory card and battery. Display •... -
Page 34: Inserting The Battery And Memory Card
Insert a memory card with the gold- colored contacts facing down. Memory card Memory card Insert the battery with the Samsung logo Using the memory card adapter facing up. To use micro memory cards with this product, a PC, or a memory card reader, insert the card into an adapter. -
Page 35: Charging The Battery And Turning On Your Camera
My Camera Charging the battery and turning on your camera Charging the battery Turning on your camera Before you use the camera for the first time, you must charge the battery. Set the Power switch to ON. Plug the small end of the USB cable into your camera, and then plug the •... -
Page 36: Performing The Initial Setup
My Camera Performing the initial setup When you turn on your camera for the first time, the initial setup screen Press [C/F] to select an item (Year/Month/Day/Hr/Min/ appears. The language is preset for the country or region where the DST). camera is sold. -
Page 37: Selecting Functions (Options)
My Camera Selecting functions (options) Selecting with buttons Selecting by touch Scroll the jog dial or press [D/I/C/F] to move, and then press [o] Do not use sharp objects, such as pens or pencils, to touch the screen. You can to select an option. -
Page 38: Using M
Selecting functions (options) My Camera > Using m Flicking: Gently flick your finger across the screen. Press [m] or touch on the screen, and then change shooting options or settings. E.g. Selecting the photo size in P mode Rotate the mode dial to P. Press [m] or touch •... -
Page 39: Using The Smart Panel
Selecting functions (options) My Camera > Scroll the jog dial or press [D/I] to move to an option, Using the Smart panel and then press [o]. Press [f] or touch on the screen to access some functions such as • You can also drag the option list, and then touch an option. - Page 40 Selecting functions (options) My Camera > Press [D/I/C/F] to move to EV, and then press [o]. Scroll the jog dial or press [C/F] to adjust the exposure value, and then press [o]. • You can directly select an option by scrolling the jog dial without having to press [o].
-
Page 41: Display Icons
My Camera Display icons In Shooting mode Icon Description Icon Description Auto focus frame AF mode (p. 80) Capturing photos Spot metering area Focus area Face detection Camera shake London White Balance (p. 76) Manual focus scale White Balance micro adjustment Level gauge (p. -
Page 42: Recording Videos
Display icons My Camera > Recording videos 2. Shooting options About the level gauge Icon Description The level gauge helps you align the camera with Video size the horizontal and vertical lines on the display. If the level gauge is not level, calibrate the level AF mode (p. -
Page 43: In Playback Mode
Display icons My Camera > In Playback mode Viewing photos Playing videos London Mode F No Shutter Metering Flash Information Focal Length White Balance Photo Size Date London Stop Capture Description Icon Description Icon Description Captured photo Continuously captured file Playback speed Current file/The total number of files RGB histogram (p. -
Page 44: Changing The Information Displayed
Display icons My Camera > Changing the information displayed Press [D] repeatedly to change the display type. Mode Display type • Basic shooting information (Shooting mode, Shutter speed, Aperture value, Exposure value, ISO sensitivity, etc.) • Basic shooting information + Shooting option buttons (MENU, Fn, AutoShare, Touch AF) + Level gauge •... -
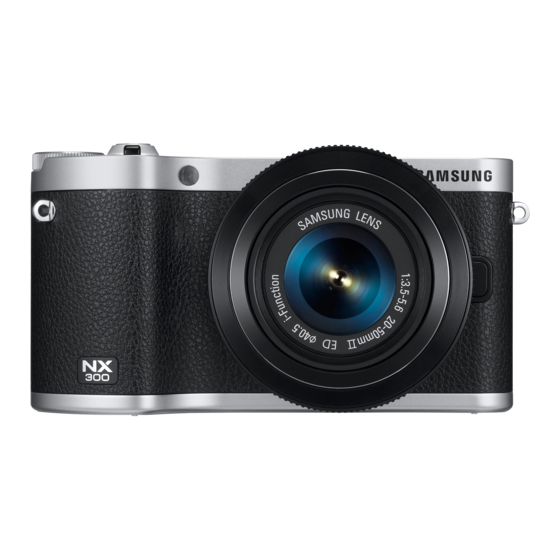
Page 45: Lenses
Lens hood mount index Lens Lens layout i-Function button (p. 60) SAMSUNG 18-55 mm F3.5-5.6 OIS III lens (example) AF/MF switch (p. 80) Lens contacts When not using the lens, attach the lens cap and lens mount cover to protect... -
Page 46: Locking Or Unlocking The Lens
Lenses My Camera > SAMSUNG 20-50 mm F3.5-5.6 ED II lens (example) Locking or unlocking the lens To lock the lens, pull and hold the zoom lock switch away from the camera body and rotate the zoom ring as shown in the illustration. - Page 47 Lenses My Camera > To unlock the lens, rotate the zoom ring as shown in the illustration until SAMSUNG 16 mm F2.4 lens (example) you hear the click. You cannot capture a photo when the lens is locked. Description i-Function button (p. 60) Lens mount index Focus ring (p.
-
Page 48: Lens Markings
A range of supported aperture values. For example, 1:3.5–6.3 means the maximum aperture value range from 3.5 to 6.3. SAMSUNG 18-200 mm F3.5-6.3 ED OIS lens (example) Focal length The distance from the middle of the lens to its focal point (in millimeters). -
Page 49: Accessories
For more information about optional accessories, refer to the manual for each accessory. • The illustrations may differ from the actual items. • You can purchase Samsung-approved accessories at a retailer or a Samsung service center. Samsung is not responsible for damage caused by using another manufacturer's accessories. Description Bulb... -
Page 50: Connecting The External Flash
Accessories My Camera > Connecting the external flash Lock the flash into place by turning the hot-shoe fastening dial clockwise. Remove the hot-shoe cover from the camera. Mount the flash by sliding it into the hot-shoe. Lift up the flash for use. - Page 51 • SEF8A may not be compatible with other NX series cameras. • For more details about optional flashes, refer to the user manual for the flash. Use only Samsung-approved flashes. Using incompatible flashes may damage your camera. Description Display icons...
-
Page 52: Gps Module Layout (Optional)
Accessories My Camera > GPS module layout (optional) Attaching the GPS module Remove the hot-shoe cover from the camera. Mount the GPS module by sliding it into the hot-shoe. Description Status lamp POWER button Hot-shoe fastening dial Hot-shoe connection Battery cover... - Page 53 Accessories My Camera > Lock the GPS module into place by turning the hot-shoe fastening dial towards LOCK. Press the power button of the GPS module.
-
Page 54: Shooting Modes
My Camera Shooting modes t Smart Auto mode Two simple shooting modes—Smart Auto and Smart mode—help you capture photos with numerous automatic settings. Additional modes allow for greater customization of settings. In Smart Auto mode, the camera recognizes surrounding conditions and automatically adjusts factors that contribute to exposure, including shutter speed, aperture value, metering, White Balance, and exposure compensation. - Page 55 Shooting modes My Camera > Rotate the mode dial to t. Icon Description Portraits at night Align your subject in the frame. Landscapes with backlighting Portraits with backlighting Half-press [Shutter] to focus. Portraits • The camera selects a scene. An appropriate scene icon appears at the screen.
-
Page 56: P Program Mode
Shooting modes My Camera > P Program mode • The camera may detect different scenes, even the same subjects, depending on external factors such as camera shake, lighting, and distance to the The camera automatically adjusts shutter speed and aperture value so that subject. -
Page 57: Program Shift
Shooting modes My Camera > Program Shift Minimum shutter speed Program Shift function lets you adjust the shutter speed and aperture Set the shutter speed not to be slower than the selected speed. However, if value while the camera maintains the same exposure. When you scroll the an optimal exposure value cannot be achieved because the ISO sensitivity jog dial to the left, the shutter speed decreases and the aperture value reached the maximum ISO value that is set by Auto ISO Range, shutter... -
Page 58: A Aperture Priority Mode
Shooting modes My Camera > A Aperture Priority mode Rotate the mode dial to A. In Aperture Priority mode, the camera automatically calculates shutter Scroll the jog dial to adjust the aperture value. speed according to the aperture value you choose. •... -
Page 59: S Shutter Priority Mode
Shooting modes My Camera > S Shutter Priority mode Rotate the mode dial to S. In Shutter Priority mode, the camera automatically adjusts the aperture Scroll the jog dial to adjust the shutter speed. value according to the shutter speed you choose. This mode is useful for •... -
Page 60: M Manual Mode
Shooting modes My Camera > M Manual mode Framing mode When you adjust the aperture value or shutter speed, the exposure Manual mode lets you adjust the shutter speed and aperture value changes according to the settings, so the display may darken. With this manually. -
Page 61: Using The Bulb Function
Shooting modes My Camera > i Lens Priority mode Using the Bulb function Use the Bulb function to shoot night scenes or the night sky. While you are pressing [Shutter], the shutter is left open so you can create moving light Using E effects. -
Page 62: Using I-Function In P/A/S/M Modes
Shooting modes My Camera > Using i-Function in P/A/S/M modes Adjust the focus ring to select a value. • You can also scroll the jog dial to adjust the value. When you use the i-Function button on an i-Function lens, you can •... - Page 63 Shooting modes My Camera > Adjust the focus ring to select an option. Available options • You can also scroll the jog dial or drag the screen to select an Shooting mode option. Aperture Shutter Speed White Balance • To select items to appear when you press [i-Function] on the lens in Shooting →...
-
Page 64: Using Z
Shooting modes My Camera > Using Z Half-press [Shutter] to focus, and then press [Shutter] to capture the photo. The Z allows you to zoom in on a subject with less degradation of photo quality than the Digital zoom. However, the photo resolution may •... -
Page 65: Smart Mode
Shooting modes My Camera > s Smart mode Option Description Macro Capture small or close-up subjects. In Smart mode, you can capture photos with options that are preset for a Action Freeze Capture subjects moving at high speed. specific scene. Rich Tones Capture a photo with vibrant colors. -
Page 66: Using The Best Face Mode
Shooting modes My Camera > Using the Best Face mode Touch the best image from the 5 faces that were captured. • Repeat steps 4 and 5 to replace the rest faces of the photo. In Best Face mode, you can capture multiple photos and replace faces to create the best possible image. -
Page 67: Capturing Panoramic Photos
Shooting modes My Camera > Capturing panoramic photos With [Shutter] pressed, slowly move the camera in the direction you selected. Capture a 2D or 3D panoramic photo. Captured 3D panoramic photos can • In 3D Panorama mode, you can capture a scene only in horizontal be viewed only on a 3D TV or 3D monitor. - Page 68 Shooting modes My Camera > • • The resolution varies depending on the panoramic photo you captured. For best results when capturing panoramic photos, avoid the following: • In Panorama mode, some shooting options are not available. moving the camera too quickly or too slowly •...
-
Page 69: Recording A Video
Shooting modes My Camera > Rotate the mode dial to t, P, A, S, M, i, or s. Recording a video • This feature may not work in some modes. In Shooting mode, you can record Full HD videos (1920X1080) by pressing (Video recording). -
Page 70: 3D Mode
PC, you can lose files on the card or cause a change in the capacity of the card. SAMSUNG 45 mm F1.8 [T6] 2D/3D lens (example) • When you press the video recording button, Z turns off. - Page 71 Shooting modes My Camera > • 3D mode is always on, regardless of the mode dial of the camera, except • Available shooting options differ compared to other shooting modes. • You can select either 4.1M (2688X1512) or 2.1M (1920X1080) photo size. •...
-
Page 72: Available Functions By Shooting Mode
Shooting modes My Camera > Available functions by shooting mode Function Available in Shortcut P/A/S/M Framing Mode (p. 59) For details about shooting functions, see Chapter 2. OIS (Anti-Shake) (p. 89) P/A/S/M/i/s*/t* Press a shortcut for each function. Drive (Continuous/ Function Available in Shortcut... -
Page 73: Shooting Functions
Chapter Shooting Functions Learn about the functions you can set in Shooting mode. You can enjoy more customized photos and videos by using the shooting functions. -
Page 74: Size And Resolution
Shooting Functions Shooting Functions Shooting Functions Size and Resolution Photo size Icon Size Recommended for 5472x3648 (3:2) Printing on A1 paper. As you increase the resolution, your photo or video will include more pixels, so it can be printed on larger paper or displayed on a larger screen. 3888x2592 (3:2) Printing on A2 paper. -
Page 75: Quality
Size and Resolution Shooting Functions > Quality Icon Format Description Normal: The camera saves photos in either the JPEG or RAW format. • Compressed for normal quality. JPEG • Recommended for printing in small size or Photos captured by a camera are often transformed to the JPEG format uploading to the web. -
Page 76: Iso Sensitivity
Shooting Functions Shooting Functions Shooting Functions ISO sensitivity The ISO sensitivity value represents the sensitivity of camera to light. Examples The larger the ISO value, the more sensitive the camera is to light. Consequently, by selecting a higher ISO sensitivity value, you can capture photos in dim or dark places at faster shutter speeds. -
Page 77: White Balance
Shooting Functions Shooting Functions Shooting Functions White Balance White Balance represents the light source that influences on the color of a Icon Description photo. Fluorescent White: Select when shooting under a daylight fluorescent lamp. Especially for white fluorescent light with a color The color of a photo depends on the type and quality of the light source. -
Page 78: Customizing Preset White Balance Options
White Balance Shooting Functions > Customizing preset White Balance options Icon Description Color Temperature: Manually adjust the color temperature of You can also customize preset White Balance options. the light source. Color temperature is a measurement in degrees Kelvin that indicates the specific type of light source. As the color →... - Page 79 White Balance Shooting Functions > Examples Auto WB Daylight Fluorescent Daylight Tungsten...
-
Page 80: Picture Wizard (Photo Styles)
Shooting Functions Shooting Functions Shooting Functions Picture Wizard (photo styles) Picture Wizard lets you apply different photo styles to your photo to create various looks and emotional moods. You can also create and save your own photo styles by adjusting color, saturation, sharpness, and contrast for each style. -
Page 81: Af Mode
Shooting Functions Shooting Functions Shooting Functions AF mode Learn how to adjust the camera’s focus according to the subjects. To set the auto → In Shooting mode, press [F] an option. focus mode, You can select a focusing mode appropriate to the subject among Single Auto Focus, Continuous Auto Focus, and Manual Focus. -
Page 82: Single Af
AF mode Shooting Functions > Single AF Continuous AF Single AF is appropriate for shooting a still subject. When you press While you are pressing [Shutter] halfway, the camera continues to [Shutter] halfway, the focus fixes in the focus area. The area turns green automatic focusing. -
Page 83: Manual Focus
AF mode Shooting Functions > Manual focus You can manually focus on a subject by rotating the focus ring on the lens. The MF Assist function lets you easily achieve a focus. While you are rotating the focus ring, the focus area is magnified. When you use the Focus Peaking function, the color you selected appears on the focused subject. -
Page 84: Af Area
Shooting Functions Shooting Functions Shooting Functions AF area The AF area function changes the positions of the focus area. Selection AF Generally, cameras focus on the nearest subject. When there are a lot of You can set the focus on an area you want. Apply an out-of-focus effect to subjects, however, unwanted subjects can be in focus. -
Page 85: Multi Af
AF area Shooting Functions > Multi AF Face detection AF The camera displays a green rectangle in places where focus is set The camera focuses on human faces preferentially. Faces of up to correctly. The photo is divided into two or more areas, and the camera 10 people can be detected. -
Page 86: Self-Portrait Af
AF area Shooting Functions > Self-Portrait AF It can be difficult to check whether your face is in focus when you are taking a self-portrait. When this function is on, the beep from the camera gets faster when your face is located at the center of the composition. -
Page 87: Touch Af
Shooting Functions Shooting Functions Shooting Functions Touch AF Select or focus on a focal area that you touch on the screen. Additionally, Tracking AF focus on the subject and capture a photo by touching on the screen. Tracking AF allows you to track and automatically focus on your subject, →... -
Page 88: One Touch Shot
Touch AF Shooting Functions > One touch shot • If you do not select a focus area, the Auto Focus function does not work. • Tracking a subject may fail when: You can capture a photo with the touch of your finger. As you touch on a the subject is too small subject, the camera focuses on the subject automatically and captures a the subject moves excessively... -
Page 89: Focus Assist
Shooting Functions Shooting Functions Shooting Functions Focus assist In the manual focus mode, you have to rotate the focus ring on the lens to * Default focus. When you use the MF Assist function or the Focus Peaking function, Option Description you can achieve a clearer focus. -
Page 90: Optical Image Stabilization (Ois)
Shooting Functions Shooting Functions Shooting Functions Optical Image Stabilization (OIS) Use the Optical Image Stabilization (OIS) function to minimize camera shake. OIS may not be available with some lenses. Camera shake tends to occur in dark places or when shooting indoors. In such cases, the camera uses slower shutter speeds in order to increase the amount of light taken in, which can result in a blurry photo. -
Page 91: Drive (Shooting Method)
Shooting Functions Shooting Functions Shooting Functions Drive (shooting method) You can set the shooting method such as Continuous, Burst, Timer and so Continuous Continuously capture photos while you are pressing [Shutter]. You can Select Single to capture one photo at a time. Select Continuous or Burst capture up to 5 photos (Continuous Normal) or 8.6 photos (Continuous to shoot fast moving subjects. -
Page 92: Burst
Drive (shooting method) Shooting Functions > Burst Timer Consecutively capture up to 10 shots per second (3 seconds), 15 shots per Capture a photo with a delay of 2 to 30 seconds. The delay is adjustable in second (2 seconds), or 30 shots per second (1 second) when you press increments of 1 second. -
Page 93: Auto Exposure Bracketing (Ae Bracket)
Drive (shooting method) Shooting Functions > Auto Exposure Bracketing (AE Bracket) White Balance Bracketing (WB Bracket) When you press [Shutter], the camera captures 3 consecutive photos: the When you press [Shutter], the camera captures 3 consecutive photos: original, one a step darker, and one a step lighter. Use a tripod to prevent the original and two more with different White Balance settings. -
Page 94: Picture Wizard Bracketing (P Wiz Bracket)
Drive (shooting method) Shooting Functions > Picture Wizard Bracketing (P Wiz Bracket) Bracketing setting When you press [Shutter], the camera captures three consecutive photos, You can set up the options for AE Bracket, WB Bracket, and P Wiz Bracket. each with a different Picture Wizard setting. The camera captures a photo (p. -
Page 95: Flash
If you select Off, the flash does not fire even when an external flash is Fill-in Red: The flash fires whenever you capture a photo and attached. reduces red-eyes. Use only Samsung-approved flashes. Using incompatible flashes may damage your camera. 94 94... -
Page 96: Reducing The Red-Eye Effect
Flash Shooting Functions > Reducing the red-eye effect Adjusting the flash intensity If the flash fires when you capture a photo of a person in the dark, a red When the flash is on, adjust the flash intensity +/-2 levels. glow may appear in the eyes. - Page 97 Flash Shooting Functions > • You can also drag the slider or touch +/- to adjust the intensity. • Adjusting the flash intensity may not be effective when: the subject is too close to the camera you set a high ISO sensitivity the exposure value is too big or too small •...
-
Page 98: Metering
Shooting Functions Shooting Functions Shooting Functions Metering The metering mode refers to the way in which a camera measures the Multi quantity of light. The Multi mode calculates the amount of light in multiple areas. When The camera measures the amount of light in a scene, and in many of its light is sufficient or insufficient, the camera adjusts the exposure by modes, uses the measurement to adjust various settings. -
Page 99: Spot
Metering Shooting Functions > Spot Center-weighted The Spot mode calculates the amount of light in the center. When you The Center-weighted mode calculates a broader area than the Spot mode capture a photo in conditions where there is a strong backlight behind a does. -
Page 100: Measuring The Exposure Value Of The Focus Area
Metering Shooting Functions > Measuring the exposure value of the focus area When this function is turned on, the camera automatically sets an optimal exposure by calculating the brightness of the focus area. This function is only available when you select Spot metering or Multi metering, and Selection AF. -
Page 101: Dynamic Range
Shooting Functions Shooting Functions Shooting Functions Dynamic Range This function automatically corrects the loss of bright detail that can occur Icon Description due to shading differences in the photo. Off: Do not use Dynamic Range. Smart Range+: Correct the loss of bright detail. →... -
Page 102: Smart Filter
Shooting Functions Shooting Functions Shooting Functions Smart Filter Smart Filter lets you apply special effects to your photos. You can select Option Description various filter options to create special effects that are difficult to be Negative Apply a negative film effect. achieved with normal lenses. -
Page 103: Exposure Compensation
Shooting Functions Shooting Functions Shooting Functions Exposure compensation The camera automatically sets the exposure by measuring the levels of light from the photo’s composition and the position of a subject. If the exposure set by the camera is higher or lower than you expected, you can adjust the exposure value manually. -
Page 104: Exposure Lock
Shooting Functions Shooting Functions Shooting Functions Exposure lock When you cannot achieve an appropriate exposure because of a strong color contrast, lock the exposure, and then capture a photo. After locking the exposure, aim the lens where you desire, and then press [Shutter]. -
Page 105: Video Functions
Shooting Functions Shooting Functions Shooting Functions Video functions The functions available for video are explained below. Movie quality Set the Movie quality. Movie size → → → To set movie In Shooting mode, press [m] Movie Quality quality options, an option. Set the movie size. -
Page 106: Multi Motion
Video functions Shooting Functions > Multi Motion Fader Set the playing speed of a video. You can fade in or fade out a scene using the fader function on the camera without having to do it on a PC. Set the fade in option to gradually fade in →... -
Page 107: Voice
Video functions Shooting Functions > Voice Mic Level Sometimes, a muted video is more appealing than the one with sound. Set the mic level for the shooting conditions. Turn the voice off to record a muted video. → → → To set the mic In Shooting mode, press [m] Mic Level... -
Page 108: Playback/Editing
Chapter Playback/Editing Learn about how to play back and edit photos and videos. Refer to chapter 6 for editing files on a PC. -
Page 109: Searching And Managing Files
Playback/Editing Searching and managing files Learn how to view photo and video thumbnails and how to protect or Viewing image thumbnails delete files. In order to search for photos and videos you want, convert to the thumbnail view. The thumbnail view displays multiple images at a time If you perform no operations for a while, information and icons on the screen disappear. -
Page 110: Viewing Files By Category
Searching and managing files Playback/Editing > Viewing files by category Viewing files as a folder Continuous and burst shots appear as a folder. Selecting a folder will play → → → In the thumbnail view, press [m] Filter back all photos automatically. Deleting a folder will delete all photos in the a category. -
Page 111: Protecting Files
Searching and managing files Playback/Editing > Protecting files Lock/Unlock all files Lock or unlock all files. Protect your files from accidental deletion. → → → In Playback mode, press [m] Protect All. → → → In Playback mode, press [m] Protect Select. -
Page 112: Deleting Files
Searching and managing files Playback/Editing > Deleting files Deleting multiple files You can select multiple files and delete them. Delete files in Playback mode and secure more space on your memory card. Protected files are not deleted. → → → In Playback mode, press [m] Delete Select. -
Page 113: Deleting All Files
Searching and managing files Playback/Editing > Deleting all files You can delete all files on the memory card at once. In Playback mode, press [m]. Select z → → Delete All. When the pop-up message appears, select Yes. -
Page 114: Viewing Photos
Playback/Editing Viewing photos Enlarging a photo Viewing a slide show You can enlarge photos when viewing them in Playback mode. You can You can view photos in a slide show, apply various effects to the slide also use the Trim function to extract the portion of the image displayed on show, and play background music. -
Page 115: Auto Rotating
Viewing photos Playback/Editing > Press [m]. Creating a print order (DPOF) DPOF (Digital Print Order Format) lets you set the number of copies to be Select Start Slide Show. printed. View the slide show. The camera saves the DPOF information in the MISC folder of your memory card. -
Page 116: Playing Videos
Playback/Editing Playing videos In Playback mode, you can play a video, capture an image from a video, or Trimming a video during playback crop a video to save as another file. In Playback mode, scroll to a video, and then touch Press [o] or touch to start playing the video. -
Page 117: Capturing An Image During Playback
Playing videos Playback/Editing > Press [f] or touch End Point. Capturing an image during playback While viewing a video, press [o] or touch at the point where Press [f] or touch Trim to trim a video. you want to capture an image. •... -
Page 118: Editing Photos
Playback/Editing Editing photos Perform photo editing tasks, such as resizing, rotating, or reducing red-eye Cropping a photo effects. Edited photos are saved as new files under different file names. Photos captured in some modes cannot be edited with the Image Edit →... -
Page 119: Rotating A Photo
Editing photos Playback/Editing > Rotating a photo Resizing photos Change the size of a photo and save it as a new file. → Touch → Touch Touch an option. Rotate : Right 90° Touch an option. Resize : 10.1M 3:2 Touch OK. -
Page 120: Adjusting Your Photos
Editing photos Playback/Editing > Adjusting your photos Press [C/F] to adjust the option. • You can also drag the slider or touch +/- to adjust the option. You can correct captured photos by adjusting the brightness, contrast, or • If you selected , skip to step 4. -
Page 121: Retouching Faces
Editing photos Playback/Editing > Retouching faces Reducing red-eye → → Touch Touch Press [C/F] to adjust the option. Touch OK. • • You can also drag the slider or touch +/- to adjust the option. To cancel correction, touch • As the number increases, the skin tone becomes brighter and Touch to save. -
Page 122: Applying Smart Filter Effects
Editing photos Playback/Editing > Applying Smart Filter effects Option Description Oil Sketch Apply an oil sketching effect. Apply special effects to your photos. Ink Sketch Apply an ink sketching effect. Acryl Apply an acryl painting effect. Touch , and then touch an option. Negative Apply a negative film effect. -
Page 123: Wireless Network
Chapter Wireless network Learn how to connect to wireless local area networks (WLANs) and use functions. -
Page 124: Connecting To A Wlan And Configuring Network Settings
Wireless network Connecting to a WLAN and configuring network settings Learn to connect via an access point (AP) when you are in a range of a Icon/Option Description WLAN. You can also configure network settings. Ad hoc AP Secured AP WPS AP Connecting to a WLAN Signal strength... -
Page 125: Setting Network Options
Connecting to a WLAN and configuring network settings Wireless network > Setting network options Manually setting the IP address In the Wi-Fi Setting screen, move to an AP, and then press In the Wi-Fi Setting screen, move to an AP, and then press [F] or touch [F] or touch →... -
Page 126: Using The Login Browser
Connecting to a WLAN and configuring network settings Wireless network > Using the login browser • You may not be able to select some items depending on the page you connected to. This does not indicate a malfunction. • You can enter your login information via the login browser when The login browser may not close automatically after you log into some pages. -
Page 127: Network Connection Tips
Connecting to a WLAN and configuring network settings Wireless network > • If you cannot connect to a WLAN, try another AP from the available AP Network connection tips list. • You must insert a memory card to use the Wi-Fi features. •... -
Page 128: Entering Text
Connecting to a WLAN and configuring network settings Wireless network > Entering text Icon Description Move the cursor. Learn how to enter text. The icons in the table let you move the cursor, Stop entering text and return to the previous page. change the case, etc. -
Page 129: Saving Files To A Smart Phone Automatically
6. if needed. • You should install Samsung SMART CAMERA App on your phone or device before using this feature. You can download the application from Samsung Select the camera from the list and connect the smart phone Apps, the Google Play Store, or the Apple App Store. -
Page 130: Sending Photos Or Videos To A Smart Phone
On the camera, select a sending option. if needed. • You should install Samsung SMART CAMERA App on your phone or device • If you select Select Files from Smartphone, you can use your before using this feature. You can download the application from Samsung smart phone to view and share files stored on the camera. - Page 131 Sending photos or videos to a smart phone Wireless network > Select the camera from the list and connect the smart phone to the camera. • The smart phone can connect to only one camera at a time. On the camera, allow the smart phone to connect to your camera.
-
Page 132: Using A Smart Phone As A Remote Shutter Release
• For iOS devices, turn on the Wi-Fi feature before turning on the • You should install Samsung SMART CAMERA App on your phone or device application. before using this feature. You can download the application from Samsung Apps, the Google Play Store, or the Apple App Store. Samsung SMART •... - Page 133 Using a smart phone as a remote shutter release Wireless network > On the camera, allow the smart phone to connect to your On the smart phone, touch and hold to focus. camera. • The focus is automatically set to Multi AF. •...
-
Page 134: Using Auto Backup To Send Photos Or Videos
Wireless network Using Auto Backup to send photos or videos You can send photos or videos that you captured with the camera to a PC Sending photos or videos to a PC wirelessly. Rotate the mode dial to B. Select Installing the program for Auto Backup on •... - Page 135 Using Auto Backup to send photos or videos Wireless network > Select a backup PC. • When you connect the camera to the WLAN, select the AP that is connected to the PC. • If you have performed a backup before, move to step 4. •...
-
Page 136: Sending Photos Or Videos Via Email
Wireless network Sending photos or videos via email You can change settings in the email menu and send photos or videos Select the Name box, enter your name, and then touch . stored on the camera via email. Sender Setting Name Changing email settings Email... -
Page 137: Setting An Email Password
Sending photos or videos via email Wireless network > Setting an email password Enter a 4-digit password. Rotate the mode dial to B. Enter the password again. Select When the pop-up appears, select OK. • The camera will automatically attempt to connect to a WLAN via the most recently connected AP device. -
Page 138: Changing The Email Password
Sending photos or videos via email Wireless network > Changing the email password Sending photos or videos via email Rotate the mode dial to B. You can send photos or videos stored on the camera via email. For information about entering text, refer to "Entering text". (p. 127) Select Rotate the mode dial to B. - Page 139 Sending photos or videos via email Wireless network > Select the Receiver box, enter an email address, and then • Even if a photo appears to have transferred successfully, errors with the touch . recipient’s email account may cause the photo to be rejected or recognized as spam.
-
Page 140: Using Photo Or Video Sharing Websites
Wireless network Using photo or video sharing websites Upload your photos or videos to file sharing websites. Available websites Enter your ID and password to log in. will be displayed on your camera. To upload files to some websites, you •... -
Page 141: Uploading Photos Or Videos
Using photo or video sharing websites Wireless network > Uploading photos or videos • You can set an upload folder for Facebook by pressing [m], and then selecting Upload Folder (Facebook) on the website's list screen. • You cannot upload files if the file size exceeds the limit. The maximum photo Access the website with your camera. -
Page 142: Using Allshare Play To Send Files
Wireless network Using AllShare Play to send files → You can upload files from your camera to AllShare Play online storage or Enter your ID and password, and then select Login view files on an AllShare Play device connected to the same AP. •... -
Page 143: Viewing Photos Or Videos On Devices That Support Allshare Play
Using AllShare Play to send files Wireless network > Viewing photos or videos on devices that On the AllShare Play device, browse the shared photos or videos. support AllShare Play • For information about searching for the camera and browsing the Rotate the mode dial to B. - Page 144 Using AllShare Play to send files Wireless network > • • You can share up to 1,000 recent files. If you reorder or sort files on the camera while viewing them on an AllShare • Play device, you must repeat the initial set-up process to update the list of On an AllShare Play device, you can view only photos or videos captured with files on the device.
-
Page 145: Sending Photos Using Wi-Fi Direct
Wireless network Sending photos using Wi-Fi Direct When the camera connects via a WLAN to a device that supports the Wi-Fi On the device, allow the camera to connect to the device. Direct function, you can send photos to the device. This feature may not be •... -
Page 146: Camera Settings Menu
Chapter Camera settings menu Learn about the user settings and general settings menu. You can adjust the settings to better suit your needs and preferences. -
Page 147: User Settings
Camera settings menu User settings You can set the user environment with these settings. Auto ISO Range You can set the maximum ISO value under which each EV step is chosen → → To set user options, In Shooting mode, press [m] an option. -
Page 148: Bracket Set
User settings Camera settings menu > Bracket Set DMF (Direct Manual Focus) You can set up the options for AE Bracket, WB Bracket, and P Wiz Bracket. You can adjust the focus manually by rotating the focus ring after achieving the focus by half-pressing [Shutter]. This feature may not be Option Description available with some lenses. -
Page 149: Color Space
User settings Camera settings menu > Color space The color space option allows you to select methods for representing Adobe RGB colors. Digital imaging devices such as digital cameras, monitors, and printers have their own methods for representing colors, which are called color spaces. -
Page 150: Distortion Correct
User settings Camera settings menu > Distortion Correct User Display You can correct lens distortion that might occur from lenses. You can add or remove shooting information from the display. This feature may not be available with some lenses. London Touch Operation Set to enable touch operation in Shooting mode. -
Page 151: Key Mapping
User settings Camera settings menu > Key Mapping Description Histogram You can change the function assigned to the Custom button or DIRECT Set the histogram on the display on or off. LINK button. About histogram * Default A histogram is a graph that shows the brightness distribution of a Button Function photo. -
Page 152: Grid Line
User settings Camera settings menu > Grid Line Select a guide to help you compose a scene. (Off*, 3 X 3, 2 X 2, Cross, Diagonal) AF Lamp When shooting in dark places, turn the AF lamp on in order to have a better auto focus. -
Page 153: Setting
Camera settings menu Setting Learn to configure your camera's settings. * Default Item Description → → Adjust the display brightness, auto brightness setting, To set Setting In Shooting or Playback mode, press [m] display color, or level gauge. options, an option. •... - Page 154 Setting Camera settings menu > * Default * Default Item Description Item Description Set power shut off time. The camera shuts off if you do not Set the video signal output appropriate for your country use it for the time you set. (30 sec, 1 min*, 3 min, 5 min, when connecting the camera to an external video device 10 min, 30 min) such as a monitor or HDTV.
- Page 155 Setting Camera settings menu > * Default * Default Item Description Item Description Select an option for playing files on a 3D TV. Set the method of numbering files and folders. • Side by Side*: Displays two images next to each other. •...
- Page 156 • GPS Valid Time Settings: Set the time to use the last • You can download firmware upgrades from location information when the camera fails to receive www.samsung.com. GPS signals. If the camera fails to receive GPS signals after Device •...
- Page 157 Setting Camera settings menu > * Default Item Description • Sensor Cleaning: Remove dust from the sensor. • Start-Up Action: When on, the camera performs sensor cleaning each time you turn it on. (Off*, On) As this product uses interchangeable lenses, the sensor Sensor can get dust on it when you change lenses.
-
Page 158: Connecting To External Devices
Chapter Connecting to external devices Make full use of the camera by connecting it to external devices such as a computer, HDTV or 3D TV. -
Page 159: Viewing Files On An Hdtv Or 3D Tv
Connecting to external devices Viewing files on an HDTV or 3D TV Play back photos or videos by connecting your camera to an HDTV (3D TV) Turn on the camera. using an optional HDMI cable. • The camera automatically enters into Playback mode when you connect it to an HDTV. -
Page 160: Viewing Files On A 3D Tv
Viewing files on an HDTV or 3D TV Connecting to external devices > Viewing files on a 3D TV Move to a 3D file, and then press [I] to switch to 3D mode. • Press [I] again to switch to 2D Mode. You can view photos or videos captured in 3D mode or with the 3D Panorama option in Smart mode on a 3D TV. -
Page 161: Transferring Files To Your Computer
Connecting to external devices Transferring files to your computer Transfer files on a memory card to your computer by connecting the Turn on the camera. camera to the PC. • The computer recognizes the camera automatically. → On your computer, select My Computer Removable Disk →... -
Page 162: Disconnecting The Camera (For Windows Xp)
Transferring files to your computer Connecting to external devices > Disconnecting the camera (for Windows XP) Transferring files to your Mac OS With Windows Vista, Windows 7, and Windows 8, the methods for disconnecting the camera are similar. Mac OS 10.5 or later is supported. Ensure that no data is being transferred between the camera and the computer. - Page 163 Transferring files to your computer Connecting to external devices > Turn on the camera. • The computer recognizes the camera automatically and displays a removable disk icon. Open the removable disk. Transfer photos or videos to the Mac OS computer.
-
Page 164: Using Programs On A Pc
Connecting to external devices Using programs on a PC You can view and edit files using the provided programs. You can also send Using i-Launcher the files to a PC wirelessly. i-Launcher allows you to play back files with Multimedia Viewer and provides a link to download the PC Auto Backup program. -
Page 165: Requirements For Mac Os
Others USB 2.0 port, CD-ROM drive Opening i-Launcher On your computer, select Start → All Programs → Samsung → i-Launcher → Samsung i-Launcher. Or, click Applications → Samsung → i-Launcher on your Mac OS computer. -
Page 166: Using Multimedia Viewer
Using programs on a PC Connecting to external devices > Using Multimedia Viewer Description File name Multimedia Viewer allows you to play back files. From the Samsung i-Launcher screen, click Multimedia Viewer. Enlarged area Histogram • Multimedia Viewer supports the following formats: Open the selected file. -
Page 167: Downloading The Firmware
Downloading the firmware From the Samsung i-Launcher screen, click Firmware Upgrade. Downloading the PC Auto Backup program From the Samsung i-Launcher screen, click PC Auto Backup. For information about installing the PC Auto Backup program, refer to page 133. Description File name Adjust the volume. -
Page 168: Installing Adobe Photoshop Lightroom
Using programs on a PC Connecting to external devices > Installing Adobe Photoshop Lightroom Using Adobe Photoshop Lightroom Photos captured by a camera are often transformed to JPEG formats and Insert Adobe Photoshop Lightroom DVD-ROM into your PC. stored in the memory according to the settings of the camera at the time of shooting. -
Page 169: Appendix
Chapter Appendix Get information about error messages, camera maintenance, trouble shooting tips, specifications, and optional accessories. -
Page 170: Error Messages
Appendix Error messages When the following error messages appear, try these remedies. Error messages Suggested remedies Folder and file Error messages Suggested remedies File names do not match the DCF standard. Transfer number are max the files on the memory card to your computer and The lens is locked. -
Page 171: Maintaining The Camera
Appendix Maintaining the camera Cleaning the camera Image sensor Depending on different shooting conditions, dust may appear in photos because the image sensor is exposed to the external environment. This Camera lens and display problem is normal, and the exposure to dust occurs in everyday use of the camera. -
Page 172: Using Or Storing The Camera
Maintaining the camera Appendix > Using or storing the camera Using on beaches or shores • Protect your camera from sand and dirt when you use it on beaches or in other similar areas. Inappropriate places to use or store the camera •... -
Page 173: Using The Camera With Caution In Humid Environments
Take the camera to a service the camera yourself. Any damage that results from unqualified Samsung service center to have it repaired. service is not covered by your warranty. • Never place cameras, batteries, chargers, or accessories near, on, or in heating devices, such as microwave ovens, stoves, or radiators. -
Page 174: About Memory Card
Maintaining the camera Appendix > About memory card Memory card adapter Supported memory card This product supports SD (Secure Digital), SDHC (Secure Digital High Memory card Capacity), SDXC (Secure Digital eXtended Capacity), UHS-1 (Ultra High Speed-1), microSD, microSDHC, microSDXC, or microUHS-1 memory cards. To use micro memory cards with this product, a PC, or a memory card reader, insert the card into an adapter. -
Page 175: Memory Card Capacity
Maintaining the camera Appendix > Memory card capacity The memory capacity may differ depending on shooting scenes or shooting conditions. These capacities are based on a 2 GB SD card. Quality Size Super Fine Fine Normal RAW + S.Fine RAW + Fine RAW + Normal 20.0M (5472X3648) 10.1M (3888X2592) - Page 176 Maintaining the camera Appendix > Quality Size Normal Approx. 10' 10" Approx. 12' 43" 1920X1080 (60 fps) Approx. 17' 41" Approx. 22' 09" 1920X1080 (30 fps) Approx. 23' 38" Approx. 29' 24" 1920X1080 (15 fps) Approx. 21' 35" Approx. 27' 02" 1920X810 (24 fps) Video Approx.
-
Page 177: Cautions When Using Memory Cards
Maintaining the camera Appendix > • Prevent memory cards from making contact with liquids, dirt, or foreign Cautions when using memory cards substances. If dirty, wipe the memory card clean with a soft cloth before • Avoid memory cards to very cold or very hot temperatures (below you insert the memory card in your camera. -
Page 178: About The Battery
Do not rest the device on flammable surfaces, such as bedding, carpets, or electric blankets for a prolonged period. • Use only Samsung-approved batteries. When the device is switched on, do not leave it in any confined space for a prolonged period. -
Page 179: Battery Life
Maintaining the camera Appendix > Battery life Notes about using the battery • Avoid exposing batteries to very cold or very hot temperatures (below Shooting mode Average time / Number of photos 0 °C/32 °F or above 40 °C/104 °F). Extreme temperatures can reduce the Photos Approx. -
Page 180: Cautions About Using The Battery
Maintaining the camera Appendix > • If you connect the camera to an external power source when the battery Cautions about using the battery is depleted, using high energy-consuming functions will cause the Protect batteries, chargers, and memory cards from damage. camera to turn off. -
Page 181: Notes About Charging With A Computer Connected
Maintaining the camera Appendix > Notes about charging with a computer connected • Use only the provided USB cable. • The battery may not charge when: you use a USB hub other USB devices are connected to your computer you connect the cable to the port on the front side of your computer the USB port of your computer does not support the power output standard (5 V, 500 mA) Handle and dispose of batteries and chargers with care... -
Page 182: Before Contacting A Service Center
Appendix Before contacting a service center If you are having trouble with your device, try these troubleshooting Situation Suggested remedies solutions before contacting a service professional. • There is no space on the memory card. Delete unnecessary files or insert a new card. •... - Page 183 Before contacting a service center Appendix > Situation Suggested remedies Situation Suggested remedies • Turn off your camera, and then turn it on again. The colors in the An incorrect White Balance can create unrealistic • Remove your memory card, and then insert it photo do not match color.
- Page 184 Insert Start screen, and then select All apps appears when you a fully charged battery and wait at least 72 Samsung i-Launcher.) Or, click Applications hours in power off status for the internal power power on the camera Samsung i-Launcher on your Mac OS source to be recharged.
-
Page 185: Camera Specifications
Approx. 100 % Color filter RGB primary color filter Angle Tiltable (Up 90°, Down 45°) Lens Mount Grid Line, Icons, Histogram, Distance Scale, Level Type Samsung NX Mount User display gauge Available lens Samsung lenses Focusing Image Stabilization Type Phase Detection & Contrast AF... - Page 186 Camera specifications Appendix > Shutter Drive Mode Electronically controlled vertical-run focal plane Single, Continuous, Burst (5M only), Timer, Type shutter Mode Bracket (Auto Exposure, White Balance, Picture Wizard) • Auto: 1/6,000–30 sec. • JPEG: High (8.6 fps), Normal (5 fps) •...
- Page 187 Appendix > Flash EV -2–+2 EV (0.5 EV Step) Beauty Face, Best Face, Landscape, Macro, Action Freeze, Rich Tones, Panorama, Waterfall, Smart mode Optional Samsung external flashes: Silhouette, Sunset, Night, Fireworks, Light Trace, External flash SEF42A, SEF220A Creative Shot Sync terminal...
- Page 188 Camera specifications Appendix > Video Playback Type MP4 (H.264) Single image, Thumbnails (15/28), Slide show, Type Movie Format Movie: H.264, Sound: AAC Smart Filter, Red-eye Fix, Resize, Rotate, Edit Program, Aperture Priority, Shutter Priority, Face Retouch, Brightness, Contrast Movie AE mode Manual Vignetting, Miniature, Colored Pencil, Watercolor, Movie clip...
- Page 189 Camera specifications Appendix > Wireless network Power Source Type IEEE 802.11b/g/n support Dual Band Rechargeable battery: BP1130 (1,130 mAh) Type * The power source may differ depending on your region. MobileLink, Remote Viewfinder, Auto Backup, Dimensions (W X H X D) Function Email, SNS &...
-
Page 190: Glossary
Appendix Glossary AP (Access Point) AEL/AFL (Auto Exposure Lock/Auto Focus Lock) An access point is a device that allows wireless devices to connect to a These features help you lock the exposure or focus on which you want to wired network. focus or calculate the exposure. - Page 191 Glossary Appendix > Camera shake (Blur) Composition If the camera is moved while the shutter is open, the entire image may Composition in photography means arranging objects in a photo. Usually, appear blurred. This occurs more often when the shutter speed is slow. abiding by the rule of thirds leads to a good composition.
- Page 192 Glossary Appendix > EV (Exposure Value) Flash All the combinations of the camera’s shutter speed and lens aperture that A speed light that helps to create adequate exposure in low-light result in the same exposure. conditions. EV Compensation Focal length This feature allows you to quickly adjust the exposure value measured by The distance from the middle of the lens to its focal point(in millimeters).
- Page 193 Glossary Appendix > Image sensor Metering The physical part of a digital camera that contains a photosite for each The metering refers to the way in which the camera measures the quantity pixel in the image. Each photosite records the brightness of the light that of light to set the exposure.
- Page 194 Glossary Appendix > Noise PAL (Phase Alternate Line) Misinterpreted pixels in a digital image that may appear as misplaced or A video color encoding standard used in numerous countries throughout random, bright pixels. Noise usually occurs when photos are shot with a Africa, Asia, Europe, and the Middle East.
- Page 195 Glossary Appendix > Shutter speed White Balance (Color balance) Shutter speed refers to the amount of time it takes to open and close the An adjustment of the intensities of colors (typically the primary colors red, shutter, and it is an important factor in the brightness of a photo, as it green, and blue), in an image.
-
Page 196: Optional Accessories
Appendix Optional accessories Lens Lens SAMSUNG 18-55 mm SAMSUNG 20-50 mm SAMSUNG 85 mm F1.4 ED SSA SAMSUNG 12-24 mm F4-5.6 ED F3.5-5.6 OIS III F3.5-5.6 ED II SAMSUNG 16 mm F2.4 SAMSUNG 20 mm F2.8 SAMSUNG 45 mm F1.8 SAMSUNG 45 mm F1.8 [T6] 2D/3D... - Page 197 These illustrations may differ from your actual items. Refer to the user BP1130 BC3NX01 manuals of these optional accessories for details. • Camera bag Camera case Use only Samsung-approved accessories. Samsung is not responsible for damage caused by using another manufacturer’s accessories. Memory card Filter...
-
Page 198: Index
Appendix Index Camera specifications 184 Image adjustment Adjusting photos 119 Charging 34 Adobe Photoshop Lightroom 167 Fader 105 Red-eye 120 Color space 148 AllShare Play 141 Files Retouching faces 120 ISO sensitivity 75 Deleting 111 Aperture 16, 20 Photo type 74 i-Zoom 63 Auto Backup 133 Protecting 110... - Page 199 Index Appendix > Shutter speed 18, 20 Slide show 113 One touch shot 87 Red-eye effect Video Out 153 Smart filter Playback mode 120 Optical Image Stabilization Videos Playback mode 121 Shooting mode 95 (OIS) 89 Capturing 116 Shooting mode 101 Remote Viewfinder 131 Options 104 Optional accessories...
- Page 200 This product and its electronic accessories should not be mixed with other commercial wastes for CAN ICES-3 (B)/NMB-3(B) disposal. Dispose unwanted electronics through an approved recycler. To find the nearest recycling location, go to our website: www.samsung.com/recyclingdirect Or call, (877) 278 - 0799...
-
Page 201: Fcc Notice
Caution: Declaration of Conformity Any changes or modifications in construction of this device which are not Trade Name : Samsung Electronics America, Inc. expressly approved by the party responsible for compliance could void the Model No. : Samsung NX300 user's authority to operate the equipment. - Page 202 CAUTION Complies with IDA Standards RISK OF EXPLOSION IF BATTERY IS REPLACED BY DA100790 Model : NX300 AN INCORRECT TYPE. Year of Manufacture : 2013 DISPOSE OF USED BATTERIES ACCORDING TO THE INSTRUCTIONS. TA-2012/1802 APPROVED No.: ESD-1306913C Operation is subject to the following two conditions:...
- Page 203 Please refer to the warranty that came with your product or visit our website www.samsung.com for after-sales service or inquiries.