
Related Manuals for TurboChef NGC (Tornado)


Summary of Contents for TurboChef NGC (Tornado)
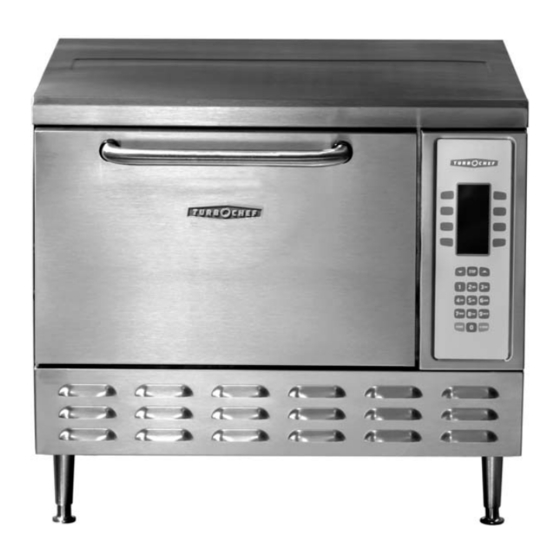
- Page 1 TurboChef Service Manual ( ) Accelerating the World of Cooking 800.90 TURBO Part Number: NGC-1007 / Revision A, July 23, 2004...
- Page 2 IMPORTANT SAFET Y INFORMATION - PLEASE READ FIRST : Improper installation, adjustment, alteration, service or maintenance can cause property damage, injury or death. Read the installation, operating and maintenance instructions thoroughly before installing or servicing this equipment. This product employs an exposed radiant heating element on the bottom of the cavity.
-
Page 3: Table Of Contents
Table of Contents Important Safety Instructions Precautions to Avoid Possible Exposure to Excessive Microwave Energy Grounding Instructions RF Interference Considerations Chapter 1: Installation, Specifications and Maintenance Specs and Dimensions Dimensions Construction Standard Features Accessories Certification Packaging Power Supply - North America Delivery and Product Placement Lifting and Placement of the Oven Restraint Oven Kit... - Page 4 Chapter 5: The Microwave System Overview of a Microwave Circuit Monitor Circuit Description Microwave Circuit Theory of Operation Microwave System Parts Microwave System Components Wave Guide Cover Replacement Wave Guide/Wave Guide Cover Parts Wave Guide Replacement and Cleaning High Voltage Transformer & Filament Transformer Replacement Wiring the High Voltage Transformers Wiring the Filament Transformers Measuring RF Leakage for Microwave Safety...
- Page 5 Chapter 8: IR Element and Catalytic Converter Components IR Element and Catalyst Removal Removing the IR Element Removing & Installing the Catalytic Converter Installing a New IR Element IR Element and Catalytic Converter Parts Chapter 9: Schematic and Schematic Parts NGC (Tornado) Schematic Inside 49 Schematic Parts...
-
Page 6: Important Safety Instructions I
INTRODUCTION IMPORTANT SAFET Y INSTRUCTIONS The following basic safety precautions should be strictly adhered to when using electrical appliances, so as to reduce the risk of burns, electric shock, fire, injury to persons or exposure to excessive microwave energy. Read all instructions before using the appliance. Read and follow the Specific Precautions to Avoid Possible Exposure to Excessive Microwave Energy found on page ii. -
Page 7: Precautions To Avoid Possible Exposure To Excessive Microwave Energy
INTRODUCTION PRECAUTIONS TO AVOID POSSIBLE EXPOSURE TO EXCESSIVE MICROWAVE ENERGY To reduce the risk of exposure to excessive microwave energy: attempt to operate this oven with the door open. Open-door operations can result in harmful exposure to microwave energy. It is important not to defeat or tamper with the safety interlocks. ... -
Page 8: Specs And Dimensions
INSTALL ATION, SPECIFICATIONS AND MAINTENANCE : NGC (Tornado) Dimensions Standard Features SPECS AND DIMENSIONS Recirculating airpath with TurboChef Dimensions Technologies patented catalytic converter system ... -
Page 9: Power Supply - North America
24 that the oven is properly placed on the countertop hours in order to file a claim. TurboChef will not at all times. TurboChef will not recognize a fallen be responsible for product damaged in shipment. - Page 10 The Daily Cleaning Recommendation below will help in maintaining the NGC (Tornado) oven. Be : The oven element operates at 1000 º F and sure to use only TurboChef Oven Cleaner. The use ® may cause injury if not allowed to cool properly.
- Page 11 Use only microwave-safe TurboChef approved cooking accessories in the oven. Review cooking instructions to ensure oven set- tings are correct for corresponding products. Keep the TurboChef Installation Guide for future reference. Call TurboChef immediately if Wave Guide Caps are broken.
-
Page 12: Chapter 2: Theory Of Operation
Figure 2 below represents the oven’s different systems THE THEORY OF OPERATION and the critical components of each system. Should The TurboChef NGC (Tornado) oven utilizes three a problem arise with any of the components listed independent heat transfer mechanisms in order to below, please turn to the appropriate section within rapidly cook food. -
Page 13: Glossary Of Common Operating Terms
THEORY OF OPERATION GLOSSARY OF COMMON OPERATING TERMS Off State All the oven’s control systems are off and the Cook Chamber Temperature is below 150 º F. Cool Down A subset of the Off State. During Cool Down the oven will circulate the main convection blower until the Cook Chamber Temperature is below 150 º... - Page 14 THEORY OF OPERATION Events A single operational element that is a part of a Recipe. Each Recipe may have up to six Events depending on programming. Each Event lasts a percentage of the Total Cook Time and can be set between 0 and 100% of the Total Cook Time.
-
Page 15: Chapter 3: Fault Codes
FAULT CODES The NGC (Tornado) oven has the ability to continually NGCVXXXX XXXXXX monitor and log various fault conditions. Some fault S/N XXXXXX conditions will terminate Cook Cycles, while others COOK COUNT will not. Please refer to the Fault Code Table on F1 BLOWER page 10 for more detailed information. -
Page 16: Fault Code Table
FAULT CODES : Door Interlock Switches are in parallel. See F7: Thermocouple Open Figure 35, on the inside of page 49. The fault is Fault is displayed when the Control detects that monitored during a Cook Cycle or Self-Test, when either the IR or CC Thermocouple is “Open”. -
Page 17: Chapter 4: The Control System
THE CONTROL SYSTEM : The part numbers for each component are is comprised of the components The Control System given within the parentheses in addition to being that signal, sense, command and switch the oven’s included with the descriptions for each part on the various components. -
Page 18: Control System Component Descriptions
THE CONTROL SYSTEM CONTROL SYSTEM COMPONENT DESCRIPTIONS EC Thermocouple (P/N 700-1179) Type K Thermocouple. Thermocouple measures the 24 VDC Power Supply (P/N 101206) temperature of the Electrical Compartment. If the 24 VDC Output at 40 Watts. Supplies control temperature within the Electrical Compartment is voltage for I/O Control Board, 24 VDC Mechanical above 158 º... -
Page 19: Test Function Options
THE CONTROL SYSTEM TEST NGC VXXXX TEST NGC VXXXX CC 81 IR 500 CC 81 IR 500 BLOWER HEATER DIAG ELEC FAULTS MGTRON STEST IR ELE IR SI P S M P S M : Test Mode - Screen 1 ... -
Page 20: Status Indicators
THE CONTROL SYSTEM The Status Indicators are displayed at the bottom Faults of the display screen when the oven is in the Test Pressing the “Faults” Soft Key will display all the and DIAG Mode. Refer to Figures 5 and 6 . accumulated faults in the Fault Log. -
Page 21: User Configurable Options
THE CONTROL SYSTEM GROUP A EDIT GROUPS < GROUP 1 > ITEM 1 ITEM 1 GROUP A ITEM 5 GROUP E COUNT 00:00 COOK TIME IR SETPT ITEM 2 GROUP B GROUP F ITEM 6 %TIME %AIR %WAV 1 XXX 2 XXX 3 XXX 4 XXX... -
Page 22: Passwords
THE CONTROL SYSTEM DONE ENTER COOK TIME 00:20 SAVE COOK STAR T TIME MORE : Time State : Done State Done State PASSWORDS The Done State (Figure 10) can be removed to Edit Mode eliminate the option to Save an altered Time or the 1. -
Page 23: Control System Panel Parts
THE CONTROL SYSTEM : Control System Panel Enclosure and Parts 8. NGC-1110 Keypad, NGC CONTROL SYSTEM PANEL PARTS 9. 100506 Connector* Figure 12. 10. 100182 Cable Connection 1. NGC-1040 Cover, Keypad Display 2. -
Page 24: Control System Trouble Shooting
THE CONTROL SYSTEM CONTROL SYSTEM TROUBLE SHOOTING ISSUE RESOLUTION No Display (Blank) 1. Verify power 208 VAC or 240 VAC is going to the oven correctly. If not, correct the voltage supply. 2. Control DOES NOT beep when any Key on the Keypad is pressed. Check power going to the 24VDC Power Supply. - Page 25 THE CONTROL SYSTEM ISSUE RESOLUTION “Cook Door Open” 1. Determine which Interlock Switch is open by entering the Test Mode. Message when door Examine the Switch(es) indicated as “Open”. is closed. If the Switch(es) is/are mechanically opened - i.e., the Cook Door is not actuating the switch - then refer to page 34 to adjust the Cook Door.
- Page 26 THE CONTROL SYSTEM ISSUE RESOLUTION F2: Cook Temperature 1. Verify the High-Limit Thermostat is not tripped. If High-Limit is tripped: Reset and allow the oven to warm-up. If High-Limit is not tripped: Follow the instructions below. High-Limit is not tripped. Place a small water load in a microwave transparent container (approx.
-
Page 27: Overview Of A Microwave Circuit
THE MICROWAVE SYSTEM If during normal operation, either Interlock Switch is the most complex system in The Microwave System opens - such as when the Cook Door opens - the the oven. Proper care must be taken during servicing Control System will turn Off the Microwave. If the to protect both the operator and technician. -
Page 28: Microwave Circuit Theory Of Operation
THE MICROWAVE SYSTEM TRANSFORMER OUTPUT VOLTAGE MAGNETRON VOLTAGE +(B) +(B) +2400 V -4800 V -2400 V -(C) -(C) 2400 2400 4800 2400 Current 2400 Current Flow Flow CAPACITOR CHARGES CHARGED CAPACITOR PLUS TRANSFORMER ON POSITIVE VOLTAGE SWING ON NEGATIVE VOLATAGE SWING ... -
Page 29: Microwave System Parts
THE MICROWAVE SYSTEM FILAMENT AND HIGH VOLTAGE TERMINALS (ORG) (BLK) COOLING FANS ANTENNA : Microwave System Parts : Microwave System Parts Figure 16 High Voltage Transformers (P/N 102101) 30. -
Page 30: Wave Guide Cover Replacement
THE MICROWAVE SYSTEM Prior to fully energizing the Microwave Circuits, Wave Guide Covers (P/N NGC-1097) the Control energizes the Filament Transformers Wave Guide Covers protect and seal the Wave for approximately three (3) seconds prior to Guides from moisture and debris. supplying the necessary high voltage via the High Voltage Transformers. -
Page 31: Wave Guide/Wave Guide Cover Parts
Support, Frame : It is important to use the correct high Screws, #8-32 x 3/8” CSK (100 º ) 39. 102809 temperature RTV as supplied by TurboChef. 40. NGC-1106 Assy, Wave Guide #2 41. 100861 Magnetron #2 7. -
Page 32: Wave Guide Replacement And Cleaning
THE MICROWAVE SYSTEM Blue 208V Brown 240V TOP VIEW Orange Brown Orange Orange Dot 208V Brown Blue Blue 240V 240V 208V 208V Brown Orange Blue 240V Orange SIDE OF OVEN : Filament Transformer Wiring ... -
Page 33: Wiring The Filament Transformers
THE MICROWAVE SYSTEM MEASURING RF LEAKAGE FOR MICROWAVE SAFET Y An RF (Microwave) leakage test must be performed at the conclusion of the following service tasks: Door removal, replacement and/or adjustment Wave Guide removal and/or replacement Magnetron removal and/or replacement ... -
Page 34: Testing The High Voltage Diode
THE MICROWAVE SYSTEM FILAMENT AND HIGH VOLTAGE TERMINALS ANTENNA : High Voltage Diode (P/N 100481) : Magnetron (P/N 100861) : To hold the Cook Door open, for this becomes non-conducting with the charged High test, back out the top center screw around the Voltage Capacitor in series with the High Voltage... -
Page 35: High Voltage And Filament Transformer Resistance Table
THE MICROWAVE SYSTEM 7. If there is infinite resistance in both direction: How to check a Magnetron for Open/Shorted Filament open Diode. 1. Disconnect the AC power source and discharge the High Voltage Capacitors. 8. Due to the High Voltage Diode consisting of approximately 15 x 1000 volt Diodes in series, 2. -
Page 36: Microwave System Trouble Shooting
THE MICROWAVE SYSTEM MICROWAVE SYSTEM TROUBLE SHOOTING ISSUE RESOLUTION F3: Magnetron 1. Check F3 Fuse. Current Low Fuse OK: Go to Step 2. Fuse Blown: Refer to “F3 Fuse Blown” on the following page. 2. Verify K1 Relay is operating correctly. K1 Not Energizing: Correct Control issues. - Page 37 THE MICROWAVE SYSTEM ISSUE RESOLUTION F3 Fuse Blown 1. Fuse Blown: Replace F3 Fuse and determine why F3 Fuse opened. : There are generally only three (3) faults that will cause the F3 Fuse to open. They are as follows: 1.
- Page 38 THE MICROWAVE SYSTEM ISSUE RESOLUTION High Voltage and/or 1. Determine if the High Voltage or Filament Transformer(s) is defective. Filament Transformer(s) Use an Ohm meter to measure the Primary and Secondary Winding Faulty Resistances. Refer to the High Voltage and Filament Transformer Table on page 29 to determine if the Transformer is OK.
-
Page 39: Chapter 6: The Cook Door
THE COOK DOOR 2. Locate and remove the two (2) #10-32 x 1/2” of the Cook Door is The proper fit and adjustment hex screws on the left and right side of the door. essential for safe and reliable operation of the NGC (Tornado) oven. - Page 40 THE COOK DOOR : Check for excessive Microwave ADJUSTING THE COOK DOOR Leakage, after adjusting the Cook Door. See 1. Slightly loosen the two (2) hex head screws on page 27 for proper procedure. the left and right side of the Door Cover.
-
Page 41: Interlock Switches
THE COOK DOOR LATCH TOGGLE LATCH TOGGLE IS ANGLED IS LEVEL COUNTER-CLOCKWISE : Mis-adjusted Cook Door : Mis-adjusted Cook Door PRIMARY AND SECONDARY INTERLOCK SWITCHES APPLY HI-TEMP GREASE TO AREA ADJUSTMENTS AND PARTS... -
Page 42: Adjusting The Cook Door
THE COOK DOOR 64 2X : Door Switch Assembly and Parts DOOR SWITCH ASSEMBLY AND PARTS Assembly Notes 1. Ring, Eclip (Item 69) is supplied with Item 63. Figure 27 2. Spring and Bracket must be lubricated with 59. -
Page 43: Monitor Safety Switch Parts
THE COOK DOOR : Monitor Switch Adjustment and Assembly 2. Open and close the Cook Door several times to 5. Open and close the Cook Door several times to ensure the Door closes smoothly and the Door make certain the adjustment is correct. -
Page 44: Cook Door Assembly
Shunt Cavity, Open Door 93. 101688 Screw, #8 x 1/2” PTH 80. NGC-1061 Hinge Block 94. 102698 Tape, Aluminum 81. NGC-1062 Spacer, Plastic Edge 95. NGC-1155 Name Plate, TurboChef 82. 102750 Handle, Door 96. NGC-1170 Label, Service 83. NGC-1076-002 Actuator, Door... -
Page 45: Screw Torque Chart
THE COOK DOOR SHUNT CAVITY/PLATE SHUNT ASSY/DOOR COVER Tightening Sequence Tightening Sequence : Cook Door Assembly: Tightening Specs Critical Adjustment Notes (Figure 29) SCREW TORQUE CHART 1. Item 76 should be oriented with the Gasket Seam Refer to Figure 30 above. -
Page 46: Interlocks Trouble Shooting
COOK DOOR INTERLOCKS TROUBLE SHOOTING ISSUE RESOLUTION “Cook Door Open” Determine which Interlock Switch is Open. Access Test Mode to view Message Interlock Switch status. M - Primary and/or Secondary Interlock(s) are/is open. Verify action of the Latch Assembly and Cook Door. When door closes, Actuator should freely clear the slot on the Flange and when it strikes the Toggle Latch should rotate smoothly to its closed position. -
Page 47: Convection System Components
THE CONVECTION CIRCUIT provides the high temperature The Convection Circuit Convection Motor (P/N 100882) airflow necessary to brown and cook food items. The Convection Motor is a Brushless DC Switch reluctance type. Its top speed is 7200 RPM at 1 HP. The Motor is controlled by a proprietary controller. -
Page 48: Convection Circuit Parts
THE CONVECTION CIRCUIT : Convection Circuit Assembly and Parts 104. 101284 Relay, K4/K5 SSR CONVECTION CIRCUIT PARTS 105. 100592 Buss, Fuses (12 Amp) Figure 32 106. 102075 High-Limit Thermostat 97. 101688 Screw, #8 x 1/2” PTH 98. -
Page 49: Blower Motor Parts
THE CONVECTION CIRCUIT SIDE VIEW 122 4X 126 4X : Blower Motor Assembly and Parts 121. 101392 Screw, PFLH, 1/4”-20 x 1/2” Lg, BLOWER MOTOR PARTS 100 º , Cres Figure 33 122. -
Page 50: Convection Circuit Trouble Shooting
THE CONVECTION CIRCUIT CONVECTION CIRCUIT TROUBLE SHOOTING ISSUE RESOLUTION F8: Heat Low 1. Check that the Blower Motor is moving air. Blower Motor is not moving air: Check Blower Motor Assembly Oven Not Warming Up and verify Motor is stalled. Correct any issues with Motor Assembly. See Figure 33. -
Page 51: Motor Winding Resistance Table
THE CONVECTION CIRCUIT ISSUE RESOLUTION F1: Blower Running Determine if Status Indicator “A” is highlighted/backlit in Test Mode. Status Bad 1. “A” is highlighted/backlit. Verify 208/240 VAC is going to the Motor Controller via Pins 2 and 3. 208/240 VAC is not present: Correct Line Voltage Wiring going to Motor Controller. -
Page 52: Components
The Catalytic Converter scrubs the air to eliminate commercially available degreasers and cleaners; VOCs and grease particulates that are liberated during therefore, only TurboChef cleaners are to be used. the cooking process. It is important to properly care for the Catalyst using only TurboChef Oven Cleaner ®... -
Page 53: Removing & Installing The Catalytic Converter
IR ELEMENT AND CATALY TIC CONVERTER 2. Once the IR Element is installed, expand the IR Removing and Installing the Catalytic Converter Element in order to reinstall the Shim Washers 1. Remove the IR Element. (Item 131) and Snap Rings (Item130). Figure 34. 2. - Page 54 : NGC (Tornado) Schematic (P/N NGC-1070, Revision H, July 22, 2004)
-
Page 55: Chapter 9: Schematic And Schematic Parts
SCHEMATIC AND SCHEMATIC PARTS 156. 102101 T1 – High Voltage Transformer FIGURE 35: NGC OVEN SCHEMATIC (P/N NGC-1070) 157. 102101 T2 – High Voltage Transformer See inside of this fold out page. Rev 2 Board, VFD 158. 102102 FT1 – Filament Transformer Display, Single Phase, 280/240 VAC, 60 Hz 159. - Page 56 SCHEMATIC AND SCHEMATIC PARTS : I/O Control Board and Test Point Locations...
- Page 57 SERVICE PARTS AND ILLUSTRATIONS FIGURE 4: NGC ( TORNADO) CONTROL SYSTEM Chapter 4: The Control System - Page 11 +24 VDC DUAL MECH MECH MECH MECH RELAY RELAY RELAY RELAY RELAY (101271) (101271) (101271) (101272) (101284) + 24 VDC - + 24 VDC - + 24 VDC - + 24 VDC -...
- Page 58 SERVICE PARTS AND ILLUSTRATIONS FIGURE 12: CONTROL SYSTEM PANEL ENCLOSURE AND PARTS Chapter 4: The Control System - Page 17 Control System Panel Parts 7. 100184 26 Pin Ribbon Cable 1. NGC-1040 Cover, Keypad display 8. NGC-1110 Keypad, NGC 2. 102960 Nut, 4-40, Stainless 9.
- Page 59 SERVICE PARTS AND ILLUSTRATIONS FIGURE 13: MONITOR CIRCUIT - SHOWN IN FAILSAFE STATE Chapter 5: The Microwave System - Page 21 PRIMARY AND SECONDARY K2 HV INTERLOCKS (CLOSED) RELAY HV TRANSFORMER F3 FUSE 20 AMP LINE VOLTAGE (BLOWN) CONTROL (L1) +24 VDC HV TRANSFORMER CONTROL...
- Page 60 SERVICE PARTS AND ILLUSTRATIONS FIGURE 16: MICROWAVE SYSTEM PARTS FILAMENT AND Chapter 5: The Microwave System - Page 23 HIGH VOLTAGE TERMINALS Microwave System Parts 30. 100861 Magnetron 31. 102070 Mag Thermostat 32. NGC-1163 Ad, Insulator (ORG) 33. 100186 Screw #6 Sheet Metal (BLK) 34.
-
Page 61: Figure 18 & 19: High Voltage Transformer And Filament Wirings
SERVICE PARTS AND ILLUSTRATIONS FIGURE 18 & 19: HIGH VOLTAGE TRANSFORMER AND FIL AMENT WIRING Chapter 5: The Microwave System - Page 26 Blue 208V Brown 240V TOP VIEW Orange Brown Orange Orange Dot 208V Brown Blue Blue 240V 240V 208V 208V Brown... - Page 62 SERVICE PARTS AND ILLUSTRATIONS FIGURE 23: COOK DOOR REMOVAL AND PARTS Chapter 6: The Cook Door - Page 33 Cook Door Parts 44. 102809 #8-32 x 3/8” PFH CSK 45. NGC-1060 Assy, Oven Door 46. NGC-1061 Hinge Block 47. 102804 Right Hinge (only) 48.
- Page 63 SERVICE PARTS AND ILLUSTRATIONS FIGURE 27: DOOR SWITCH ASSEMBLY AND PARTS Chapter 6: The Cook Door - Page 36 64 2X Door Switch Parts 65. 101557 Screw, #4-40 x 1.25” Lg, 59. NGC-1072 Bracket Latch PPHD, CRES 60. 102012 Switch, Micro, 0.1A/125VAC 66.
- Page 64 SERVICE PARTS AND ILLUSTRATIONS FIGURE 28: MOTOR SWITCH ADJUSTMENT AND ASSEMBLY Chapter 6: The Cook Door - Page 37 Monitor Safety Switch Parts 73. 101912 Standoff, #8-32F/Fx1 in S 70. 102804 Hinge, Right 74. 102921 Screw, #8-32 x 3/8” 71. 102012 Switch, Limit, Micro 75.
- Page 65 Handle, Door 93. 101688 Screw, #8 x 1/2” PTH 83. NGC-1076-002 Actuator, Door 94. 102698 Tape, Aluminum 84. NGC-1132 Shim, Door Latch 95. NGC-1155 Name Plate, TurboChef 85. 102945 Bolt, 1/4”-20 x 1.00 96. NGC-1170 Label, Service 86. NGC-1138 Label, Precaution...
- Page 66 SERVICE PARTS AND ILLUSTRATIONS FIGURE 31: CONVECTION CIRCUIT BLOCK DIAGRAM Chapter 7: Convection Circuit - Page 41 BOTTOM IR CONTROL WH-28 MAIN HX CONTROL WH-30 MANUAL RESET RD-19 HX ELEMENT 3300 WATTS BL540 13.1 OHMS HT520 (100649) BL510 BOTTOM IR 3000 WATTS 14.4 OHMS (100661)
- Page 67 SERVICE PARTS AND ILLUSTRATIONS FIGURE 32: CONVECTION CIRCUIT ASSEMBLY AND PARTS Chapter 7: Convection Circuit - Page 42 Convection Circuit Parts 102. 100661 Heater, Convection 97. 101688 Screw, #8 x 1/2” PTH 103. 100443 Controller, Motor 98. NGC-1081 Cover, Motor, Cap 104.
- Page 68 SERVICE PARTS AND ILLUSTRATIONS FIGURE 33: BLOWER MOTOR PARTS AND ASSEMBLY Chapter 7: Convection Circuit - Page 43 SIDE VIEW 122 4X 126 4X Blower Motor Parts 120. 102400 Washer, Splitlock, 1/4”, CRES 107. 700-0306-2 Hub, Small 121. 101392 Screw, PFLH, 1/4”-20 x 1/2” Lg, 108.
- Page 69 SERVICE PARTS AND ILLUSTRATIONS FIGURE 34: IR ELEMENT AND CATALY TIC CONVERTER PARTS AND ASSEMBLY Chapter 8: IR Element and Catalytic Converter - Page 48 IR Element and Catalytic Converter Parts 134. 101688 Screw, #8 x 1/2” Sht Metal PTH 130.
- Page 70 SERVICE PARTS AND ILLUSTRATIONS FIGURE 35: NGC ( TORNADO) SCHEMATIC (P/N NGC-1070) Chapter 9: Schematic and Schematic Parts - Inside the fold out of page 49 Part list to the right. FIGURE 36: I/O CONTROL BOARD AND TEST POINT LOCATIONS Chapter 9: Schematic and Schematic Parts - Page 50 Part list to the right.
-
Page 71: I/O Control Board Item Identification And Test Point Locations
SERVICE PARTS AND ILLUSTRATIONS Schematic Parts Line Voltage Components 160. 100201 C1 – High Voltage Capacitor 137. 100543 EMI Filter 161. 100201 C2 – High Voltage Capacitor 138. 100586 F1, F2 and F3 - Fuse, Holders 162. 100481 D1 – High Voltage Diode 139. -
Page 72: Figure 37: Covers And Miscellaneous Parts
SERVICE PARTS AND ILLUSTRATIONS FIGURE 37: COVERS AND MISCELL ANEOUS PARTS Covers and Miscellaneous Parts 200. 100781 Leg. 4” 192. NGC-1147 Assy, Rear Chassis/Door 201. 10191 Hole Plug, 1/2” Dia, Black 193. NGC-1069-1 Cover, Left Side, NGC Oven 202. NGC-1054-1 Assy, Keypad/Display HSNG 194.