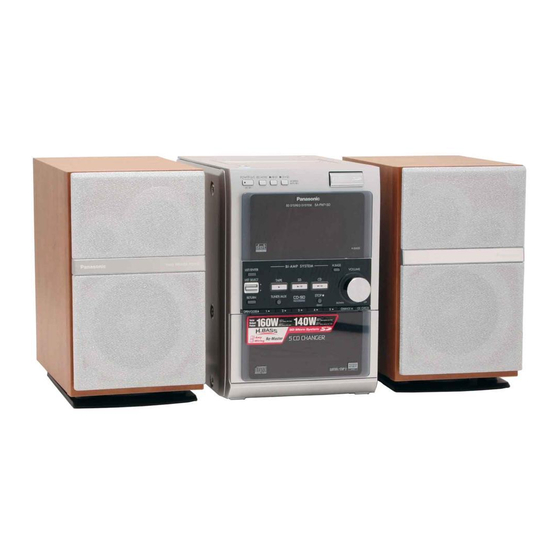
Panasonic SC-PM71SD Operating Instructions Manual
Sd stereo system
Hide thumbs
Also See for SC-PM71SD:
- Operating instructions manual (44 pages) ,
- Instrucciones de funcionamiento (12 pages)
Table of Contents
Advertisement
For SC-PM7190
Dear customer
Thank you for purchasing this product. For optimum performance
and safety, please read these instructions carefully.
Before connecting, operating or adjusting this product, please read
the instructions completely.
Please keep this manual for future reference.
Only for Canada
If you have any questions, contact
As an ENERGY STAR
Participant, Panasonic has
determined that this product
meets the ENERGY STAR
guidelines for energy
efficiency.
Note
"EB" on the packaging indicates the United Kingdom.
E
EB
High speed recording - Performance and
n
convenience!
More fun with SD — Connect and expand!
n
⇒ page 36
Never forget a recording again with the
n
"Record timer".
Save your favorite tracks from an external
: 1-800-561-5505
n
source to SD!
®
If the display lights up when the unit is turned off,
®
turn the demo function off. ⇒ page 10
Operations in these instructions are described mainly for the
remote control, but you can do the operations on the main
unit if the controls are the same.
Operating Instructions
SD Stereo System
SC-PM71SD
Model No.
⇒ page 24
⇒ page 33
⇒ page 35
RQT8312-B
Advertisement
Table of Contents

Related Manuals for Panasonic SC-PM71SD


Summary of Contents for Panasonic SC-PM71SD
-
Page 1: Operating Instructions
: 1-800-561-5505 source to SD! ⇒ page 35 As an ENERGY STAR ® Participant, Panasonic has determined that this product If the display lights up when the unit is turned off, meets the ENERGY STAR ® turn the demo function off. ⇒ page 10 guidelines for energy efficiency. -
Page 2: Accessories
For Canada System SC-PM71SD CAUTION! Main unit SA-PM71SD DO NOT INSTALL OR PLACE THIS UNIT IN A Speakers SB-PM71 BOOKCASE, BUILT-IN CABINET OR IN ANOTHER CONFINED SPACE. ENSURE THE UNIT IS WELL VENTILATED. TO PREVENT RISK OF ELECTRIC SHOCK OR FIRE HAZARD DUE TO OVERHEATING, ENSURE... -
Page 3: Table Of Contents
Table of contents Getting started Editing Accessories ....... . 2 Editing SDs . -
Page 4: Listening Caution (For Canada)
Listening caution (For Canada) Caution for AC Mains Lead Selecting fine audio equipment such as the unit you’ve just purchased is only the start of your musical enjoyment. Now it’s time to consider how you can maximize the fun and excitement your equipment offers. -
Page 5: Important Safety Instructions
IMPORTANT SAFETY Safety precautions INSTRUCTIONS (For Canada) Placement Read these operating instructions carefully before using the unit. Follow the safety instructions on the unit and the applicable Set the unit up on an even surface away from direct sunlight, high temperatures, high humidity, and excessive vibration. -
Page 6: Disc/Card Information
• Includes miniSD Cards. A miniSD adaptor needs to be inserted before using these cards. • You cannot use multimedia cards. • We recommend using a Panasonic SD card. (⇒ Suitable SD Memory Cards, below) SD Memory — • You can only play audio data (AAC/MP3/WMA) recorded in SD Audio Format. -
Page 7: Handling Precautions
• SD logo is a trademark. Disc and card handling n How to hold a disc or card • Portions of this product are protected under copyright law and are Do not touch the recorded provided under license by ARIS/SOLANA/4C. surface or the terminal surface. -
Page 8: Inserting/Removing The Discs And Cards
Inserting/Removing the discs and cards Adhere to the following to avoid problems. Inserting discs Inserting a card • You can use SD cards with capacities between 8MB and 1GB on this unit. (⇒ page 6) Open/close the CD lid only with Open the lid. -
Page 9: Setup
• Do not use rechargeable type batteries. Positioning the speakers Place so that the Panasonic logos and super tweeters are on the outside. n Use only the supplied speakers • Using other speakers can damage the unit and sound quality will be... -
Page 10: Connections
Setup Connections Conserving power The unit consumes power ( approx. 0.3 W, or approx. 0.5 W ) even when it is turned off. To save For Canada Except or Canada power when the unit is not to be used for a long time, unplug it from the household AC mains socket. You will need to reset some memory items after plugging in the unit again. -
Page 11: Fm Indoor Antenna
FM indoor antenna Speakers • If the speaker cords have vinyl tips, twist the vinyl tip and pull off. • Confirm the colors of the tags on the Fix the other end of the Adhesive tape ends of the cords. antenna where recep- tion is best. -
Page 12: Control Guide
Control guide Main unit The illustration of the main unit which has been used for these instructions is for Canada. OPEN ; (⇒ page 19) Only for Canada PHONES (Headphone jack) Press to open the POWER 8 (standby/on switch) Reduce the volume level and connect the headphones. cassette lid. - Page 13 Remote control SLEEP (⇒ page 32) CLOCK/ (⇒ page 32) –AUTO OFF (⇒ page 32) TIMER (⇒ page 33) z PLAY/REC (⇒ page 33) ^ (⇒ page 33) DISPLAY (⇒ page 15, 33) –DIMMER (⇒ page 33) PROGRAM (⇒ page 17) PLAY MODE (⇒...
-
Page 14: Basic Play
Basic play q/h SD q/h CD STOP g LIST SELECT e, r VOLUME UP/DOWN CD CHECK OPEN/CLOSE ; CHANGE ; 1 q – 5 q CD lid Playing discs Select a disc tray. • The unit turns on automatically. • When a CD is already loaded, the unit comes on automatically and starts play (One touch play). -
Page 15: Playing Sd Cards
Playing SD cards Remote control Main unit Within 10 seconds This unit can only play music data (AAC/MP3/WMA) recorded in the SD Selecting a standard audio format. Other SD audio formats cannot be played. disc Insert the SD card. (⇒ page 8) Start play. -
Page 16: Other Ways Of Playing Discs/Cards
Basic play Other ways of playing discs/cards Preparation Press [q/h CD] or [q/h SD] and then [g STOP]. Selecting a track q/h SD LIST/ENTER q/h CD LIST SELECT Press the numbered button(s) to select and play the e, r STOP g track. -
Page 17: Program Play (Up To 24 Items)
Program play (up to 24 items) Random play During stop During stop Press [PROGRAM]. Press [PLAY MODE, –REPEAT] to select the mode. CD/WMA/MP3 only Every time you press the button: Select a disc. Press [DISC]. Within 10 seconds: Press [1] - [5] to select the disc. Press the numbered button(s) to select the track. -
Page 18: Playing Highmat Discs
Basic play LIST/ENTER LIST SELECT e, r STOP g RETURN Playing HighMAT discs “HighMAT” appears to show that you can use these features. Remote control During stop Press [LIST/ENTER]. The CD selection screen appears. Press [e] or [r] to select the disc and press [LIST/ENTER]. Press [e] or [r] to select the method of play and press [LIST/ENTER]. -
Page 19: Cassette Tapes
Cassette tapes OPEN ; Cassette lid q TAPE LIST SELECT VOLUME e, r UP/DOWN STOP g Press to open and insert a cassette. Side to be played back facing up. Insert the cassette with the exposed tape facing you. • Make sure that the cassette is fully inserted and close the lid by hand. -
Page 20: Sound Field And Sound Quality
Sound field and sound quality H.BASS indicator H.BASS H.BASS You can enjoy more powerful bass on wide range speakers. Press [H.BASS]. Every time you press the button: H.BASS 1 H.BASS 2 H.BASS OFF H.BASS 1: Add powerful bass (factory preset) H.BASS 2: Further increases the power of the bass •... -
Page 21: Surround
SURROUND Changing sound field and quality You can add natural width and depth to the stereo sound. Preset EQ Press [SURROUND]. Press [SOUND]. Every time you press the button: Every time you press the button: SURROUND 1: Natural effect SURROUND 2: Enhanced effect HEAVY : Adds punch to rock (factory preset) CLEAR : Clarifies higher sounds... -
Page 22: The Radio
The radio Manual tuning n FM frequency step (main unit only) Select “FM” or “AM”. For Canada You can change the frequency step (0.2 MHz or 0.1 MHz). 1. Select “FM”. 2. Press and hold [TUNER/AUX] on the main unit. Select “MANUAL”. -
Page 23: Recording
Recording sources and media SD card Cassette tape From: Normal speed High speed* Normal speed ⇒ page 24 ⇒ page 25 A disc in play position ⇒ page 24 ⇒ page 25 All discs in trays ⇒ page 25 5CD auto recording ⇒... -
Page 24: Recording Cds
Recording CDs */h SD REC MODE * CD HI-SPEED AUTO REC q/h CD q TAPE STOP g OPEN/CLOSE ; 1 q – 5 q CD lid Preparation Insert the SD card (⇒ page 8) or the cassette tape (⇒ page 19). •... -
Page 25: 5Cd Auto Recording (Cd È Sd)
5CD auto recording (CD è SD) Recording to cassette tape (High-speed recording only) (Normal recording only) This function high-speed records all loaded CDs in succession from the Preparation first tray onto a SD card with one-touch. Wind up the leader tape so recording can begin immediately. •... -
Page 26: Recording From Cassette Tape/The Radio To Sd
Recording from cassette tape/the radio to SD Preparation Insert the SD card. (⇒ page 8) • Securely close the lid of the SD card slot. You cannot record if the lid is open. Press [REC MODE] to select the recording mode. Recording from cassette tape (Normal recording only) Insert the cassette tape. -
Page 27: Recording From Sd/The Radio To Cassette Tape
Recording from SD/the radio to cassette tape Preparation Insert the SD card (⇒ page 8) or the cassette tape (⇒ page 19). Recording from SD (Normal recording only) Select “SD” as the source. While pressing [*/h REC], press [TAPE] to start recording. Recording from the radio (Normal recording only) Tune to the station. -
Page 28: Editing Sds
Editing SDs Preparation Insert the SD card. (⇒ page 8) Erasing tracks — TRACK ERASE/ALL ERASE • Securely close the lid of the SD card slot. You cannot edit if the lid is open. Press [q/h SD] and then [g STOP] to select “SD” as the source. TRACK ERASE During stop or play Select “TRACK ERASE?”. -
Page 29: Formatting A Card - Card Format
Formatting a card — CARD FORMAT To create a new playlist – PL CREATE Formatting erases all the contents of the card and not only the tracks Press the numbered buttons to select the track. recorded using this unit. Once erased, the contents of the card are lost •... -
Page 30: Entering Titles
Entering titles Preparation You can enter titles for discs, tracks, artists and playlists. Show Enter Name screen. (⇒ page 31) Note The maximum number of characters per title: 32 Entering characters Press [CHARA] to select upper-case, lower-case, or numeric characters. Press the numbered button to select the character. - Page 31 Entering titles on a CD (CD title memory) Entering titles on a SD after recording The unit can record the disc titles for 100 CDs, 25 track titles per CD. Preparation Insert the SD card. (⇒ page 8) • Securely close the lid of the SD card slot. You cannot edit if the lid is Preparation Insert the CD.
-
Page 32: Convenient Functions
Convenient functions Setting the time Press [CLOCK/TIMER] to select “CLOCK”. Every time you press the button: Original display Within 10 seconds: Press [u 2/REW, i 1/FF] to set the day and press [LIST/ENTER]. Every time you press the button: Press [u 2/REW, i 1/FF] to set the time and press [LIST/ENTER]. •... -
Page 33: The Play/Record Timer
Changing the timer settings The play/record timer (when the unit is on) You can set the timer to come on at a certain time to wake you up (play To change the play/record times timer) or to record a radio station or from the external source (record Do steps 1, 2, 3, 4 and 6. -
Page 34: Using Other Equipment
Using other equipment Before connection Other antenna connections • Disconnect the AC mains lead. • Turn off all equipment and read the appropriate operating instructions. Use outdoor antennas if radio reception is poor. • The equipment connections described are examples only. FM outdoor antenna (using a television antenna) Using an external unit •... -
Page 35: Recording From An External Unit
Recording from an external unit Preparation Connect the external unit. (⇒ page 34). Turn on the power. Insert the SD card (⇒ page 8) or the cassette tape (⇒ page 19). If recording to SD card, press [REC MODE] to select XP, SP or LP mode. -
Page 36: Even More Fun With Sd
Please note that Panasonic is in no way liable for any music data you lose, or for any You can save SD tracks (audio data) to your computer, edit titles, make other direct or indirect damages. -
Page 37: Reference
Turn on the computer and start Windows. If the icon is not on the desktop, from the “start” menu, select “All Programs” è “Panasonic” è “SD-Jukebox V5” è “SD-Jukebox V5”. Connect the SD Memory Card Reader Writer to the computer. -
Page 38: Troubleshooting Guide
If you are in doubt about some of the check points, or if the remedies indicated in the chart do not solve the problem, contact the Only for Canada Panasonic Canada Inc. Customer Care Centre at 905-624-5505, or visit the website (www.panasonic.ca), or an Authorized Ser- vice Centre closest to you. -
Page 39: Maintenance
Unit displays “CAN’T EDIT” You cannot edit or enter titles on SD during play. “CARD FULL” There is no space on the SD card. Erase unneeded tracks (⇒ page 28) or record with another card. “CARD LOCKED” You have inserted a SD card the unit cannot play or record on. Insert a compatible card. (⇒ page 6) “CARD PROTECTED”... -
Page 40: Limited Warranty (Only For Canada)
5770 Ambler Drive, Mississauga, Ontario L4W 2T3 PANASONIC/TECHNICS PRODUCT—LIMITED WARRANTY Panasonic Canada Inc. warrants this product to be free from defects in material and workmanship and agrees to remedy any such defect, or at its option, replace the product for a period as stated below from the date of original purchase. -
Page 41: Specifications
Specifications n AMPLIFIER SECTION n SD SECTION Only for Canada Sampling frequency 32 kHz (LP), 44.1 kHz (SP, XP) FTC output power, both channels driven Coding system 10% total harmonic distortion SD Audio Playback AAC, MP3, WMA (Low channel) 35 W per channel (6 Ω) 60 Hz to 3 kHz SD Audio Record 3 kHz to 16 kHz... -
Page 42: Product Service (Only For Canada)
For the United Kingdom and the Republic of Ireland For product information or assistance with product operation: Sales and Support Information In Canada, contact the Panasonic Canada Inc. Customer Care Centre at 905-624-5505, or visit the website Customer Care Centre (www.panasonic.ca), or an authorized Servicentre closest to... -
Page 44: Index
Program recording ......25, 27 For Canada Except or Canada Panasonic Canada Inc. Matsushita Electric Industrial Co., Ltd. 5770 Ambler Drive...