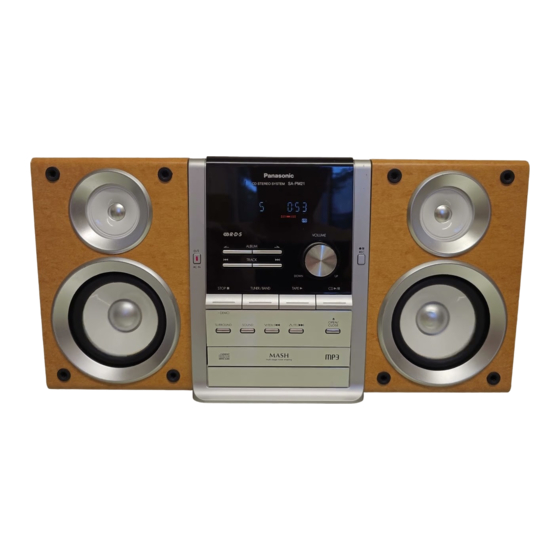
Panasonic SC-PM21 Operating Instructions Manual
Hide thumbs
Also See for SC-PM21:
- Operating instructions manual (16 pages) ,
- Operating instructions manual (16 pages)
Table of Contents
Advertisement
Available languages
Available languages
Before connecting, operating or adjusting this product, please read the
instructions completely. Please keep this manual for future reference.
Operations in these instructions are described mainly using remote
control, but you can do the operations on the main unit if the controls
are the same.
PC
Operating Instructions
CD Stereo System
Model No.
Table of contents
Supplied accessories ....................... 2
INSTRUCTIONS ............................... 3
Product Service ................................ 3
Listening caution .............................. 3
Getting started .................................. 4
Overview of controls ........................ 6
CDs and MP3 - Play ......................... 7
Cassette tape - Play ......................... 9
Cassette tape - Record ................... 10
Radio - Tune ..................................... 11
Timer .................................................. 12
Sound Adjustment ............................ 13
Troubleshooting guide ..................... 14
Specifications ................................... 15
Maintenance ...................................... 15
Warranty ............................................ 16
RQT7968-2Y
Advertisement
Chapters
Table of Contents

Related Manuals for Panasonic SC-PM21


Summary of Contents for Panasonic SC-PM21
-
Page 1: Table Of Contents
Operating Instructions CD Stereo System SC-PM21 Model No. Before connecting, operating or adjusting this product, please read the instructions completely. Please keep this manual for future reference. Operations in these instructions are described mainly using remote Table of contents control, but you can do the operations on the main unit if the controls are the same. -
Page 2: Sc-Pm21
Use numbers indicated in parentheses when asking for These operating instructions are applicable to the following replacement parts. (As of January 2005) system. 1 x Remote control 1 x AM loop antenna System SC-PM21 Main unit SA-PM21 Speakers SB-PM21 (N2QAJB000131) (N1DAAAA00001) -
Page 3: Important Safety Instructions
For product information or assistance with product operation: Once you have established a comfortable sound level: Contact the Panasonic Canada Inc. Customer Care Centre at • Set the dial and leave it there. 905-624-5505, or visit the website (www.panasonic.ca), or an Taking a minute to do this now will help to prevent hearing authorized Servicentre closest to you. -
Page 4: Getting Started
Getting started Step Step 1 1 - Making the connections - Making the connections Connect the AC power supply cord only after all other connections have been made. Preparation Twist and pull off the vinyl tip of the speaker cords. If the speaker cords do not have vinyl tips, directly connect them to the terminals. -
Page 5: Step 2 - Inserting Batteries Into The Remote Control
Step 2 Step 2 - Inserting batteries into the remote control - Inserting batteries into the remote control ■ Batteries • Insert so the poles (+ and –) match those in the remote control. • Remove if the remote control is not going to be used for a long period of time. Store in a cool, dark place. -
Page 6: Overview Of Controls
Overview of controls Main unit Main unit Refer numbers in parentheses for page reference. Top of the unit Headphone jack (PHONES) Avoid listening for prolonged periods of time to prevent hearing damage. ˝ Plug type: 3.5 mm ( ) stereo (not included) Cassette lid (9, 10) Cassette open (9, 10) -
Page 7: Cds And Mp3 - Play
CDs and MP3 – Play Numeric buttons Disc tray Play Mode function Play Mode function Playing a disc Playing a disc Press [CD 6]. Press [y] to turn the unit on. Press [PLAY MODE] to select the desired mode. Press [0 OPEN/CLOSE] to open the disc tray and Mode To play then load the disc. -
Page 8: Advanced Cds And Mp3 Functions
CDs and MP3 – Play (Continued) Advanced CDs and MP3 functions Advanced CDs and MP3 functions Press [CD 6] and then [STOP Direct access play Direct access play Press [PROGRAM]. This function allows you to start play from a specific track. Press [ALBUM ] to select your desired CD-DA... -
Page 9: Cassette Tape - Play
Cassette tape – Play Album/Track title search Album/Track title search Enable you to search your desired album or track. Press [CD 6] and then [STOP For album title search, press [TITLE SEARCH] once. For track title search, press [TITLE SEARCH] twice. Press the numeric buttons repeatedly to select your desired character then press [ /FF/¢] to key in the next character. -
Page 10: Cassette Tape - Record
Cassette tape – Record Before recording Before recording Recording the radio Recording the radio Preparation Insert the cassette to be recorded on. Wind up the leader tape so that recording can begin immediately. Tune to the required station (refer page 11). •... -
Page 11: Radio - Tune
Radio – Tune Numeric buttons Memory preset Memory preset Manual tuning Manual tuning Up to 15 stations each can be set in the FM and AM bands. Press [TUNER/BAND] to select “FM” or “AM”. Preparation Press [PLAY MODE] to select “MANUAL”. Press [TUNER/BAND] to select “FM”... -
Page 12: Timer
Timer Using the play or record timer Using the play or record timer You can set the timer to come on at a certain time to wake you up (play timer) or to record from the radio (record timer). Preparation Turn the unit on and set the clock. -
Page 13: Sound Adjustment
Sound Adjustment Selecting sound effects Selecting sound effects Enjoying surround sound Enjoying surround sound You can change the sound effect by selecting Preset EQ or Enable you to add natural width and depth to the stereo adjusting the bass or treble effect. sound. -
Page 14: Troubleshooting Guide
Troubleshooting guide Before requesting service, make the following checks. If you are in doubt about some of the check points, or if the remedies indicated in the chart do not solve the problem, refer to the “Product information” on page 3. Common problems No sound. -
Page 15: Specifications
Specifications AMPLIFIER SECTION CD SECTION FTC OUTPUT POWER both channel driven Disc played 10% Total harmonic distortion CD/MP3/CD-R/RW 8 cm/12 cm (3 ˝/4 ˝) 20 Hz–3.5 kHz Bit rate SC-PM1915 W per channel (6 Ω) (Low channel) 32 kbps – 320 kbps 3.5 kHz–20 kHz Sampling frequency SC-PM195 W per channel (6 Ω) -
Page 16: Warranty
5770 Ambler Drive, Mississauga, Ontario L4W 2T3 PANASONIC/TECHNICS PRODUCT – LIMITED WARRANTY Panasonic Canada Inc. warrants this product to be free from defects in material and workmanship and agrees to remedy any such defect, or at its option, replace the product for a period as stated below from the date of original purchase. - Page 17 Avant de raccorder, régler ou utiliser l’appareil, il est recommandé de lire attentivement le manuel d’utilisation. Conserver ce manuel. SC-PM21 Dans ce manuel, les procédures décrivent principalement le Modèle fonctionnement à partir de la télécommande; toutefois, il est possible d’utiliser les commandes de l’appareil principal si les...
-
Page 18: Sc-Pm21
Utiliser les numéros indiqués entre parenthèses lors de la présent manuel. commande de pièces de rechange. (À partir de janvier 2005) Ce manuel d’utilisation concerne la chaîne suivante. Chaîne SC-PM21 1 x Télécommande 1 x Antenne-cadre AM Appareil principal SA-PM21... -
Page 19: Importantes Mises En Garde
• Régler le volume et le laisser à ce niveau. fonctionnement du produit: Les quelques secondes que vous demanderont ce réglage Veuillez contacter le service à la clientèle de Panasonic contribueront à prévenir tout dommage éventuel à l’ouïe. Canada Inc. au 905-624-5505, son site web (www. -
Page 20: Avant L'usage
Avant l’usage Étape Étape 1 1 - Raccordements - Raccordements Effectuer tous les raccordements avant de raccorder le cordon d’alimentation. Préparatifs Torsader et retirer le bout en vinyle des cordons d’enceinte. Si les cordons d’enceinte n’ont pas de bouts en vinyle, les connecter directement aux prises. -
Page 21: Étape 2 - Insertion Des Piles Dans La Télécommande
Étape Étape 2 2 - Insertion des piles dans la télécommande - Insertion des piles dans la télécommande ■ Piles • Insérer les piles en respectant la polarité (+ et –) selon les indications dans la télécommande. • Retirer les piles si la télécommande ne sera pas utilisée pendant une période prolongée. -
Page 22: Emplacement Des Commandes
Emplacement des commandes Appareil principal Appareil principal Se reporter aux pages dont les numéros sont indiqués entre parenthèses. Dessus de l’appareil Prise de casque d’écoute (PHONES) Afin de prévenir tout dommage à l’ouïe, éviter l’écoute prolongée. Type de fiche : Stéreo, 3,5 mm (1/8 po) (vendue séparément) Logement de la cassette (9, 10) Touche d’éjection... -
Page 23: Lecture De Cd Et De Fichiers Mp3
Lecture de CD et de fichiers MP3 Touches numériques Tiroir des plateaux disques Fonction de mode de lecture des disques Fonction de mode de lecture des disques Lecture d’un disque Lecture d’un disque Appuyer sur [CD 6]. Appuyer sur [y] pour mettre l’appareil sous tension. Appuyer sur [PLAY MODE] pour sélectionner le mode voulu. -
Page 24: Fonctions Avancées De Lecture Cd Et Mp3
Lecture de CD et de fichiers MP3 (Suite) Fonctions avancées de lecture CD et MP3 Fonctions avancées de lecture CD et MP3 Appuyer sur [CD 6] puis sur [STOP Lecture à accès direct Lecture à accès direct Appuyer sur [PROGRAM]. L’accès direct permet de faire débuter la lecture à... -
Page 25: Lecture De Cassettes
Lecture de cassettes Recherche de titre d’album/de plage Recherche de titre d’album/de plage Permet de rechercher l’album ou la plage désiré. Appuyer sur [CD 6] puis sur [STOP Pour lancer une recherche de titre d’album, appuyer une fois sur [TITLE SEARCH]. Pour lancer une recherche de titre de plage, appuyer deux fois sur [TITLE SEARCH]. -
Page 26: Enregistrement De Cassettes
Enregistrement de cassettes Préparatifs à l’enregistrement Préparatifs à l’enregistrement Enregistrement d’émissions radio Enregistrement d’émissions radio Préparatifs Insérer la cassette sur laquelle il faut enregistrer. Embobiner la bande d’amorce pour commencer tout de suite l’enregistrement. Syntoniser la station désirée (se reporter à la page 11). •... -
Page 27: Syntonisation De La Radio
Syntonisation de la radio Touches numériques Syntonisation manuelle Syntonisation manuelle Mémoire de présyntonisation Mémoire de présyntonisation La mémoire accepte 15 stations dans chacune des deux Appuyer sur [TUNER/BAND] pour sélectionner “FM” bandes, AM et FM. ou “AM”. Appuyer sur [PLAY MODE] pour sélectionner Préparatifs “MANUAL”. -
Page 28: Minuterie
Minuterie Utilisation de la minuterie de lecture/ Utilisation de la minuterie de lecture/ enregistrement enregistrement La minuterie peut être réglée pour qu’elle s’enclenche au réveil (minuterie de lecture) ou encore pour enregistrer une émission radio (minuterie d’enregistrement). Préparatifs Mettre l’appareil sous tension et régler l’horloge. Minuterie Mesure Minuterie de lecture... -
Page 29: Réglage Du Son
Réglage du son Effet ambiophonique Effet ambiophonique Sélection des effets sonores Sélection des effets sonores Permet d’ajouter une profondeur et une largeur naturelles au Il est possible de modifier l’effet sonore en sélectionnant la son stéréophonique. touche d’égalisation prédéfinie ou en ajustant l’effet des graves ou des aigus. -
Page 30: Guide De Dépannage
Guide de dépannage Avant d’appeler un centre de service, faire les vérifications décrites ci-dessous. En cas de doute sur certains des points de vérification, ou si les solutions proposées dans le tableau ne résolvent pas le problème rencontré, Se reporter à la section “Demande d’informations”... -
Page 31: Spécifications
Spécifications SECTION AMPLIFICATEUR SECTION LECTEUR AUDIONUMÉRIQUE PUISSANCE DE SORTIE FTC, les deux canaux en circuit Disque Distorsion harmonique totale de 10% CD/MP3/CD-R/RW 8 cm/12 cm (3 po/4 20 Hz–3,5 kHz Débit binaire 15 W par canal (6 Ω) (Canal de basse fréquence) 32 kbps–320 kbps 3,5 kHz–20 kHz Fréquence d’échantillonnage... -
Page 32: Garantie
5770 Ambler Drive, Mississauga, Ontario L4W 2T3 Certificat de garantie limitée Panasonic/Technics Panasonic Canada Inc. garantit cet appareil contre tout vice de fabrication et accepte, le cas échéant, de remédier à toute défectuosité ou, à sa discrétion, de remplacer l’appareil pendant la période indiquée ci-dessous et commençant à...