Advertisement
Table of Contents
- 1 Connecting Components Without Hdmi
- 2 Audio/Video Signal Connection
- 3 Connecting Speakers
- 4 Connecting/Playing Bluetooth-Enabled Device
- 5 Using Home Menu
- 6 Connecting with Player
- 7 Making Multi-Zone Connection
- 8 Performing Multi-Zone Playback
- 9 Troubleshooting
- 10 Resetting Unit
- 11 Specifications
- 12 License and Trademark Information
- Download this manual
Advertisement
Table of Contents

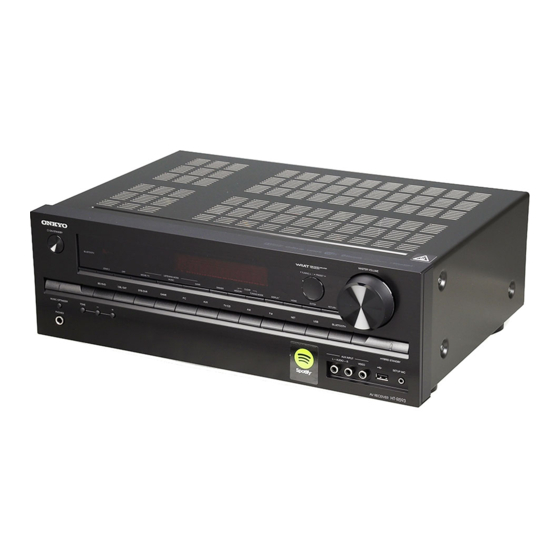
Related Manuals for Onkyo HT-R593


Summary of Contents for Onkyo HT-R593
- Page 1 HT-R593 AV RECEIVER Basic Manual Advanced Manual found here http://www.onkyo.com/manual/htr593/adv/en.html...
- Page 2 WAV, Ogg Vorbis, Apple Lossless, DSD, Dolby TrueHD Remote control sensor Advanced Settings via network and USB storage device AV Receiver Operating Other Components with the Remote Controller Connecting/Operating Onkyo product with RI jack. Batteries (AA/R6) Updating the Firmware Details on Troubleshooting Reference Information (5 m) If you do not use the remote controller for a long time, remove the batteries to prevent leakage.
- Page 3 Step 1: Connections Personal computer HDMI cable To use the ARC function, connect to the ARC compatible HDMI jack of the TV and make an appropriate setting on the unit. See the section 4 "HDMI Setup" of "Step 2: Setting Up". Blu-ray Disc/ DVD player Game console...
-
Page 4: Connecting Components Without Hdmi
Step 1: Connections ARC compatible TV, and HDMI Through function. See the Audio signal connection section 4 "HDMI Setup" of "Step 2: Setting Up". Digital connection: Use a digital optical cable To play 4K or 1080p video, use the high speed HDMI (OPTICAL) or digital coaxial cable (COAXIAL) for cable. -
Page 5: Connecting Speakers
Step 1: Connections Front R Front L Connecting speakers Center Important: The power cord must be connected only after all other connections are completed. 1 2 Front speakers Center speaker 4 5 Surround speakers Subwoofer The position and size of the speakers is an image. Up to two subwoofers can be connected. - Page 6 Step 1: Connections Connect LINE INPUT jack on the subwoofer and PRE OUT Network connection Other connections SUBWOOFER jack on this unit as described in the figure. Up to two subwoofers can be connected. If the subwoofer has a cut-off You can enjoy Internet radio and DLNA by connecting the filter selection switch, set to DIRECT.
- Page 7 Step 2: Setting Up Place the speaker setup microphone at the Turning the power on measurement position Correct measurement will not be possible if the microphone is held by hand. It is desirable that the Connect the power cord to the outlet. Press zON/ microphone be placed on a stand at the height STANDBY on the main unit or zRECEIVER on the remote of listener's ears.
- Page 8 Step 2: Setting Up Follow the guidance displayed on the TV screen. The subwoofer sound may not be detected since "12. Network Setup" becomes selectable after the You can set up by viewing the guidance displayed on the it is extremely low frequencies. If "No" is shown for network starts up even if it cannot be selected first.
- Page 9 Step 2: Setting Up 3 If the security method of the access point to be HDMI Through HDMI Setup connected is WEP, select "Default Key ID", select "OK" and press ENTER. The function allows transmission from players to the TV even if the unit is in standby.
- Page 10 Step 3: Playing Back zRECEIVER button: Turns the unit on or into standby Playing the player and TV mode. RCV button: Switches the remote controller to the mode for operating this unit. REMOTE MODE/INPUT SELECTOR buttons: Switches the input to be played. Cursor buttons and ENTER button: Moves the cursor and confirms the selection.
- Page 11 Step 3: Playing Back Listening modes "Bass": Allows you to enhance or moderate the bass. Listening to AM/FM Radio "Treble": Allows you to enhance or moderate the treble. "PM Bass": Allows you to keep the clear midrange and Select the desired mode by switching and listening actual effectively enhance the bass.
-
Page 12: Connecting/Playing Bluetooth-Enabled Device
Step 3: Playing Back It may take about a minute until connection is established NAS device connected to the network. Select the server Connecting and playing the Bluetooth- when the unit is on since the Bluetooth function takes with the cursors, select the desired music file and press some time to start up. - Page 13 Step 3: Playing Back AccuEQ: Disables the sound field correction settings Using Quick Setup menu set in the automatic speaker setting. The setting can be separately set to each input. The setting cannot be selected if the automatic In the Quick Setup menu, you can set frequently used speaker setting has not been performed.
-
Page 14: Connecting With Player
AUDIO Direct. (Asian model) While ZONE 2 is on, the RI linked system function (interlink between Onkyo components) is disabled. Multi-zone audio output is not possible if the player and the unit are connected only via HDMI cable or digital cable. - Page 15 (Asian model) (Asian model) Front Panel zON/STANDBY button: Turns the unit on or into MEMORY button: Registers or deletes a station. PHONES jack: Stereo headphones with a standard plug TUNING MODE button: Switches the tuning mode. standby mode. are connected. BLUETOOTH indicator: Flashes while pairing with a DISPLAY button: Switches the information on the TONE and Tone Level buttons: Adjusts the high tone...
- Page 16 Rear Panel Lights when NET or USB is controlled. Lights according to the type of input digital signals and RI REMOTE CONTROL jack: An Onkyo product with RI ZONE 2 LINE OUT jacks: Audio output jacks connected the listening mode.
-
Page 17: Troubleshooting
Troubleshooting HDMI control does not function correctly. Resetting the unit Before starting the procedure Set the CEC link function of the unit to on. It is also necessary to make the HDMI linked system setting on Resetting the unit to the status at the time of shipment may Problems may be solved by simply turning the power solve the problem. -
Page 18: Specifications
Specifications Amplifier Section AM Tuning Frequency Range Dimensions (W × H × D) 522/530 kHz - 1611/1710 kHz 435 mm × 150 mm × 329 mm Rated Output Power Preset Channel 17-1/8" × 5-7/8" × 12-15/16" All channels: 65 watts minimum continuous power per channel, Weight 8 ohm loads, 2 channels driven from 20 Hz to 20 kHz, with a 7.6 kg (16.8 lbs.) (North American) -
Page 19: License And Trademark Information
® word mark and logos are registered trademarks owned by Bluetooth SIG, Inc. and any use of such marks by Onkyo is under license. Other trademarks and trade names are those of their respective owners. Onkyo does not guarantee Bluetooth compatibility between the AV receiver and all Bluetooth-enabled devices. - Page 20 Tel: 86-21-52131366 Fax: 86-21-52130396 http://www.cn.onkyo.com/ Asia, Oceania, Middle East, Africa Please contact an Onkyo distributor referring to Onkyo SUPPORT site. http://www.intl.onkyo.com/support/ The above-mentioned information is subject to change without prior notice. Visit the Onkyo web site for the latest update.
- Page 21 D1410-0 Le réglage du volume avec l'application Spotify n'est Spotify. possible que pour l'équipement connecté aux bornes SN 29402014 d'enceintes ZONE2/3 (modèle compatible seulement). (C) Copyright 2014 Onkyo Corporation Japan. All rights reserved.
- Page 22 Unterstützung für Spotify Connect Opmerkingen voor gebruik van de multi-zonefunctie Automatiskt strömpåslag Om te genieten van muziek van Spotify in een aparte Genom att slå på nätverks-standby kan du använda Spotify Connect kann durch Aktualisierung der Firmware ruimte, selecteert u „NET” als de invoer van de aparte funktionen för automatiskt strömpåslag när du använder des Geräts unterstützt werden.