Table of Contents
Advertisement
Quick Links
Advertisement
Table of Contents

Related Manuals for Western Digital BLACK 2


Summary of Contents for Western Digital BLACK 2
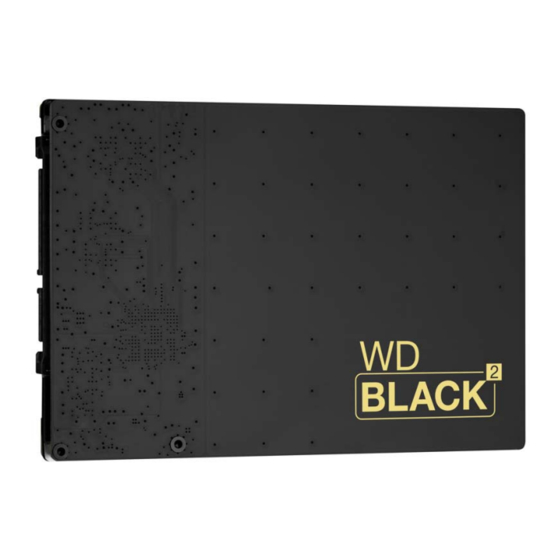
- Page 1 WD BLACK ² Fusion and Dual Drive Configuration for Mac ® Installation Guide...
- Page 2 WD Service and Support Should you encounter any problem, please give us an opportunity to address it before returning this product. Most technical support questions can be answered through our knowledge base or e-mail support service at http://support.wd.com. If the answer is not available or, if you prefer, please contact WD at the best telephone number shown below.
-
Page 3: Table Of Contents
Table of Contents Getting Started ........... 1 WD Black²... - Page 4 WD Black² Fusion and Dual Drive Configuration for Mac Installation Guide...
-
Page 5: Getting Started
Getting Started This document is intended to guide you through the process of installing your new WD Black² as a Mac Fusion or dual drive (non-Fusion) configuration. Important: To install the WD Black² dual drive, you must have a Mac System that supports a 9.5 mm (2.5") drive with Mavericks OSX 10.9.x. - Page 6 WD Black² Fusion and Dual Drive Configuration for Mac Installation Guide GETTING STARTED...
-
Page 7: Wd Black² Firmware Update Procedure
WD Black² Firmware Update Procedure You must update the WD Black² drive firmware before setting up or configuring the drive. Updating the WD Black² drive firmware requires creating a bootable Linux USB flash drive. Creating the Bootable Linux USB Flash Drive CAUTION: During this procedure, all data on your flash drive will be erased. -
Page 8: Installing The Linux Iso Image On The Usb Flash Drive
WD Black² Fusion and Dual Drive Configuration for Mac Installation Guide Installing the Linux ISO Image on the USB Flash Drive 1. The WD Black Firmware Update Utility file should be mounted in Disk Utility under the divider line on the left side. Select the mounted partition WD_LINUX. Note: If WD Black Firmware Update Utility is not mounted in Disk Utility, you will need to double click the file to mount it, as stated in... - Page 9 WD Black² Fusion and Dual Drive Configuration for Mac Installation Guide 3. To select a destination volume, drag the partition with the temporary name you gave the flash drive in Step 9 on page 3, from the list on the left to the Destination field.
- Page 10 WD Black² Fusion and Dual Drive Configuration for Mac Installation Guide Allow approximately 4 minutes for Linux to load onto the USB flash drive. When complete, the USB bootable Linux flash drive is ready to boot to Linux and update the firmware. WD BLACK²...
-
Page 11: Update The Drive Firmware
WD Black² Fusion and Dual Drive Configuration for Mac Installation Guide Update the Drive Firmware 1. Shut down your system. 2. Remove the USB flash drive before performing step 3 of this procedure. 3. Remove the original system drive from your Mac system and replace it with the WD Black². - Page 12 WD Black² Fusion and Dual Drive Configuration for Mac Installation Guide WD BLACK² FIRMWARE UPDATE PROCEDURE...
-
Page 13: Setting Up The Wd Black² Drive
Setting Up the WD Black² Drive Follow these instructions to boot the Mac system from the original system drive using the SATA to USB cable. 1. Attach the original system drive to your Mac system using the SATA to USB cable. -
Page 14: Preparing Your Wd Black Drive
WD Black² Fusion and Dual Drive Configuration for Mac Installation Guide Preparing your WD Black Drive Before configuring the WD Black² Drive in the next section, you must first prepare the drive. This will expand the drive's capacity to 1.12 TB. 1. - Page 15 WD Black² Fusion and Dual Drive Configuration for Mac Installation Guide 4. Click Continue to reboot, then press and hold the Mac keyboard option key until the boot option screen appears. Note: The System Reboot allows the Mac OSX to display the extended combined SSD and HDD drive capacity.
-
Page 16: Configuring The Wd Black Drive
WD Black² Fusion and Dual Drive Configuration for Mac Installation Guide Configuring the WD Black Drive How you configure a WD Black² drive for use in a Mac system depends on how much control you want over your data. You have two options. Option 1: Creating a Mac Fusion Drive ... - Page 17 WD Black² Fusion and Dual Drive Configuration for Mac Installation Guide 3. Read the warning message and click OK. In a few minutes the following message will appear, indicating that the Fusion drive was successfully created. 4. Click OK. 5. To verify your configuration, continue to the section, “Verify Creation of a Fusion Drive or Dual Drive (Non-Fusion).”...
-
Page 18: Create A Dual Drive (Non-Fusion)
WD Black² Fusion and Dual Drive Configuration for Mac Installation Guide Create a Dual Drive (Non-Fusion) To create a Dual Drive (Non-Fusion), use the Create Dual Drive Volumes utility. 1. Locate the WD Black² Configuration Utility that you downloaded from the “Getting Started”... -
Page 19: Verify Creation Of A Fusion Drive Or Dual Drive (Non-Fusion)
WD Black² Fusion and Dual Drive Configuration for Mac Installation Guide Verify Creation of a Fusion Drive or Dual Drive (Non-Fusion) To verify that the Fusion Drive or Dual Drive (Non-Fusion) drive was created properly, do the following: 1. Click the Apple icon located on the top left corner of the screen, and select About This Mac from the drop-down menu. - Page 20 WD Black² Fusion and Dual Drive Configuration for Mac Installation Guide SETTING UP THE WD BLACK² DRIVE...
-
Page 21: Restoring The Master Drive Image To The Wd Black² Drive
Restoring the Master Drive Image to the WD Black² Drive After successfully configuring your drive, follow the instructions below to restore your original system drive image to the newly setup WD Black 1. Shut down your Mac. 2. Press the power button, then press and hold the option key on the keyboard. 3. - Page 22 WD Black² Fusion and Dual Drive Configuration for Mac Installation Guide 4. From the OSX Utilities Window, select the Disk Utility icon and click the Continue button. “Restoring to a Fusion Drive.” (a) If you are restoring a Fusion Drive, continue to “Restoring to a Dual Drive (Non- (b) If you are restoring a Dual Drive (Non-Fusion), skip to Fusion)”...
-
Page 23: Restoring To A Fusion Drive
WD Black² Fusion and Dual Drive Configuration for Mac Installation Guide Restoring to a Fusion Drive After clicking Continue in Step 4 above, the below screen appears. 1. In the left window pane, select the USB drive partition containing the Mac OSX operating system, and then click the Restore tab at the top of this window, next to the RAID tab. -
Page 24: Restoring To A Dual Drive (Non-Fusion)
WD Black² Fusion and Dual Drive Configuration for Mac Installation Guide 3. A warning message displays informing you that the partition will be erased. Click OK and wait for the restore process to finish. 4. When the restore process is finished, shut down your Mac and disconnect the original USB attached drive. - Page 25 WD Black² Fusion and Dual Drive Configuration for Mac Installation Guide 2. In the left window pane, drag the SSD partition at the top of the list to the Destination field, and click Restore. 3. A warning message displays informing you that the partition will be erased. Click OK and wait for the restore process to finish.
- Page 26 Western Digital, WD, and the WD logo are registered trademarks of Western Digital Technologies, Inc. in the U.S. and other countries: and WD Black² is a trademark of Western Digital Technologies, Inc. in the U.S. and other countries.