Chapters
Table of Contents

Related Manuals for Convotherm OES


Summary of Contents for Convotherm OES
- Page 1 C C ONVOTHERM OES OEB OGS OGB easyTOUCH User manual...
- Page 2 Table of Contents User manual...
-
Page 3: Table Of Contents
Identifying your combi steamer About this user manual Design and function Intended use of your combi steamer Design and function of the combi steamer Technical data for OES Technical data for OGS Technical data for OEB Technical data for OGB For your Safety... - Page 4 Table of Contents How to operate the touchscreen First operating steps Turn the combi steamer on / off Cooking with Press&Go Boiling Basic working procedure for cooking Entering a cooking program Entering the Delta-T cooking program Boiling Manual steaming during cooking Using spare shelves during cooking Regenerate Basic working procedure for regenerating...
- Page 5 Table of Contents How to do it correctly Opening the oven door safely Inserting and removing the preheat bridge (floor-standing appliances only) Removing and fitting the racks (table-top appliances only) Loading table-top appliances / removing food from table-top appliances Loading table-top appliances using the transport trolley Loading floor-standing appliances Removing and fitting the suction panel Cleaning the double glass door...
-
Page 6: General Information
General information 1 General information Purpose of this chapter This chapter shows you how to identify your combi steamer and provides guidance on using this ma- nual. Contents This chapter includes the following topics: Page EC Declaration of Conformity Identifying your combi steamer About this user manual User manual... -
Page 7: Ec Declaration Of Conformity
General information EC Declaration of Conformity Manufacturer CONVOTHERM Elektrogeräte GmbH Talstraße 35 82436 Eglfing Germany Appliances This Declaration of Conformity applies to the following combi steamers: Electric appliances OES ... 6.10 6.20 10.10 10.20 12.20 20.10 20.20 Electric appliances OEB ... - Page 8 ƒ EN 61000-3-2: 2006/prA1: 2007/prA2: 2007, EN 61000-3-3: 1995+A1:2001+A2: 2005 Quality and environmental management CONVOTHERM Elektrogeräte GmbH employs a certified quality management system in accordance with EN ISO 9001 and a certified environmental management system in accordance with EN ISO 14001.
-
Page 9: Identifying Your Combi Steamer
Number of shelves Optional shelves 1/1 GN 2/1 GN 600 x 400 baking Number of tray plates OES 6.10 Electric appliance with injection OGS 6.10 Gas appliance with injection OEB 6.10 Electric appliance with steam generator OGB 6.10 Gas appliance with steam generator OES 6.20... - Page 10 OGS 6.20 Gas appliance with injection OEB 6.20 Electric appliance with steam generator OGB 6.20 Gas appliance with steam generator OES 10.10 Electric appliance with injection OGS 10.10 Gas appliance with injection OEB 10.10 Electric appliance with steam generator OGB 10.10...
- Page 11 General information Specific operating requirements for particular types of appliance The following table summarizes the specific operating requirements for particular types of appliance: Model Type Procedure Please observe the following points OEB or OGB Appliances with daily task at switch-on the steam generator must be emptied and steam generator rinsed daily:...
-
Page 12: About This User Manual
General information About this user manual Purpose This user manual provides answers to the following questions: ƒ What food can I cook using the combi steamer? ƒ What particular cooking methods are offered by the combi steamer? ƒ How can I use the combi steamer to perform specific cooking methods? The aim of this user manual is to show you how to perform the following tasks: ƒ... - Page 13 General information Chapters in the user manual The table below lists the chapters in this manual and summarizes their content, purpose and target groups: Chapter/section Purpose Target group ƒ General information Shows you how to identify your combi steamer Chef ƒ...
- Page 14 This chapter specifies the intended use of the combi steamer and explains its functions. Contents This chapter includes the following topics: Page Intended use of your combi steamer Design and function of the combi steamer Technical data for OES Technical data for OGS Technical data for OEB Technical data for OGB User manual...
-
Page 15: Intended Use Of Your Combi Steamer
Design and function Intended use of your combi steamer Intended use The combi steamer must only be used for the purposes specified below: ƒ The combi steamer is designed and built solely for cooking different foodstuffs. Steam, convection and superheated steam are used for this purpose. ƒ... - Page 16 Design and function Requirements relating to the operating condition of the combi steamer The following requirements relating to the operating condition of the combi steamer must be met: ƒ The combi steamer must only be operated when all safety devices are working correctly. ƒ...
-
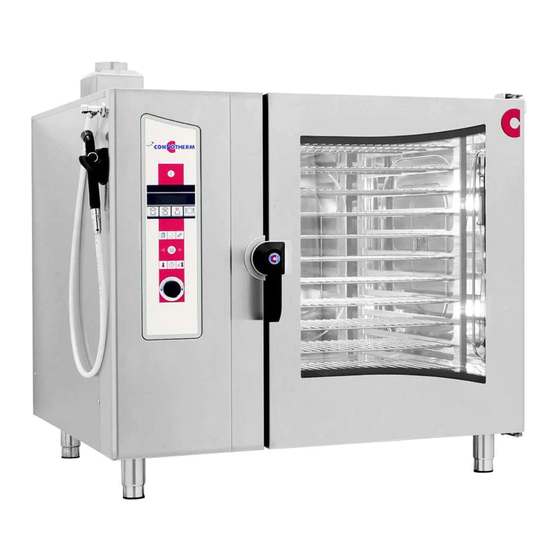
Page 17: Design And Function Of The Combi Steamer
Design and function Design and function of the combi steamer Table-top appliance construction The following diagram shows a gas appliance and an electric appliance, representing all table-top appliances: Components of the table-top appliances and their function The components of the table-top appliances have the following function Name Function picture... - Page 18 Design and function Name Function picture Touchscreen Central control of the combi steamer: ƒ Combi steamer operated by touching symbols on control-panel pages ƒ Status displays ƒ Oven compartment Contains the food during cooking. ƒ Has a different number of shelf levels depending on model. rack Used to hold GN containers or baking trays.
- Page 19 Design and function Name Function picture Multipurpose door handle Has the following functions depending on its position: ƒ Pointing vertically downwards: combi steamer closed ƒ Horizontal: combi steamer open but in on-latch position ƒ 20 degrees above horizontal: Combi steamer can be opened Also has the following functions: ƒ...
-
Page 20: Technical Data For Oes
Design and function Technical data for OES Dimensions and weights The following table shows appliance dimensions and weights: 6.10 6.20 10.10 10.20 12.20 20.10 20.20 Table-top appliances Floor-standing appliances Width including loading trolley with packaging [mm] 1130 1410 1130 1410... - Page 21 Design and function 6.10 6.20 10.10 10.20 12.20 20.10 20.20 Table-top appliances Floor-standing appliances Convection power [kW] 10,5 18,9 18,9 33,0 33,0 37,8 66,0 Motor power [kW] Rated current 27,2 46,2 46,2 83,5 83,5 92,3 166,9 max. permissible system 0,239 0,151 0,151 impedance Z...
- Page 22 Design and function Water supply and water quality The following table shows the values for the water supply and water quality: 6.10 6.20 10.10 10.20 12.20 20.10 20.20 Table-top applian- Floor-standing appliances Water supply (cold only) Shut-off valve with non-return valve and dirt filter Water intake G 3/4'', permanent connection optional with min.
-
Page 23: Technical Data For Ogs
Design and function Technical data for OGS Dimensions and weights The following table shows appliance dimensions and weights: 6.10 6.20 10.10 10.20 12.20 20.10 20.20 Table-top appliances Floor-standing appliances Width including loading trolley with packaging [mm] 1130 1410 1130 1410 1435 1150 1435... - Page 24 Design and function 6.10 6.20 10.10 10.20 12.20 20.10 20.20 Table-top appliances Floor-standing appliances Heat output latent [kJ/h] 2100 3500 3500 7100 11000 7100 11000 sensible [kJ/h] 2500 4100 4100 7200 8200 8200 14100 *recommended conductor cross-section for wires laid uncovered in air up to 5 m in length. Gas supply The following table shows the conditions for the gas supply: 6.10...
- Page 25 Design and function 6.10 6.20 10.10 10.20 12.20 20.10 20.20 Table-top applian- Floor-standing appliances max. 100 mg/l max. 400 mg/l max. 0.1 mg/l max. 0.05 mg/l max. 0.05 mg/l max. 0.1 mg/l Water drain Type DN 50, permanent connection or funnel waste trap User manual...
-
Page 26: Technical Data For Oeb
Design and function Technical data for OEB Dimensions and weights The following table shows appliance dimensions and weights: 6.10 6.20 10.10 10.20 12.20 20.10 20.20 Table-top appliances Floor-standing appliances Width including loading trolley with packaging [mm] 1130 1410 1130 1410 1435 1150 1435... - Page 27 Design and function 6.10 6.20 10.10 10.20 12.20 20.10 20.20 Table-top appliances Floor-standing appliances Rated power consumption [kW] 11,7 20,1 20,1 34,6 34,6 40,1 69,1 Convection power [kW] 10,5 18,9 18,9 33,0 33,0 37,8 66,0 Steam power [kW] 16,5 16,5 26,4 29,7 29,7...
- Page 28 Design and function 6.10 6.20 10.10 10.20 12.20 20.10 20.20 Table-top applian- Floor-standing appliances Water intake G 3/4'', permanent connection optional with min. 3/8" supply pipe Flow pressure without ConvoClean system 2 - 6 bar with ConvoClean system 3 - 6 bar Drinking water quality (install water treatment unit if necessary) Overall hardness 5 - 15...
-
Page 29: Technical Data For Ogb
Design and function Technical data for OGB Dimensions and weights The following table shows appliance dimensions and weights: 6.10 6.20 10.10 10.20 12.20 20.10 20.20 Table-top appliances Floor-standing appliances Width including loading trolley with packaging [mm] 1130 1410 1130 1410 1435 1150 1435... - Page 30 Design and function 6.10 6.20 10.10 10.20 12.20 20.10 20.20 Table-top appliances Floor-standing appliances Rated current Fuse 16,0 16,0 16,0 16,0 16,0 16,0 16,0 recommended wire 5x 1.5 5x 1.5 5x 1.5 5x 1.5 5x 1.5 5x 1.5 5x 1.5 cross-section* Heat output latent...
- Page 31 Design and function 6.10 6.20 10.10 10.20 12.20 20.10 20.20 Table-top applian- Floor-standing appliances 6,3 - 8,8 °eH (English degrees of hardness) 90 - 120 (USA) 6,5 - 8,5 Conductivity 10 - 200 μS/cm max. 100 mg/l max. 400 mg/l max.
- Page 32 For your Safety 3 For your Safety Purpose of this chapter This chapter provides you with all the information you need in order to use the combi steamer safely without putting yourself or others at risk. This is a particularly important chapter that you should read through carefully. Contents This chapter includes the following topics: Page...
-
Page 33: Basic Safety Code
For your Safety Basic safety code Object of this safety code This safety code aims to ensure that all persons who use the combi steamer have a thorough know- ledge of the hazards and safety precautions, and that they follow the safety instructions given in the user manual and on the combi steamer. -
Page 34: Warning Signs On The Combi Steamer
For your Safety Warning signs on the combi steamer Where are the hazard signs fitted? The hazard signs are located in the following positions on the combi steamer: Warning signs on the oven door The following warning signs are fitted on the oven door above the door handle (2): Warning sign Description Warning of hot liquids... - Page 35 For your Safety Warning signs on the loading trolley for floor-standing appliances The following warning signs are fitted on the loading trolley of floor-standing appliances: Warning sign Description Warning of hot liquids Spillage of hot liquid foods can result in scalds if the upper shelves are loaded with liquids or foods that produce liquid during cooking.
-
Page 36: Summary Of Hazards
For your Safety Summary of hazards General rules for dealing with hazards and safety precautions The combi steamer is designed to protect the user from all hazards that can reasonably be avoided by design measures. The actual purpose of the combi steamer, however, means that there are still residual risks; you must therefore take precautions to avoid them. - Page 37 For your Safety Hot liquids Foodstuffs are cooked in the combi steamer. These foodstuffs may also be liquid, or liquefy during cooking. This poses: ƒ a risk of scalding from hot liquids, which may be spilled if not handled properly Live components The combi steamer contains live parts.
-
Page 38: Hazards And Safety Precautions
For your Safety Hazards and safety precautions Operation of electric and gas appliances When operating the combi steamer, be aware of the following hazards and take the specified preven- tive actions: Hazard Where or in what situations Preventive action Safety device does the hazard arise? A fire risk from heat given When flammable gases or... - Page 39 For your Safety Hazard Where or in what situations Preventive action Safety device does the hazard arise? Risk of scalding from hot In front of the combi steamer Check safety device Oven door steam ƒ In front of the oven door use safety device On-latch ƒ...
- Page 40 For your Safety Cleaning When cleaning the combi steamer, be aware of the following hazards and take the specified preventive actions: Hazard Where or in what situations Preventive action Safety device does the hazard arise? Risk of electric shock On the combi steamer Do not clean the outside of None the case with the hand shower...
- Page 41 For your Safety Maintenance When performing maintenance work on the combi steamer, be aware of the following hazards and take the specified preventive actions: Hazard Where or in what situations Preventive action Safety device does the hazard arise? ƒ ƒ Risk from live parts Under the cover Work on the electrical...
-
Page 42: Safety Devices
For your Safety Safety devices Meaning The combi steamer has a number of safety devices to protect the user from hazards. It is absolutely essential that all safety devices are fitted and in working order when operating the combi steamer Position The following diagrams show the location of the safety devices: Functions... - Page 43 For your Safety Safety device Function Check ƒ Opening the oven door fully ƒ Press Start Result Motor must not start up. In-Out function of oven Oven door in on-latch position: Check at low temperature: door; put the oven door in the on-latch (no picture) Allows the oven door to be position (see Opening the oven...
-
Page 44: Requirements To Be Met By Personnel, Working Positions
For your Safety Requirements to be met by personnel, working positions Requirements to be met by personnel Those people using the combi steamer must meet the following requirements: Staff Tasks Personal protective Chapter to read before qualifications equipment required task ƒ... -
Page 45: Personal Protective Equipment
For your Safety Personal protective equipment Operation When operating the combi steamer, wear the following personal protective equipment: Activity Materials used Protection equipment Loading / removing food None Work wear as specified in country-specific standards and directives (BGR 111 in Germany) for kitchen work, in particular: ƒ... - Page 46 Layout of the touchscreen pages 4 Layout of the touchscreen pages The touchscreen and its control buttons Your combi steamer is operated using a touchscreen. This means that all the combi-steamer functions are presented as control buttons on various pages of the touchscreen. Simply touch the buttons with your finger to select a function.
-
Page 47: The Work Pages
Layout of the touchscreen pages 4.1 The work pages The touchscreen functions for cooking, regenerating and cleaning This section presents the touchscreen pages that you need for you everyday work, i.e. cooking, rege- nerating and cleaning, and explains the functions available on each of the pages. Contents This section contains the following topics: Page... -
Page 48: Layout Of The Work Pages
Layout of the touchscreen pages Layout of the work pages Layout of the touchscreen pages for everyday tasks The following screenshot uses the 'Cook' page to illustrate the layout of a typical page for everyday work. The page sectors contain the following functions: Name Function Illustration... -
Page 49: The Start Page
Layout of the touchscreen pages The Start page Appearance The buttons and what they do The buttons in the Start page have the following meanings and functions: Button Meaning Function Boiling Opens the 'Cook' page: ƒ Page for entering data for cooking programs using steam, superheated steam or convection Press Opens the 'Press... -
Page 50: The Cook Page
Layout of the touchscreen pages The Cook page How to access the 'Cook' page The buttons and what they do The buttons on the 'Cook' page have the following meanings and functions: Button Meaning Function Main selection Steam Selects the Steam cooking program. Superheated steam Selects the Superheated steam cooking program. - Page 51 Layout of the touchscreen pages Button Meaning Function ƒ ƒ Delete data Deletes all data for the current cooking step. (before program start) ƒ ƒ Manual steaming (while the Starts the manual steaming function while the main cooking program is running) cooking program is running.
- Page 52 Layout of the touchscreen pages The 'Extra cooking functions' page The buttons on the 'Extra cooking functions' page have the following meanings and functions: Button Meaning Function Program protection Prevents a connected energy optimization system from stopping cooking programs that are running. Lower fan speed Reduces the air-flow speed inside the oven.
-
Page 53: The Press&Go Page
Layout of the touchscreen pages The Press&Go page How to access the 'Press Go' page & The buttons and what they do The buttons on the 'Press Go' page have the following meanings and functions: & Button Meaning Function Program Recipe e.g. -
Page 54: The Regenerate Page
Layout of the touchscreen pages The Regenerate page How to access the 'Regenerate' page The buttons and what they do The buttons on the 'Regenerate' page have the following meanings and functions: Button Meaning Function Main selection Plate Selects the Plate regenerating program. Gastronorm Selects the Gastronorm regenerating program. - Page 55 Layout of the touchscreen pages The keypad for entering the regeneration temperature The buttons on the keypad have the following meanings and functions: Button Meaning Function Numerical values For entering numbers in the hundreds, tens and units Example: input sequence 1 - 2 - 0 gives 120 °C Clear Deletes all entries.
-
Page 56: The Clean Page
Layout of the touchscreen pages The Clean page How to access the 'Clean' page The buttons and what they do The buttons on the 'Clean' page have the following meanings and functions: Button Meaning Function Program Semi-automatic cleaning Starts semiautomatic cleaning. Steam-generator rinsing Starts steam generator rinse cycle. -
Page 57: The Cookbook
Layout of the touchscreen pages 4.2 The cookbook The cookbook This section presents the touchscreen cookbook pages and explains the functions available on each of the pages. Contents This section contains the following topics: Page Layout of the cookbook pages The Favorites page The recipe groups page The recipes page... -
Page 58: Layout Of The Cookbook Pages
Layout of the touchscreen pages Layout of the cookbook pages Layout of the main cookbook pages The following screenshot uses the 'Recipe groups' page from the 3 main cookbook pages to illustrate their typical layout. The page sectors contain the following functions: Name Function Illustration... - Page 59 Layout of the touchscreen pages Buttons common to all pages and what they do The individual buttons are described separately for each page. The footer area contains buttons that have the same function in all pages: Button Meaning Function Footer Close page On the main pages: returns to Start page.
-
Page 60: The Favorites Page
Layout of the touchscreen pages The Favorites page How to access the 'Favorites' page The buttons and what they do The buttons on the 'Favorites' page have the following meanings and functions: Button Meaning Function Main selection Favorites Displays a list of selectable favorite recipes . Recipe groups Opens the 'Recipe groups' page. - Page 61 Layout of the touchscreen pages The 'Edit Favorites' page The buttons on the 'Edit Favorites' page have the following meanings and functions: Button Meaning Function Main selection ƒ Text field Displays the recipe group name Favorites ƒ Cannot be changed Move recipe up Moves the selected recipe up the Favorites list.
-
Page 62: The Recipe Groups Page
Layout of the touchscreen pages The recipe groups page How to access the 'Recipe groups' page The buttons and what they do The buttons on the 'Recipe groups' page have the following meanings and functions: Button Meaning Function Main selection Favorites Opens the 'Favorites' page. - Page 63 Layout of the touchscreen pages The 'Manage recipe groups' page The buttons on the 'Manage recipe groups' page have the following meanings and functions: Button Meaning Function Main selection Move recipe group up Moves the selected recipe group up the list. Move recipe group down Moves the selected recipe group down the list.
- Page 64 Layout of the touchscreen pages The 'Edit recipe group' page The buttons on the 'Edit recipe group' page have the following meanings and functions: Button Meaning Function Main selection Edit text Displays the keypad for text input. Move recipe group up Moves the selected recipe group up the list.
-
Page 65: The Recipes Page
Layout of the touchscreen pages The recipes page How to access the 'Recipes' page The buttons and what they do The buttons on the 'Recipes' page have the following meanings and functions: Button Meaning Function Main selection Favorites Opens the 'Favorites' page. Recipe groups Opens the 'Recipe groups' page. - Page 66 Layout of the touchscreen pages The 'Manage pictures' page The buttons on the 'Manage pictures' page have the following meanings and functions: Button Meaning Function Main selection Scroll up. Down Scroll down. Folder Selects the folder containing the picture. Selects the USB port as the source for the picture (only enabled if a USB device is connected).
-
Page 67: The Settings
Layout of the touchscreen pages 4.3 The Settings The Settings This section presents the touchscreen pages on which you can make settings, and explains the func- tions available on each of the pages. Contents This section contains the following topics: Page The Settings page The General menu... -
Page 68: The Settings Page
Layout of the touchscreen pages The Settings page How to access the 'Settings' page The buttons and what they do The buttons on the 'Settings' page have the following meanings and functions: Button Meaning Function Main selection General information Opens the 'General' menu: ƒ... -
Page 69: The General Menu
Layout of the touchscreen pages The General menu How to access the 'General' menu The 'General' tab The 'Misc' tab contains the following functions: Menu type Meaning Function Cookbook Selects the cookbook Number of shelves Selects the number of shelves that can be used Temperature units Selects °C or °F as the temperature units The 'Food inspection' tab... -
Page 70: The Import/Export Page
Layout of the touchscreen pages The Import/Export page How to access the 'Import/Export' page The buttons and what they do The buttons on the 'Import/Export' page have the following meanings and functions: Button Meaning Function Import Selects the 'Import' tab: ƒ... - Page 71 How to operate the touchscreen 5 How to operate the touchscreen Basic operating principles for the touchscreen This chapter contains step-by-step instructions for basic operations using the touchscreen. Contents This chapter includes the following topics: Page First operating steps Boiling Regenerate Working with the cookbook User manual...
-
Page 72: First Operating Steps
How to operate the touchscreen 5.1 First operating steps First operating steps This section shows you how to switch the combi steamer on and off, and the easy way to make your first cooked products. Contents This section contains the following topics: Page Turn the combi steamer on / off Cooking with Press&Go... -
Page 73: Turn The Combi Steamer On / Off
The Start page is displayed. Select your cooking program. Start the cooking program. Result: ƒ for OES/OGS appliances whatever the cooking program, and for all other appliances for the convection program: The selected cooking program will start immediately. ƒ In specific cases:... - Page 74 How to operate the touchscreen More on this ... Related topics Basic working procedure for cooking ....................78 Basic working procedure for regenerating ..................87 Emptying and rinsing the steam generator ..................137 User manual...
-
Page 75: Cooking With Press&Go
How to operate the touchscreen Cooking with Press&Go Hot steam / vapor Risk of scalding from hot steam and vapor Escaping hot steam and vapor can cause scalding to face, hands, feet and legs. Open the oven door as specified in the safety regulations and never put your head into the oven. For floor-standing appliances, insert the preheat bridge when the loading trolley is not in the combi steamer during preheating. - Page 76 How to operate the touchscreen Cooking To cook, follow the steps below: Step Action Button Select the recipe you want, such as Rolls. Result: ƒ Your combi steamer will preheat. Place the food inside the oven as soon as the appliance is preheated (you will be prompted to do so).
- Page 77 How to operate the touchscreen 5.2 Boiling Cooking in detail This section shows you what steps you need to follow when cooking, and how to use all the touch- screen functions for cooking. Contents This section contains the following topics: Page Basic working procedure for cooking Entering a cooking program...
-
Page 78: Basic Working Procedure For Cooking
How to operate the touchscreen Basic working procedure for cooking How to do it Using the combi steamer for cooking is very simple and only involves these 5 steps: Step Action How to do it: Switch on the combi steamer. Turn the combi steamer on / off on page 73 Retrieving a recipe from the cookbook on page 94 Select or enter your cooking program. -
Page 79: Entering A Cooking Program
How to operate the touchscreen Entering a cooking program How to access the 'Cook' page Entering a cooking program To enter a cooking program, follow the steps below: Step Action Button Select a main cooking program. Enter the cooking temperature. Define the switch-off criteria: ƒ... -
Page 80: Entering The Delta-T Cooking Program
How to operate the touchscreen Entering the Delta-T cooking program How to access the 'Cook' page Requirements To do this, the following conditions must be satisfied: ƒ Your combi steamer comes with a core temperature probe. Action Follow the steps below to enter a program that uses 'T cooking: Step Action Button... - Page 81 How to operate the touchscreen Boiling Hot steam / vapor Risk of scalding from hot steam and vapor Escaping hot steam and vapor can cause scalding to face, hands, feet and legs. Open the oven door as specified in the safety regulations and never put your head into the oven. For floor-standing appliances, insert the preheat bridge when the loading trolley is not in the combi steamer during preheating.
- Page 82 How to operate the touchscreen Step Action Button Open the oven door and remove the cooked product. Cooking without preheating If the combi steamer has already reached the required temperature, follow the steps below for coo- king: Step Action Button You do not need to perform this step if you wish to use the same cooking program as you just used.
-
Page 83: Manual Steaming During Cooking
How to operate the touchscreen Manual steaming during cooking Objective You wish to provide extra steaming of the food during a superheated steam or convection cooking program that is already in progress. Requirements To do this, the following conditions must be satisfied: ƒ... -
Page 84: Using Spare Shelves During Cooking
How to operate the touchscreen Using spare shelves during cooking Hot steam / vapor Risk of scalding from hot steam and vapor Escaping hot steam and vapor can cause scalding to face, hands, feet and legs. Open the oven door as specified in the safety regulations and never put your head into the oven. For floor-standing appliances, insert the preheat bridge when the loading trolley is not in the combi steamer during preheating. - Page 85 How to operate the touchscreen Optimizing the process by setting continuous operation The continuous operation setting is recommended if you wish to cook shelf-by-shelf over a prolonged period. To get to continuous operation, select the following buttons, starting from the start page: User manual...
- Page 86 How to operate the touchscreen 5.3 Regenerate Regenerating in detail This section shows you what steps you need to follow for regenerating, and how to use all the touch- screen functions for regenerating. Contents This section contains the following topics: Page Basic working procedure for regenerating Entering the regenerating program...
-
Page 87: Basic Working Procedure For Regenerating
How to operate the touchscreen Basic working procedure for regenerating How to do it Using the combi steamer for regenerating is very simple and only involves these 5 steps: Step Action How to do it: Switch on the combi steamer. Turn the combi steamer on / off on page 73 Retrieving a recipe from the cookbook on page Select or enter your regenerating program. -
Page 88: Entering The Regenerating Program
How to operate the touchscreen Entering the regenerating program How to access the 'Regenerate' page Entering the regenerating program To enter your regenerating program, follow the steps below: Step Action Button Select a main regenerating program. Enter the regenerating temperature. Define the switch-off criteria: ƒ... - Page 89 How to operate the touchscreen Regenerate Hot steam / vapor Risk of scalding from hot steam and vapor Escaping hot steam and vapor can cause scalding to face, hands, feet and legs. Open the oven door as specified in the safety regulations and never put your head into the oven. For floor-standing appliances, insert the preheat bridge when the loading trolley is not in the combi steamer during preheating.
- Page 90 How to operate the touchscreen Step Action Button Open the oven door and remove the regenerated product. Regenerating without preheating If the combi steamer has already reached the required temperature, follow the steps below for rege- nerating: Step Action Button You do not need to perform this step if you wish to use the same regenerating program as you just used.
-
Page 91: Using Spare Shelves During Regenerating
How to operate the touchscreen Using spare shelves during regenerating Hot steam / vapor Risk of scalding from hot steam and vapor Escaping hot steam and vapor can cause scalding to face, hands, feet and legs. Open the oven door as specified in the safety regulations and never put your head into the oven. For floor-standing appliances, insert the preheat bridge when the loading trolley is not in the combi steamer during preheating. - Page 92 How to operate the touchscreen Optimizing the process by setting continuous operation The continuous operation setting is recommended if you wish to cook shelf-by-shelf over a prolonged period. Path to continuous operation: User manual...
-
Page 93: Working With The Cookbook
How to operate the touchscreen 5.4 Working with the cookbook The combi steamer cookbook This section shows you how to create, edit and manage recipes in the cookbook. Contents This section contains the following topics: Page Retrieving a recipe from the cookbook Creating a cooking recipe Changing the name and picture of a recipe Removing a recipe from the cookbook... -
Page 94: Retrieving A Recipe From The Cookbook
How to operate the touchscreen Retrieving a recipe from the cookbook How to access the 'Favorites' page Retrieving a recipe from Favorites To retrieve a recipe from Favorites, follow the steps below: Step Page Action Button Select the recipe you want, such as Rolls. Result: ƒ... - Page 95 How to operate the touchscreen How to access the 'Recipes' page Retrieving a recipe from the saved recipes To retrieve a recipe from the recipes saved in the cookbook, follow the steps below: Step Page Action Button Select the recipe you want, such as Rolls. Result: ƒ...
-
Page 96: Creating A Cooking Recipe
How to operate the touchscreen Creating a cooking recipe Creating a cooking recipe To create a cooking recipe, follow the steps below: Step Page Action Button Enter a cooking program. Use the 'Cook' page to do this. Save the program as a cooking recipe. Give the cooking recipe a name. -
Page 97: Changing The Name And Picture Of A Recipe
How to operate the touchscreen Changing the name and picture of a recipe How to access the 'Recipes' page Changing the name and picture of a recipe To change the name and picture of a cooking recipe, follow the steps below: Step Page Action... -
Page 98: Removing A Recipe From The Cookbook
How to operate the touchscreen Removing a recipe from the cookbook How to access the 'Recipes' page Removing a recipe from the cookbook To remove a recipe from the cookbook, follow the steps below: Step Page Action Button Open the 'Manage recipes' page. Select the recipe that you wish to remove from the cook- book. -
Page 99: Saving / Removing A Recipe Under Favorites
How to operate the touchscreen Saving / removing a recipe under Favorites How to access the 'Favorites' page Saving a recipe under Favorites To save a recipe under Favorites, follow the steps below: Step Page Field Action Button Open the 'Manage favorites' page. Select the recipe that you wish to add to Favorites. - Page 100 How to operate the touchscreen Removing a recipe from the cookbook You can also remove a recipe from the cookbook from the 'Manage favorites' page. To do this, follow the steps below: Step Page Field Action Button Open the 'Manage favorites' page. Select the recipe that you wish to remove from the cookbook.
-
Page 101: Creating A New Recipe Group
How to operate the touchscreen Creating a new recipe group How to access the 'Recipe groups' page Creating a new recipe group To create a new recipe group, follow the steps below: Step Page Action Button Open the 'Manage recipe group' page. Open the 'Create recipe group' page. -
Page 102: Changing The Name And Picture Of A Recipe Group
How to operate the touchscreen Changing the name and picture of a recipe group How to access the 'Recipe groups' page Changing the name and picture of a recipe group To change the name and picture of a recipe group, follow the steps below: Step Page Field... -
Page 103: Saving / Removing A Recipe In A Recipe Group
How to operate the touchscreen Saving / removing a recipe in a Recipe group How to access the 'Recipe groups' page Saving a recipe in a Recipe group To save a recipe in a recipe group, follow the steps below: Step Page Field... - Page 104 How to operate the touchscreen Step Page Field Action Button Remove the recipe from the recipe group. Removing a recipe from the cookbook You can also remove a recipe from the cookbook from the 'Manage recipe group' page. To do this, follow the steps below: Step Page...
-
Page 105: Deleting A Recipe Group
How to operate the touchscreen Deleting a recipe group How to access the 'Recipe groups' page Deleting a recipe group To delete a recipe group, follow the steps below: Step Page Field Action Button Open the 'Manage recipe group' page. Select the recipe group that you wish to delete. - Page 106 Your combi-steamer cooking programs 6 Your combi-steamer cooking programs The cooking programs Your combi steamer provides you with the following preset main cooking programs: ƒ Steam ƒ Superheated steam ƒ Convection ƒ Regenerate Working from these main cooking programs, you can cook all sorts of food to a high quality and in shorter times.
- Page 107 Your combi-steamer cooking programs Steam General uses When you use the Steam cooking program, you are working in the 30 °C to 120 °C temperature range. The Steam cooking program is suitable for the cooking methods ƒ Boiling ƒ Steam ƒ...
- Page 108 Your combi-steamer cooking programs Advantages of steaming between 101 °C and 120 °C You enjoy the following benefits: ƒ You save time. Examples of use for steaming between 101 °C and 120 °C In this temperature range, the cooking program is suitable for less sensitive foods such as ƒ...
-
Page 109: Superheated Steam
Your combi-steamer cooking programs Superheated steam Temperature range When you use the Superheated steam cooking program, you are working in the 100 °C to 250 °C temperature range. Usage The Superheated steam cooking program is suitable for all foodstuffs for which moisture or steam is added manually in the traditional cooking methods, for instance ƒ... - Page 110 Your combi-steamer cooking programs Convection Temperature range When you use the Convection cooking program, you are working in the 30 °C to 250 °C temperature range. Usage The Convection cooking program is suitable for all cooking techniques that do not require moisture, such as ƒ...
- Page 111 Your combi-steamer cooking programs Regenerate Usage The Regenerate cooking program is suitable for regenerating prepared dishes that have already been arranged on plates, platters or in GN containers. Temperature range and regeneration time The regeneration time and temperature depend on the product, its thickness and on the number of plates or GN containers to be regenerated (see recommended values in this section).
- Page 112 The following recommended values are for a full load: OEB, OGB Regenerating Plate capacity Preheat tem- Preheat Regenera- Regenera- OES, OGS racks up to ø 32 cm perature with time ting ting ø 26 cm superheated...
-
Page 113: Core Temperature Control
Your combi-steamer cooking programs Core temperature control The principle The core temperature control function uses the core temperature inside the food to control the length of the cooking process rather than the time. The core temperature control function can be used with all main cooking programs. Usage Measuring the core temperature is particularly recommended for cooking slow roasts and achieving a precise result (medium, rare etc.). - Page 114 Your combi-steamer cooking programs Food Degree of cooking Core temperature Leg of lamb Medium 58 - 62 °C Saddle of lamb Medium 52 - 56 °C Poultry Whole chicken Well done 88 - 92 °C Breast of chicken Well done 75 - 77 °C Chicken leg Well done...
-
Page 115: Delta-T Cooking
Your combi-steamer cooking programs Delta-T cooking The principle 'T cooking is a cooking program in which the oven temperature increases according to the core tem- perature. This option must always be used with the core temperature probe. The Delta-T cooking program Enter the cooking program data in the 'Cook' page. - Page 116 Your combi-steamer cooking programs Meaning Description Temperature inside the oven (A) End of phase 2 End of program: Core temperature (B) is reached. Usage 'T cooking is particularly suitable for obtaining excellent results when roasting large joints. Advantages You enjoy the following benefits: ƒ...
- Page 117 Using the cooking programs 7 Using the cooking programs Tried and tested recipes to inspire you This section contains some tried and tested recipes to inspire you to develop your own recipes. Contents This chapter includes the following topics: Page Vegetables, side dishes, egg dishes Fish, shellfish, sous-vide techniques Meat, sausage products, large roasting joints...
-
Page 118: Vegetables, Side Dishes, Egg Dishes
Using the cooking programs Vegetables, side dishes, egg dishes Boiling Typical settings for boiling: Dish Points to note °C °C ƒ Pasta (durum wheat 100-115 10-14 – Use unperforated containers; no semolina) need to stir ƒ 1 part pasta, min. 5 parts cold water ƒ... - Page 119 Using the cooking programs Baking Typical settings for baking Dish Points to note °C °C ƒ Vegetable casserole – Steam vegetables before preparing User manual...
-
Page 120: Fish, Shellfish, Sous-Vide Techniques
Using the cooking programs Fish, shellfish, sous-vide techniques Roasting Typical settings for roasting Dish Points to note °C °C Trout 220-140 12-15 – Use every other shelf Plaice Whole sole Salmon steak 210-230 6-12 – Use every other shelf Frozen breaded fish filet 210-230 12-16 –... -
Page 121: Meat, Sausage Products, Large Roasting Joints
Using the cooking programs Meat, sausage products, large roasting joints Roasting Typical settings for roasting Dish Points to note °C °C Neck of pork 130-160 60-90 65-78 Roast pork Loin of pork ƒ Knuckle of pork 130-160 70-90 after steaming for 10 minutes, score the rind Knuckle of veal ƒ... - Page 122 Using the cooking programs Poaching Typical settings for poaching Dish Points to note °C °C ƒ Boiled ham 1-4 hours Cooking time depends on weight User manual...
-
Page 123: Meat, Sausage Products, Small Roasting Cuts
Using the cooking programs Meat, sausage products, small roasting cuts Grilling Typical settings for grilling Dish Points to note °C °C Fillet steak, beef 180 g 44-48 49-55 56-62 Rump steak 180-200 g 44-48 49-55 56-62 Veal steak 160 g 190-230 8-10 56-62... -
Page 124: Game And Poultry
Using the cooking programs Game and poultry Roasting Typical settings for roasting: Dish Points to note °C °C Leg of boar 130-160 100-120 approx. approx. 2-2.5 kg ƒ Venison trimmed off bone 130-160 70-80 60-68 Rub with fat or marinate if required ƒ... - Page 125 Using the cooking programs Grilling Typical settings for grilling: Dish Points to note °C °C ƒ Chicken 160-200 35-40 – Special chicken grill with fat collecting tray ƒ Rub in seasoning well Chicken leg 160-210 – User manual...
-
Page 126: Baked Dishes And Desserts
Using the cooking programs Baked dishes and desserts Baking Typical settings for baking: Dish Points to note °C °C ƒ Baked slices 160-170 40-50 – Use every other shelf Sponge bases 140-160 15-30 – ƒ Cheesecakes 1. 105 1. 20 –... -
Page 127: Potato Products, Oriental Food, Finger Food
Typical settings for baking without fat: Dish Points to note °C °C ƒ French fries 8-12 – Using the CONVOTHERM frying basket ƒ Max. 2kg on every other shelf ƒ Potato wedges / cubes 10-12 – Using the CONVOTHERM frying basket ƒ... - Page 128 Typical settings for frying with Crisp Tasty: & Dish Points to note °C °C ƒ Chicken fingers 10-14 – Using the CONVOTHERM black plate or shelf-grill Chicken wings Chicken sticks ƒ BBQ ribs – 75-78 Place on shelf-grill User manual...
- Page 129 Cleaning and Maintenance 8 Cleaning and Maintenance Cleaning and maintaining the combi steamer This chapter presents the cleaning and maintenance schedule and gives cleaning instructions for your combi steamer. Contents This chapter includes the following topics: Page Cleaning and maintenance schedule Semi-automatic oven cleaning Fully automatic oven cleaning (CONVOClean system option) Emptying and rinsing the steam generator...
-
Page 130: Cleaning And Maintenance Schedule
Cleaning and Maintenance Cleaning and maintenance schedule Hot steam Risk of scalding from hot steam If water is sprayed into the hot oven using the hand shower, steam will be produced that may scald. Do not clean until the oven interior has cooled to below 60 °C. Skin and eye irritation Risk of skin and eye irritation The CONVOClean new and CONVOCare cleaning agents will irritate the skin and eyes if there is any... - Page 131 Cleaning and Maintenance What must be cleaned? Procedure Cleaning agents panel page 133 soiled ovens CONVOClean forte for normal to heavily soiled ovens Fully automatic oven cleaning CONVOClean forte (CONVOClean system option) on page 135 CONVOCare Removable hygienic seal around Cleaning the removable hygienic Commercial detergent in the plug-in gasket on page 159...
- Page 132 Cleaning and Maintenance Carrying out maintenance tasks You will need to carry out a few regular maintenance tasks yourself. Any more extensive maintenance tasks must only be performed by Customer Services. Daily maintenance tasks that you must perform yourself The following table lists the maintenance tasks that you must perform daily: What must be maintained? Procedure Materials / tools...
-
Page 133: Semi-Automatic Oven Cleaning
Cleaning and Maintenance Semi-automatic oven cleaning Skin and eye irritation Risk of skin and eye irritation The CONVOClean new and CONVOCare cleaning agents will irritate the skin and eyes if there is any direct contact, and care must be exercised when handling the cleaning canisters. Do not inhale the spray mist. -
Page 134: More On This
Cleaning and Maintenance Step Action Button As soon as a signal sounds, hinge out the rack and suction panel. Spray inside the oven, including behind the suction panel, and into the drain in the floor using the spray bottle of CONVO- Clean new / forte (1). -
Page 135: Fully Automatic Oven Cleaning (Convoclean System Option)
Cleaning and Maintenance Fully automatic oven cleaning (CONVOClean system option) Requirements Check that the following requirements have been met: ƒ For floor-standing appliances: the preheat bridge is fitted. ƒ No food has been left in the oven. ƒ The two canisters containing the cleaning agents have been connected correctly. ƒ... - Page 136 Cleaning and Maintenance Faults that may occur The following table shows what faults might occur and the appropriate actions: Fault Action "Not enough water" appears in display Check the water supply. "No cleaner pressure" appears in display Check which canister is almost empty and re-fill it. Power failure If cleaning solutions have been used, the combi steamer will automatically rinse the oven before it can...
-
Page 137: Emptying And Rinsing The Steam Generator
Cleaning and Maintenance Emptying and rinsing the steam generator Requirements Check that the following requirements have been met: ƒ You have an OEB or OGB appliance Materials required You need the following materials: ƒ None Emptying and rinsing the steam generator To empty and rinse the steam generator, follow the steps below: Step Action... -
Page 138: Cleaning Agents
Cleaning and Maintenance Cleaning agents CONVOTHERM cleaning agents Use only original cleaning agents to clean the oven interior. Please note: Damage caused as a result of improper cleaning without using the specified cleaning agents will inva- lidate any warranty claims. -
Page 139: Troubleshooting
Not enough water in the steam generator: The 2. Contact customer service water level could not be reached within 3 minutes OES: Not enough water: Water pressure is less than 0.5 bar 3 seconds after valve activation Steam generator filling time is too long 1. - Page 140 Cleaning and Maintenance Error code Description of fault Required response Safety temperature limiter B8 in the boiler has a Contact customer service ground fault Excess temperature detected by safety tempera- Contact customer service ture limiter Core temperature probe is touching the appliance Contact customer service housing Steam generator malfunction...
-
Page 141: How To Do It Correctly
How to do it correctly 9 How to do it correctly Main handling operations for the combi steamer This chapter describes how to perform some of the main repetitive handling tasks that will arise when operating the combi steamer. Contents This chapter includes the following topics: Page Opening the oven door safely... -
Page 142: Opening The Oven Door Safely
How to do it correctly Opening the oven door safely Hot surfaces Risk of burns from high temperatures inside the oven and on the inside of the oven door You may get burnt if you touch any of the interior parts of the oven, the inside of the oven door or any parts that were inside the oven during cooking. - Page 143 How to do it correctly Step Action Illustration Open the door (2) and slide it back (3) along the side of the combi steamer. User manual...
-
Page 144: Inserting And Removing The Preheat Bridge (Floor-Standing Appliances Only)
How to do it correctly Inserting and removing the preheat bridge (floor-standing appliances only) Purpose of the preheat bridge The preheat bridge is required in floor-standing appliances for the following procedures: ƒ When preheating without loading trolley, because escaping hot steam may otherwise scald feet and legs ƒ... -
Page 145: Removing And Fitting The Racks (Table-Top Appliances Only)
How to do it correctly Removing and fitting the racks (table-top appliances only) Hot surfaces Risk of burns from high temperatures inside the oven and on the inside of the oven door You may get burnt if you touch any of the interior parts of the oven, the inside of the oven door or any parts that were inside the oven during cooking. - Page 146 How to do it correctly Fitting racks To fit a rack, follow the steps in the reverse order. User manual...
-
Page 147: Loading Table-Top Appliances / Removing Food From Table-Top Appliances
How to do it correctly Loading table-top appliances / removing food from table-top appliances Hot surfaces Risk of burns from high temperatures inside the oven and on the inside of the oven door You may get burnt if you touch any of the interior parts of the oven, the inside of the oven door or any parts that were inside the oven during cooking. - Page 148 How to do it correctly Loading To load the oven, follow the steps below: Step Action Illustration Open the oven door (1). Place the food onto the required shelf levels (2). WARNING Please note that containers holding liquids or food that will liquefy during cooking must be placed on shelf levels that allow a proper view inside the container.
-
Page 149: Loading Table-Top Appliances Using The Transport Trolley
How to do it correctly Loading table-top appliances using the transport trolley Hot surfaces Risk of burns from high temperatures inside the oven and on the inside of the oven door You may get burnt if you touch any of the interior parts of the oven, the inside of the oven door or any parts that were inside the oven during cooking. - Page 150 How to do it correctly Loading using the transport trolley To load the oven using the transport trolley, follow the steps below: Step Action Illustration Remove the rack. Secure the slide-in frame (1) and attache it to the floor of the appliance.
- Page 151 How to do it correctly Removing food You can either remove the containers individually or use the transport trolley. To remove food using the transport trolley, follow the steps below: Step Action Illustration Open the oven door. Fix the transport trolley onto the combi steamer (2) and engage the handbrake.
-
Page 152: Loading Floor-Standing Appliances
How to do it correctly Loading floor-standing appliances Hot surfaces Risk of burns from high temperatures inside the oven and on the inside of the oven door You may get burnt if you touch any of the interior parts of the oven, the inside of the oven door or any parts that were inside the oven during cooking. - Page 153 How to do it correctly Requirements Check that the following requirements have been met: ƒ You are already conversant with the instructions listed under "How to do it correctly". Loading floor-standing appliances using the loading trolley To load the oven using the loading trolley, follow the steps below: Step Action Illustration...
- Page 154 How to do it correctly More on this ... How to do it correctly Opening the oven door safely ......................142 Inserting and removing the preheat bridge (floor-standing appliances only) ........144 User manual...
-
Page 155: Removing And Fitting The Suction Panel
How to do it correctly Removing and fitting the suction panel Hot surfaces Risk of burns from high temperatures inside the oven and on the inside of the oven door You may get burnt if you touch any of the interior parts of the oven, the inside of the oven door or any parts that were inside the oven during cooking. - Page 156 How to do it correctly More on this ... Related topics Cleaning the bypass measuring hole ....................160 Cleaning the demoisturising tray......................162 User manual...
-
Page 157: Cleaning The Double Glass Door
How to do it correctly Cleaning the double glass door Hot steam Risk of scalding from hot steam If water is sprayed into the hot oven using the hand shower, steam will be produced that may scald. Do not clean until the oven interior has cooled to below 60 °C. Electric shock Risk of electric shock from live parts Water on the exterior of the combi steamer can cause a short-circuit, which may result in electric... - Page 158 How to do it correctly Cleaning the double glass door To clean the double glass door, follow the steps below: Step Action Illustration Open the quick-release catch on the double glass door (1). Clean the double glass door with glass cleaner. Take care not to scratch the glass.
-
Page 159: Cleaning The Removable Hygienic Plug-In Gasket
How to do it correctly Cleaning the removable hygienic plug-in gasket Hot steam Risk of scalding from hot steam If water is sprayed into the hot oven using the hand shower, steam will be produced that may scald. Do not clean until the oven interior has cooled to below 60 °C. Electric shock Risk of electric shock from live parts Water on the exterior of the combi steamer can cause a short-circuit, which may result in electric... -
Page 160: Cleaning The Bypass Measuring Hole
How to do it correctly Cleaning the bypass measuring hole Hot steam Risk of scalding from hot steam If water is sprayed into the hot oven using the hand shower, steam will be produced that may scald. Do not clean until the oven interior has cooled to below 60 °C. Skin and eye irritation Risk of skin and eye irritation The CONVOClean new and CONVOCare cleaning agents will irritate the skin and eyes if there is any... - Page 161 How to do it correctly Using the spray bottle Please follow this guidance when using the cleaning agents: ƒ Never leave the spray bottle unused under pressure for prolonged periods. Open the pump head slowly to release the pressurized air. ƒ...
-
Page 162: Cleaning The Demoisturising Tray
How to do it correctly Cleaning the demoisturising tray Skin and eye irritation Risk of skin and eye irritation The CONVOClean new and CONVOCare cleaning agents will irritate the skin and eyes if there is any direct contact, and care must be exercised when handling the cleaning canisters. Do not inhale the spray mist. - Page 163 How to do it correctly Cleaning the demoisturising tray To clean the demoisturising tray, follow the steps below: Step Action Illustration Remove the suction panel or hinge it down. Take the cover off the demoisturising tray. Clean the demoisturising tray and outflow of any food resi- dues.
-
Page 164: Cleaning The Armature
How to do it correctly Cleaning the armature Hot surfaces Risk of burns from high temperatures inside the oven and on the inside of the oven door You may get burnt if you touch any of the interior parts of the oven, the inside of the oven door or any parts that were inside the oven during cooking. -
Page 165: Changing The Cleaning Canisters
How to do it correctly Changing the cleaning canisters Skin and eye irritation Risk of skin and eye irritation The CONVOClean new and CONVOCare cleaning agents will irritate the skin and eyes if there is any direct contact, and care must be exercised when handling the cleaning canisters. Do not inhale the spray mist. - Page 166 How to do it correctly Changing the cleaning canisters containing CONVOCare K To change the cleaning canisters containing CONVOCare K, follow the steps below: Step Action Illustration Unscrew the supply pipe plus suction nozzle from the empty canister of CONVOCare K (2). Pour the CONVOCare K concentrate (1 l) into the empty canister.
- Page 167 CONVOTHERM OES OEB OGS OGB easyTOUCH 6.10 / 6.20 / 10.10 / 10.20 / 12.20 / 20.10 / 20.20 Subject to technical changes. CONVOTHERM Elektrogeräte GmbH Tel,+49 (0) 8847/67-0 www.convotherm.de Talstraße 35 Fax +49 (0) 8847/414 D-82436 Eglfing info@convotherm.de...