Utax CD 1116 Instruction Handbook Manual
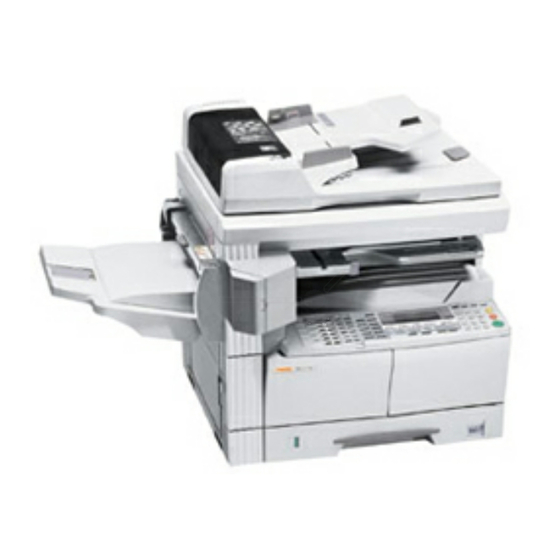
Basic digital multifunctional system
Hide thumbs
Also See for CD 1116:
- Service manual (278 pages) ,
- Instruction handbook manual (161 pages)
Table of Contents
Advertisement
Quick Links
Download this manual
See also:
Service Manual
Advertisement
Chapters
Table of Contents

Related Manuals for Utax CD 1116


Summary of Contents for Utax CD 1116
- Page 1 CD 1116 1120 1125 INSTRUCTION HANDBOOK BASIC DIGITAL MULTIFUNCTIONAL SYSTEM...
-
Page 3: Making Full Use Of Advanced Functions
Making Full Use of Advanced Functions Automatic selection of copy Reduction/enlargement for a Reduction/enlargement in paper the same size as the specified cassette size: Auto the range from 25 to 200 %: original: Auto Paper Zoom mode (Refer to page Zoom mode (Refer to page Selection mode (Refer to 3-5) - Page 4 Memorizing copy settings: Selection of the language Using ID-codes to control the Program function used in the message display: number of copies made: (Refer to Chapter 1, Language Setting Job Accounting mode Advanced Operation Guide) (Refer to page 2-18) (Refer to Chapter 4, Advanced Operation Guide) English Full range of optional...
-
Page 5: Table Of Contents
Legal and Safety Information Read this information prior to using your machine. This chapter explains the following topics: • Legal Information............. iv • Energy Star Program............v • Safety Conventions ............vi • Caution Labels .............. viii • Installation Precautions ........... ix •... -
Page 6: Legal Information
Legal and Safety Information Legal Information CAUTION: No liability is assumed for any damage caused by improper installation. Notice The information in this guide is subject to change without notification. Additional pages may be inserted in future editions. The user is asked to excuse any technical inaccuracies or typographical errors in the present edition. -
Page 7: Energy Star Program
Legal and Safety Information Legal Restriction On Copying • It may be prohibited to copy copyrighted material without permission of the copyright owner. • It is prohibited under any circumstances to copy domestic or foreign currencies. • Copying other items may be prohibited. Energy Star Program We have determined as a participating company in the International Energy Star Program that this product is compliant with the standards laid... -
Page 8: Safety Conventions
Legal and Safety Information Paper Recycling The Energy Star Program encourages use of environmentally friendly recycled paper. Your Sales or Service Representative can provide information about recommended paper types. Safety Conventions Please read this Operation Guide before using the machine. Keep it close to the machine for easy reference. - Page 9 Legal and Safety Information The following symbols indicate that the related section includes information on prohibited actions. Specifics of the prohibited action are indicated inside the symbol..[Warning of prohibited action] ..[Disassembly prohibited] The following symbols indicate that the related section includes information on actions which must be performed.
-
Page 10: Caution Labels
Legal and Safety Information Caution Labels Caution labels have been attached to the machine at the following locations for safety purposes. Take care to avoid fire or electric shock when removing a paper jam or when replacing toner. Label 2 Label 3 High temperature inside. -
Page 11: Installation Precautions
Legal and Safety Information Installation Precautions Environment CAUTION: Avoid placing the machine on or in locations which are unstable or not level. Such locations may cause the machine to fall down or fall over. This type of situation presents a danger of personal injury or damage to the machine. Avoid locations with humidity or dust and dirt. -
Page 12: Power Supply/Grounding The Machine
Legal and Safety Information During copying, some ozone is released, but the amount does not cause any ill effect to one's health. If, however, the machine is used over a long period of time in a poorly ventilated room or when making an extremely large number of copies, the smell may become unpleasant. -
Page 13: Precautions For Use
Legal and Safety Information Precautions for Use Cautions when Using the Machine WARNING: Do not place metallic objects or containers with water (flower vases, flower pots, cups, etc.) on or near the machine. This situation presents a danger of fire or electrical shock should they fall inside. - Page 14 Legal and Safety Information If the machine will not be used for a short period of time (overnight, etc.), turn the power switch off ( ). If it will not be used for an extended period of time (vacations, etc.), remove the power plug from the outlet for safety purposes during the time the machine is not in use.
-
Page 15: Cautions When Handling Consumables
Legal and Safety Information Cautions when Handling Consumables CAUTION: Do not attempt to incinerate the Toner Container or Waste Toner Box. Dangerous sparks may cause burns. Keep the Toner Container and Waste Toner Box out of the reach of children. If toner happens to spill from the Toner Container or Waste Toner Box, avoid inhalation and ingestion, as well as contact with your eyes and skin. -
Page 16: Laser Safety
Legal and Safety Information Laser Safety Laser radiation could be hazardous to the human body. For this reason, laser radiation emitted inside this machine is hermetically sealed within the protective housing and external cover. In the normal operation of the product by a user, no radiation can leak from the machine. -
Page 17: Disconnection Of Power
Legal and Safety Information Disconnection of Power CAUTION: The power plug is the main isolation device! Other switches on the equipment are only functional switches and are not suitable for isolating the equipment from the power source. CAUTION: Der Netzstecker ist die Hauptisoliervorrichtung! Die anderen Schalter auf dem Gerät sind nur Funktionsschalter und können nicht verwendet werden, um den Stromfluß... - Page 18 Legal and Safety Information BASIC OPERATION GUIDE...
-
Page 19: Introduction
Introduction This Basic Operation Guide has the following chapters: • Machine Parts Identifies the names of the machine parts and main functions. • Preparation Contains explanations on loading paper and machine connections. • Basic Operation Explains how to make simple copies and prints. •... -
Page 20: Guides Included
Introduction Guides Included The following guides are included with this machine. Refer to the guide that corresponds to your particular objective. Basic Operation Guide (this guide) This Basic Operation Guide contains procedural steps for initial installation and set-up of the machine and connection to a computer. It also includes basic procedures for using the machine as a copier and printer and has a Troubleshooting section. -
Page 21: Conventions
Introduction Conventions This manual uses the following conventions Convention Description Example Italic Typeface Used to emphasise a key word, Open the Multi-Bypass Tray. phrase or message. In addition, references to other publications are displayed in italic typeface. Bracket Bold Text Used to emphasise the Press [Enter]. - Page 22 Introduction BASIC OPERATION GUIDE...
- Page 23 Contents Making Full Use of Advanced Functions ......... . .i Legal and Safety Information Legal Information .
- Page 24 Contents Optional Equipment Optional Equipment Overview........... 4-2 Document Processor.
-
Page 25: Machine Parts
1 Machine Parts This chapter explains the following topics: • Main Body ..............1-2 • Operation Panel ............1-5 • Message Display ............1-5 BASIC OPERATION GUIDE... -
Page 26: Main Body
Machine Parts Main Body Original Cover Output Tray Operation Panel Cassette 1 Cassette 2 (20 and 25 ppm models only) Paper Width Adjusting Tab Paper Length Adjusting Tab Left Cover Handle Multi-Bypass Tray Multi-Bypass Tray Extension Insert Guides BASIC OPERATION GUIDE... - Page 27 Machine Parts Platen Original Size Indicator Plates Left Cover Waste Toner Box Toner Container Release Lever Toner Container Charger Cleaner Rod Front Cover BASIC OPERATION GUIDE...
- Page 28 Machine Parts Main Power Switch Main Power Switch Cover Handles for Transport Network Interface Connector USB Interface Connector Parallel Interface Connector Memory Card Slot BASIC OPERATION GUIDE...
-
Page 29: Operation Panel
Machine Parts Operation Panel 12 13 28 27 29 30 Ready to copy. Auto Auto 100% 9 10 16 14 17 18 34 36 System Menu/Counter Key and Indicator Copier Key and Indicator Printer Key and Indicator Scanner Key and Indicator Fax Key and Indicator Combine Key and Indicator Border Erase Key and Indicator... - Page 30 Machine Parts Image Quality Mode Select Key Auto Exposure Key Lighter Key / Darker Key / Exposure Display Message Display Ready Indicator (green light) Data Indicator (green light) Attention Indicator (red light) Job Accounting Key Interrupt Key and Indicator Energy Saver Key and Indicator Power Key and Indicator Numeric Keys Reset Key...
-
Page 31: Message Display
Machine Parts Message Display The message display indicates the operation status of the machine. Copier Basic Screen The following screen displays when the Copier key is pressed. Ready to copy. Auto Auto 100% Reference Meaning number Indicates the current machine status. Displays when the original size is automatically selected. -
Page 32: Printer Basic Screen
Machine Parts Printer Basic Screen The following screen displays when the Printer key is pressed: Ready CANCEL MENU Reference Meaning number Indicates the current status of the machine. Select to switch between online and offline, to print/resume printing, to clear a specific error, and to cancel the currently processing page to begin printing a new page. -
Page 33: Preparation
2 Preparation This chapter explains the following topics: • Loading Paper .............. 2-2 • Connection ..............2-10 • Switching Power On ........... 2-12 • Network Settings ............2-13 • Setting the Date and Time.......... 2-16 • Setting the Language ..........2-18 •... -
Page 34: Loading Paper
Preparation Loading Paper Paper and media can be loaded in the Cassette or Multi-Bypass Tray. NOTE: For information about the types of media that can be used, refer to Appendix, Advanced Operation Guide. Prepare the Paper After removing paper from the packaging, fan through the sheets to separate prior to loading. - Page 35 Preparation Pull the cassette completely out of the machine. IMPORTANT: When pulling the cassette out of the machine, ensure it is supported and does not fall out. NOTE: Pull out one cassette at a time. Push down on the Cassette Base Plate.
- Page 36 Preparation When loading A3 or 11 × 17" (Ledger) paper, move the paper length guide to the right end and push it down, as shown. NOTE: The paper sizes are marked on the cassette. Load the paper in the cassette, the leading edge must be aligned against the Paper Length Guide.
-
Page 37: Loading Paper In The Multi-Bypass Tray
Preparation Push the cassette back into the machine until it stops. Loading Paper in the Multi-Bypass Tray In addition to standard and recycled paper, special paper (45 to 160 g/m²) can be loaded in the Multi-Bypass Tray. The paper sizes that can be used are: A3 to A6R, postcard, Folio, 11 × 17" (Ledger) to 5 ×... - Page 38 Preparation If loading long paper, pull out the Multi-Bypass Tray Extension and flip it open. Adjust the Insert Guides to fit the width of the paper. Slide the paper along the Insert Guides and into the tray as far as it will go.
-
Page 39: Multi-Bypass Tray Size And Type
Preparation Multi-Bypass Tray Size and Type Use the following instructions to set the paper size and type prior to using the Multi-Bypass Tray. Paper Size The following paper size options are available for the Multi-Bypass Tray: • Regular Paper Size - these standard paper sizes can be selected from the Bypass Paper Size menu. - Page 40 Preparation Other Regular Size: The following other regular paper sizes are available: • Inch Specification — A3, B4, B5R, B5, A5R, B6R, A6R, HAGAKI, Folio, Executive, ISO B5, Envelope DL, Envelope C5, Envelope C4, Comm. #10, Comm. #9, Comm. #6-3/4, Monarch •...
- Page 41 Preparation Input Size: Press [System Menu / Counter]. Press to select Bypass System Menu / Counter: Setting and press [Enter]. Language Bypass Setting Press to select Input Size Bypass Paper Size: and press [Enter]. Universal Size Input Size Press < or > to select the vertical Input Size: size required, 3 "...
-
Page 42: Connection
Preparation Connection This machine can be connected to a computer through a network, parallel or USB interface. Connecting to a Network To connect the machine to a network, use a network cable (10Base-T or 100Base-TX). Open the main power switch cover on the right side of the machine and press the Power Switch to Off (... - Page 43 Preparation Connecting to a Parallel or USB Interface To connect the machine directly to your computer, use a parallel cable or a USB cable. IMPORTANT: Always power off the machine ( ) and remove the power cord from the outlet before connecting the printer cable. Ensure your computer is also switched off.
-
Page 44: Switching Power On
Preparation Connecting to Power Connect the power cord to the Power Cord Connector on the right side of the machine. Connect the other end of the power cord to a power outlet. Switching Power On Open the main power switch cover on the right side of the machine and press the Power Switch to On ( | ). -
Page 45: Network Settings
Preparation Network Settings IP Address Setting Use the following procedure to register an IP Address to the machine. Check with your network administrator before performing this procedure. The following procedure applies when DHCP is Off and TCP/IP is On. Refer to Chapter 2, Advanced Operation Guide for details. NOTE: Any changes made to network settings become valid after you power the machine off and on again. - Page 46 Preparation Press to select IP TCP/IP Setting Address and press [Enter]. Back DHCP IP Address Use the keypad to enter the IP Address address. Enter the first segment of the IP Address in the highlighted area and press [#]. Enter the next segment and press IP Address [#].
-
Page 47: Registering The Default Gateway
Preparation Registering the Default Gateway Continue from the previous Step 3 to register the Default Gateway. NOTE: If you are not sure of the appropriate Default Gateway address, contact your Network Administrator. Access the TCP/IP Setting screen. Press to select Gateway TCP/IP Setting and press [Enter]. -
Page 48: Setting The Date And Time
Preparation Setting the Date and Time Use these instructions to register the current date and time, the time difference from Greenwich Mean Time (GMT), and the summer time setting. Press [System Menu / Counter]. Press to select Machine System Menu / Counter: default and press [Enter]. - Page 49 Preparation Press to select Time. Date/Time: Press the < key or the > key to set Time 06:33 the current time. Press to select DST Date/Time: (Summer time). Time 06:33 Press < or > to set On or Off. Press to select Year.
-
Page 50: Setting The Language
Preparation Setting the Language You can select the language that will be used in the message display. The following languages are available for selection: • Inch Specification — English, French (Français), Spanish (Español), and Japanese ( • Metric Specification — English, German (Deutsch), French (Français), Spanish (Español), and Italian (Italiano) For details refer to Chapter 3, Advanced Operation Guide. -
Page 51: Basic Operation
3 Basic Operation This chapter contains explanations on the following topics: • Basic Copying Procedure..........3-2 • Making Zoom Copies ........... 3-5 • Duplex Mode ..............3-9 • Split Mode ..............3-12 • Sort Mode..............3-14 • Interrupt Mode ............3-15 •... -
Page 52: Basic Copying Procedure
Basic Operation Basic Copying Procedure Open the main power switch cover on the right side of the machine and press the Power Switch to On ( | ). At the end of warm-up, the Start indicator lights. Open the Original Cover and place the original face-down onto the Platen. - Page 53 Basic Operation Press [Image Quality] to select the image quality mode required. The indicator light displays for the selected mode. Image Quality mode Description Text+Photo Select for originals containing a mixture of both text and photographs. Photo Select for originals containing mostly photographs. Text Select for originals containing mostly text.
- Page 54 Basic Operation Press [Start]. Copying begins immediately once the green Start indicator is lit. Finished copies are delivered to the Output Tray. NOTE: The capacity of the Output Tray is 250 sheets of standard paper (80 g/m²). The capacity varies depending on the paper used. CAUTION: If the optional Fax kit is installed and the...
-
Page 55: Making Zoom Copies
Basic Operation Making Zoom Copies It is possible to change the Zoom ratio in order to make copies of an enlarged or reduced size. The following modes are available for selecting the required Zoom ratio. Mode Description Auto Zoom Adjusts the Zoom ratio to fit the copied image onto the selected paper size. - Page 56 Basic Operation Position the original and press [Auto% / 100%]. Auto % displays on the screen. Press [Paper Select] to select the copy paper required. The zoom ratio displays on the screen. Press [Start]. The original is copied and automatically resized to fit on the selected paper.
-
Page 57: Zoom Mode
Basic Operation Zoom Mode With this mode, the zoom ratio 25 % can be set between 25 % and 200 % in 1 % increments. 200 % Position the original and press [Zoom]. Use the keypad to enter the zoom Zoom: ratio. -
Page 58: Preset Zoom Mode
Basic Operation Preset Zoom Mode Use to make copies using one of the Preset Zoom ratios. Position the original and press [Zoom]. Press to select the zoom Zoom: ratio required and press [Enter]. 121 :8.5x14 11x17 100%: 100% 78 :8.5x14 8.5x11 The zoom ratio displays. -
Page 59: Duplex Mode
Basic Operation Duplex Mode If the optional Duplex Unit is installed, two-sided copies can be produced from one or two sided originals. Original Copy The following Duplex Modes are available: Mode Description 1 sided 2 sided Two-sided copies are produced from one-sided originals. If there is an odd number of originals, the back of the last copy page is blank. - Page 60 Basic Operation Mode Description 2 sided 2 sided Two-sided output is produced from two-sided originals. Copy Originals NOTE: The paper sizes that can be used are A3 to A5R, Folio, 11 × 17" (Ledger), 8 × 14" (Legal), 8 × 11" (Letter), 11 × 8 ", ×...
- Page 61 Basic Operation If [1 sided 2 sided] is selected, Saddle Stitch Direction: press to select the Saddle Left Side Stitch Direction required and Top Side press [Enter]. Press [Start]. If using the optional Document Processor, copying completes automatically. If using the platen, a message displays when the next original is required.
-
Page 62: Split Mode
Basic Operation Split Mode Use this mode to produce one- sided copies from two-sided or double-page spread originals, for example a magazine or book. Original Copy The following Split Modes are available: Mode Description 2 sided 1 sided One-sided copies are produced from two-sided originals. Original Copy The following Original Stitch Side options are available:... - Page 63 Basic Operation Position the original and press [Duplex/Split Page]. If copying from a double-page spread original, place the original face-down on the platen. Align the original flush up against the left rear corner of the Platen. NOTE: Use the Original Size Indicator plates located along the top and left edges of the platen to ensure the original is positioned correctly.
-
Page 64: Sort Mode
Basic Operation Sort Mode Multiple originals can be scanned into memory in a single operation and the required number of copy sets created. The maximum number of originals which can be scanned depends on the machine’s available memory. Original Copy NOTE: If the optional Document Processor is installed, Sort mode can be set as default. -
Page 65: Interrupt Mode
Basic Operation Interrupt Mode Interrupt Mode can be used to stop copying or printing temporarily to run a more urgent job. After the urgent job is complete, the interrupted job can be resumed. The following Interrupt Modes are available: Mode Description Interrupt Copy •... - Page 66 Basic Operation Position the original for the interrupt job. Select the functions required for the interrupt job and press [Start]. When the interrupt job completes remove the original and press [Interrupt]. The settings for the interrupted job are restored. Position the previous original and press [Start] to resume copying. Interrupting Printing or Fax Press [Interrupt] when the machine is printing.
- Page 67 Basic Operation If Priority:Printer or Priority:Fax is selected the output prints automatically. To perform a copying job, position the original, select the functions required and press [Start]. When the interrupt job completes, press [Interrupt]. The interrupted job resumes. BASIC OPERATION GUIDE 3-17...
-
Page 68: Low Power Mode
Basic Operation Low Power Mode Energy Saver Press [Energy Saver] to place the machine into an energy- saving state. Only the Energy Saver indicator, Power indicator, and the Main Power indicator remain lit on the operation panel. Press [Energy Saver] again to resume copying operations. The recovery time before copies can be made is 10 seconds. -
Page 69: Auto Sleep Mode
Basic Operation Auto Sleep Mode Auto Sleep mode puts the machine into a state of sleep if no operation has been performed for a preset period of time. The factory default setting is 30 minutes (16 and 20 ppm models) and 45 minutes (25 ppm model). Time that can be set: •... -
Page 70: Basic Printing Procedure
Basic Operation Basic Printing Procedure Ensure the machine’s printer and network cables and the power cord are connected correctly. Installing the Printer Driver To use the printer function of your machine, the printer driver software must be installed in your computer. For information on how to install the printer driver software, refer to the KX Printer Drivers Operation Guide. - Page 71 Basic Operation To start printing, click [OK]. NOTE: For information on how to use the printer driver software, refer to the KX Printer Driver Operation Guide. BASIC OPERATION GUIDE 3-21...
- Page 72 Basic Operation 3-22 BASIC OPERATION GUIDE...
-
Page 73: Optional Equipment
4 Optional Equipment The following optional equipment is available for use with your machine • Optional Equipment Overview........4-2 • Document Processor............ 4-3 • Paper Feeder ............... 4-7 • Duplex Unit..............4-8 • Finisher................. 4-8 • Job Separator............. 4-12 • Key Counter ............... -
Page 74: Optional Equipment Overview
Optional Equipment Optional Equipment Overview The following optional equipment is available for use with your machine. Document Processor Expansion Memory Hard Disk page 4-3 page 4-15 page 4-15 Key Counter page 4-13 Duplex Unit page 4-8 Fax Kit page 4-14 Finisher page 4-8 Network Scanner Kit... -
Page 75: Document Processor
Optional Equipment Document Processor Automatically feeds and scans multiple originals one by one. Two-sided originals are automatically turned to enable both sides to be scanned. Acceptable Originals • Use sheet originals only • Paper weight: One-sided originals: 45 to 160 g/m² Two-sided originals: 50 to 120 g/m²... -
Page 76: Names Of Parts
Optional Equipment Names of Parts Original Table — Place originals to be copied on this table. Original Insert Guides — Align these guides to fit the width of the originals to be copied. Left Cover — Open this cover if an original jam occurs. - Page 77 Optional Equipment Arrange the originals in order and place face up on the Original Table. Slide the leading edge of the originals into the Document Processor, as far as they will go. IMPORTANT: To avoid jams, ensure originals do not exceed the level indicator on the inside of the rear insert guide.
-
Page 78: Placing Originals On The Platen
Optional Equipment Placing Originals on the Platen When copying from an original which cannot be loaded in the Document Processor (for example books, magazines, objects, etc.), lift open the Document Processor and place the original directly on to the Platen. NOTE: Ensure there are no originals left on the Document Processor before lifting it open. -
Page 79: Paper Feeder
Optional Equipment Paper Feeder A Paper Feeder with additional cassettes can be added below the standard cassette(s). • Cassette capacity: 300 sheets of standard paper (64 to 105 g/m²). • Paper sizes: A3, B4, A4, A4R, B5, B5R, A5R, Folio, 11 × 17" (Ledger), 8 ×... -
Page 80: Duplex Unit
Optional Equipment Duplex Unit Two-sided copies can be made if the duplex unit is installed. Two- sided copies of sizes from A3 to A5R, Folio, 11 × 17" (Ledger) to × 8 " (Statement) can be made. Finisher The Finisher holds a large quantity of copies and can sort multiple copy sets by offsetting each set. -
Page 81: Using The Finisher
Optional Equipment Using the Finisher Sorted copies are output to the Finisher Tray offset. Adjust the Finisher Tray Extension to accommodate the size of paper. Paper sizes are marked on the Finisher Tray Extension. Open Paper Output Guide 1 or 2, depending on the paper size. -
Page 82: Adding Staples
Optional Equipment Adding Staples Open the Stapler Front Cover. Pull out the Staple Holder. Remove the empty staple cartridge from the staple holder. Insert the new staple cartridge into the holder. The arrow on the staple cartridge indicates the correct insertion direction. -
Page 83: Clearing A Staple Jam
Optional Equipment Insert the Staple Holder back into the stapler unit. The holder should click into place when inserted correctly. Close the Stapler Front Cover. Clearing a Staple Jam Remove the Staple Holder, refer to Adding Staples, on page 4-10. Using Knob A on the Staple Holder face plate, raise the plate. -
Page 84: Job Separator
Optional Equipment Insert the Staple Holder back into the stapler unit and close the Stapler Front Cover. Job Separator This unit is used to separate paper output for easy distribution. Copies are delivered to the Output Tray and prints are delivered to the Job Separator tray. -
Page 85: Key Counter
Optional Equipment Key Counter The Key Counter option is used to monitor the amount of copier usage. It can track copier usage for each department, section and for the overall company. Inserting the Key Counter Insert Key Counter displays if the Key Counter option is installed and the Key Counter is not inserted. -
Page 86: Fax Kit
Optional Equipment Fax Kit Installing the Fax kit on the machine enables the facsimile function. If the optional Network Scanner kit is also installed, the machine can be used as a network fax which enables data to be transmitted and received via a computer. -
Page 87: Hard Disk
Optional Equipment Hard Disk The Hard Disk is used for print data storage. To use all the e- MPS functions, the Hard Disk must be installed. Capacity: 340 MB, 512 MB, 1 GB For details about e-MPS functions, refer to Chapter 2, Advanced Operation Guide. - Page 88 Optional Equipment 4-16 BASIC OPERATION GUIDE...
-
Page 89: Maintenance
5 Maintenance This chapter explains the following topics: • Cleaning the Machine........... 5-2 • Replacing the Toner Container and Waste Toner Box.. 5-5 BASIC OPERATION GUIDE... -
Page 90: Cleaning The Machine
Maintenance Cleaning the Machine CAUTION: For safety purposes, always remove the power plug from the outlet when cleaning the machine. Cleaning your machine regularly will ensure optimum copy quality. Cleaning the Platen, Original Cover and Document Processor Use a soft cloth dampened with alcohol or mild detergent to clean the platen and the Original Cover or Document Processor. - Page 91 Maintenance Cleaning the Separation Needles Open the Front Cover and remove the cleaning brush. Pull up the Left Cover handle and open the cover. Remove any dirt or dust from the separation needles by moving the brush from left to right along the needle, as shown in the illustration.
-
Page 92: Cleaning The Transfer Roller
Maintenance Cleaning the Transfer Roller This task should be carried out at least once a month. Open the Front Cover and remove the cleaning brush. Pull up the Left Cover handle and open the cover. Whilst turning the left transfer roller gear, as shown in the illustration, move the brush from left to right along the roller to... -
Page 93: Replacing The Toner Container And Waste Toner Box
Maintenance Replacing the Toner Container and Waste Toner Box If Unable to Copy. Please Add Set toner container. Toner displays, replace the Toner Please Add Toner Container and Waste Toner Box. Auto 100% Only add toner when this message displays. Also, perform the appropriate cleaning operation whenever the Toner Container and Waste Toner Box are replaced. - Page 94 Maintenance Turn the Toner Container Release Lever (A) to the left and pull out the Toner Container. Place the used Toner Container and the used Waste Toner Box in the plastic bags provided for disposal. Hold the charger cleaner rod and gently pull it out as far as it will go, then push it back in again.
- Page 95 Maintenance Fit the Grid Cleaner to the notch and install it into the machine. Pull out the Electrical Charge Section as far as it will go, then push it in again after moving it back and forth several times. Remove the Grid Cleaner and close the cap.
- Page 96 Maintenance Install the new Waste Toner Box. Close the Front Cover. NOTE: After use, always dispose of the Toner Container and Waste Toner Box in accordance with local rules and regulations. BASIC OPERATION GUIDE...
-
Page 97: Troubleshooting
6 Troubleshooting This chapter explains the following topics: • Problem Solving ............6-2 • Error Messages and Correction ........6-5 • Paper Jams ..............6-10 BASIC OPERATION GUIDE... -
Page 98: Problem Solving
Troubleshooting Problem Solving The table below provides general guidelines for problem solving. If a problem occurs with your machine, carry out the checkpoints and procedures indicated on the following pages. If the problem persists, contact your Service Representative or Authorized Service Center. Reference Problem Checkpoint... - Page 99 Troubleshooting Reference Problem Checkpoint Procedure page The copies come out too Is the copier in Auto In order to adjust the overall exposure Chapter 3, dark. Exposure Adjustment level, perform the Auto Exposure Advanced mode? Adjustment procedure. Operation Guide Is the manual exposure Use the Image Quality key to adjust the page 3-3 mode set?
- Page 100 Troubleshooting Reference Problem Checkpoint Procedure page Black lines appear on Is the slit glass dirty? Clean the slit glass. page 5-2 copies when copying It is also possible to use the black line Chapter 3, from the optional correction function to make any black Advanced document processor.
-
Page 101: Error Messages And Correction
Troubleshooting Error Messages and Correction When any of the following messages appear perform the procedures listed below. Reference Message Procedure page Close ## cover. The indicated cover is open. — Close all the covers securely. Add paper in cassette. Paper has run out. page 2-2 Add paper. - Page 102 Troubleshooting Reference Message Procedure page Unable to copy. The Toner Container is empty. page 5-5 Please Add Toner Replace the Toner Container. Cannot copy. Add toner, resume copyi Replace Waste Toner The Waste Toner Box is full. page 5-5 Replace the Waste Toner Box. Clean the slit glass for The Slit Glass is dirty.
- Page 103 Troubleshooting Reference Message Procedure page Memory is full. Copying cannot be processed as the copying memory is full, or — the number of originals has reached the limit of 999 pages. • Select [Copy Scanned Image] to output the pages that have been scanned or select [Cancel] to delete scanned data.
- Page 104 Troubleshooting Reference Message Procedure page Remove paper from Top The Output Tray capacity has been exceeded during printing. — tray. Press GO There are 250 sheets in the Output Tray. There are 150 sheets in the Output Tray and the optional Job Separator is installed.
- Page 105 Troubleshooting Reference Message Procedure page MemoryCard err Press An error has occurred in writing to or reading from the Memory — Card. • Press [Printer] and press to select [GO] and press [Enter]. The error is cleared. Memory card error Insert The Memory Card has been removed during printer setup.
-
Page 106: Paper Jams
Troubleshooting Paper Jams If a paper jam occurs, a message Paper misfeed in displays and copying or printing cassette 1. stops. Remove paper. JAM11 A message indicating the jammed area and instructions for clearance displays. Jam location indicators also display. Leave the main power switch on ( | ) and refer to the appropriate instructions to remove the jammed paper. - Page 107 Troubleshooting WARNING: High voltage is present in the charger section. Take sufficient care when working in this area, as there is a danger of electrical shock. CAUTION: The fixing unit is extremely hot. Take sufficient care when working in this area, as there is a danger of getting burned. IMPORTANT: Do not reuse jammed paper.
-
Page 108: Cassettes 2 To
Troubleshooting Push the cassette back in firmly. NOTE: If JAM21 displays, remove the jammed paper. For further information refer to Left Cover, on page 6-14. Cassettes 2 to 4 If a jam occurs in cassettes 2 to 4 Paper misfeed in or the optional Paper Feeder, cassette 2. - Page 109 Troubleshooting NOTE: If the paper tears during removal, remove any loose scraps from inside the machine. Close the left cover of the cassette. Pull out the cassette currently being used. Remove the jammed paper. Check to see if paper is loaded correctly.
-
Page 110: Left Cover
Troubleshooting Multi-Bypass Tray If a jam occurs in the Multi-Bypass Paper misfeed in Tray and JAM10 displays, stack bypass. perform the following procedure Remove paper. to remove the jammed paper. JAM10 IMPORTANT: If JAM20 or JAM40 displays, refer to Left Cover, on page 6- When removing jammed paper, do not pull it out from the Multi-Bypass Tray side. -
Page 111: Paper Output Slot
Troubleshooting Remove any jammed paper. NOTE: If the paper tears, remove any loose scraps from inside the machine. If the optional Duplex Unit is installed, raise the Duplex Unit and remove any paper. NOTE: If the paper tears, remove any loose scraps from inside the machine. - Page 112 Troubleshooting If jammed paper shows through the Paper Output Slot, pull it out to remove it. NOTE: If the paper tears, remove any loose scraps from inside the machine. Pull up the Left Cover handle and open the Left Cover. Remove any jammed paper.
-
Page 113: Optional Document Processor
Troubleshooting Optional Document Processor If a paper jam occurs in the Misfeed in DP. optional Document Processor, Remove original(s). perform the following procedure to remove the jammed original(s). JAM70 Remove all the originals remaining on the Original Table. Open the Document Processor Left Cover. -
Page 114: Optional Finisher
Troubleshooting Turn the dial as shown in the illustration to remove the jammed original. Close the Left Cover. Reload all the originals and start copying again. Optional Finisher If a paper jam occurs in the Paper misfeed in Optional Finisher, perform the Finisher,lower Process following procedure to remove the Tray and remove paper. - Page 115 Troubleshooting Raise the Process Tray. Remove the Finisher Tray. Pull up the Left Cover handle and open the Left Cover. Remove any jammed paper. NOTE: If the paper tears, remove any loose scraps from inside the machine. BASIC OPERATION GUIDE 6-19...
- Page 116 Troubleshooting Close the Left Cover. Reattach the Finisher Tray. Lower the Process Tray. The error message clears. Optional Job Separator If a paper jam occurs in the Paper misfeed at optional Job Separator, perform Job Separator. the following procedure to remove Remove paper.
- Page 117 Troubleshooting Pull up the Left Cover handle and open the Left Cover. Remove any jammed paper. NOTE: If the paper tears, remove any loose scraps from inside the machine. Close the Left Cover. BASIC OPERATION GUIDE 6-21...
- Page 118 Troubleshooting 6-22 BASIC OPERATION GUIDE...
-
Page 119: Appendix
Appendix The Appendix contains the following specifications: • Machine............Appendix-2 • Copier.............. Appendix-4 • Printer.............. Appendix-5 • Document Processor (Option)......Appendix-5 • Paper Feeder (Option) ........Appendix-5 • Duplex Unit (Option)........Appendix-6 • Finisher (Option)..........Appendix-6 • Job Separator (Option)........Appendix-6 •... -
Page 120: Specifications
Appendix Specifications NOTE: Specifications are subject to change without notice. Machine Copying System Indirect Electrostatic System Original Types Sheets, Books, and 3-dimensional objects (maximum original Accommodated size: A3/11 × 17") Copy Sizes Cassette A3, B4, A4, A4R, B5, B5R, A5R, Folio, 11 × 17" (Ledger), ×... - Page 121 Appendix Dimensions 16ppm model: (W) × (D) × (H) × 23 × 21 " 7/16 574 × 593 × 545 mm 20/25 ppm model: x 23 x 25 " 9/16 574 x 593 x 650mm Weight 16 ppm model: Approx 92.4lbs/42kg 20/25 ppm model: Approx107.8lbs/49kg Noise Emission 70 dB(A)
-
Page 122: Copier
Appendix Copier Copying Speed: Platen (1:1) 16 ppm model A3/11 × 17" (Ledger): 8 sheets/minute B4/8 × 14" (Legal): 8 sheets/minute A4/11 × 8 ": 16 sheets/minute A4R/8 × 11" (Letter): 13 sheets/minute B5: 16 sheets/minute B5R: 13 sheets/minute A5R: 10 sheets/minute A6R: 10 sheets/minute 20 ppm model A3/11 ×... -
Page 123: Printer
Appendix Printer Printing Speed Same As Copying Speed. First Print Time 16/20 ppm model Approx. 5.5 seconds (1:1, A4/ 11 × 8 ") 25 ppm model Approx. 4.9 seconds (1:1, A4/ 11 × 8 ") Resolution 300 dpi, 600 dpi, Fast 1200 mode Applicable OS Microsoft Windows 95/98/Me Microsoft Windows NT4.x/2000/XP... -
Page 124: Duplex Unit (Option)
Appendix Duplex Unit (Option) System Internal type Paper Sizes A3, B4, A4, A4R, B5, B5R, A5R, Folio, 11 × 17" (Ledger), × 14" (Legal), 11 × 8 ", 8 × 11" (Letter), 5 × 8 " (Statement), 8 × 13" (Oficio II) Acceptable Paper Weight: 64 to 90 g/m²... -
Page 125: Environmental Specifications
Appendix Environmental Specifications Recovery time from Low Power mode 10 seconds Transition time to Low Power mode (at time of 15 minutes purchase) Transition time to Auto Sleep mode (at time of 30 minutes (16 and 20 ppm models) purchase) 45 minutes (25 ppm model) Duplex (2-sided) Copying Option... - Page 126 Appendix Appendix-8 BASIC OPERATION GUIDE...
- Page 127 Index Numerics Multi-bypass tray 6-14 Paper output slot 6-15 2 sided copying Legal and Safety-v, 3-9 Combine mode Legal and Safety-i 2 sided unit Connecting to a network 2-10 Connecting to a parallel or USB interface Connecting to power 2-12 Adding staples 4-10 Connection...
- Page 128 Index Jam location indicators 6-10 Job accounting mode Legal and Safety-ii Empty toner container Job separator 4-12, 6-20, Appendix-6 Energy saver 3-18 Job separator specifications Appendix-6 Energy Star program Legal and Safety-v Environmental specifications Appendix-7 Error messages Expansion memory 4-15 Key counter 4-13 Fax kit...
- Page 129 Index Document processor Document processor 6-17 Finisher Finisher 6-18 Network cable Job separator 2-10 6-20 Network interface connector Left cover 6-14 Network scanner kit Multi-bypass tray 4-14 6-14 Network Settings Paper output slot 2-13 6-15 Default gateway Paper jam indicators 2-15 6-10 IP address...
- Page 130 Index Paper jams Paper feeder 6-10 Appendix-5 Paper output slot Printer 6-15 Appendix-5 Program function Split mode Legal and Safety-ii 3-12 Staple jam 4-11 Stapling 4-10, 4-11 Subnet mask setting 2-14 Replacing the toner container Summer time 2-17 Replacing the waste toner box Switching on 2-12 Resolution...
- Page 131 MEMO...
- Page 132 For best print results and machine performance, we recommend that you use only UTAX original supplies for your UTAX products.
- Page 133 UTAX GmbH, Ohechaussee 235, 22848 Norderstedt, Germany...